
Home>Create & Decorate>DIY & Crafts>DIY Outdoor Bar: How To Create Your Own Backyard Oasis
DIY & Crafts
DIY Outdoor Bar: How To Create Your Own Backyard Oasis
Published: May 27, 2024

Senior Editor in Create & Decorate, Kathryn combines traditional craftsmanship with contemporary trends. Her background in textile design and commitment to sustainable crafts inspire both content and community.
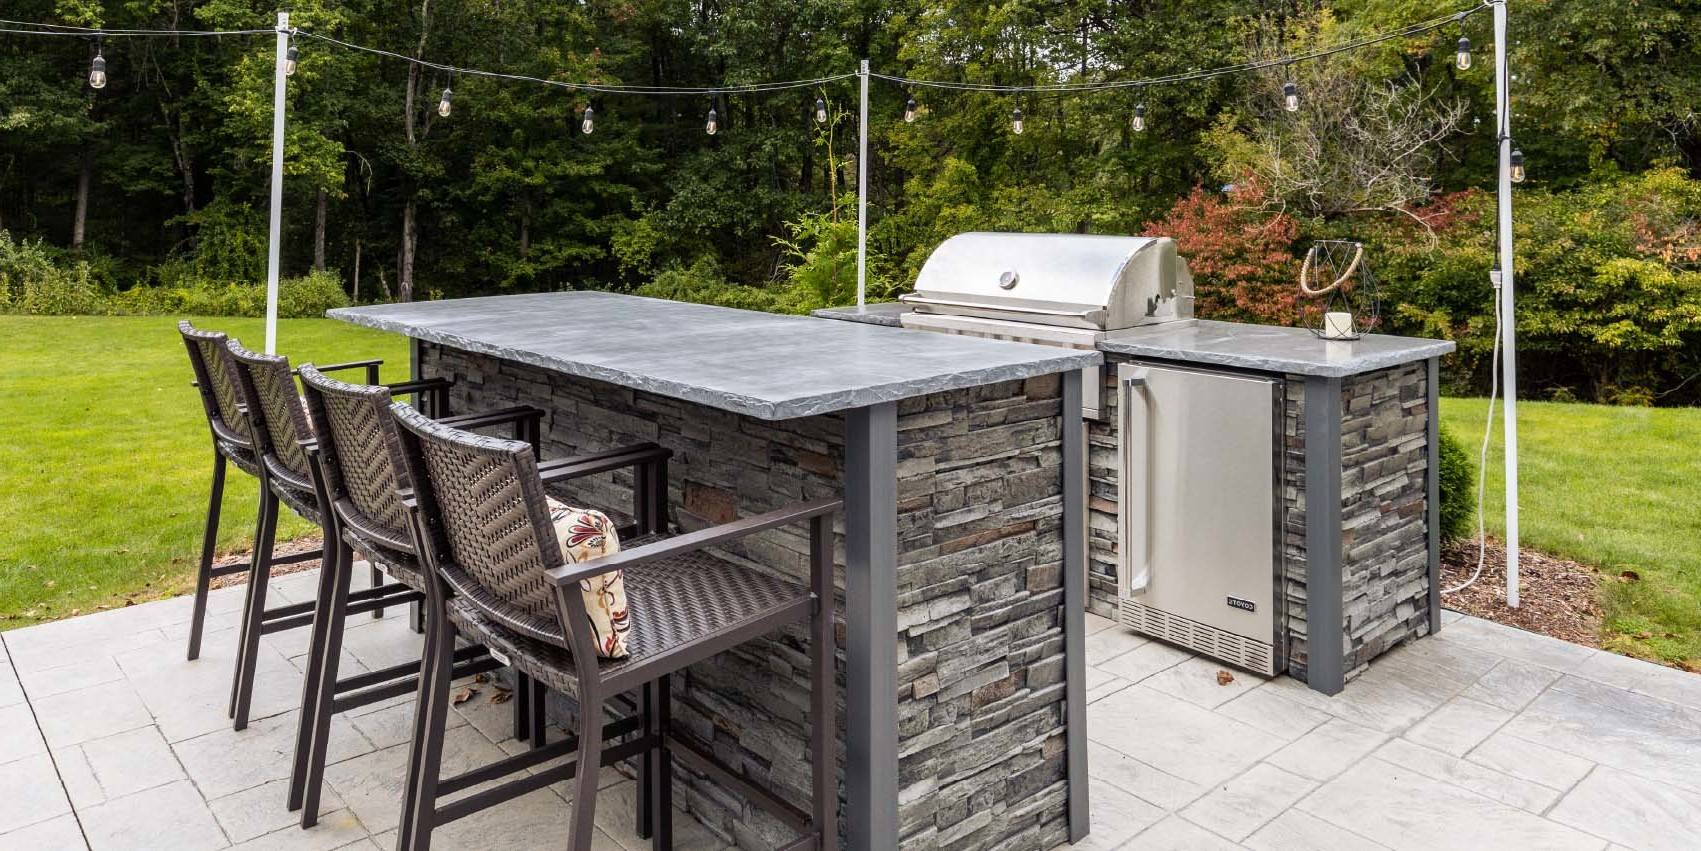
Create your own backyard oasis with our DIY outdoor bar ideas and crafts. Transform your outdoor space into a stylish and functional retreat.
(Many of the links in this article redirect to a specific reviewed product. Your purchase of these products through affiliate links helps to generate commission for Twigandthistle.com, at no extra cost. Learn more)
Introduction
Are you dreaming of creating a cozy and inviting space in your backyard where you can entertain friends and family? Building your own DIY outdoor bar can be a fantastic way to transform your outdoor area into a relaxing oasis. Whether you're a seasoned DIY enthusiast or a beginner looking for a fun project, constructing an outdoor bar can be a rewarding and enjoyable experience. In this guide, we'll walk you through the steps to create your own backyard oasis, from choosing the perfect location to adding the finishing touches and maintaining your outdoor bar for years to come. Let's dive in and get started on this exciting DIY adventure!
Choosing the Perfect Location for Your Outdoor Bar
When selecting the ideal location for your DIY outdoor bar, consider the following factors:
-
Accessibility: Choose a spot that is easily accessible from your house and other outdoor living areas. This will ensure that your guests can move freely between the bar and other entertainment spaces.
-
Shade and Sunlight: Take into account the position of the sun throughout the day. While some may prefer a sunny spot, others may want a shaded area to escape the heat. Consider the placement of trees, umbrellas, or pergolas to provide the desired level of shade.
-
Proximity to Utilities: If you plan to include a sink, refrigerator, or other amenities in your outdoor bar, ensure that it is located near existing water and power sources to simplify installation.
-
Privacy: Create a sense of intimacy by positioning your bar in a secluded area of your backyard. This can be achieved by utilizing natural barriers such as hedges, fences, or strategic landscaping.
-
Aesthetic Appeal: The location of your outdoor bar should complement the overall design of your backyard. Consider how it will integrate with existing features and landscaping to create a cohesive and visually appealing outdoor space.
By carefully considering these factors, you can select a location that not only suits your practical needs but also enhances the ambiance of your outdoor bar, creating a welcoming and enjoyable space for entertaining and relaxation.
Designing and Building Your Outdoor Bar
Designing and building your outdoor bar is an exciting phase of the DIY project. Here's how to get started:
-
Create a Design Plan: Begin by sketching out your ideal outdoor bar design. Consider the size, shape, and layout that will best fit your space and accommodate your entertaining needs. Whether you prefer a simple straight bar, an L-shaped design, or a custom configuration, having a clear plan will guide you through the construction process.
-
Choose Suitable Materials: Selecting the right materials is crucial for the durability and aesthetics of your outdoor bar. Opt for weather-resistant materials such as cedar, teak, or pressure-treated lumber for the frame and countertop. For a more modern look, consider using materials like stainless steel or concrete for the countertop surface.
-
Construct the Frame: Once you have your design and materials in place, it's time to start building the frame of your outdoor bar. Use a level to ensure that the bar is straight and even. Secure the frame to the ground or existing structures to provide stability.
-
Install the Countertop: The countertop is a focal point of your outdoor bar. Whether you choose natural stone, tile, or a sleek composite material, carefully measure and cut the countertop to fit the dimensions of your bar. Seal the surface to protect it from the elements and make it easier to clean.
-
Incorporate Storage and Features: Consider adding shelves, cabinets, or a built-in cooler to enhance the functionality of your outdoor bar. These features can provide convenient storage for glassware, beverages, and bar accessories, keeping everything organized and easily accessible.
-
Personalize the Design: Add personal touches to make your outdoor bar uniquely yours. Consider incorporating a built-in grill, a decorative backsplash, or custom lighting to elevate the ambiance of your outdoor entertaining space.
By following these steps and infusing your creativity into the design, you can build a stylish and functional outdoor bar that reflects your personal taste and enhances your outdoor living experience.
Selecting the Right Materials and Tools
When embarking on the construction of your DIY outdoor bar, choosing the appropriate materials and tools is essential for ensuring the longevity and visual appeal of your project. Here's a detailed look at the materials and tools you'll need:
Materials
-
Lumber: Opt for weather-resistant wood such as cedar, teak, or pressure-treated lumber for the frame and structural components of your outdoor bar. These materials are durable and can withstand exposure to the elements.
-
Countertop Surface: Select a material for the countertop that is both aesthetically pleasing and capable of withstanding outdoor conditions. Natural stone, tile, stainless steel, or composite materials are popular choices for outdoor bar countertops due to their durability and low maintenance requirements.
-
Fasteners and Hardware: Ensure that you have corrosion-resistant screws, nails, and hardware to assemble the various components of your outdoor bar. Stainless steel or galvanized fasteners are ideal for outdoor applications as they are less susceptible to rust and corrosion.
-
Sealant and Finish: Invest in a high-quality sealant or finish to protect the wood and countertop surface from moisture, UV exposure, and general wear and tear. This will help preserve the appearance and structural integrity of your outdoor bar over time.
-
Optional Features: If you plan to incorporate additional features such as a built-in cooler, shelves, or cabinets, select materials that are suitable for outdoor use and complement the overall design of your bar.
Tools
-
Measuring and Marking Tools: Accurate measurements are crucial for ensuring precise cuts and assembly. Equip yourself with a tape measure, carpenter's square, and marking tools to mark and measure the materials effectively.
-
Cutting Tools: A circular saw or miter saw will be essential for cutting lumber and countertop materials to the desired dimensions. Additionally, a jigsaw may be necessary for more intricate cuts, especially when customizing the countertop shape.
-
Fastening Tools: A cordless drill with appropriate drill bits and screwdriver attachments will streamline the assembly process. Consider investing in a pneumatic nail gun for efficient and secure fastening of structural components.
-
Finishing Tools: Sanding blocks or an orbital sander will be indispensable for smoothing rough edges and surfaces before applying the sealant or finish. Additionally, brushes or applicators for sealant and finish application are essential for protecting the wood and countertop surface.
By carefully selecting the right materials and ensuring that you have the necessary tools at your disposal, you can set the stage for a successful and enjoyable construction process, ultimately resulting in a stunning DIY outdoor bar that enhances your outdoor living space.
Adding the Finishing Touches to Your Backyard Oasis
As you near the completion of your DIY outdoor bar project, adding the finishing touches will elevate the overall aesthetic and functionality of your backyard oasis. Here are some essential steps to consider:
1. Outdoor Bar Seating
Integrate comfortable and stylish seating options around your outdoor bar to create a welcoming and social atmosphere. Whether you opt for bar stools, lounge chairs, or built-in bench seating, ensure that the furniture complements the design of your bar and provides ample comfort for your guests.
2. Lighting
Strategically placed lighting can enhance the ambiance of your outdoor bar and extend its functionality into the evening hours. Consider installing overhead string lights, LED strip lighting, or decorative lanterns to create a warm and inviting atmosphere. Additionally, task lighting near the bar area can improve visibility for food and beverage preparation.
3. Outdoor Decor
Incorporate decorative elements such as potted plants, outdoor artwork, or decorative accents to infuse personality and style into your backyard oasis. These elements can add visual interest and create a cohesive look that ties your outdoor bar into the overall design of your outdoor space.
4. Entertainment Features
Enhance the entertainment value of your outdoor bar by incorporating features such as a Bluetooth speaker system, outdoor television, or a designated area for playing music. These additions can elevate the overall experience for you and your guests, making your backyard oasis a go-to destination for gatherings and relaxation.
5. Bar Accessories
Stock your outdoor bar with essential accessories such as cocktail shakers, glassware, and a variety of drink options to cater to different preferences. Consider displaying these items in an organized and visually appealing manner, adding a touch of sophistication to your outdoor bar setup.
6. Weather Protection
Ensure that your outdoor bar is equipped with adequate weather protection, such as a retractable awning, pergola, or outdoor umbrella. These features can shield your bar and seating area from the elements, allowing you to enjoy your backyard oasis regardless of the weather conditions.
By paying attention to these finishing touches, you can transform your DIY outdoor bar into a captivating and functional backyard oasis that is perfect for entertaining, relaxation, and creating lasting memories with family and friends.
Maintaining and Caring for Your DIY Outdoor Bar
Proper maintenance is essential for preserving the beauty and functionality of your DIY outdoor bar. By implementing regular care and upkeep, you can ensure that your outdoor oasis remains in top condition for years to come. Here's a comprehensive guide to maintaining and caring for your outdoor bar:
1. Cleaning and Inspection
Regularly clean the surfaces of your outdoor bar to remove dirt, debris, and spills. Use a mild soap or specialized cleaner suitable for the materials used in your bar's construction. Inspect the wood, countertop, and hardware for any signs of wear, damage, or corrosion. Address any issues promptly to prevent further deterioration.
2. Sealing and Refinishing
Depending on the materials used, periodic resealing or refinishing may be necessary to protect the wood and countertop surface from moisture and UV exposure. Follow the manufacturer's recommendations for sealant application and refinishing intervals to maintain the integrity and appearance of your outdoor bar.
3. Weather Protection
During inclement weather or extended periods of non-use, consider covering your outdoor bar with a weatherproof tarp or utilizing protective covers for the countertop and seating areas. This will shield the bar from rain, snow, and excessive sun exposure, prolonging its lifespan and minimizing the need for repairs.
4. Pest Control
Implement measures to deter pests such as ants, termites, and rodents from causing damage to your outdoor bar. Keep the surrounding area free of food debris, seal any gaps or cracks in the structure, and consider using non-toxic pest deterrents to safeguard your bar against infestations.
5. Seasonal Considerations
Adjust your maintenance routine based on seasonal changes. In colder climates, take precautions to protect your outdoor bar from freezing temperatures and snow accumulation. In warmer climates, focus on mitigating the effects of intense sunlight and humidity on the bar's materials.
6. Regular Inspections
Schedule routine inspections to assess the overall condition of your outdoor bar. Check for loose fasteners, signs of water damage, and structural integrity. Address any issues promptly to prevent minor problems from escalating into major repairs.
7. Upkeep of Accessories
Maintain and clean any accessories, such as outdoor lighting, seating cushions, and decorative elements, to ensure they remain in good condition. Replace worn or damaged accessories as needed to uphold the aesthetic appeal of your outdoor bar.
By incorporating these maintenance practices into your routine, you can safeguard your DIY outdoor bar against environmental factors and general wear, preserving its allure and functionality for countless outdoor gatherings and leisurely moments.