
Home>Create & Decorate>DIY & Crafts>DIY: How To Build A Range Hood From Scratch
DIY & Crafts
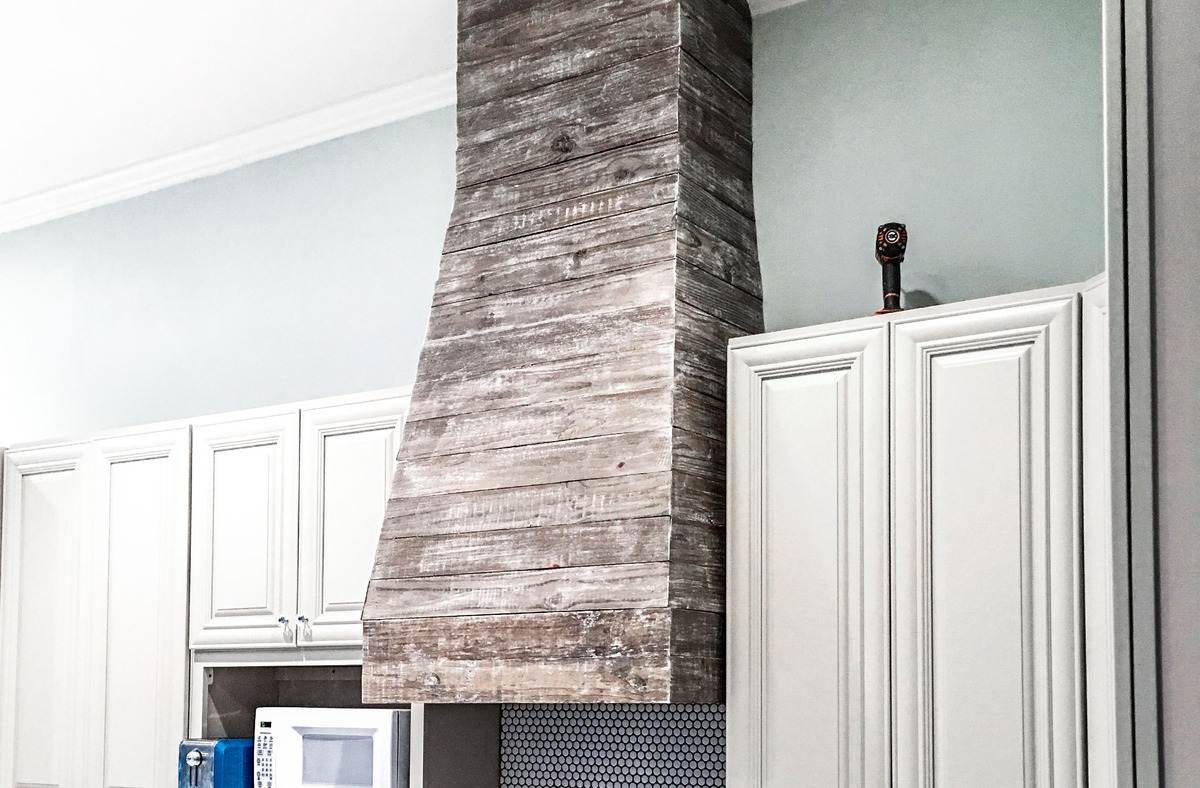
DIY: How To Build A Range Hood From Scratch
Published: June 8, 2024

Content Creator specializing in woodworking and interior transformations. Caegan's guides motivate readers to undertake their own projects, while his custom furniture adds a personal touch.
Learn how to create a custom range hood from scratch with our step-by-step DIY guide. Perfect for DIY & Crafts enthusiasts.
(Many of the links in this article redirect to a specific reviewed product. Your purchase of these products through affiliate links helps to generate commission for Twigandthistle.com, at no extra cost. Learn more)
Introduction
Are you tired of the smoke and odors lingering in your kitchen every time you cook? Building a range hood from scratch can be a rewarding and practical DIY project. Not only will it improve the air quality in your kitchen, but it can also add a stylish focal point to the space. In this guide, we'll walk you through the step-by-step process of creating your own custom range hood, from planning and design to the finishing touches. Let's roll up our sleeves and get started!
Materials Needed
To build a range hood from scratch, you'll need the following materials:
- Plywood: This will be used for constructing the frame and the cover of the hood.
- Ventilation Kit: Ensure you have a ventilation kit that includes a fan, ductwork, and a vent cap.
- Screws and Nails: These will be essential for securing the frame and attaching the cover.
- Wood Glue: Use wood glue to reinforce the joints and ensure the stability of the hood.
- Sandpaper: You'll need sandpaper for smoothing out any rough edges and preparing the wood for painting or staining.
- Primer and Paint or Stain: Depending on your preference, you can either paint or stain the hood to match your kitchen decor.
- Lighting Kit: If you want to incorporate lighting into your range hood, you'll need a lighting kit with wiring and fixtures.
- Safety Gear: Don't forget safety goggles, gloves, and a dust mask to protect yourself during the construction process.
Gathering these materials will set you up for a successful DIY range hood project.
Planning and Design
Before diving into the construction of your range hood, it's crucial to spend time on the planning and design phase. Here's how to approach it:
-
Measure Your Space: Take precise measurements of the area where the range hood will be installed. Consider the dimensions of your stove and the available space above it.
-
Choose a Style: Decide on the style of your range hood. Whether it's sleek and modern, rustic and farmhouse-inspired, or something entirely unique, having a clear vision of the style will guide the design process.
-
Select Materials: Determine the type of wood and finish you want for your range hood. Consider how it will complement your kitchen's aesthetic.
-
Ventilation Requirements: Assess the ventilation needs of your kitchen. Ensure that the ventilation kit you choose is suitable for your cooking habits and the size of your kitchen.
-
Create a Design Sketch: Sketch out the design of your range hood, including the dimensions and any decorative elements. This will serve as a blueprint for the construction phase.
-
Consider Lighting: If you want to incorporate lighting into your range hood, plan the placement of the fixtures and the wiring.
By carefully planning and designing your range hood, you'll set the stage for a successful construction process and a finished product that meets both your functional and aesthetic needs.
Constructing the Frame
Once you have your design plan in place, it's time to start constructing the frame of your range hood. Follow these steps to bring your vision to life:
-
Cut the Plywood: Using the measurements from your design plan, carefully cut the plywood to create the front, back, and sides of the hood. Ensure that the pieces are cut accurately to achieve a seamless fit.
-
Assemble the Frame: Begin by assembling the front, back, and side pieces of the frame. Use wood glue to reinforce the joints, and then secure them in place with screws. This will form the basic structure of the hood.
-
Add Support Braces: To ensure the stability of the frame, add support braces inside the hood. These braces will help distribute the weight of the hood and provide additional reinforcement.
-
Smooth the Edges: Once the frame is assembled, use sandpaper to smooth out any rough edges and ensure that the surfaces are even. This step is essential for achieving a professional-looking finish.
-
Priming (Optional): If you plan to paint the hood, consider applying a coat of primer to the frame. This will help the paint adhere better and provide a more even finish.
By following these steps, you'll have a sturdy and well-constructed frame for your range hood, setting the stage for the next phase of the project.
Installing the Ventilation System
Installing the ventilation system is a critical step in ensuring that your DIY range hood effectively removes smoke, odors, and airborne grease from your kitchen. Here's a detailed guide on how to install the ventilation system:
-
Positioning the Ventilation Kit: Begin by positioning the ventilation kit components, including the fan, ductwork, and vent cap. The fan should be placed in a location that allows it to efficiently draw air from the cooking surface.
-
Cutting a Hole for the Ductwork: Using a jigsaw or a suitable cutting tool, carefully cut a hole in the wall or ceiling for the ductwork. Ensure that the hole is the appropriate size for the duct to fit through.
-
Connecting the Ductwork: Once the hole is prepared, connect the ductwork to the fan. Secure the connections with duct tape or metal clamps to prevent air leaks.
-
Routing the Ductwork: Route the ductwork to the exterior of your home, ensuring that it provides a clear path for the expelled air. It's essential to follow local building codes and regulations regarding the installation of ventilation ducts.
-
Installing the Vent Cap: Secure the vent cap to the exterior wall or roof. The vent cap will prevent outdoor elements from entering the ductwork while allowing the expelled air to exit freely.
-
Electrical Wiring (If Applicable): If your ventilation system includes a fan with electrical components, follow the manufacturer's instructions for wiring the fan to a power source. It's crucial to adhere to electrical safety standards during this process.
-
Testing the Ventilation System: Once the installation is complete, test the ventilation system to ensure that the fan operates effectively and expels air to the exterior. Check for any air leaks and make adjustments as needed.
By following these steps, you'll successfully install a ventilation system that complements your DIY range hood, creating a functional and efficient kitchen ventilation solution.
Building the Hood Cover
Building the hood cover is a crucial step in the construction of your DIY range hood, as it not only adds a decorative element but also encases the ventilation system. Here's a detailed guide on how to build the hood cover:
-
Cutting the Cover Panels: Begin by cutting the plywood or chosen material to create the panels for the hood cover. You'll need panels for the front, sides, and top of the cover. Ensure that the dimensions align with your design plan and the frame of the hood.
-
Assembling the Panels: Using wood glue and screws, assemble the panels to form the structure of the hood cover. Pay attention to the alignment and ensure that the corners are square for a professional finish.
-
Adding Decorative Elements (Optional): If you want to enhance the aesthetic appeal of your range hood, consider adding decorative elements such as trim, molding, or carved details to the cover. This customization can elevate the overall look of the hood and tie it in with your kitchen's style.
-
Creating an Opening for the Ventilation: Depending on the design of your ventilation system, you may need to create an opening in the top panel of the cover to accommodate the ductwork. Ensure that the opening aligns with the position of the ventilation system for a seamless integration.
-
Attaching the Cover to the Frame: Once the cover is assembled, carefully attach it to the frame of the range hood. Use screws to secure the cover to the frame, ensuring a snug and stable fit.
-
Finishing Touches: Before proceeding to the finishing stage, inspect the hood cover for any imperfections or rough edges. Use sandpaper to smooth out any uneven surfaces and prepare the cover for the finishing treatment.
By following these steps, you'll successfully construct the hood cover for your DIY range hood, bringing you one step closer to completing this rewarding home improvement project.
Finishing Touches
After completing the construction of the frame and the installation of the ventilation system, it's time to add the finishing touches to your DIY range hood. This phase involves the final steps to ensure that your range hood not only functions efficiently but also looks visually appealing in your kitchen.
-
Filling Nail Holes: Inspect the entire range hood for any visible nail holes or imperfections. Use wood filler to fill in the nail holes and any gaps in the joints. Smooth out the filler with a putty knife and allow it to dry completely.
-
Sanding and Smoothing: Once the wood filler is dry, use fine-grit sandpaper to sand the entire surface of the range hood. This step is crucial for achieving a smooth and even finish. Pay attention to the edges and corners to ensure that they are free of rough spots.
-
Priming the Surface: If you plan to paint the range hood, apply a coat of primer to the entire surface. The primer will help the paint adhere better and provide a uniform base for the final paint or stain.
-
Painting or Staining: Depending on your preference, apply the chosen paint or stain to the range hood. Use even strokes and ensure complete coverage. If you opt for a stained finish, apply multiple coats to achieve the desired depth of color.
-
Sealing the Wood: Once the paint or stain has dried, consider applying a clear sealant to protect the wood and enhance its durability. The sealant will also provide a smooth and easy-to-clean surface for your range hood.
-
Installing Lighting (Optional): If your design includes lighting, install the lighting fixtures according to the manufacturer's instructions. Ensure that the wiring is safely concealed and that the fixtures are securely attached to the hood.
-
Final Inspection: Take a close look at the entire range hood to ensure that the finish is even and free of blemishes. Make any necessary touch-ups and allow the final treatment to dry completely.
By completing these finishing touches, you'll elevate the visual appeal of your DIY range hood and ensure that it stands as a functional and stylish addition to your kitchen.
Conclusion
Congratulations on completing the construction of your DIY range hood! By following the step-by-step process outlined in this guide, you've not only created a functional ventilation solution for your kitchen but also added a custom, stylish element to the space. Your dedication to planning, designing, and constructing the range hood from scratch has resulted in a rewarding home improvement project that enhances both the aesthetics and functionality of your kitchen.
As you admire your newly built range hood, take pride in the craftsmanship and attention to detail that went into its creation. Whether you opted for a sleek modern design, a rustic farmhouse-inspired look, or a completely unique style, your DIY range hood reflects your personal taste and adds a distinctive touch to your home.
Remember that proper maintenance and care will prolong the life and performance of your range hood. Regularly clean the surfaces, replace filters as needed, and ensure that the ventilation system operates efficiently. By doing so, you'll continue to enjoy a fresh, odor-free kitchen environment for years to come.
As you embark on future DIY projects, carry the knowledge and skills gained from building your range hood with you. The satisfaction of creating a practical and visually appealing addition to your home serves as a testament to the possibilities that DIY and home improvement endeavors offer. Whether it's a range hood, a piece of furniture, or a decorative accent, your creativity and hands-on approach can continue to transform your living spaces.
With your newly acquired expertise in range hood construction, you're well-equipped to tackle more DIY projects and infuse your home with your unique style and functionality. Embrace the sense of accomplishment that comes with each completed project, and let your creativity and ingenuity continue to shape your living environment. Happy DIY-ing!