
Home>Create & Decorate>DIY & Crafts>DIY Homemade Drifting Trike: How To Build Your Own Ultimate Drift Machine
DIY & Crafts
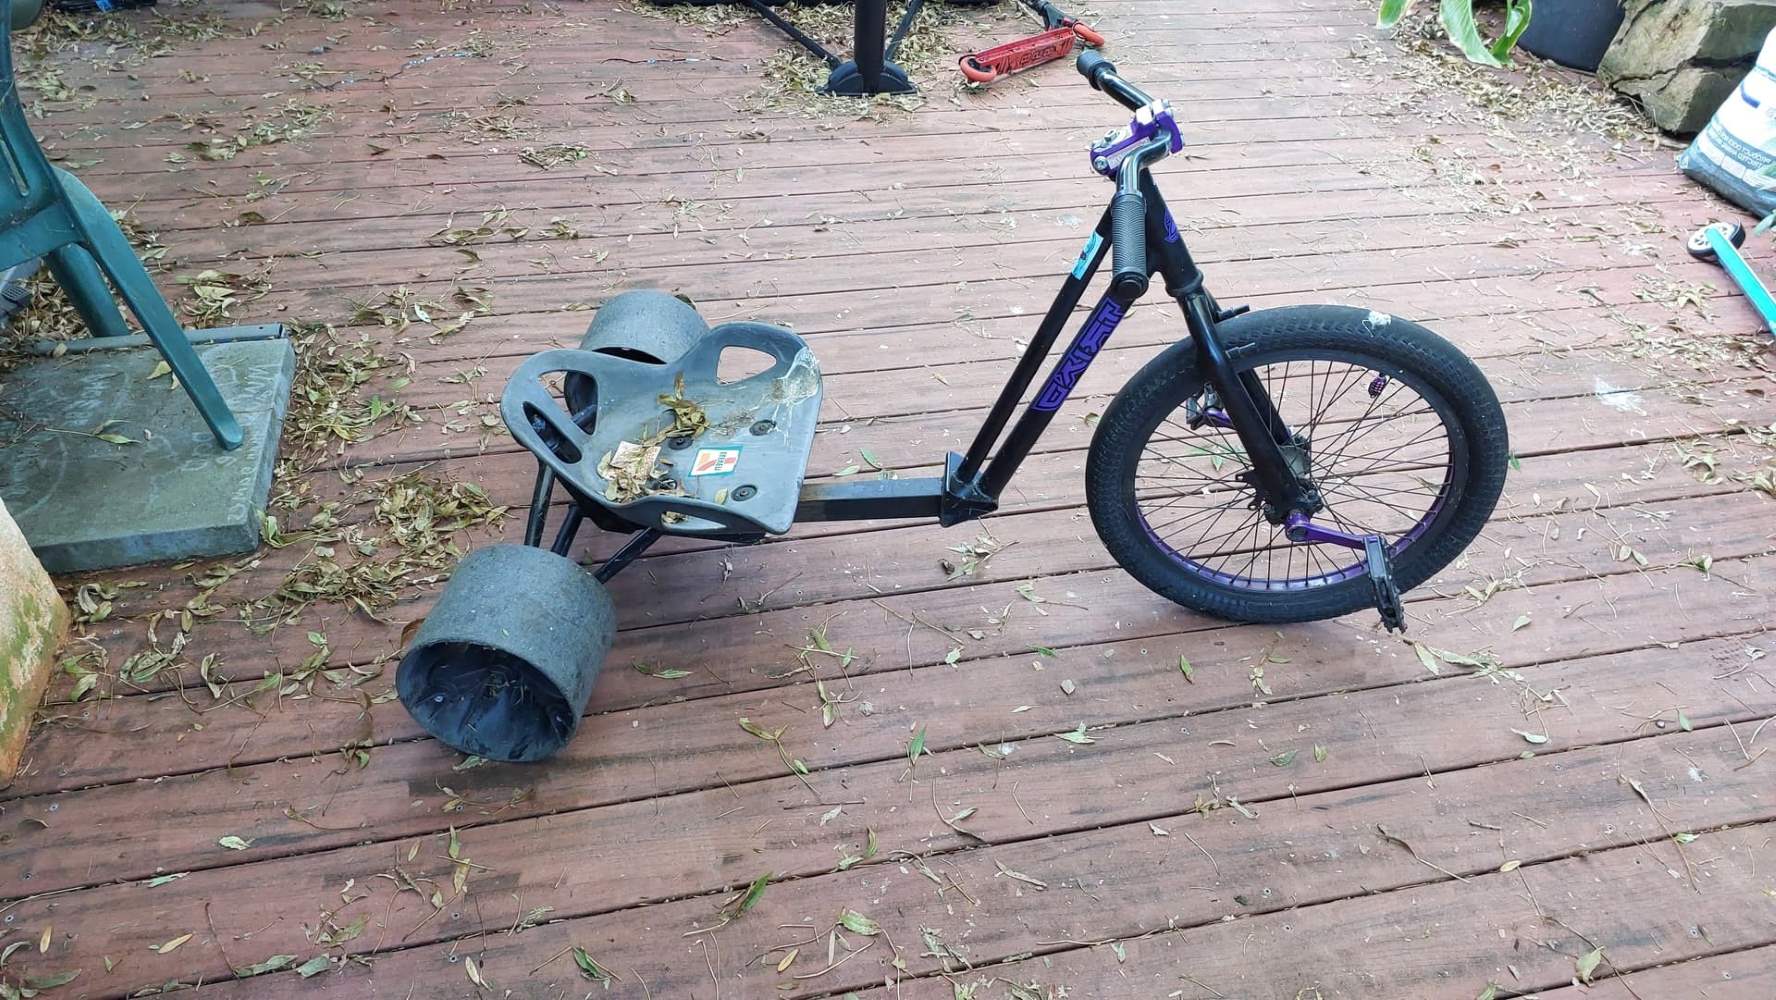
DIY Homemade Drifting Trike: How To Build Your Own Ultimate Drift Machine
Published: May 29, 2024

Content Creator specializing in woodworking and interior transformations. Caegan's guides motivate readers to undertake their own projects, while his custom furniture adds a personal touch.
Learn how to build your own DIY homemade drifting trike with our step-by-step guide. Get ready to create the ultimate drift machine with this fun and creative DIY project. Perfect for DIY & Crafts enthusiasts!
(Many of the links in this article redirect to a specific reviewed product. Your purchase of these products through affiliate links helps to generate commission for Twigandthistle.com, at no extra cost. Learn more)
Introduction
So, you've seen those awesome drifting trikes tearing up the streets and you want to build your own ultimate drift machine? Well, you've come to the right place! Building your own homemade drifting trike can be a fun and rewarding project that will have you cruising and drifting in style. Whether you're a seasoned DIY enthusiast or just looking for a new project to tackle, creating your own drifting trike is a fantastic way to unleash your creativity and have a blast while doing it. In this guide, we'll take you through the step-by-step process of building your very own drifting trike, from gathering the materials and tools to testing and adjusting your creation. Get ready to rev up your DIY skills and hit the pavement in your custom-built drift machine!
Materials and Tools Needed
To get started on your DIY homemade drifting trike, you'll need to gather the following materials and tools:
Materials:
- Steel tubing: This will be used to construct the frame of the trike. Look for tubing with a diameter of around 1.5 inches for sturdiness.
- Drift sleeves: These are essential for achieving those epic drifts. You can purchase drift sleeves online or at a local auto parts store.
- Front wheel and fork: Look for a durable front wheel and fork that can handle the demands of drifting.
- Rear axle and wheels: You'll need a sturdy rear axle and wheels to provide stability and support for your drifting trike.
- Seat and handlebars: Choose a comfortable seat and handlebars that suit your preferences and provide a good grip for steering.
Tools:
- Welder: A MIG welder is ideal for joining the steel tubing together to create the frame of the trike.
- Angle grinder: This will be used for cutting and shaping the steel tubing to the desired dimensions.
- Drill and bits: You'll need these to create holes for attaching components and assembling the trike.
- Wrenches and sockets: Various sizes of wrenches and sockets will be necessary for assembling the components of the trike.
- Measuring tape and marker: These tools will help you accurately measure and mark the steel tubing for cutting and assembly.
Gathering these materials and tools will set you on the right path to building your very own drifting trike. Now that you have everything you need, it's time to roll up your sleeves and start constructing the frame of your ultimate drift machine!
Building the Frame
The first step in creating your DIY homemade drifting trike is constructing the frame. This is the foundation of your drift machine, so it's crucial to get it right. Here's a step-by-step guide to building the frame:
-
Measure and Cut the Steel Tubing: Using your measuring tape and marker, carefully measure and mark the steel tubing according to the dimensions of the frame. Ensure precision in your measurements to guarantee a sturdy and well-fitted frame.
-
Prepare for Welding: Once the tubing is marked, use an angle grinder to cut the tubing to the desired lengths. After cutting, use the grinder to clean the edges and remove any burrs or rough spots that could affect the quality of the welds.
-
Welding the Frame: With the cut tubing prepared, it's time to fire up the MIG welder. Carefully join the tubing together according to your design, ensuring strong and secure welds at each connection point. Take your time with the welding process to ensure the frame is structurally sound.
-
Check for Alignment: After welding, it's important to check the alignment of the frame to ensure it is straight and true. Use a measuring tape and a level to verify that the frame is properly aligned in all dimensions.
-
Reinforce Critical Joints: To add extra strength to the frame, consider reinforcing critical joints with additional welds or gussets. This will help prevent any weak points that could compromise the integrity of the frame during drifting maneuvers.
-
Test for Sturdiness: Once the welding is complete, give the frame a thorough inspection to ensure it is sturdy and free from any defects. Gently apply pressure to different parts of the frame to test its resilience.
By following these steps, you'll have a solid and reliable frame for your drifting trike. With the frame built, you're one step closer to unleashing your homemade drift machine on the streets.
Adding the Drift Sleeves
Adding the drift sleeves is a crucial step in transforming your trike into a drifting powerhouse. These specialized sleeves are what enable your trike to perform those epic sideways slides and drifts. Here's how to add the drift sleeves to your DIY homemade drifting trike:
-
Prepare the Rear Wheels: Begin by removing the rear wheels from the axle. This will provide access to the wheel hubs, where the drift sleeves will be installed.
-
Install the Drift Sleeves: Slide the drift sleeves onto the wheel hubs, ensuring a snug and secure fit. The sleeves should be positioned in a way that allows them to make smooth contact with the ground during drifting maneuvers.
-
Secure the Drift Sleeves: Once the drift sleeves are in place, use the appropriate fasteners to secure them to the wheel hubs. This will prevent the sleeves from slipping or rotating during intense drifting action.
-
Test for Smooth Rotation: After securing the drift sleeves, rotate the rear wheels to ensure that the sleeves move freely without any obstructions. Smooth rotation is essential for achieving controlled drifts.
-
Check for Clearance: Verify that the drift sleeves have adequate clearance from the frame and other components. This will prevent any interference that could hinder the trike's performance during drifting.
-
Inspect for Stability: Give the drift sleeves a gentle tug to check their stability. They should be firmly attached to the wheel hubs and show no signs of loosening or shifting.
By following these steps, you'll have successfully added the drift sleeves to your drifting trike, setting the stage for some adrenaline-pumping sideways action. With the drift sleeves in place, your homemade drift machine is one step closer to dominating the streets with its impressive drifting capabilities.
Installing the Front Wheel and Fork
Installing the front wheel and fork is a critical step in the construction of your DIY homemade drifting trike. The front wheel and fork assembly play a pivotal role in providing stability and control during drifting maneuvers. Here's a detailed guide on how to install the front wheel and fork:
-
Prepare the Fork: Before installing the front wheel, ensure that the fork is in optimal condition. Check for any signs of damage or wear and tear. If necessary, clean and lubricate the fork components to ensure smooth operation.
-
Mount the Front Wheel: Position the front wheel between the fork legs, ensuring that it is centered and aligned. Slide the wheel axle through the fork dropouts, making sure it is securely seated.
-
Secure the Wheel Axle: Once the wheel is in place, use the appropriate fasteners to secure the wheel axle to the fork dropouts. Tighten the fasteners to the manufacturer's recommended torque specifications to ensure a secure and stable connection.
-
Check for Alignment: Verify that the front wheel is aligned with the fork and frame. Use a measuring tape to check the distance between the wheel and the frame on both sides to ensure symmetrical alignment.
-
Test Steering and Suspension: With the front wheel installed, test the steering and suspension to ensure smooth and responsive operation. Turn the handlebars from lock to lock to check for any binding or resistance in the steering mechanism.
-
Inspect Brake System: If your front wheel is equipped with a brake system, inspect the brake components to ensure they are properly aligned and functioning correctly. Adjust the brakes as needed to achieve optimal performance.
-
Tighten all Fasteners: Once everything is in place and aligned, go through all the fasteners again to ensure they are tightened to the recommended torque. This will prevent any potential issues caused by loose components during drifting.
By following these steps, you'll have successfully installed the front wheel and fork, bringing your drifting trike one step closer to completion. The front wheel and fork assembly are essential for providing the stability and control needed to conquer those thrilling drifts with confidence.
Attaching the Rear Axle and Wheels
Attaching the rear axle and wheels is a pivotal step in the assembly of your DIY homemade drifting trike. The rear axle and wheels play a crucial role in providing stability and propulsion for your drift machine. Here's a detailed guide on how to attach the rear axle and wheels:
-
Position the Rear Axle: Begin by positioning the rear axle in the designated location on the frame. Ensure that the axle is aligned parallel to the frame and positioned at the appropriate distance from the ground to achieve the desired ride height.
-
Secure the Axle Mounting Points: Once the axle is in position, use the appropriate fasteners to secure the axle mounting points to the frame. Ensure that the axle is firmly attached and aligned with the frame to prevent any wobbling or misalignment during operation.
-
Install the Rear Wheels: Slide the rear wheels onto the axle, ensuring that they are centered and aligned with the frame. The wheels should rotate freely without any resistance or wobbling. Secure the wheels in place using the provided axle nuts or fasteners.
-
Check Wheel Alignment: Verify that the rear wheels are aligned with each other and perpendicular to the frame. Use a measuring tape to check the distance between the wheels and the frame on both sides to ensure symmetrical alignment.
-
Tighten Axle Nuts: Once the wheels are in place and aligned, tighten the axle nuts to the manufacturer's recommended torque specifications. This will ensure that the wheels are securely attached to the axle and prevent any potential issues during drifting maneuvers.
-
Inspect for Smooth Rotation: Rotate the rear wheels to ensure that they move freely without any obstructions. Smooth rotation is essential for achieving controlled drifts and maintaining stability during high-speed maneuvers.
-
Check for Clearance: Verify that the rear wheels have adequate clearance from the frame and other components. This will prevent any interference that could hinder the trike's performance during drifting and ensure smooth operation.
By following these steps, you'll have successfully attached the rear axle and wheels to your drifting trike, bringing it one step closer to hitting the streets with its impressive drifting capabilities. The rear axle and wheels are essential components that provide the stability and propulsion needed to conquer those thrilling drifts with confidence.
Adding the Seat and Handlebars
Adding the seat and handlebars is a crucial step in completing your DIY homemade drifting trike. The seat provides comfort and support, while the handlebars are essential for steering and control during drifting maneuvers. Here's a detailed guide on how to add the seat and handlebars to your drifting trike:
-
Position the Seat: Begin by positioning the seat on the frame of the trike. Ensure that it is aligned and centered for optimal balance and weight distribution. The seat should be placed at a height and angle that provides a comfortable and ergonomic riding position.
-
Secure the Seat Mounting Points: Once the seat is in position, use the appropriate fasteners to secure the seat mounting points to the frame. Ensure that the seat is firmly attached and stable, as it will endure the forces of drifting and maneuvering.
-
Adjust Seat Position: Test the seat for comfort and adjust its position if necessary. The goal is to achieve a seating position that allows for easy reach to the handlebars and provides a stable and comfortable riding experience.
-
Install the Handlebars: Position the handlebars on the front fork or designated handlebar mount. Ensure that the handlebars are aligned with the front wheel and fork for precise steering control. The handlebars should be at a comfortable height and angle for the rider.
-
Secure the Handlebars: Once the handlebars are in position, use the appropriate fasteners to secure them to the front fork or handlebar mount. Tighten the fasteners to the recommended torque to ensure that the handlebars are securely attached and stable during operation.
-
Test Steering and Comfort: With the seat and handlebars in place, test the steering and comfort of the riding position. Turn the handlebars from lock to lock to ensure smooth and responsive steering. Sit on the seat and adjust the handlebars for optimal comfort and control.
-
Check for Stability: Give the seat and handlebars a gentle tug to check their stability. They should be firmly attached to the frame and front fork, showing no signs of loosening or shifting. Stability is essential for maintaining control during drifting maneuvers.
By following these steps, you'll have successfully added the seat and handlebars to your drifting trike, bringing it one step closer to being a complete and fully functional homemade drift machine. The seat and handlebars are essential components that provide comfort, control, and stability, allowing you to unleash the full potential of your custom-built drifting trike.
Testing and Adjusting the Drift Trike
Once you've completed the assembly of your DIY homemade drifting trike, it's time to put it to the test and make any necessary adjustments to ensure optimal performance. Testing and adjusting the drift trike is a crucial step in the process, as it allows you to fine-tune the machine for maximum stability, control, and drifting capabilities. Here's a detailed guide on how to test and adjust your drift trike:
-
Initial Inspection: Before testing the trike, conduct a thorough inspection of all components to ensure they are securely fastened and in proper working condition. Check the frame, wheels, axle, handlebars, and drift sleeves for any signs of damage or looseness.
-
Safety Gear: Prior to testing, ensure that you are equipped with appropriate safety gear, including a helmet, gloves, and protective clothing. Safety should always be a top priority when testing any vehicle, especially one designed for high-speed maneuvers.
-
Test Ride in Controlled Environment: Find a suitable location, such as an empty parking lot or closed-off area, to conduct your initial test rides. This will allow you to familiarize yourself with the handling and performance of the drift trike in a controlled environment.
-
Evaluate Stability and Control: During the test rides, pay close attention to the stability and control of the trike. Test its ability to maintain a straight line, make sharp turns, and initiate controlled drifts. Note any areas where stability or control may need improvement.
-
Adjust Seat and Handlebars: If you experience discomfort or difficulty in reaching the handlebars, consider adjusting the seat and handlebar positions to achieve a more ergonomic and comfortable riding posture. Proper seating and handlebar positioning are essential for maintaining control during drifting maneuvers.
-
Fine-Tune Drift Sleeve Performance: Experiment with different tire pressures and drift sleeve configurations to optimize the trike's drifting capabilities. Adjusting the pressure and positioning of the drift sleeves can significantly impact the trike's ability to initiate and maintain controlled drifts.
-
Brake System Evaluation: Test the effectiveness of the brake system and ensure that it provides sufficient stopping power when needed. Adjust the brake calipers and pads as necessary to achieve optimal braking performance without compromising the trike's drifting abilities.
-
Inspect Welded Joints: Revisit the welded joints on the frame and critical components to ensure they remain secure and free from any signs of stress or fatigue. Welds should be inspected periodically to prevent potential structural issues during intense drifting maneuvers.
-
Fine-Tune Suspension: If your drift trike is equipped with suspension components, evaluate their performance and adjust the suspension settings to achieve a balance between stability and responsiveness. Proper suspension tuning can enhance the trike's ability to handle varying road conditions and drifting surfaces.
-
Repeat Testing and Adjustments: After making initial adjustments, continue to test the drift trike and make further adjustments as needed. It may take several test rides and fine-tuning sessions to achieve the desired level of stability, control, and drifting performance.
By following these steps and conducting thorough testing and adjustments, you'll be able to fine-tune your DIY homemade drifting trike to deliver an exhilarating and adrenaline-pumping drifting experience. Remember to prioritize safety at all times and enjoy the process of optimizing your custom-built drift machine for the ultimate sideways thrills.
Conclusion
Congratulations! You've successfully completed the construction of your very own DIY homemade drifting trike. Through meticulous assembly, precise adjustments, and thorough testing, you've transformed a vision into a reality. Your custom-built drift machine is now ready to hit the streets and unleash its impressive drifting capabilities.
As you prepare to take your drifting trike for a spin, remember the dedication and craftsmanship that went into its creation. From welding the sturdy frame to fine-tuning the drift sleeves, every step has contributed to the birth of a unique and exhilarating ride.
Now, it's time to embrace the thrill of controlled drifts, the rush of speed, and the satisfaction of knowing that you've built something truly special. Whether you're tearing up the pavement or showcasing your creation at local events, your homemade drifting trike is a testament to your ingenuity and passion for DIY projects.
So, rev up your engine, grab hold of the handlebars, and let the sideways action begin. Your ultimate drift machine is a reflection of your creativity and determination, and it's ready to carve its own path in the world of drifting.
Get out there and enjoy the adrenaline-pumping experience of drifting on a machine that you've built with your own hands. The streets await, and your homemade drifting trike is poised to leave a lasting impression with its unique blend of craftsmanship and performance.