
Home>Create & Decorate>DIY & Crafts>DIY Guitar Amp: Step-by-Step Guide To Building Your Own
DIY & Crafts
DIY Guitar Amp: Step-by-Step Guide To Building Your Own
Published: May 18, 2024

Content Creator specializing in woodworking and interior transformations. Caegan's guides motivate readers to undertake their own projects, while his custom furniture adds a personal touch.
Learn how to build your own DIY guitar amp with our step-by-step guide. Get creative with DIY & Crafts and rock out with your custom creation.
(Many of the links in this article redirect to a specific reviewed product. Your purchase of these products through affiliate links helps to generate commission for Twigandthistle.com, at no extra cost. Learn more)
Introduction
So, you've got a passion for music and a love for tinkering with electronics. Ever thought about combining the two by building your very own DIY guitar amp? Not only can it be a rewarding project, but it also allows you to customize the sound to your liking. In this step-by-step guide, we'll walk you through the process of building your own guitar amp, from choosing the right components to adding the finishing touches. Whether you're a seasoned DIY enthusiast or a beginner looking for a new challenge, this guide will help you bring your musical and technical skills together to create a one-of-a-kind guitar amp. Let's dive in and get started!
Choosing the Right Components
When it comes to building your own DIY guitar amp, selecting the right components is crucial to achieving the sound and performance you desire. Here are the key components you'll need to consider:
1. Amplifier Kit or Individual Components
Decide whether you want to purchase a complete amplifier kit or source individual components separately. Kits are convenient and often come with all the necessary parts, while sourcing individual components allows for more customization.
2. Vacuum Tubes
The type and number of vacuum tubes will significantly impact the amp's tone. Research different tube options and consider factors such as power output, distortion characteristics, and overall sound quality.
3. Speaker
Selecting the right speaker is essential for achieving the desired sound. Consider factors such as wattage, impedance, and speaker size to ensure compatibility with your amplifier design.
4. Chassis and Cabinet
Choose a chassis and cabinet that not only fit the aesthetic you're aiming for but also provide ample space for housing the components and ensuring proper ventilation.
5. Resistors, Capacitors, and Other Electronic Components
Carefully select resistors, capacitors, and other electronic components based on their ratings, tolerances, and suitability for the amplifier's circuit design.
6. Power Supply
The power supply is a critical component that directly impacts the amp's performance. Ensure that the power supply unit can deliver the necessary voltage and current for the amplifier's operation.
7. Knobs, Switches, and Hardware
Don't overlook the importance of knobs, switches, and hardware. These components not only contribute to the amp's functionality but also add to its overall aesthetic appeal.
By carefully considering and selecting the right components, you can lay a solid foundation for building a DIY guitar amp that meets your sonic preferences and technical requirements.
Designing the Circuit
Designing the circuit for your DIY guitar amp is a critical step that directly influences the amp's performance and sound characteristics. Here's how to approach the circuit design process:
-
Research Amplifier Topologies:
Before diving into the circuit design, research different amplifier topologies such as single-ended, push-pull, or hybrid designs. Each topology has its unique sonic characteristics, power handling capabilities, and complexity, so choose one that aligns with your preferences and skill level. -
Select the Tube Configuration:
Determine the tube configuration for the preamp and power amp stages. Whether you opt for a classic 12AX7-driven preamp or a pair of EL34 tubes for the power stage, consider how each tube's characteristics will contribute to the overall tone and gain structure of the amplifier. -
Understand Signal Flow:
Visualize the signal flow within the amplifier circuit. Identify the input stage, tone control section, power amp stage, and output transformer. Understanding the signal path will help you optimize the circuit for desired tonal qualities and gain levels. -
Choose Component Values:
Select appropriate resistor, capacitor, and inductor values for each stage of the amplifier. Pay attention to component tolerances, voltage ratings, and frequency response characteristics to ensure stability and optimal performance. -
Incorporate Tone Controls:
If desired, incorporate tone control circuits such as bass, midrange, and treble controls. Experiment with different tonestack configurations to tailor the amplifier's EQ response to your liking. -
Consider Negative Feedback:
Decide whether to implement negative feedback in the amplifier circuit to regulate gain, improve linearity, and reduce distortion. Carefully adjust the feedback loop to achieve the desired balance between clean headroom and harmonic richness. -
Plan for Biasing and Power Supply:
Factor in biasing circuits for setting the operating points of the tubes and ensure proper voltage regulation in the power supply section. Proper biasing and power supply design are crucial for tube longevity and consistent performance. -
Simulate and Test:
Utilize circuit simulation software or breadboarding techniques to simulate the amplifier circuit and evaluate its performance. Test different component values and configurations to fine-tune the circuit before finalizing the design.
By carefully designing the amplifier circuit, you can tailor the amp's sonic characteristics to your preferences and gain a deeper understanding of the technical aspects of tube amplifier design. This stage sets the foundation for bringing your DIY guitar amp to life with a unique and personalized sound.
Assembling the Chassis
Assembling the chassis is a pivotal phase in the construction of your DIY guitar amp. It involves housing and mounting the components within the chassis, ensuring proper placement, secure connections, and effective heat dissipation. Here's a detailed guide on how to tackle this crucial step:
-
Prepare the Chassis: Begin by prepping the chassis for component installation. Clean the chassis to remove any debris, sharp edges, or manufacturing residues. Ensure that the chassis is free from any defects that could hinder the assembly process.
-
Mounting the Tube Sockets and Transformers: Carefully position and mount the tube sockets and transformers in their designated locations within the chassis. Secure them firmly using appropriate hardware to prevent movement or vibration during operation.
-
Installing the Potentiometers and Switches: Place the potentiometers (volume, tone controls, etc.) and switches in their respective positions on the chassis. Ensure that they are aligned and oriented correctly for easy operation and accessibility from the front panel.
-
Securing the Input and Output Jacks: Mount the input and output jacks on the chassis, ensuring a snug fit and proper alignment. These jacks serve as the connection points for the guitar and speaker, so their secure installation is crucial for reliable performance.
-
Positioning the Circuit Board: If your amplifier utilizes a printed circuit board (PCB), carefully position and mount the board within the chassis. Ensure that the board is securely fastened and aligned with the mounting holes to prevent flexing or stress on the components.
-
Routing and Dressing Wires: Organize and route the wires from the components to their respective connection points. Use cable ties or wire clamps to secure the wiring and prevent tangling or interference with other components.
-
Grounding and Bonding: Establish proper grounding connections between the components and the chassis. Ensure that all ground points are securely bonded to the chassis to minimize noise, hum, and electrical interference.
-
Heat Dissipation Considerations: Pay attention to the placement of heat-generating components such as power tubes and resistors. Allow adequate space and ventilation to facilitate heat dissipation and prevent overheating.
-
Final Inspection: Before proceeding to the wiring phase, conduct a thorough inspection of the chassis assembly. Check for any loose components, sharp edges, or potential clearance issues that may arise during the wiring and testing stages.
By meticulously assembling the chassis, you set the stage for the subsequent wiring and testing processes. Attention to detail and precision during this phase ensures a solid foundation for the functionality, reliability, and longevity of your DIY guitar amp.
Wiring the Components
Wiring the components of your DIY guitar amp is a critical step that brings together the electrical connections, ensuring proper signal flow and functionality. Here's a detailed guide on how to approach the wiring process:
-
Plan the Wiring Layout: Before diving into the actual wiring, carefully plan the layout of the components and their interconnections within the chassis. Consider factors such as signal paths, proximity of high and low-level circuits, and accessibility for future maintenance.
-
Use High-Quality Wiring: Select high-quality insulated wire for the internal connections. Differentiate between signal wires, power supply lines, and ground connections, using appropriate wire gauges and types to minimize interference and ensure safety.
-
Follow Wiring Diagrams: Refer to the amplifier schematic and layout diagrams to guide the placement and routing of the wiring. Pay close attention to the orientation of components, terminal connections, and signal flow to avoid errors during the wiring process.
-
Employ Proper Wire Dressing Techniques: Bundle and dress the wires neatly using cable ties, wire looms, or lacing cord. Organize the wiring to minimize the risk of signal crosstalk, interference, and accidental damage during operation.
-
Soldering Connections: Use high-quality solder and a reliable soldering iron to make secure and reliable connections. Ensure that the solder joints are clean, free from cold solder joints, and provide a strong mechanical and electrical bond.
-
Insulate and Protect: Apply heat-shrink tubing or electrical tape to insulate and protect the soldered connections. Shield sensitive signal wires from potential sources of electromagnetic interference to maintain signal integrity.
-
Grounding Scheme: Implement a robust grounding scheme to minimize noise and hum. Connect all ground points to a central grounding bus or chassis ground, ensuring a low-impedance path for electrical currents to dissipate.
-
Power Supply Wiring: Pay special attention to the wiring of the power supply components, including the rectifier, filter capacitors, and voltage regulators. Ensure proper isolation and routing of high-voltage lines to prevent electrical hazards and interference.
-
Signal Path Integrity: Verify the integrity of the signal paths from the input to the output stages. Check for continuity, proper shielding, and absence of unintended signal coupling or leakage between different stages of the amplifier.
-
Safety Considerations: Adhere to safety practices when working with high-voltage circuits. Use insulated tools, work on a non-conductive surface, and discharge filter capacitors before handling the wiring to prevent electrical shocks.
By meticulously wiring the components of your DIY guitar amp, you ensure reliable operation, optimal signal integrity, and safety. Attention to detail and adherence to best practices during the wiring process lay the groundwork for a well-crafted and functional amplifier.
Testing and Troubleshooting
Testing and troubleshooting are crucial phases in the DIY guitar amp building process, ensuring that the amplifier functions as intended and identifying and resolving any potential issues. Here's a comprehensive guide on how to approach the testing and troubleshooting stages:
-
Initial Power-Up: Before connecting the guitar or audio source, perform an initial power-up test. Monitor the amp for any unusual sounds, smoke, or abnormal behavior. Verify that the power indicator lights up and that the tubes begin to glow gradually.
-
Signal Input Test: Connect a guitar or signal source to the input jack and gradually increase the volume. Listen for any unwanted noise, hum, or oscillations. Test the functionality of the tone controls and ensure that the amplifier responds to input signals.
-
Output Signal Test: Connect the amplifier to a speaker cabinet and gradually increase the volume while playing the guitar. Verify that the amplifier produces sound and that the speaker responds appropriately to changes in volume and tone settings.
-
Signal Integrity Check: Use a signal generator and an oscilloscope to analyze the amplifier's signal integrity. Verify that the amplifier reproduces the input signal accurately without distortion, clipping, or frequency anomalies.
-
Biasing and Operating Point Verification: Measure the bias voltage and current for the output tubes to ensure that they operate within the specified range. Verify that the operating points align with the design specifications to achieve optimal tube performance.
-
Temperature and Heat Dissipation Test: Monitor the temperature of the output tubes, power resistors, and other heat-generating components during extended operation. Ensure that the chassis remains at a safe temperature and that heat dissipation is adequate.
-
Troubleshooting Steps: If any issues arise during testing, systematically troubleshoot the amplifier by checking for loose connections, cold solder joints, component failures, or incorrect wiring. Use a multimeter and oscilloscope to diagnose and isolate the root cause of the problem.
-
Signal Path Analysis: Trace the signal path through the amplifier stages using an oscilloscope and signal injector. Identify any points of signal loss, distortion, or abnormal behavior and rectify the underlying causes.
-
Component Substitution: If troubleshooting reveals a faulty component, consider substituting it with a known working part to verify the source of the issue. Test and compare the amplifier's performance with different components to pinpoint the problematic element.
-
Safety Precautions: Adhere to safety protocols when conducting tests on live amplifiers. Use insulated tools, work in a well-ventilated area, and exercise caution when handling high-voltage circuits to prevent electrical hazards.
-
Iterative Testing and Adjustment: After addressing any identified issues, repeat the testing process to ensure that the amplifier functions reliably and meets the desired performance criteria. Make iterative adjustments and retests as needed to achieve optimal results.
By meticulously testing and troubleshooting the DIY guitar amp, you ensure that it operates safely, reliably, and in accordance with your design goals. Thorough testing and effective troubleshooting techniques are essential for delivering a high-quality, functional amplifier that meets your musical and technical expectations.
Adding Finishing Touches
After successfully assembling and testing your DIY guitar amp, it's time to add the finishing touches that will not only enhance its visual appeal but also contribute to its overall functionality and user experience. Here's a detailed guide on how to elevate your amplifier with the perfect finishing touches:
-
Aesthetic Customization: Consider applying a durable and visually appealing finish to the chassis and cabinet. Whether it's a classic tolex covering, a vibrant custom paint job, or a natural wood veneer, the aesthetic customization adds a personal touch to your amplifier.
-
Front Panel Design: Create a professional-looking front panel by adding engraved or printed labels for control knobs, input/output jacks, and switches. Utilize high-quality knobs and control hardware that complement the overall design.
-
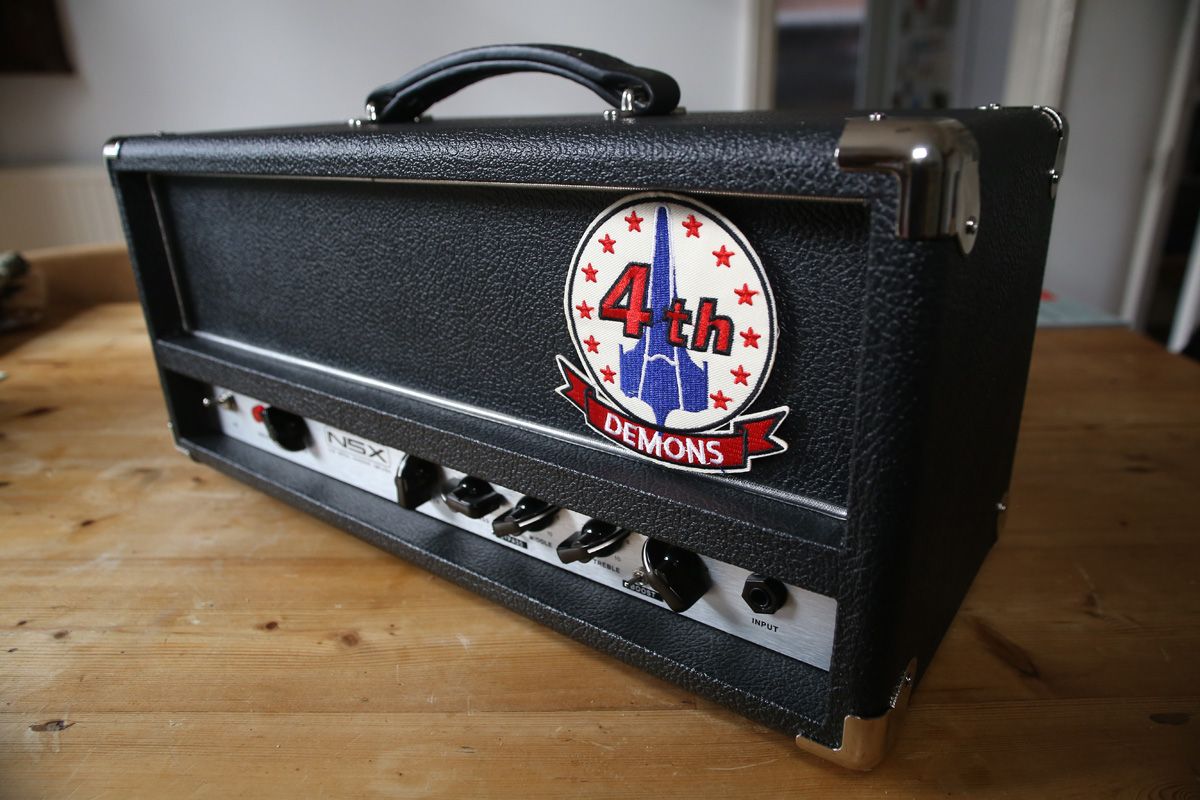
Logo and Branding: If you've built the amp as part of a personal project or a small-scale production, consider adding a custom logo or branding to the chassis. This not only adds a professional touch but also personalizes the amplifier as your own creation.
-
Handle and Corner Hardware: Install robust and visually appealing handles and corner hardware to protect the amp during transportation and give it a rugged, professional appearance.
-
Ventilation and Cooling: Ensure that the chassis and cabinet provide adequate ventilation for heat dissipation. Consider adding ventilation grilles or fans to maintain optimal operating temperatures for the internal components.
-
Cable Management: Implement cable management solutions within the chassis to keep internal wiring organized and prevent interference with moving parts or components.
-
User Interface Enhancements: If applicable, consider adding indicator lights, VU meters, or other visual elements that enhance the user interface and provide valuable feedback during operation.
-
Documentation and User Manual: Create a comprehensive user manual that includes the amplifier's specifications, operating instructions, and safety guidelines. Providing clear documentation enhances the user experience and ensures safe and informed usage of the amplifier.
-
Quality Control and Final Inspection: Before considering the amplifier complete, conduct a final inspection to verify that all components are securely fastened, the wiring is tidy, and the amplifier meets your quality standards.
-
Accessories and Add-Ons: Consider offering optional accessories or add-ons such as footswitches, covers, or custom speaker cabinets that complement the amplifier and provide additional value to users.
By paying attention to these finishing touches, you can elevate your DIY guitar amp from a functional project to a polished, professional-quality instrument. These details not only enhance the visual appeal of the amplifier but also contribute to its usability, durability, and overall desirability for musicians and enthusiasts alike.
Conclusion
In conclusion, building your own DIY guitar amp is a fulfilling and rewarding endeavor that allows you to merge your passion for music with hands-on technical skills. From carefully selecting the right components to designing the circuit, assembling the chassis, wiring the components, testing and troubleshooting, and adding the finishing touches, each step contributes to the creation of a unique and personalized amplifier. Whether you're a seasoned DIY enthusiast or a newcomer to the world of amp building, this guide has provided you with the essential knowledge and guidance to embark on this exciting journey. By following the step-by-step process and infusing your creativity and technical prowess, you can craft a custom guitar amp that not only reflects your musical preferences but also showcases your craftsmanship and dedication to the art of DIY and home improvement. So, roll up your sleeves, gather your tools, and let the sound of your own creation amplify your musical journey.