
Home>Create & Decorate>DIY & Crafts>DIY Deer Stand: Building Your Own Hunting Platform
DIY & Crafts
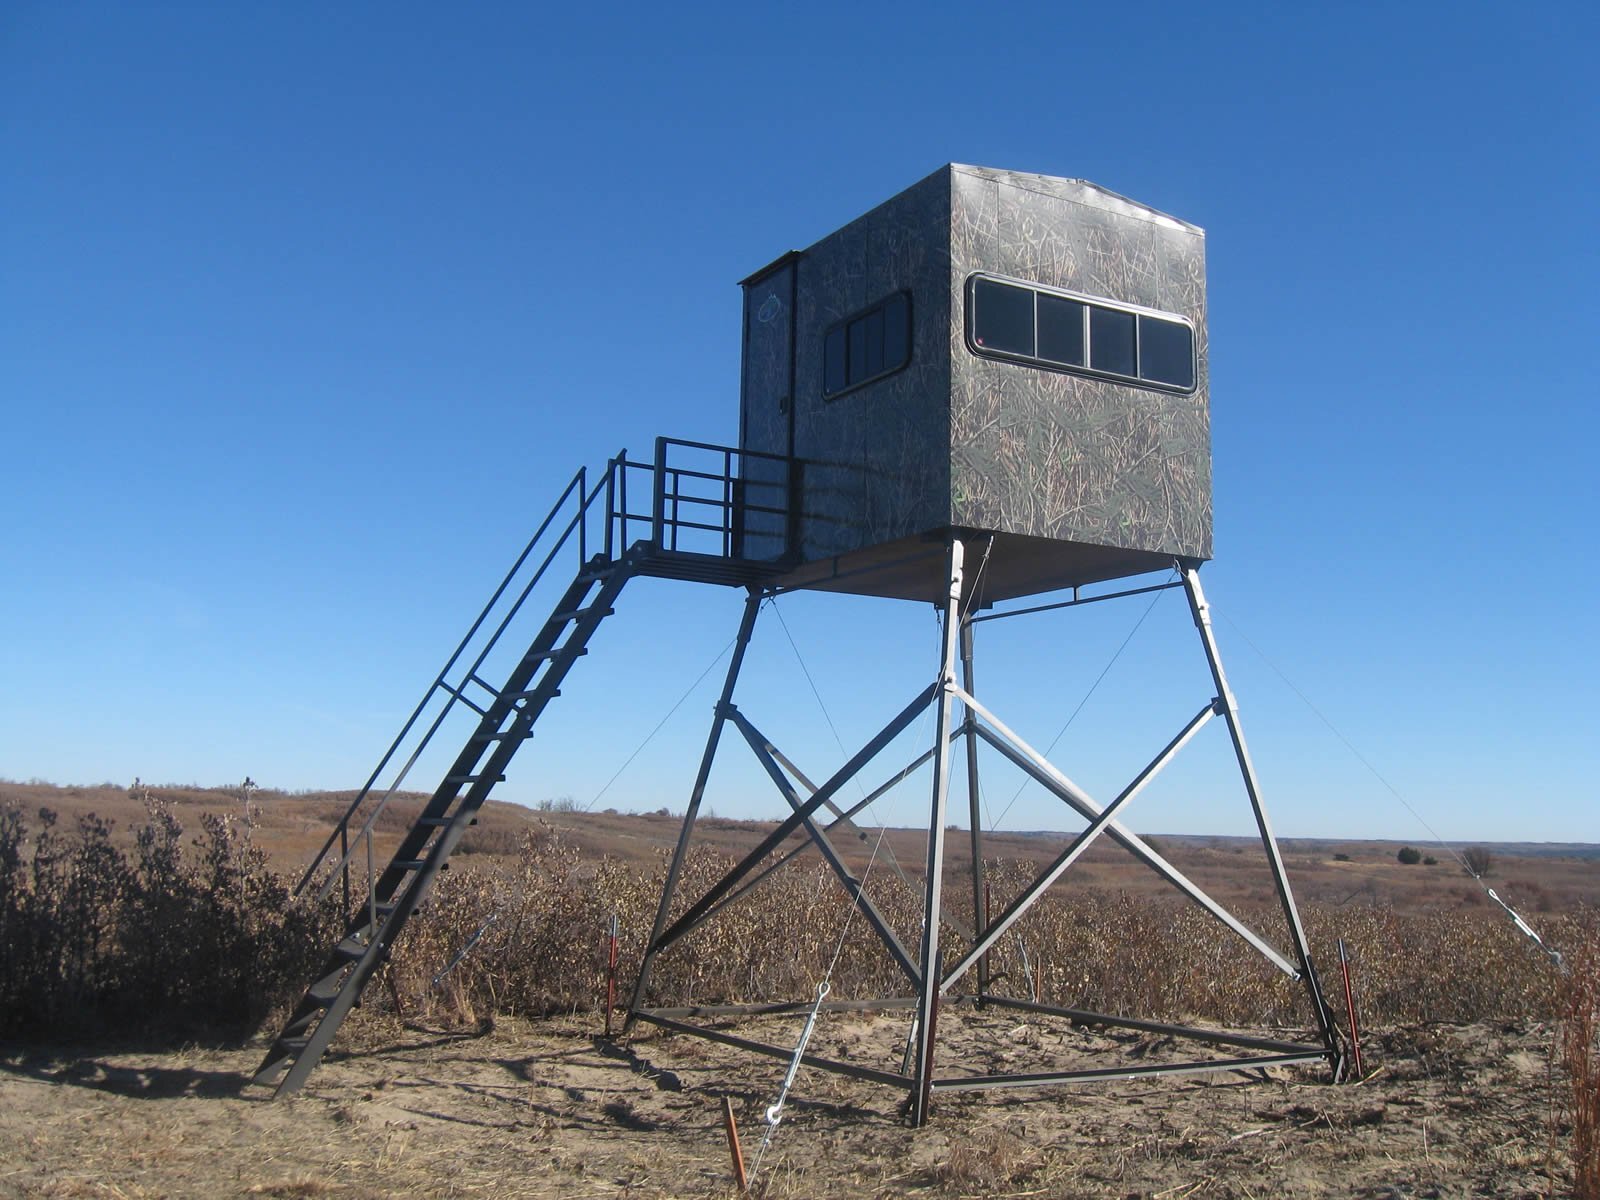
DIY Deer Stand: Building Your Own Hunting Platform
Published: June 6, 2024

Content Creator specializing in woodworking and interior transformations. Caegan's guides motivate readers to undertake their own projects, while his custom furniture adds a personal touch.
Discover how to build your own DIY deer stand with our step-by-step guide. Perfect for hunting enthusiasts who love DIY & Crafts. Start your project today!
(Many of the links in this article redirect to a specific reviewed product. Your purchase of these products through affiliate links helps to generate commission for Twigandthistle.com, at no extra cost. Learn more)
Introduction
So, you're an avid hunter, and you're looking to take your hunting game to the next level by building your very own DIY deer stand. Well, you've come to the right place! In this article, we'll guide you through the process of constructing a sturdy and reliable hunting platform that will give you the perfect vantage point for your next hunting expedition. From choosing the right location to adding essential safety features, we've got you covered. Let's dive in and get started on this exciting DIY project!
Choosing the Right Location
When it comes to building your DIY deer stand, selecting the right location is crucial for a successful hunting experience. Here are some key factors to consider when choosing the perfect spot for your hunting platform:
-
Scouting: Before you start building, spend some time scouting the area for deer activity. Look for signs such as tracks, droppings, and feeding areas. Setting up your deer stand in a location with high deer traffic will increase your chances of a successful hunt.
-
Legal Considerations: Ensure that you are allowed to build a deer stand in your chosen location. Check local hunting regulations and obtain any necessary permits or permissions before proceeding with your DIY project.
-
Cover and Concealment: Look for a location that provides natural cover and concealment. Choose a spot near trees or brush that will help camouflage your deer stand and keep you hidden from the keen eyes of your prey.
-
Wind Direction: Pay attention to the prevailing wind direction in your chosen location. Position your deer stand downwind of where you expect the deer to approach. This will help minimize the chances of your scent being detected.
-
Accessibility: Consider how you will access your deer stand. Choose a location that allows for easy and quiet entry and exit, minimizing disturbance to the surrounding area.
By carefully considering these factors, you can select a prime location for your DIY deer stand that will maximize your hunting success.
Selecting Materials and Tools
When it comes to building a sturdy and reliable DIY deer stand, selecting the right materials and tools is essential. Here's a detailed guide to help you make the best choices for your hunting platform:
Materials
- Lumber: Choose high-quality, pressure-treated lumber that can withstand the elements. Opt for treated wood to prevent rot and decay, ensuring the longevity of your deer stand.
- Fasteners: Select corrosion-resistant screws and bolts to secure the components of your deer stand. Stainless steel or galvanized fasteners are ideal for outdoor use, as they are less likely to rust.
- Platform Flooring: Consider using non-slip decking material for the flooring of your deer stand. This will provide stability and safety when you're on the platform.
- Safety Railings: If you plan to include safety railings, choose durable materials such as metal or composite materials that can withstand weather exposure.
Tools
- Circular Saw: A reliable circular saw will be essential for cutting lumber to the required dimensions.
- Drill/Driver: Invest in a high-quality drill/driver for assembling the components of your deer stand. A cordless model will provide flexibility, especially if you're building in a remote location.
- Level: Ensure the stability and safety of your deer stand by using a level to keep the platform and supports perfectly aligned.
- Measuring Tape: Accurate measurements are crucial in construction. A sturdy measuring tape will be indispensable for ensuring precision in your project.
- Safety Gear: Don't forget to prioritize safety. Equip yourself with protective gear, including goggles, gloves, and a hard hat, to stay safe during the construction process.
By carefully selecting the right materials and tools, you can ensure that your DIY deer stand is not only well-constructed but also safe and durable for many hunting seasons to come.
Designing Your Deer Stand
Designing your deer stand is a crucial step in the DIY process, as it sets the foundation for the functionality and comfort of your hunting platform. Here are some key considerations to keep in mind as you plan the design of your deer stand:
Platform Size and Shape
- Size: Determine the size of the platform based on the number of hunters it will accommodate and the gear you plan to bring. A larger platform provides more space but may require additional support.
- Shape: Consider the shape of the platform based on the surrounding landscape. A rectangular or square platform is common, but you may opt for a custom shape to fit specific tree configurations.
Seating and Shooting Lanes
- Seating: Decide on the type of seating you prefer, whether it's a built-in bench, swivel chair, or stool. Comfort and stability are essential for long hours of hunting.
- Shooting Lanes: Plan the orientation of shooting lanes to align with common deer approaches. Clear any obstructive branches or foliage to ensure unobstructed shooting opportunities.
Roof and Cover
- Roof: If you desire overhead cover, consider adding a roof to your deer stand. This provides protection from the elements and helps conceal your movements.
- Camouflage: Choose materials that blend with the natural surroundings to camouflage your deer stand. Consider using natural foliage or camouflage netting to minimize its visibility.
Access and Entry Points
- Ladder or Stairs: Determine the best access method for your deer stand. A ladder or stairs can provide safe and convenient entry, especially for elevated platforms.
- Entry Points: Plan the location of entry points to minimize disturbance to the hunting area. Consider adding a hinged trap door for easy access and to reduce noise during entry and exit.
Additional Features
- Storage: If desired, incorporate storage compartments for hunting gear and equipment. This can help keep the platform organized and clutter-free.
- Safety Railings: Consider adding safety railings around the platform to enhance safety, especially for elevated stands.
By carefully considering these design elements, you can create a deer stand that not only meets your hunting needs but also provides a comfortable and secure environment for your hunting expeditions.
Constructing the Platform
Constructing the platform of your DIY deer stand is a critical phase that requires precision and attention to detail. Here's a step-by-step guide to help you build a sturdy and reliable platform for your hunting needs:
-
Prepare the Site: Clear the chosen tree of any obstructions and ensure it is healthy and sturdy enough to support the deer stand. Trim any overhanging branches that may interfere with the construction process.
-
Install Support Brackets: Begin by attaching support brackets to the tree at the desired height for the platform. Use heavy-duty lag screws or bolts to secure the brackets, ensuring they are level and firmly anchored to the tree.
-
Frame the Platform: Construct the frame of the platform using pressure-treated lumber. Cut the lumber to the required dimensions and assemble the frame on the ground before lifting it into position. Use joist hangers and galvanized nails or screws to secure the frame together.
-
Attach the Flooring: Once the frame is in place, attach the flooring material to create the platform surface. Ensure the flooring is securely fastened to the frame, providing a stable and safe surface for hunting activities.
-
Add Guardrails: If you opt to include guardrails for safety, attach them to the platform using appropriate fasteners. Ensure the guardrails are at a suitable height and securely anchored to the platform to prevent accidents.
-
Stabilize the Platform: To enhance stability, consider adding diagonal bracing or cross supports beneath the platform. This will help distribute weight evenly and minimize any swaying or movement while on the stand.
-
Inspect for Safety: Once the platform is constructed, thoroughly inspect all components for stability and safety. Test the platform's weight-bearing capacity and ensure all fasteners are secure and free from defects.
-
Consider Weatherproofing: Apply a weatherproof sealant or stain to the platform to protect the wood from the elements. This will help extend the lifespan of the deer stand and maintain its structural integrity over time.
By following these steps, you can construct a robust and secure platform for your DIY deer stand, providing a reliable vantage point for your hunting endeavors.
Adding Safety Features
Ensuring the safety of your DIY deer stand is paramount for a successful and secure hunting experience. Here are essential safety features to consider incorporating into your deer stand:
Harness and Safety Line
- Full-Body Safety Harness: Prioritize safety by using a full-body safety harness while on the deer stand. This essential piece of equipment provides fall protection and should be worn at all times when elevated.
- Safety Line or Lifeline: Install a safety line or lifeline that allows you to connect your safety harness to the tree. This provides an additional layer of security, preventing falls in the event of a slip or stumble.
Non-Slip Surfaces
- Grip-Enhancing Flooring: Choose non-slip flooring materials for the platform to minimize the risk of accidental slips or falls, especially in wet or icy conditions.
- Traction Strips or Mats: Consider adding traction strips or mats to areas prone to moisture buildup, such as the entry point or ladder/stair treads, to enhance grip and stability.
Secure Entry and Exit
- Sturdy Ladder or Stairs: Ensure that the ladder or stairs leading to the deer stand are securely attached and free from defects. Regularly inspect and maintain these access points to prevent accidents during entry and exit.
- Well-Positioned Entry Points: Design the entry points to provide easy and unobstructed access to the platform. Consider adding handrails or grab bars for additional support during entry and exit.
Visibility and Marking
- Reflective Markings: Enhance the visibility of your deer stand, especially in low-light conditions, by adding reflective tape or markings to the structure. This increases awareness for both hunters and non-hunters in the area.
- Warning Signage: Install visible signage near the deer stand to alert others to its presence. Include safety reminders and instructions for proper use of the stand.
Regular Maintenance
- Inspection and Maintenance Schedule: Establish a routine for inspecting and maintaining the deer stand. Check for any signs of wear, damage, or deterioration, and promptly address any issues to ensure the ongoing safety and integrity of the structure.
- Weatherproofing and Preservation: Apply weatherproofing treatments to protect the wood from rot and decay. Regularly inspect and reapply these treatments as needed to maintain the structural strength of the deer stand.
By incorporating these safety features into your DIY deer stand, you can create a secure and reliable hunting platform that prioritizes the well-being of both yourself and others in the hunting environment.
Camouflaging Your Deer Stand
Camouflaging your deer stand is essential for blending it seamlessly into the natural surroundings, minimizing its visibility to wildlife and other hunters. Here are some effective strategies for camouflaging your deer stand:
Natural Cover and Foliage
Utilize natural cover and foliage from the surrounding area to conceal your deer stand. Gather branches, leaves, and other natural materials to create a camouflage effect that matches the environment. Secure these materials to the structure using zip ties or twine, ensuring they are firmly attached and will not obstruct the functionality of the deer stand.
Camouflage Netting
Consider using camouflage netting specifically designed for hunting purposes. These nettings are available in various patterns and colors to mimic different landscapes, such as woodland, marshland, or snow-covered terrain. Drape the netting over the deer stand, allowing it to drape naturally and blend with the surroundings.
Paint and Stain
Apply camouflage paint or stain to the exterior surfaces of the deer stand. Choose colors that match the predominant hues of the environment, such as earthy browns, greens, and grays. Use a combination of spray paint and brush-on techniques to create a natural, textured appearance that helps the deer stand seamlessly blend into the landscape.
Natural Vegetation
Incorporate live vegetation, such as small shrubs, vines, or grasses, into the design of your deer stand. Consider planting native vegetation around the base of the stand or in containers placed on the platform. This living camouflage not only conceals the structure but also enhances its integration into the natural habitat.
Strategic Placement
Position your deer stand near trees or brush that naturally break up its outline. Avoid placing the stand in open, exposed areas that make it more conspicuous. By strategically situating the deer stand within the existing vegetation, you can take advantage of natural cover to enhance its camouflage.
Seasonal Adaptation
Adapt the camouflage of your deer stand to the changing seasons. In the spring and summer, incorporate fresh, green foliage and vibrant natural elements. As autumn approaches, transition to earthier tones and textures to match the changing landscape. In winter, consider adding snow camouflage to the structure to minimize its visibility in snowy conditions.
By implementing these camouflage techniques, you can effectively conceal your deer stand, making it less detectable to wildlife and increasing your hunting success while maintaining a harmonious presence within the natural environment.
Conclusion
In conclusion, building your own DIY deer stand can be a rewarding and fulfilling project for any hunting enthusiast. By carefully selecting the location, materials, and design elements, you can create a hunting platform that not only enhances your hunting experience but also prioritizes safety and environmental integration. The construction of the platform, addition of safety features, and effective camouflage techniques are essential steps in ensuring the functionality and concealment of your deer stand. With proper planning and attention to detail, your DIY deer stand can become a reliable vantage point for successful hunting expeditions, providing a sense of accomplishment and pride in your craftsmanship. Embrace the challenge, enjoy the process, and look forward to the countless memorable hunting moments that await you from your custom-built deer stand.