
Home>Create & Decorate>DIY & Crafts>DIY Crib: How To Build Your Own Baby Bed
DIY & Crafts
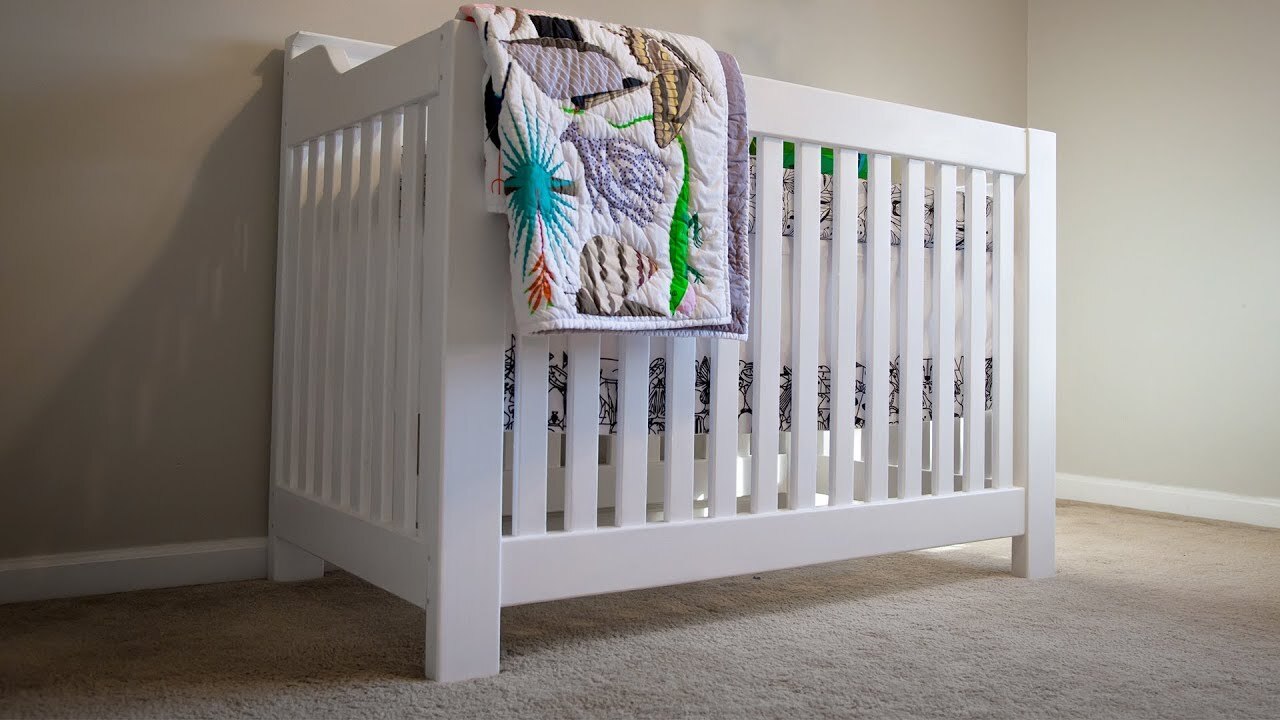
DIY Crib: How To Build Your Own Baby Bed
Published: June 12, 2024

Senior Editor in Create & Decorate, Kathryn combines traditional craftsmanship with contemporary trends. Her background in textile design and commitment to sustainable crafts inspire both content and community.
Discover step-by-step instructions for creating a personalized crib with our DIY & Crafts guide. Build a safe and stylish baby bed for your little one.
(Many of the links in this article redirect to a specific reviewed product. Your purchase of these products through affiliate links helps to generate commission for Twigandthistle.com, at no extra cost. Learn more)
Introduction
So, you've got a little one on the way, and you want to create a special place for them to rest their tiny head. Building your own DIY crib can be a rewarding and cost-effective project that allows you to customize the design to fit your style and needs. In this article, we'll guide you through the process of planning, gathering materials, and building a safe and sturdy crib for your bundle of joy. Let's dive in and get started on this exciting DIY adventure!
Planning and Designing Your DIY Crib
Before you start building your DIY crib, it's essential to plan and design the bed to ensure it meets safety standards and suits your preferences. Here's how to get started:
-
Research Safety Standards: Begin by researching safety standards for cribs to understand the necessary dimensions, spacing between slats, and other safety considerations. The Consumer Product Safety Commission (CPSC) provides guidelines for crib safety, including the allowable distance between slats and the sturdiness of the crib structure.
-
Choose a Design: Consider the style and design of the crib. Do you want a traditional, timeless look, or do you prefer a modern and sleek design? Look for inspiration in home improvement magazines, online platforms, and DIY forums to find a design that resonates with you.
-
Create a Blueprint: Once you have a design in mind, create a blueprint or detailed plan for your DIY crib. Include measurements, materials needed, and a step-by-step construction plan. This blueprint will serve as your guide throughout the building process.
-
Consider Functionality: Think about the functionality of the crib. Will it have an adjustable mattress height? Are you incorporating storage features? Considering these aspects during the planning phase will help you create a crib that meets your specific needs.
-
Gather Inspiration: Look for inspiration from various sources, such as Pinterest, home improvement websites, and DIY blogs. Gathering inspiration can help you refine your design ideas and incorporate unique elements into your DIY crib.
By carefully planning and designing your DIY crib, you can ensure that the end result is both safe and visually appealing, providing a cozy and secure sleeping space for your little one.
Gathering Materials and Tools
Now that you have a solid plan and design for your DIY crib, it's time to gather the necessary materials and tools to bring your vision to life. Here's a detailed guide on gathering everything you need for this exciting project:
Materials:
-
Wood: Select high-quality, sturdy wood for the construction of the crib. Hardwoods such as oak, maple, or birch are excellent choices due to their durability and aesthetic appeal. Ensure that the wood is free from any defects or splinters that could pose a safety hazard.
-
Mattress Support: You'll need a firm and supportive material for the crib's mattress base. Consider using plywood or solid wood slats to provide adequate support for the mattress.
-
Hardware: Gather the necessary hardware, including screws, bolts, and brackets, to assemble the crib securely. Opt for high-quality, durable hardware that can withstand the weight and movement of the crib.
-
Finishing Materials: If you plan to paint or stain the crib, gather the appropriate finishing materials such as non-toxic paint, wood stain, and a protective sealant. Ensure that the finishing materials are safe for use in a baby's environment.
-
Mattress and Bedding: While not part of the construction process, it's essential to have the crib's mattress and bedding ready for installation once the crib is complete. Choose a firm, well-fitting mattress that meets safety standards and select bedding that complements the crib's design.
Tools:
-
Measuring Tools: Accurate measurements are crucial for ensuring the crib's components fit together securely. Gather measuring tape, a square, and a level to ensure precision during construction.
-
Cutting Tools: Depending on your design, you may need a circular saw, jigsaw, or handsaw to cut the wood to the required dimensions. Ensure that the cutting tools are sharp and suitable for the type of wood you're using.
-
Assembly Tools: Prepare a set of screwdrivers, a power drill with various drill bits, and a wrench for assembling the crib's components. Having the right tools on hand will make the assembly process more efficient.
-
Safety Gear: Prioritize safety by wearing protective gear such as safety goggles, gloves, and a dust mask when working with wood and power tools. Safety should always be a top priority throughout the construction process.
By gathering the right materials and tools, you'll be well-equipped to start building your DIY crib with confidence and precision. With everything in place, you're ready to move on to the next exciting phase of this project.
Step-by-Step Instructions for Building the Crib
Now that you have your materials and tools ready, it's time to roll up your sleeves and start constructing your DIY crib. Follow these step-by-step instructions to bring your crib to life:
-
Prepare the Wood: Begin by cutting the wood to the dimensions outlined in your blueprint. Use a measuring tape and a square to ensure precise cuts. Sand the edges of the wood to remove any rough spots and create a smooth surface.
-
Assemble the Crib Sides: Lay out the pieces for the crib sides and attach them together using the chosen hardware. Use a power drill with the appropriate drill bits to create pilot holes for the screws, ensuring a secure and sturdy assembly.
-
Construct the Mattress Support: Depending on your design, create the mattress support using plywood or wood slats. Ensure that the mattress support fits snugly within the crib and provides ample support for the mattress.
-
Build the Crib Base: Assemble the crib base by connecting the sides and ends of the crib. Double-check the measurements and alignment to guarantee that the base is level and square.
-
Install Safety Features: If your design includes safety features such as teething rails or adjustable mattress heights, install them securely to the crib. These features are essential for the safety and comfort of your little one.
-
Apply Finishing Touches: Once the basic structure of the crib is complete, sand any remaining rough edges and apply the chosen finish, whether it's a coat of non-toxic paint or a natural wood stain. Allow the finish to dry completely before proceeding.
-
Attach the Mattress Support and Bedding: Install the mattress support within the crib and add the mattress and bedding. Ensure that the mattress fits snugly and meets safety standards for infant sleep environments.
-
Perform a Safety Check: Before placing your baby in the crib, conduct a thorough safety check. Ensure that all components are securely fastened, there are no sharp edges or protruding hardware, and the crib meets safety standards.
By following these step-by-step instructions, you can create a beautiful and safe crib for your little one to rest and grow. Remember to refer to your blueprint and take your time to ensure precision and attention to detail throughout the construction process.
Safety Considerations for DIY Cribs
When building a DIY crib for your baby, prioritizing safety is paramount. Here are essential safety considerations to keep in mind throughout the construction process:
-
Spacing Between Slats: Ensure that the spacing between the crib slats meets safety standards to prevent the risk of entrapment. The CPSC recommends that the distance between slats should be no more than 2 3/8 inches apart to prevent a baby's head from becoming trapped.
-
Sturdy Construction: The crib should be structurally sound and sturdy to withstand the weight and movement of a growing baby. Double-check all connections and hardware to ensure they are secure and reliable.
-
Non-Toxic Materials: Use non-toxic, baby-safe materials for the construction and finishing of the crib. Avoid materials that contain harmful chemicals or lead-based paint, as these can pose health risks to infants.
-
Smooth Surfaces: Sand all wooden surfaces thoroughly to remove any rough spots, splinters, or sharp edges that could potentially harm the baby. The crib should be free from any protruding hardware or rough edges.
-
Teething Rails: If your design includes teething rails, ensure they are securely attached and made from safe, non-toxic materials. Teething rails protect the crib from damage and provide a safe surface for the baby to chew on.
-
Mattress Fit: The crib mattress should fit snugly within the crib with no gaps around the edges. A well-fitting mattress reduces the risk of entrapment and ensures a safe sleep environment for the baby.
-
Safety Standards Compliance: Throughout the construction process, refer to safety standards set by the CPSC and other relevant authorities to ensure that your DIY crib meets all necessary requirements for infant safety.
By adhering to these safety considerations, you can create a secure and comfortable sleeping space for your baby, providing you with peace of mind as they rest and play in their custom-built crib.
Finishing Touches and Decorative Options
As you near the completion of your DIY crib, it's time to add the finishing touches and explore decorative options to enhance the visual appeal of the bed. Here are some creative ideas to consider as you put the final touches on your custom-built crib:
-
Paint or Stain: Choose a non-toxic paint or wood stain to add color and personality to your crib. Opt for soothing pastel tones for a calming effect, or go bold with vibrant hues to make a statement. Ensure that the paint or stain is safe for use in a baby's environment and allows the natural beauty of the wood to shine through.
-
Personalized Details: Consider adding personalized details to the crib, such as engraving your baby's name or incorporating meaningful symbols or motifs. These personalized touches can make the crib feel extra special and unique to your little one.
-
Decorative Accents: Enhance the aesthetic appeal of the crib by adding decorative accents such as wooden appliques, carved details, or elegant hardware. These embellishments can elevate the overall look of the crib and create a charming focal point in the nursery.
-
Mobile or Canopy: If you're feeling particularly crafty, consider adding a handmade mobile or canopy to the crib. A whimsical mobile or a dreamy canopy can add a touch of enchantment to the crib and provide visual stimulation for your baby.
-
Soft Bedding and Accessories: Choose soft, cozy bedding and accessories to complement the crib's design. Opt for high-quality, breathable fabrics and consider adding decorative pillows, a plush mattress pad, or a coordinating crib skirt to complete the look.
-
Lighting: Incorporate soft, ambient lighting near the crib to create a warm and inviting atmosphere. Consider adding a small, dimmable lamp or string lights to provide gentle illumination during nighttime feedings and diaper changes.
-
Themed Design: If you have a specific theme for the nursery, incorporate elements of the theme into the crib's design. Whether it's a nautical theme, a woodland motif, or a celestial-inspired concept, infusing the crib with thematic elements can tie the room's decor together.
By adding these finishing touches and exploring decorative options, you can transform your DIY crib into a beautiful and personalized centerpiece in your baby's nursery. These thoughtful details will not only enhance the visual appeal of the crib but also create a cozy and inviting space for your little one to rest and thrive.
Conclusion and Final Tips for Building Your Own Baby Bed
As you wrap up the construction of your DIY crib, it's time to reflect on the journey you've embarked on and the beautiful creation you've brought to life. Building your own baby bed is a labor of love, and the end result is not just a functional piece of furniture but a symbol of care and dedication for your little one. As you prepare to welcome your baby into the world, here are some final tips to ensure that your DIY crib is a safe, comfortable, and cherished addition to your nursery:
-
Regular Maintenance: Once your DIY crib is in use, perform regular checks to ensure that all components are secure and in good condition. Tighten any loose hardware, inspect the wood for signs of wear, and make any necessary adjustments to maintain the crib's safety and stability.
-
Follow Safety Guidelines: As your baby grows, be mindful of safety guidelines for crib use. Avoid placing soft bedding, pillows, or toys in the crib, as these can pose suffocation hazards. Additionally, lower the mattress as your baby becomes more mobile to prevent climbing and falling.
-
Create a Cozy Environment: Pair your DIY crib with a comfortable and inviting nursery environment. Choose soothing colors, soft lighting, and gentle decor to create a serene space where your baby can rest and thrive.
-
Capture Memories: Document the process of building your DIY crib and the early days of your baby using the crib. These memories will become cherished keepsakes, reminding you of the love and effort poured into creating a special place for your little one.
-
Share Your Experience: If you've enjoyed the process of building your own baby bed, consider sharing your experience with other DIY enthusiasts. Your insights and tips can inspire and guide others who are considering embarking on a similar project.
Building your own baby bed is a remarkable achievement that reflects your commitment to providing a safe and nurturing environment for your child. As you prepare to welcome your little one, take pride in the craftsmanship and care that went into creating a personalized and meaningful space for them to sleep and grow. Your DIY crib is not just a piece of furniture; it's a testament to the love and dedication that you've poured into preparing for your baby's arrival.