
Home>Create & Decorate>DIY & Crafts>DIY Closet Building: Step-by-Step Guide To Creating Your Own Custom Closet
DIY & Crafts
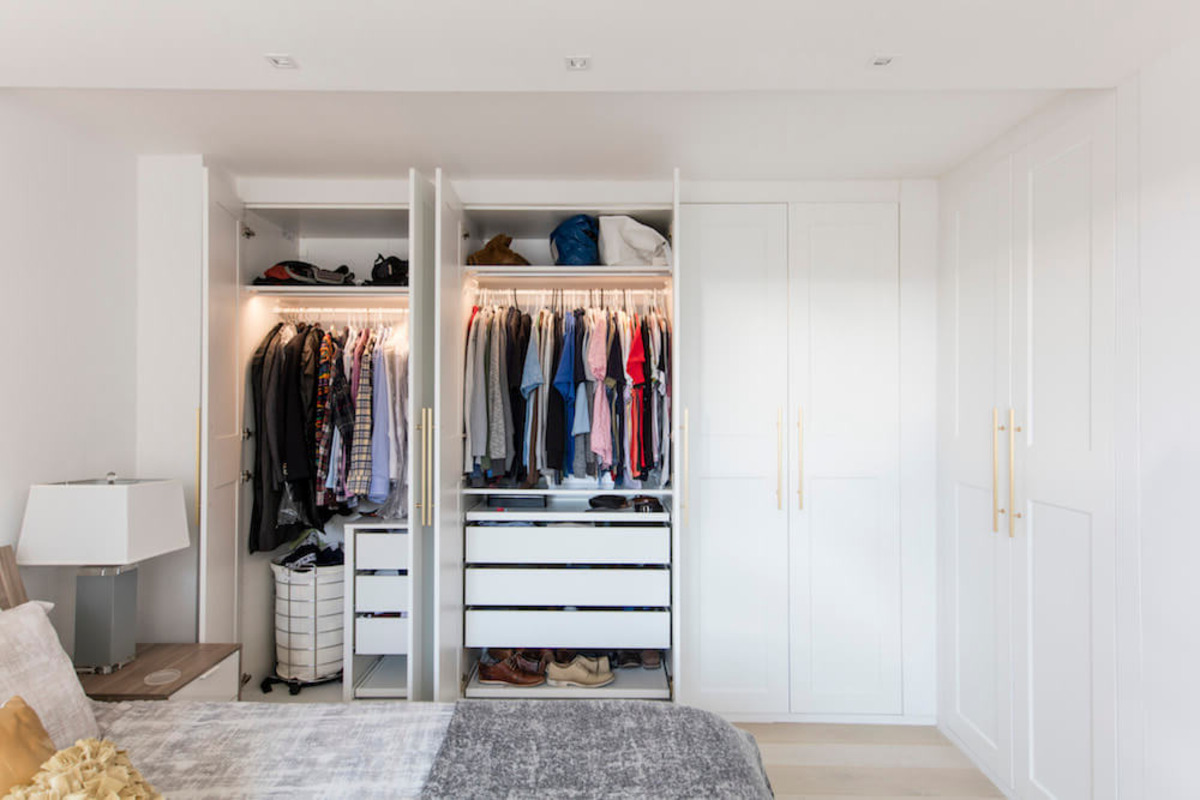
DIY Closet Building: Step-by-Step Guide To Creating Your Own Custom Closet
Published: June 5, 2024

Senior Editor in Create & Decorate, Kathryn combines traditional craftsmanship with contemporary trends. Her background in textile design and commitment to sustainable crafts inspire both content and community.
Learn how to build your own custom closet with our step-by-step DIY guide. Get creative with DIY & Crafts to create the closet of your dreams!
(Many of the links in this article redirect to a specific reviewed product. Your purchase of these products through affiliate links helps to generate commission for Twigandthistle.com, at no extra cost. Learn more)
Introduction
Are you tired of struggling to find your favorite shirt or pair of shoes in a cluttered and disorganized closet? Building your own custom closet can be the perfect solution to your storage woes. Not only does it allow you to maximize the space you have, but it also gives you the freedom to design a closet that perfectly suits your needs and style. In this step-by-step guide, we will walk you through the process of creating your own custom closet, from planning and measuring to building and adding the finishing touches. So, roll up your sleeves and get ready to transform your cluttered closet into a well-organized and stylish space!
Planning Your Custom Closet
Before you start swinging hammers and sawing wood, it's crucial to take the time to plan out your custom closet. Here are the essential steps to consider when planning your DIY project:
-
Assess Your Needs: Take a good look at your current closet situation and identify what's not working. Do you need more shelves for shoes? More hanging space for clothes? Understanding your specific storage needs will guide the design of your custom closet.
-
Set a Budget: Determine how much you're willing to invest in your custom closet project. Setting a budget will help you make decisions about materials and design elements as you move forward.
-
Gather Inspiration: Browse through home improvement magazines, websites, and social media platforms for inspiration. Collect images of closets that appeal to you and take note of the features you'd like to incorporate into your own design.
-
Consider Your Space: Take accurate measurements of the space where your custom closet will be installed. Consider the height, width, and depth of the area, as well as any obstacles such as light switches, outlets, or vents that may impact the design.
-
Think About Functionality: Think about how you want to use your closet. Do you need more space for hanging clothes, or do you prefer more shelving for folded items? Consider incorporating a mix of hanging rods, shelves, drawers, and other storage solutions to maximize functionality.
By carefully planning your custom closet, you'll set the stage for a successful DIY project that meets your storage needs and reflects your personal style.
Measuring and Designing Your Closet Space
Accurate measurements are the foundation of a well-designed custom closet. Before you start sketching out your dream closet, grab a tape measure and get to work.
-
Measure the Space: Begin by measuring the height, width, and depth of the area where your custom closet will be installed. Use a reliable tape measure to ensure precision. Take note of any architectural features, such as sloped ceilings or irregular angles, that may impact the design.
-
Consider Accessibility: If your closet is shared or if you have specific accessibility needs, take these factors into account when designing the layout. Ensure that the most frequently used items are easily accessible for everyone who will be using the closet.
-
Sketch Your Design: Once you have your measurements, it's time to put pen to paper. Sketch out a rough design of your custom closet, taking into consideration the storage elements you identified during the planning phase. Consider the placement of shelves, hanging rods, drawers, and any other storage components you plan to include.
-
Use Online Tools: If you're not confident in your sketching abilities, consider using online closet design tools. Many websites offer free tools that allow you to input your measurements and experiment with different layouts and configurations.
-
Consult with Professionals: If you're unsure about the design or layout of your custom closet, consider consulting with a professional. Many home improvement stores offer closet design services, and their expertise can help ensure that your design is both functional and aesthetically pleasing.
By taking the time to measure and design your closet space thoughtfully, you'll lay the groundwork for a successful custom closet project that maximizes storage and enhances the organization of your belongings.
Gathering Materials and Tools
When it comes to building your custom closet, having the right materials and tools at your disposal is essential for a successful DIY project. Here's a comprehensive list of materials and tools you'll need to gather before you roll up your sleeves and get to work:
Materials
-
Lumber: Depending on your design, you'll need various sizes of lumber for constructing the frame and shelves. Consider using high-quality plywood for shelves and solid wood for the frame to ensure durability.
-
Shelving Material: Whether you opt for pre-made shelves or plan to cut your own, make sure you have enough shelving material to accommodate your storage needs.
-
Hanging Rods: If your design includes a hanging space for clothes, purchase sturdy metal rods in the appropriate length for your closet.
-
Fasteners: Stock up on screws, nails, and other fasteners to assemble the frame and secure the shelves and rods in place.
-
Paint or Stain: If you want to add a pop of color or a touch of elegance to your custom closet, don't forget to pick up paint or stain in your preferred shade.
-
Finishing Materials: Consider adding finishing touches such as trim, molding, or edge banding to give your closet a polished look.
-
Hardware: Don't overlook the importance of hardware such as drawer pulls, knobs, and hooks to add functionality and style to your custom closet.
Tools
-
Measuring Tape: Accurate measurements are crucial, so make sure you have a reliable measuring tape on hand.
-
Circular Saw or Miter Saw: For cutting lumber and shelving material to the desired dimensions, a circular saw or miter saw is indispensable.
-
Drill and Bits: A power drill with a variety of drill bits will be necessary for pre-drilling holes and driving screws.
-
Level: To ensure that your closet components are installed straight and level, a good quality level is a must-have tool.
-
Screwdriver: Both manual and electric screwdrivers will come in handy for assembling the closet frame and attaching hardware.
-
Paintbrushes or Rollers: If you plan to paint or stain your custom closet, have the appropriate paintbrushes or rollers ready for the job.
-
Safety Gear: Last but not least, prioritize safety by wearing protective gear such as goggles, gloves, and a dust mask while working with tools and materials.
By gathering the right materials and tools before you begin building your custom closet, you'll set yourself up for a smooth and efficient construction process, bringing you one step closer to enjoying a well-organized and personalized storage space.
Building the Closet Frame
Building the closet frame is a crucial step in creating a sturdy and functional custom closet. The frame provides the structure and support for the shelves, rods, and other storage components. Here's a detailed guide to help you tackle this essential phase of your DIY project:
-
Cutting the Lumber: Begin by cutting the lumber to the appropriate dimensions based on your closet design. Use a circular saw or miter saw to make precise cuts, ensuring that the pieces fit together seamlessly.
-
Assembling the Frame Structure: Once the lumber is cut, it's time to assemble the frame structure. Start by constructing the vertical supports, which will form the corners of the frame. Use a level to ensure that the supports are plumb and secure them in place using screws or nails.
-
Adding Horizontal Supports: With the vertical supports in place, add horizontal supports to connect the vertical pieces and provide additional stability to the frame. Measure carefully to ensure that the horizontal supports are evenly spaced and level.
-
Securing the Frame to the Wall: Depending on the design of your custom closet, you may need to secure the frame to the wall for added support. Use a stud finder to locate the wall studs and attach the frame securely using appropriate fasteners.
-
Checking for Stability: Once the frame is assembled and secured, double-check its stability and sturdiness. Gently shake the frame to ensure that it is firmly anchored and capable of supporting the weight of the shelves and hanging rods.
-
Making Adjustments: If you notice any wobbling or instability, make necessary adjustments to reinforce the frame. Adding additional fasteners or braces can help enhance the overall stability of the structure.
-
Applying Finishing Touches: Before moving on to the next phase of your custom closet project, take the time to apply any desired finishing touches to the frame. This may include sanding rough edges, filling in nail or screw holes, and applying paint or stain to match your desired aesthetic.
By following these steps, you'll be well on your way to building a solid and reliable frame for your custom closet. A well-constructed frame sets the stage for the installation of shelves, rods, and other storage components, bringing you closer to the completion of your personalized and organized closet space.
Installing Shelves and Rods
Now that the frame of your custom closet is in place, it's time to focus on installing the shelves and rods to create functional storage space for your belongings. Follow these steps to ensure a successful installation process:
-
Positioning Shelves: Begin by determining the placement of the shelves within the closet. Consider the height and spacing of the shelves to accommodate items of various sizes. Use a level to ensure that the shelves are installed evenly and are parallel to the closet frame.
-
Securing Shelves: Once the shelf positions are marked, secure them in place using appropriate fasteners. Depending on your design, this may involve attaching shelf brackets to the frame and then placing the shelves on top. Ensure that the shelves are firmly anchored and capable of supporting the intended weight.
-
Installing Hanging Rods: If your custom closet includes a hanging space for clothes, install the hanging rods at the desired height. Use a rod that is sturdy enough to support the weight of hanging garments. Secure the rods in place using rod brackets or supports, ensuring that they are level and parallel to the closet frame.
-
Adjusting Shelf Heights: After the initial installation, take the time to assess the functionality of the shelves and rods. Make any necessary adjustments to the shelf heights or rod positions to better accommodate your storage needs. Flexibility in the placement of shelves and rods is key to creating a personalized and efficient closet space.
-
Adding Additional Features: Consider incorporating additional features such as drawer units, cubbies, or accessory hooks to further enhance the functionality of your custom closet. These elements can be installed within the existing frame to maximize storage and organization.
-
Testing Stability: Once all shelves and rods are installed, test the stability of the entire storage system. Gently apply pressure to the shelves and hanging rods to ensure that they are securely anchored and capable of supporting the intended weight. Make any necessary adjustments to enhance stability.
By following these steps, you'll be able to install shelves and rods effectively, creating a well-organized and functional storage space within your custom closet. With the shelves and rods in place, you're one step closer to enjoying a personalized and efficient storage solution that meets your specific needs.
Adding Finishing Touches
After completing the construction and installation of the main components of your custom closet, it's time to add the finishing touches that will elevate the overall look and functionality of the space. Paying attention to these final details will ensure that your custom closet not only serves its practical purpose but also enhances the aesthetic appeal of the room. Here are the essential steps to consider when adding finishing touches to your custom closet:
-
Trim and Molding: Consider adding trim and molding to the edges of shelves, around the frame, or along the ceiling of the closet. This decorative element not only provides a polished look but also covers any rough edges or gaps, giving the closet a more refined appearance.
-
Edge Banding: If you've used plywood or other exposed materials for your shelves, applying edge banding can give them a clean and finished look. Edge banding is available in various colors and finishes, allowing you to coordinate it with the overall design of your closet.
-
Paint or Stain: Apply a fresh coat of paint or stain to the closet frame, shelves, and any visible surfaces. Choose a color that complements the room's decor or adds a pop of personality to the space. A well-chosen paint or stain can tie the custom closet into the overall design scheme of the room.
-
Hardware Installation: Install drawer pulls, knobs, or handles on any drawers or cabinet doors within the closet. The right hardware not only adds functionality but also contributes to the visual appeal of the space. Choose hardware that complements the style of the closet and reflects your personal taste.
-
Lighting: Consider incorporating lighting into your custom closet to enhance visibility and create a more inviting atmosphere. Install LED strip lights, puck lights, or a small overhead fixture to illuminate the space and make it easier to find and organize your belongings.
-
Organization Accessories: Integrate organization accessories such as baskets, bins, or dividers to further optimize the storage capacity of your custom closet. These accessories can help keep smaller items organized and easily accessible, contributing to the overall efficiency of the space.
-
Mirror Installation: If space allows, consider installing a mirror within the closet. A full-length mirror or a smaller vanity mirror can be a practical addition, allowing you to assess your outfit or appearance while getting ready and eliminating the need for a separate mirror elsewhere in the room.
By focusing on these finishing touches, you'll transform your custom closet into a well-appointed and functional space that not only meets your storage needs but also adds value to your home. These details will elevate the overall design and ensure that your custom closet is a seamless and stylish addition to your living space.
Conclusion
In conclusion, building your own custom closet is a rewarding DIY project that allows you to create a personalized and efficient storage solution tailored to your specific needs. By carefully planning, measuring, and designing your closet space, gathering the necessary materials and tools, constructing the frame, installing shelves and rods, and adding the finishing touches, you can transform a cluttered and disorganized closet into a well-organized and stylish space. The satisfaction of seeing your vision come to life and the practical benefits of a custom closet make this project well worth the effort. With a well-designed and expertly crafted custom closet, you'll enjoy the convenience of a storage space that not only meets your practical needs but also enhances the overall aesthetic of your home. So, roll up your sleeves, unleash your creativity, and embark on the journey of creating your own custom closet.