
Home>Create & Decorate>DIY & Crafts>DIY Above Ground Pool: Step-by-Step Guide To Building Your Own Swimming Oasis
DIY & Crafts
DIY Above Ground Pool: Step-by-Step Guide To Building Your Own Swimming Oasis
Published: June 16, 2024

Content Creator specializing in woodworking and interior transformations. Caegan's guides motivate readers to undertake their own projects, while his custom furniture adds a personal touch.
Discover how to create your own DIY above ground pool with our step-by-step guide. Dive into the world of DIY & Crafts and build your own swimming oasis today!
(Many of the links in this article redirect to a specific reviewed product. Your purchase of these products through affiliate links helps to generate commission for Twigandthistle.com, at no extra cost. Learn more)
Introduction
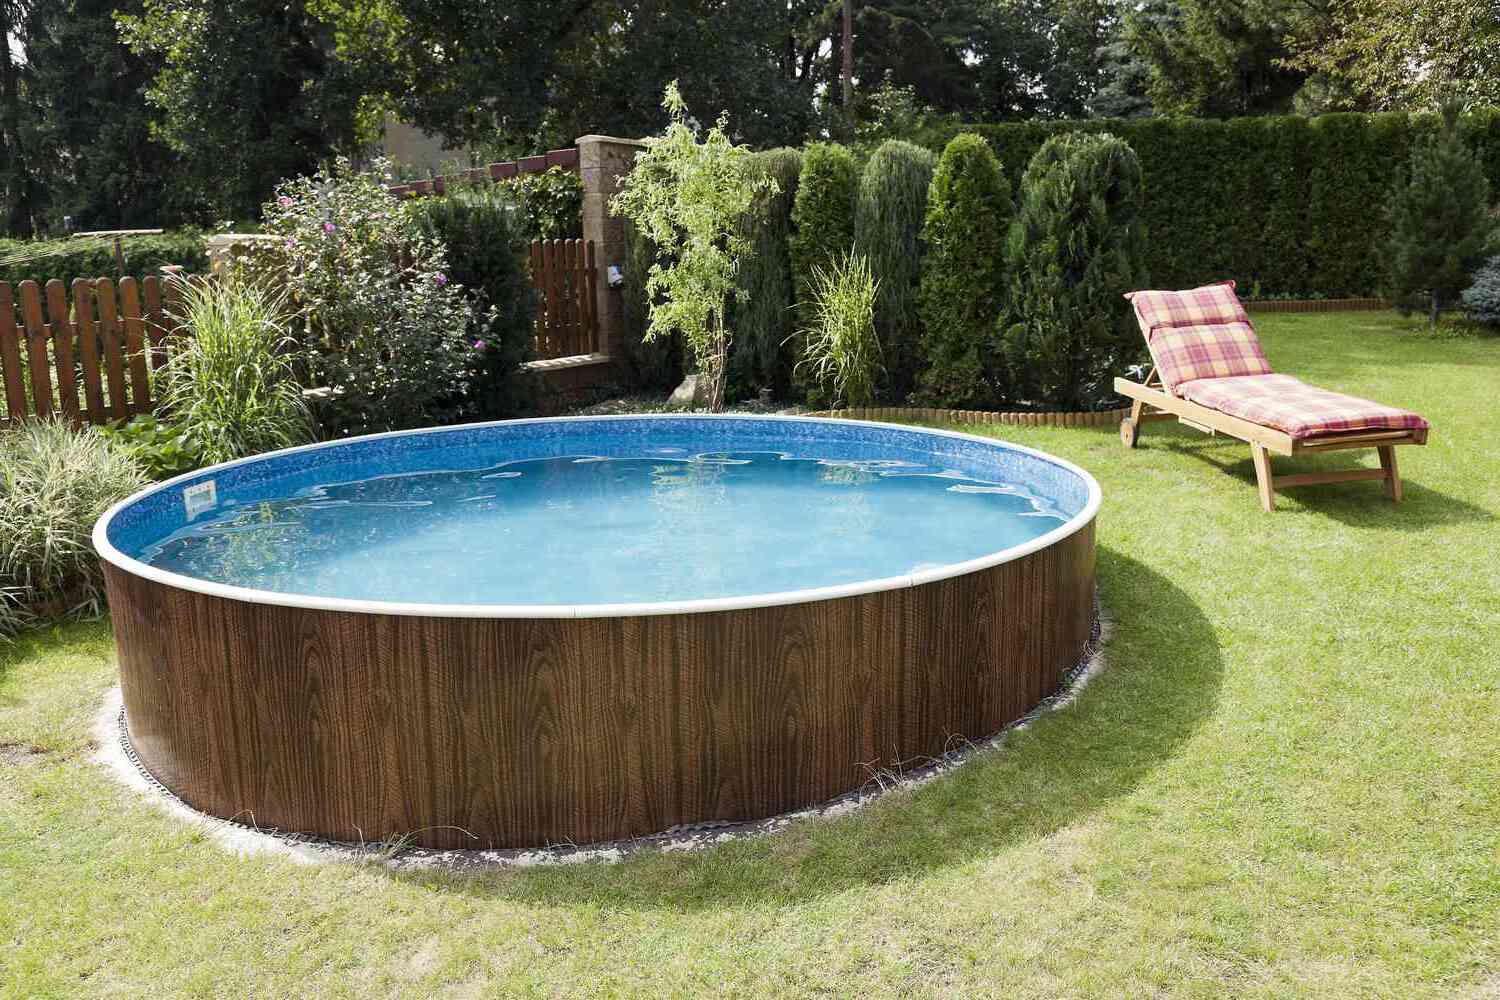
So, you've decided to take the plunge and build your own DIY above ground pool. Congratulations! Building your own swimming oasis can be a rewarding and cost-effective project that will provide endless hours of fun and relaxation for you and your family. In this step-by-step guide, we'll walk you through the process of creating your very own backyard retreat. From choosing the right location to adding the finishing touches, we've got you covered. Let's dive in and get started on creating the pool of your dreams!
Choosing the Right Location for Your DIY Above Ground Pool
When it comes to choosing the perfect spot for your DIY above ground pool, there are a few key factors to consider. Here's a step-by-step guide to help you find the ideal location:
-
Level Ground: Ensure that the ground is level and free from any slopes or bumps. A flat surface will provide a stable foundation for your pool and prevent any structural issues down the line.
-
Sun Exposure: Consider the amount of sunlight the area receives throughout the day. A location with ample sunlight will help keep the water warm and inviting, creating a more enjoyable swimming experience.
-
Accessibility: Choose a spot that is easily accessible from your home. This will make it more convenient for you and your family to access the pool and will also make maintenance tasks simpler.
-
Utility Lines and Obstructions: Before you start digging, be sure to check for any underground utility lines or overhead obstructions such as trees or power lines. It's crucial to avoid these areas to prevent any safety hazards or damage to the pool.
-
Privacy and Aesthetics: Consider the surrounding landscape and how the pool will fit into the overall aesthetic of your backyard. Additionally, think about privacy – selecting a location that offers a degree of seclusion can enhance the overall enjoyment of your pool.
By carefully considering these factors, you can select a location that maximizes the enjoyment and functionality of your DIY above ground pool. Once you've found the perfect spot, you'll be one step closer to creating your own backyard oasis.
Gathering Materials and Tools
Before you begin the construction of your DIY above ground pool, it's essential to gather all the necessary materials and tools. Here's a comprehensive list to ensure you have everything you need to get started:
Materials
- Pool Kit: Purchase a high-quality above ground pool kit that includes the pool walls, frame, and necessary hardware.
- Pool Liner: Select a durable pool liner that is compatible with the size and shape of your pool.
- Sand or Foam Padding: To provide a cushioning layer between the ground and the pool liner, you'll need either sand or foam padding.
- Supporting Materials: Depending on the specific requirements of your pool kit, you may need additional supporting materials such as braces, straps, or connectors.
- Chemicals and Cleaning Supplies: Stock up on pool chemicals, testing kits, and cleaning supplies to maintain the water quality and cleanliness of your pool.
- Decking Materials: If you plan to build a deck around your pool, gather the necessary materials such as lumber, screws, and joist hangers.
Tools
- Shovel and Rake: These basic landscaping tools will be essential for preparing the ground and creating a level surface for your pool.
- Level: A reliable level will ensure that the pool structure is assembled on a perfectly even surface.
- Tape Measure: Accurate measurements are crucial throughout the construction process, so a quality tape measure is a must-have.
- Screwdriver and Power Drill: These tools will be used for assembling the pool frame and securing the components.
- Utility Knife: A sharp utility knife will come in handy for trimming the pool liner and making precise cuts.
- Hose and Water Source: You'll need a hose and access to a water source for filling the pool once it's assembled.
- Safety Equipment: Don't forget essential safety gear such as gloves, goggles, and sturdy footwear to protect yourself during construction.
By ensuring that you have all the necessary materials and tools on hand, you'll be well-prepared to tackle the construction of your DIY above ground pool. With everything in place, you can proceed with confidence, knowing that you have everything you need to bring your swimming oasis to life.
Preparing the Ground for Your Pool
Preparing the ground for your DIY above ground pool is a crucial step that sets the foundation for a stable and long-lasting pool structure. Follow these steps to ensure that the ground is properly prepped before you begin assembling your pool:
-
Clear the Area: Start by clearing the area where the pool will be placed. Remove any rocks, sticks, or debris from the ground to create a clean and even surface.
-
Mark the Layout: Use spray paint or stakes and string to mark the outline of the pool on the ground. This will provide a visual guide for excavating and leveling the area.
-
Excavate the Site: Using a shovel, excavate the marked area to create a level surface for the pool. Remove any grass, roots, or uneven soil to ensure that the ground is flat and stable.
-
Level the Ground: Once the site is excavated, use a level to check for any uneven areas. Add or remove soil as needed to achieve a uniformly level surface. This step is crucial for preventing the pool from leaning or shifting once it's installed.
-
Add a Layer of Sand or Foam Padding: To protect the pool liner and provide a cushioning layer, add a layer of sand or foam padding to the leveled ground. This will help prevent punctures and tears in the liner and create a more comfortable surface for the pool bottom.
-
Compact the Surface: After adding the padding, use a tamper or roller to compact the surface. This will further ensure that the ground is stable and ready to support the weight of the pool.
By meticulously preparing the ground for your DIY above ground pool, you'll create a solid and secure foundation for your pool structure. Taking the time to properly level and prepare the ground will contribute to the overall stability and longevity of your pool, providing you with years of enjoyment and relaxation.
Assembling the Pool Structure
Now that the ground is prepared, it's time to move on to assembling the pool structure. This is where the actual construction of your DIY above ground pool begins. Follow these step-by-step instructions to ensure a smooth and successful assembly process:
-
Lay Out the Pool Components: Start by laying out all the components of your pool kit in the designated assembly area. This will allow you to easily access the parts and ensure that everything is accounted for before you begin.
-
Follow the Manufacturer's Instructions: Carefully review the manufacturer's instructions that came with your pool kit. These guidelines will provide specific details on the assembly process, including the sequence of steps and any special considerations for your particular pool model.
-
Assemble the Frame: Begin by assembling the frame of the pool according to the manufacturer's instructions. This typically involves connecting the metal or resin components to create the outer perimeter of the pool.
-
Install the Vertical Supports: Once the frame is assembled, install the vertical supports at designated intervals around the perimeter of the pool. These supports provide additional stability and reinforcement for the pool walls.
-
Attach the Top Rails and Caps: Secure the top rails and caps onto the assembled frame and vertical supports. These components will help to further stabilize the pool structure and create a finished look.
-
Connect the Wall Panels: If your pool kit includes separate wall panels, carefully connect and secure them to the frame and vertical supports. Follow the manufacturer's instructions for the specific method of attachment.
-
Secure the Bottom Rails: Install the bottom rails along the base of the pool structure, ensuring that they are securely fastened to the frame and provide additional support for the wall panels.
-
Check for Level and Alignment: Throughout the assembly process, use a level to ensure that the pool structure is perfectly level and aligned. Making adjustments as needed at this stage will prevent issues with the pool's stability once it's filled with water.
-
Double-Check Connections and Fastenings: Before proceeding, double-check all connections and fastenings to ensure that they are secure and properly tightened. This will help prevent any issues with the structural integrity of the pool.
By following these detailed steps and carefully adhering to the manufacturer's instructions, you can confidently assemble the pool structure of your DIY above ground pool. With the frame, supports, and panels securely in place, you're one step closer to completing your backyard oasis.
Installing the Pool Liner
Installing the pool liner is a critical step in the construction of your DIY above ground pool. The pool liner not only provides a waterproof barrier but also contributes to the overall aesthetics of the pool. Follow these step-by-step instructions to ensure a smooth and successful installation of the pool liner:
-
Prepare the Pool Bottom: Before installing the liner, ensure that the pool bottom is clean and free from any debris. Smooth out the sand or foam padding to create an even surface, removing any lumps or bumps that could cause wrinkles in the liner.
-
Unfold the Liner: Carefully unfold the pool liner and position it inside the pool structure. Take care to align the liner so that it evenly covers the entire pool bottom and extends up the walls of the pool.
-
Smooth Out Wrinkles: Starting from the center of the pool, gently smooth out any wrinkles or creases in the liner. Work methodically towards the edges, ensuring that the liner fits snugly against the pool walls and bottom.
-
Secure the Liner: Once the liner is properly positioned, secure it in place using coping strips or other fastening mechanisms provided by the pool kit manufacturer. These strips will hold the liner in position and prevent it from shifting during the filling process.
-
Trim Excess Liner: If the pool liner extends beyond the top of the pool walls, carefully trim off the excess material using a sharp utility knife. Take care to make clean and precise cuts to achieve a neat and professional finish.
-
Inspect for Proper Fit: After securing and trimming the liner, inspect the entire pool bottom and walls to ensure that the liner fits properly and is free from any wrinkles or folds. Making any necessary adjustments at this stage will prevent issues once the pool is filled with water.
By following these detailed steps, you can successfully install the pool liner for your DIY above ground pool. A properly installed liner will not only provide a watertight seal but also enhance the visual appeal of your pool, bringing you one step closer to enjoying your own backyard oasis.
Filling and Testing the Pool
Once the pool structure and liner are in place, it's time to fill your DIY above ground pool with water and ensure that everything is functioning as it should. Follow these steps to successfully fill and test your pool:
-
Fill the Pool: Begin filling the pool with water using a garden hose or other water source. It's essential to monitor the filling process closely, especially as the water level rises. Take care not to overfill the pool, as this can cause the liner to stretch excessively and may lead to structural issues.
-
Check for Leaks: As the pool fills, keep a close eye on the pool liner and surrounding areas for any signs of leaks or seepage. If you notice any water escaping from the pool, immediately stop the filling process and identify the source of the leak. Common areas to check for leaks include the seams of the liner, around fittings and connections, and at the base of the pool walls.
-
Test the Equipment: If your pool is equipped with a filtration system, pump, or other accessories, now is the time to test these components. Ensure that the pump is functioning correctly, and the filtration system is operational. Check for any unusual noises, vibrations, or leaks that may indicate a problem with the equipment.
-
Monitor Water Quality: Once the pool is filled, it's crucial to monitor the water quality to ensure that it is safe and balanced for swimming. Use a pool testing kit to check the pH, chlorine levels, and other water parameters. Adjust the chemical balance as needed to achieve optimal water quality and clarity.
-
Inspect Safety Features: As the pool fills, take the opportunity to inspect any safety features such as ladders, handrails, or pool covers. Ensure that these components are securely in place and functioning as intended to provide a safe swimming environment.
-
Address Any Issues: If you encounter any issues during the filling and testing process, such as leaks, equipment malfunctions, or water quality concerns, address these issues promptly. Taking the time to resolve any problems now will prevent larger issues from arising once the pool is in regular use.
By following these steps, you can successfully fill and test your DIY above ground pool, ensuring that it is safe, functional, and ready for enjoyment. Once the pool is filled and tested, you'll be one step closer to creating your own backyard oasis where you can relax and unwind with family and friends.
Adding Finishing Touches and Accessories
Once the main structure of your DIY above ground pool is in place and the water is sparkling, it's time to add the finishing touches and accessories that will elevate your pool from a simple water feature to a true backyard oasis. Here are some ideas to consider as you put the final touches on your pool area:
1. Decking and Seating
Consider adding a deck around your pool to create a designated space for lounging, sunbathing, and entertaining. Whether you opt for a simple wooden deck or a more elaborate multi-level design, a well-planned deck can enhance the functionality and visual appeal of your pool area. Don't forget to include comfortable seating options such as lounge chairs, umbrellas, and outdoor furniture to create a welcoming and relaxing atmosphere.
2. Lighting
Strategically placed lighting can transform your pool area into a magical retreat after the sun goes down. Consider installing LED lights around the perimeter of the pool, underwater lighting for a mesmerizing glow, and pathway lighting to guide guests to and from the pool area. Not only does lighting enhance the ambiance, but it also improves safety for evening gatherings.
3. Landscaping
Incorporating landscaping around your pool can soften the edges and create a more natural and inviting environment. Consider adding potted plants, shrubs, and flowers to add color and texture to the pool area. Be mindful of the types of plants you choose, opting for low-maintenance varieties that can withstand the pool's environment.
4. Pool Accessories
Enhance the functionality and enjoyment of your pool with the addition of accessories such as pool floats, inflatable toys, and games. These items can provide entertainment for both children and adults, making your pool a hub of fun and activity during the warmer months.
5. Safety Features
Prioritize safety by installing necessary safety features such as a pool cover, fencing, and alarms. These measures are essential for protecting young children and pets from accidental entry into the pool area and should be considered non-negotiable additions to your pool setup.
6. Outdoor Kitchen or Barbecue Area
If you love to entertain, consider adding an outdoor kitchen or barbecue area near your pool. This addition allows you to prepare and enjoy meals without having to leave the pool area, creating a seamless transition between cooking, dining, and swimming.
By adding these finishing touches and accessories, you can transform your DIY above ground pool into a luxurious and inviting space that will be the envy of the neighborhood. Whether you're seeking relaxation, entertainment, or a combination of both, these enhancements will elevate your pool area to new heights.
Maintenance and Care for Your DIY Above Ground Pool
Maintaining and caring for your DIY above ground pool is essential to ensure that it remains a safe, clean, and enjoyable space for you and your family. By following a regular maintenance routine and implementing proper care practices, you can prolong the lifespan of your pool and minimize the need for costly repairs. Here are the key steps to effectively maintain and care for your above ground pool:
1. Regular Cleaning
Regular cleaning is crucial to keep your pool water clear and free from debris. Use a skimmer to remove leaves, insects, and other floating debris from the surface of the water. Additionally, invest in a pool vacuum or robotic cleaner to remove dirt and debris that settle on the pool floor. Brush the pool walls and floor to prevent the buildup of algae and other contaminants.
2. Water Testing and Chemical Balance
Regularly test the water chemistry of your pool using a reliable testing kit. Monitor the pH, chlorine levels, alkalinity, and calcium hardness to ensure that the water is balanced and safe for swimming. Adjust the chemical levels as needed to maintain optimal water quality and prevent issues such as algae growth and skin irritation.
3. Filter Maintenance
The pool filter plays a critical role in removing impurities from the water. Clean or replace the filter cartridge or backwash the sand or DE filter regularly to ensure that it functions efficiently. A well-maintained filter will help keep the water clean and clear, reducing the need for excessive chemical treatments.
4. Inspect and Maintain Equipment
Regularly inspect and maintain the pool equipment, including the pump, motor, and other components. Ensure that the pump is functioning properly, and the motor is free from debris and obstructions. Lubricate moving parts as needed and address any issues promptly to prevent further damage.
5. Winterization
If you live in a climate with cold winters, proper winterization is essential to protect your pool from freezing temperatures. Drain the water to the appropriate level, remove and store the pump and filter, and install a winter cover to protect the pool from debris and ice. Following a thorough winterization process will help prevent damage to the pool structure and equipment.
6. Regular Inspections
Conduct regular visual inspections of the pool structure, liner, and surrounding area. Look for signs of wear, damage, or leaks and address any issues promptly. By identifying and addressing potential problems early, you can prevent more significant issues from developing.
7. Safety Measures
Maintaining safety measures such as pool covers, fencing, and alarms is crucial to prevent accidents and unauthorized access to the pool area. Regularly inspect and maintain these safety features to ensure that they are functioning as intended.
By incorporating these maintenance and care practices into your routine, you can ensure that your DIY above ground pool remains a safe, clean, and enjoyable space for years to come. Regular attention to cleaning, water chemistry, equipment maintenance, and safety measures will contribute to the longevity and functionality of your pool, allowing you to make the most of your backyard oasis.
Conclusion
In conclusion, building your own DIY above ground pool can be a rewarding and fulfilling project that brings endless enjoyment and relaxation to your backyard. By carefully choosing the right location, gathering the necessary materials and tools, preparing the ground, assembling the pool structure, installing the pool liner, filling and testing the pool, and adding finishing touches and accessories, you can create a personalized swimming oasis that meets your family's needs and preferences.
Furthermore, maintaining and caring for your above ground pool through regular cleaning, water testing, filter maintenance, equipment inspections, winterization, and safety measures is essential for ensuring the longevity and safety of your pool.
With the right planning, attention to detail, and ongoing maintenance, your DIY above ground pool can provide years of fun, relaxation, and cherished memories for you and your loved ones. So, roll up your sleeves, dive in, and start building the pool of your dreams!