Home>Create & Decorate>DIY & Crafts>Enhancing Your Home Decor With DIY Rosette Cluster Pillows
DIY & Crafts
Enhancing Your Home Decor With DIY Rosette Cluster Pillows
Published: February 15, 2024

Senior Editor in Create & Decorate, Kathryn combines traditional craftsmanship with contemporary trends. Her background in textile design and commitment to sustainable crafts inspire both content and community.
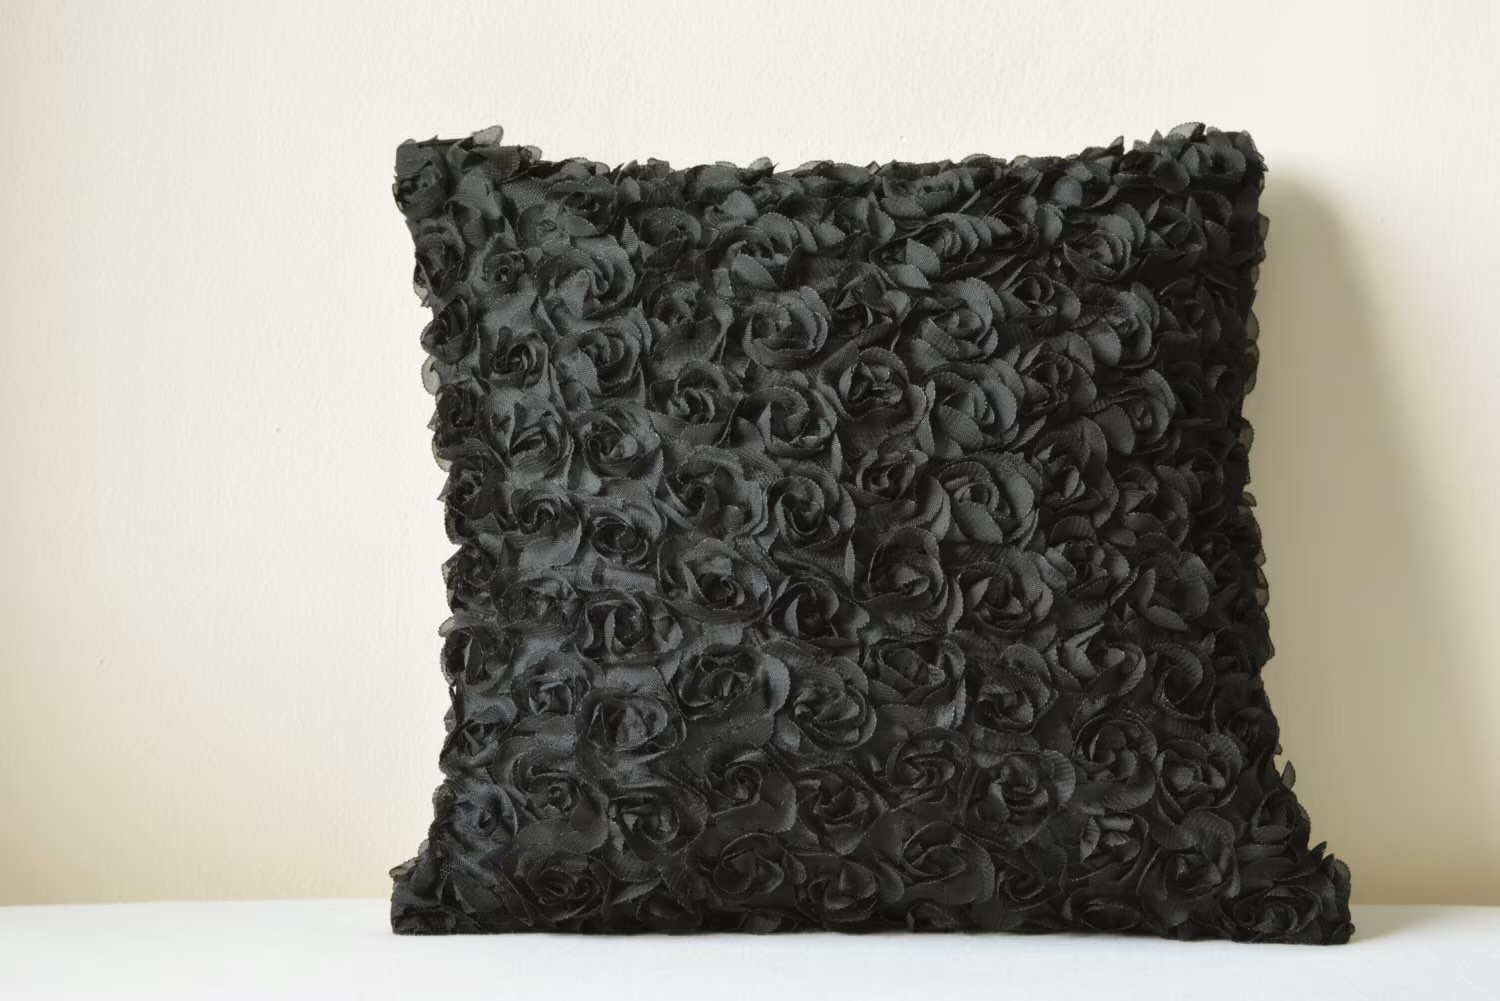
Transform your home decor with these stunning DIY rosette cluster pillows. Get creative with our easy DIY & Crafts tutorial.
(Many of the links in this article redirect to a specific reviewed product. Your purchase of these products through affiliate links helps to generate commission for Twigandthistle.com, at no extra cost. Learn more)
Introduction
Are you looking to add a touch of elegance and charm to your living space? DIY rosette cluster pillows are a wonderful way to enhance your home decor with a personalized and stylish touch. These beautiful pillows can instantly elevate the ambiance of any room, adding a pop of color and texture to your sofa, bed, or favorite armchair.
Creating your own rosette cluster pillows allows you to unleash your creativity and tailor the design to complement your existing decor. Whether you prefer a classic and refined look or a more eclectic and bohemian vibe, these DIY pillows can be customized to suit your unique style and preferences.
Not only are rosette cluster pillows visually appealing, but they also offer a fun and rewarding crafting experience. As you embark on this creative project, you'll have the opportunity to explore different fabrics, colors, and patterns, allowing you to express your individuality through your home decor.
In this comprehensive guide, we'll walk you through the step-by-step process of making your own rosette cluster pillows. From gathering the necessary materials to crafting the rosettes and assembling them onto the pillow, you'll learn all the essential techniques to bring your vision to life. So, roll up your sleeves, unleash your imagination, and get ready to embark on a delightful DIY journey that will transform your living space into a cozy and inviting haven.
Materials Needed
To embark on the delightful journey of creating your own rosette cluster pillows, you'll need a few essential materials to bring your vision to life. Here's a comprehensive list of the items you'll need to get started:
-
Fabric: Select a fabric of your choice to serve as the base for your rosette cluster pillows. Consider opting for a durable and visually appealing fabric that complements your existing decor. Whether you prefer a luxurious velvet, a rustic linen, or a vibrant cotton print, the fabric will set the tone for your DIY project.
-
Pillow Inserts: Choose pillow inserts in the desired size for your rosette cluster pillows. These inserts will provide the necessary volume and support to ensure that your pillows are plump and inviting. Select inserts that are compatible with the dimensions of your pillow covers for a snug and polished fit.
-
Scissors: A pair of sharp fabric scissors is essential for cutting the fabric and shaping the rosettes. Opt for high-quality scissors that can effortlessly glide through the fabric, allowing you to achieve clean and precise cuts.
-
Needle and Thread: Ensure that you have a reliable needle and a selection of thread colors that complement your chosen fabric. The needle should be suitable for sewing through the fabric and attaching the rosettes securely to the pillow cover.
-
Hot Glue Gun and Glue Sticks: A hot glue gun is a handy tool for assembling the rosettes and attaching them to the pillow cover. Make sure to have an ample supply of glue sticks to keep the creative process flowing smoothly.
-
Ruler or Measuring Tape: Accurate measurements are crucial for creating evenly sized rosettes and ensuring that the placement of the rosettes on the pillow cover is balanced. A ruler or measuring tape will help you maintain precision throughout the crafting process.
-
Embellishments (Optional): If you wish to add extra flair to your rosette cluster pillows, consider incorporating embellishments such as decorative buttons, beads, or sequins. These embellishments can infuse your pillows with a touch of glamour and individuality.
-
Pins: Sewing pins are useful for securing the fabric and rosettes in place before attaching them permanently. They can help you visualize the layout of the rosettes and make any necessary adjustments before sewing or gluing.
-
Cardboard: A piece of cardboard can be used as a template for creating uniform rosettes. This simple tool will streamline the process of cutting and shaping the fabric, resulting in consistent and professional-looking rosettes.
By gathering these materials, you'll be well-equipped to embark on the exciting journey of crafting your own rosette cluster pillows. With these essentials at your disposal, you can unleash your creativity and bring a touch of handmade charm to your home decor.
Step 1: Making the Rosettes
To begin the creative process of crafting your rosette cluster pillows, the first step involves making the charming and intricate rosettes that will adorn the pillow covers. These rosettes serve as the focal point of the pillows, adding a delightful touch of texture and visual interest to your home decor. Follow these detailed steps to create beautiful rosettes that will elevate the aesthetic appeal of your DIY pillows:
-
Selecting the Fabric: Choose a fabric that aligns with your design vision and complements the overall aesthetic of your living space. Whether you opt for a luxurious satin, a rustic burlap, or a vibrant printed cotton, the fabric will set the tone for your rosettes. Consider experimenting with different textures and patterns to add depth and character to your pillows.
-
Cutting the Fabric: Using sharp fabric scissors, cut the selected fabric into strips of the desired width. The width of the strips will determine the size of the rosettes, so ensure that the measurements align with your creative vision. For uniform rosettes, precise cutting is essential to achieve a polished and professional look.
-
Shaping the Rosettes: Once the fabric strips are cut, it's time to shape them into rosettes. Begin by folding one end of the strip to form a small loop, securing it with a few stitches using a needle and thread. Then, continue to twist and coil the fabric around the center, gradually forming the rosette. Secure the coiled fabric with stitches as you progress, ensuring that the rosette maintains its shape.
-
Securing the Rosettes: After shaping the rosettes, secure the loose end of the fabric at the back of the rosette with additional stitches, ensuring that it remains neatly tucked away. This step is crucial for maintaining the integrity of the rosette and preventing it from unraveling over time.
-
Creating Variation: To add visual interest to your rosette cluster pillows, consider experimenting with different sizes and shapes of rosettes. By varying the dimensions and designs, you can create a captivating arrangement that captures attention and infuses your pillows with a dynamic and personalized touch.
By following these steps, you'll master the art of creating exquisite rosettes that will serve as the centerpiece of your DIY pillows. With careful attention to detail and a dash of creativity, you'll soon have a stunning collection of rosettes ready to adorn your pillow covers, adding a touch of handmade elegance to your home decor.
Step 2: Attaching the Rosettes to the Pillow
With a delightful collection of beautifully crafted rosettes in hand, it's time to embark on the next phase of this creative journey: attaching the rosettes to the pillow. This step is where your vision truly comes to life as the rosettes transform a plain pillow cover into a stunning piece of personalized home decor. Follow these detailed steps to seamlessly attach the rosettes and bring your DIY rosette cluster pillows to fruition.
1. Preparing the Pillow Cover
Before attaching the rosettes, lay out the pillow cover on a flat surface, ensuring that it is clean and free of any debris. Smooth out the fabric to create a stable and even surface for the attachment process. If you're working with a patterned fabric, take a moment to visualize the placement of the rosettes to achieve a balanced and visually appealing arrangement.
Read more: DIY Wainscoting: Step-by-Step Guide
2. Positioning the Rosettes
Begin by arranging the rosettes on the pillow cover, experimenting with different layouts to find the most captivating composition. Consider factors such as color distribution, rosette size variation, and overall balance. Once you're satisfied with the arrangement, use sewing pins to temporarily secure the rosettes in place, allowing you to make any necessary adjustments before attaching them permanently.
3. Sewing the Rosettes
Using a needle and thread that complements the fabric, carefully sew each rosette onto the pillow cover. Start by securing the center of the rosette to the fabric, ensuring that it is firmly attached. Then, work your way around the edges of the rosette, stitching it in place to guarantee a secure and durable attachment. Take care to conceal the stitches within the folds of the rosette, maintaining a polished and seamless look.
4. Adding Embellishments (Optional)
For an extra touch of flair, consider incorporating embellishments such as decorative buttons or beads to the center of the rosettes. This simple addition can elevate the visual appeal of the pillows, infusing them with a hint of charm and individuality. Secure the embellishments with additional stitches, ensuring that they are firmly affixed to the rosettes.
5. Inspecting the Final Arrangement
Once all the rosettes are securely attached, take a moment to inspect the final arrangement. Ensure that the rosettes are evenly spaced and that the overall composition aligns with your creative vision. Make any final adjustments as needed, ensuring that the pillows exude a sense of artful elegance and craftsmanship.
By following these steps, you'll skillfully attach the rosettes to the pillow covers, transforming them into exquisite rosette cluster pillows that reflect your unique style and creativity. With each rosette securely in place, your DIY pillows will radiate a handmade charm that adds a touch of warmth and personality to your home decor.
Read more: DIY Window Cornice
Step 3: Arranging the Rosettes on the Pillow
Arranging the rosettes on the pillow is a pivotal step that allows you to infuse your DIY rosette cluster pillows with a captivating and harmonious visual appeal. The placement and composition of the rosettes play a crucial role in determining the overall aesthetic impact of the pillows, making this step an exciting opportunity to unleash your creativity and design sensibilities.
1. Visualizing the Composition
Before physically arranging the rosettes, take a moment to visualize the composition you wish to achieve. Consider factors such as color distribution, rosette size variation, and the overall balance of the arrangement. By envisioning the final look, you can strategically plan the placement of the rosettes to create a visually engaging and cohesive design.
2. Experimenting with Layouts
Begin by experimenting with different layouts for the rosettes on the pillow cover. Arrange the rosettes in various configurations, exploring asymmetrical and symmetrical designs to find the most captivating composition. This experimentation phase allows you to tap into your artistic intuition and explore diverse arrangements that harmonize with the fabric and reflect your personal style.
3. Balancing Color and Texture
As you arrange the rosettes, pay attention to the distribution of colors and textures across the pillow cover. Integrate rosettes of varying hues and fabric patterns to create a dynamic interplay of color and texture. By strategically balancing these elements, you can craft a visually stimulating arrangement that adds depth and dimension to the pillows.
Read more: DIY Closet Reading Nook Ideas
4. Achieving Symmetry and Harmony
Strive to achieve symmetry and harmony in the arrangement of the rosettes. While asymmetrical designs can exude a whimsical charm, a balanced and harmonious layout can create a sense of visual equilibrium and sophistication. Take the time to fine-tune the positioning of the rosettes, ensuring that they interact harmoniously to form a cohesive and aesthetically pleasing ensemble.
5. Seeking Feedback and Making Adjustments
Once you've arranged the rosettes to your satisfaction, consider seeking feedback from a trusted friend or family member. A fresh perspective can offer valuable insights and help you refine the arrangement further. Take any constructive feedback into account and make any necessary adjustments to perfect the composition, ensuring that the pillows exude an artful elegance that resonates with your design vision.
By meticulously arranging the rosettes on the pillow cover, you'll transform your DIY rosette cluster pillows into captivating works of art that reflect your unique style and attention to detail. Each thoughtfully positioned rosette contributes to a harmonious and visually striking composition, infusing your home decor with a touch of handmade sophistication and charm.
Conclusion
In conclusion, the journey of creating DIY rosette cluster pillows is a delightful fusion of creativity, craftsmanship, and personal expression. As you reach the culmination of this crafting endeavor, you are rewarded with a stunning addition to your home decor that reflects your unique style and attention to detail.
Through the meticulous process of crafting the rosettes, you have honed your skills in fabric manipulation and design, shaping each rosette with care and precision. The selection of fabric, the artful shaping of the rosettes, and the thoughtful arrangement on the pillow covers have all contributed to the creation of a visually captivating and personalized home accent.
The DIY rosette cluster pillows serve as a testament to the beauty of handmade decor, infusing your living space with warmth, elegance, and a touch of individuality. Each rosette bears the mark of your creativity, adding a sense of artful sophistication to your surroundings.
Furthermore, the crafting journey itself has been a source of joy and fulfillment, allowing you to immerse yourself in a world of textures, colors, and design possibilities. The process of bringing your vision to life, from the initial selection of materials to the final placement of the rosettes, has been a testament to your dedication and passion for creating a home that reflects your personality and style.
As you admire the completed rosette cluster pillows gracing your sofa or bed, you can take pride in the fact that you have transformed simple materials into a work of art that enhances the ambiance of your home. The pillows not only serve as a visual delight but also as a reflection of your creativity and ability to infuse everyday objects with a touch of handmade charm.
In essence, the journey of creating DIY rosette cluster pillows transcends the act of crafting; it embodies the spirit of self-expression, creativity, and the joy of transforming humble materials into objects of beauty. With your newfound expertise in crafting rosettes and assembling them into stunning pillows, you are poised to continue exploring the boundless possibilities of DIY home decor, infusing your living space with warmth, personality, and a touch of handmade elegance.