
Home>Home & Furniture>Kitchen>How to Paint Kitchen Cabinets Step-by-Step
Kitchen
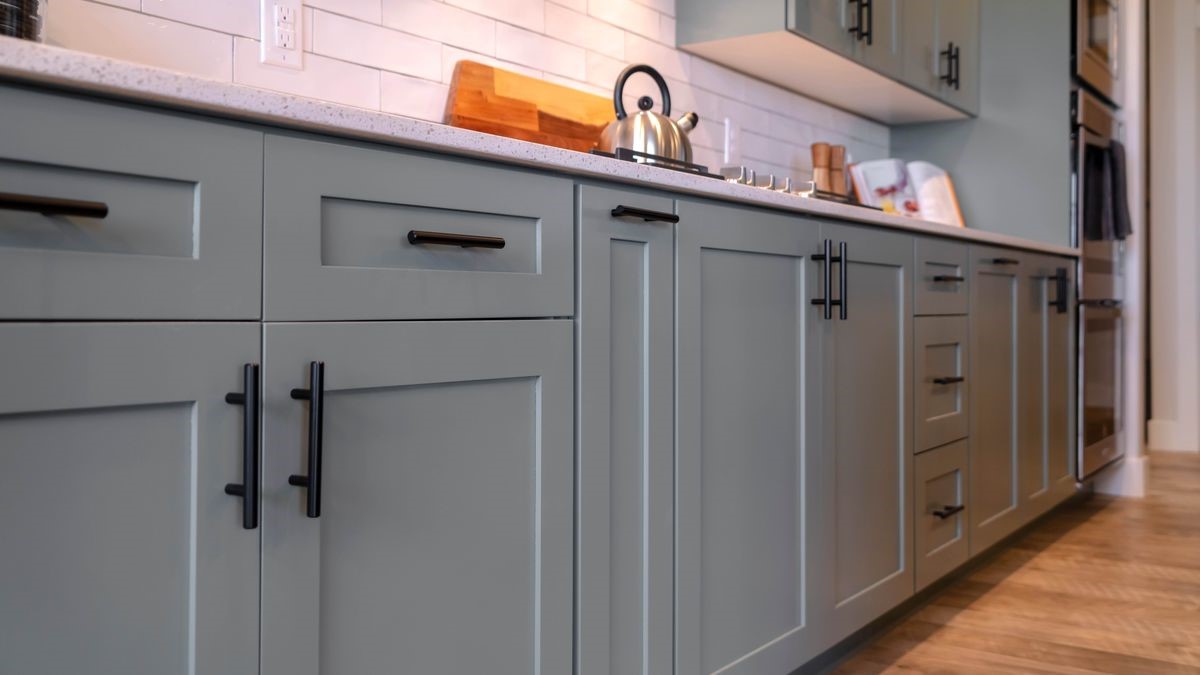
How to Paint Kitchen Cabinets Step-by-Step
Published: July 29, 2024
Transform your kitchen with our step-by-step guide on how to paint kitchen cabinets. Learn expert tips and techniques for a professional finish.
(Many of the links in this article redirect to a specific reviewed product. Your purchase of these products through affiliate links helps to generate commission for Twigandthistle.com, at no extra cost. Learn more)
Tired of looking at those drab kitchen cabinets? Painting them can be a simple way to give your kitchen a fresh, new look. You don't have to be a professional to complete this project. With some basic tools and a bit of patience, anyone can do it. This guide will walk you through each step, offering tips to ensure a smooth and lasting finish. By the end, your kitchen will look like a whole new space. Ready to get started? Let's dive in and transform those old cabinets.
Getting Ready for the Project
Clear the Area: Remove all items from the cabinets. Take out dishes, pots, and pans. Clear countertops to avoid any spills.
Safety First: Wear safety goggles and a mask to protect from dust and fumes. Use gloves to keep hands clean and safe from chemicals.
Workspace Setup: Lay down drop cloths or old sheets to protect floors. Set up a workbench or table for painting doors and drawers.
Remove Hardware: Use a screwdriver to take off handles, knobs, and hinges. Keep screws and small parts in a labeled container to avoid losing them.
Clean Surfaces: Wipe down cabinets with a degreaser to remove grease and grime. Rinse with water and let dry completely.
Sand the Cabinets: Lightly sand all surfaces with medium-grit sandpaper to help paint stick better. Wipe off dust with a tack cloth.
Fill Holes and Cracks: Use wood filler to patch any holes or cracks. Let it dry, then sand smooth.
Prime the Cabinets: Apply a coat of primer to ensure even paint coverage. Let it dry according to the manufacturer's instructions.
Ventilation: Make sure the area is well-ventilated. Open windows or use a fan to circulate air and reduce fumes.
Test Paint: Apply a small amount of paint on an inconspicuous area to check color and adhesion. Adjust if necessary before painting the entire cabinet.
Essential Materials and Tools
- Screwdriver: Used to remove cabinet doors, drawers, and hardware.
- Sandpaper: Helps smooth surfaces and remove old paint or varnish.
- Painter's Tape: Protects areas you don't want to paint.
- Drop Cloths: Covers floors and countertops to catch drips and spills.
- Degreaser: Cleans cabinets to remove grease and grime.
- Primer: Prepares the surface for paint, ensuring better adhesion.
- Paint: Choose a high-quality paint designed for cabinets.
- Paintbrushes: Use for detailed areas and edges.
- Paint Rollers: Covers larger, flat surfaces quickly.
- Paint Tray: Holds paint for easy access while painting.
- Putty Knife: Fills in any holes or imperfections with wood filler.
- Wood Filler: Repairs dents, holes, or scratches on the cabinets.
- Sanding Block: Ensures even sanding on flat surfaces.
- Tack Cloth: Removes dust after sanding.
- Safety Gear: Includes gloves, goggles, and a mask to protect yourself from fumes and dust.
Required Skills and Time Commitment
Skill Level: Intermediate
Time Required:
Preparation: 2-3 hours
- Remove cabinet doors, drawers, and hardware.
- Clean surfaces with a degreaser.
- Sand surfaces lightly.
Priming: 1-2 hours
- Apply primer to all surfaces.
- Allow drying time (usually 1-2 hours).
Painting: 4-6 hours
- Apply the first coat of paint.
- Allow drying time (usually 2-4 hours).
- Apply a second coat if needed.
Reassembly: 1-2 hours
- Reattach doors, drawers, and hardware.
Total Time: 8-13 hours
Detailed Painting Instructions
Remove Cabinet Doors and Hardware
- Use a screwdriver to take off doors, drawers, and hardware.
- Label each piece to remember where it goes.
Clean Surfaces
- Wipe down cabinets with a degreaser to remove grease and grime.
- Rinse with water and let dry completely.
Sand the Cabinets
- Use 120-grit sandpaper to sand all surfaces lightly.
- Wipe away dust with a tack cloth.
Fill Holes and Cracks
- Apply wood filler to any holes or cracks.
- Let it dry, then sand smooth with 220-grit sandpaper.
Prime the Cabinets
- Apply a coat of primer using a brush or roller.
- Let the primer dry according to the manufacturer's instructions.
Sand Again
- Lightly sand the primed surfaces with 220-grit sandpaper.
- Wipe away dust with a tack cloth.
Paint the Cabinets
- Apply the first coat of paint using a brush or roller.
- Let the paint dry completely, then apply a second coat if needed.
Reattach Hardware and Doors
- Once the paint is fully dry, reattach hardware.
- Hang the doors and put drawers back in place.
Touch Up
- Inspect for any missed spots or drips.
- Touch up as needed with a small brush.
Helpful Tips and Tricks
Clean cabinets thoroughly before starting. Grease and grime can ruin your paint job. Use a degreaser or a mix of vinegar and water.
Label each door and drawer with a piece of tape. This helps you remember where everything goes.
Sand the surfaces lightly. This helps the paint stick better. Use medium-grit sandpaper for best results.
Prime the cabinets. Primer helps cover old stains and gives a smooth surface for the paint.
Use a high-quality brush or roller. Cheap tools can leave streaks or bristles in the paint.
Apply thin coats of paint. Thick coats can drip and take longer to dry. Two to three thin coats work best.
Let each coat dry completely before adding another. Rushing can cause smudges and uneven color.
Seal the paint with a clear topcoat. This adds durability and makes cleaning easier.
Reattach doors and drawers carefully. Make sure the paint is fully dry to avoid smudges.
Common mistakes to avoid:
Skipping the cleaning step. Dirt and grease can make the paint peel.
Not sanding enough. Smooth surfaces help the paint stick better.
Using cheap brushes or rollers. Quality tools give a better finish.
Applying thick coats. Thin coats dry faster and look smoother.
Rushing the drying process. Let each coat dry fully to avoid smudges.
Alternatives for materials or methods:
Instead of traditional paint, consider chalk paint. It requires less prep work and gives a matte finish.
For a modern look, use spray paint. It provides a smooth, even coat but requires good ventilation.
If you want a natural look, try staining the cabinets instead of painting. Stain enhances the wood grain and requires less maintenance.
Budgeting for Your Cabinet Makeover
Paint: A gallon of high-quality paint costs around $30-$50. You might need 2 gallons, so budget $60-$100.
Primer: A gallon of primer costs about $20-$30. One gallon should be enough, so plan for $20-$30.
Sandpaper: A pack of assorted sandpaper costs around $10-$15.
Painter's Tape: A roll costs about $5-$10. You might need 2 rolls, so budget $10-$20.
Paint Brushes and Rollers: A good set costs around $15-$30.
Drop Cloths: A pack of plastic drop cloths costs about $10-$15.
Cleaning Supplies: Degreaser and rags will cost around $10-$15.
Screwdriver: If you don't already have one, a basic set costs around $10-$20.
Total Estimated Cost: $135-$245.
Budget-Friendly Alternatives:
Paint: Opt for a mid-range paint at $20-$30 per gallon. Total: $40-$60.
Primer: Choose a budget primer at $15-$20 per gallon. Total: $15-$20.
Sandpaper: Buy a smaller pack for $5-$10.
Painter's Tape: Go for a cheaper brand at $3-$5 per roll. Total: $6-$10.
Paint Brushes and Rollers: A basic set costs around $10-$15.
Drop Cloths: Use old sheets or newspapers for free.
Cleaning Supplies: Use household cleaners you already have.
Screwdriver: Borrow one if possible.
Total Budget-Friendly Cost: $86-$135.
Creative Variations and Customizations
Alternative Materials: Instead of traditional paint, consider using chalk paint for a matte finish or milk paint for a vintage look. Both options require minimal prep work. Gel stain can also be used for a rich, wood-like appearance without stripping the original finish.
Colors: Experiment with bold colors like navy blue, forest green, or even black for a modern touch. For a more classic look, neutral tones such as white, beige, or gray work well. Two-tone cabinets are another option; paint the upper cabinets a lighter color and the lower cabinets a darker shade.
Styles: Add distressing techniques for a rustic or farmhouse style. Lightly sand edges and corners after painting to reveal some of the wood underneath. For a sleek, modern look, use high-gloss paint and smooth out any brush strokes with a foam roller.
Hardware: Swap out old handles and knobs for new ones that match your chosen style. Brushed nickel or matte black hardware pairs well with modern designs, while antique brass or ceramic knobs complement vintage or farmhouse styles.
Finishes: Seal your painted cabinets with a polyurethane finish for durability. Choose between satin, semi-gloss, or gloss finishes depending on your desired look. Satin gives a soft sheen, semi-gloss offers a bit more shine, and gloss provides a high-shine, reflective surface.
Decorative Elements: Add molding or trim to cabinet doors for extra detail. Consider glass inserts for some of the doors to display dishware or decorative items. Stencil designs or decals can also be applied to create unique patterns or accents.
Eco-Friendly Painting Tips
Remove Cabinet Doors and Hardware: Use a screwdriver to take off doors, handles, and hinges. Keep screws and hardware in a container for reuse.
Clean Surfaces: Mix equal parts vinegar and water. Wipe down cabinets to remove grease and grime. This eco-friendly cleaner avoids harsh chemicals.
Sand Cabinets: Lightly sand surfaces with recycled sandpaper. This helps paint adhere better. Wipe away dust with a damp cloth.
Fill Holes and Cracks: Use wood filler made from natural materials. Apply with a putty knife and let dry. Sand smooth once dry.
Prime Cabinets: Choose a low-VOC (volatile organic compounds) primer. Apply a thin coat with a brush or roller. Let it dry completely.
Paint Cabinets: Opt for low-VOC or zero-VOC paint. Apply the first coat evenly. Let it dry, then apply a second coat if needed.
Reattach Hardware and Doors: Once paint is dry, reattach handles, hinges, and doors. Use the original screws and hardware to reduce waste.
Dispose of Waste Properly: Recycle empty paint cans and dispose of any leftover paint at a hazardous waste facility. Clean brushes and rollers with water, not harsh chemicals.
Your Kitchen's New Look
Painting kitchen cabinets yourself can be a game-changer. With some patience, the right tools, and a bit of elbow grease, you can transform your kitchen without breaking the bank. Remember, preparation is key. Clean, sand, and prime those cabinets before you even think about opening that paint can. Use quality paint and brushes for the best results. Don’t rush the drying process between coats; it’s worth the wait. Reassemble everything carefully, and admire your handiwork. You’ve not only saved money but also added a personal touch to your home. Now, every time you step into your kitchen, you’ll feel a sense of pride knowing you did it yourself. So, grab that paintbrush and get started. Your dream kitchen is just a few brush strokes away. Happy painting!
How do I prep my kitchen cabinets for painting?
First, remove all doors, drawers, and hardware. Clean everything with a degreaser to get rid of grease and grime. Sand the surfaces lightly to help the paint stick better. Wipe away any dust with a damp cloth.
What type of paint should I use?
Use a high-quality, semi-gloss or satin paint. These finishes are durable and easy to clean, which is perfect for kitchen cabinets. You can choose either latex or oil-based paint, but latex is easier to work with and clean up.
Do I need to use a primer?
Yes, using a primer is crucial. It helps the paint adhere better and provides a smooth surface. Choose a stain-blocking primer if your cabinets have dark stains or are made of wood that bleeds.
How many coats of paint are necessary?
Typically, you'll need two coats of paint. Apply the first coat and let it dry completely before adding the second. This ensures even coverage and a smooth finish.
How long should I wait between coats?
Wait at least 4-6 hours between coats, but check the paint can for specific drying times. Humidity and temperature can affect drying time, so make sure the first coat is fully dry before adding another.
Can I use a paint sprayer instead of a brush?
Yes, a paint sprayer can give you a smooth, professional finish. However, it requires more prep work to protect surrounding areas from overspray. If you use a brush, choose a high-quality, angled brush for the best results.
How do I avoid brush marks?
Use a high-quality brush and apply thin, even coats. Sand lightly between coats to smooth out any imperfections. Adding a paint conditioner can also help the paint level out and reduce brush marks.
When can I reattach the doors and hardware?
Wait at least 24 hours after the final coat of paint before reattaching doors and hardware. This ensures the paint is fully dry and less likely to chip or smudge.