
Home>Home & Furniture>Kitchen>DIY Outdoor Concrete Countertops
Kitchen
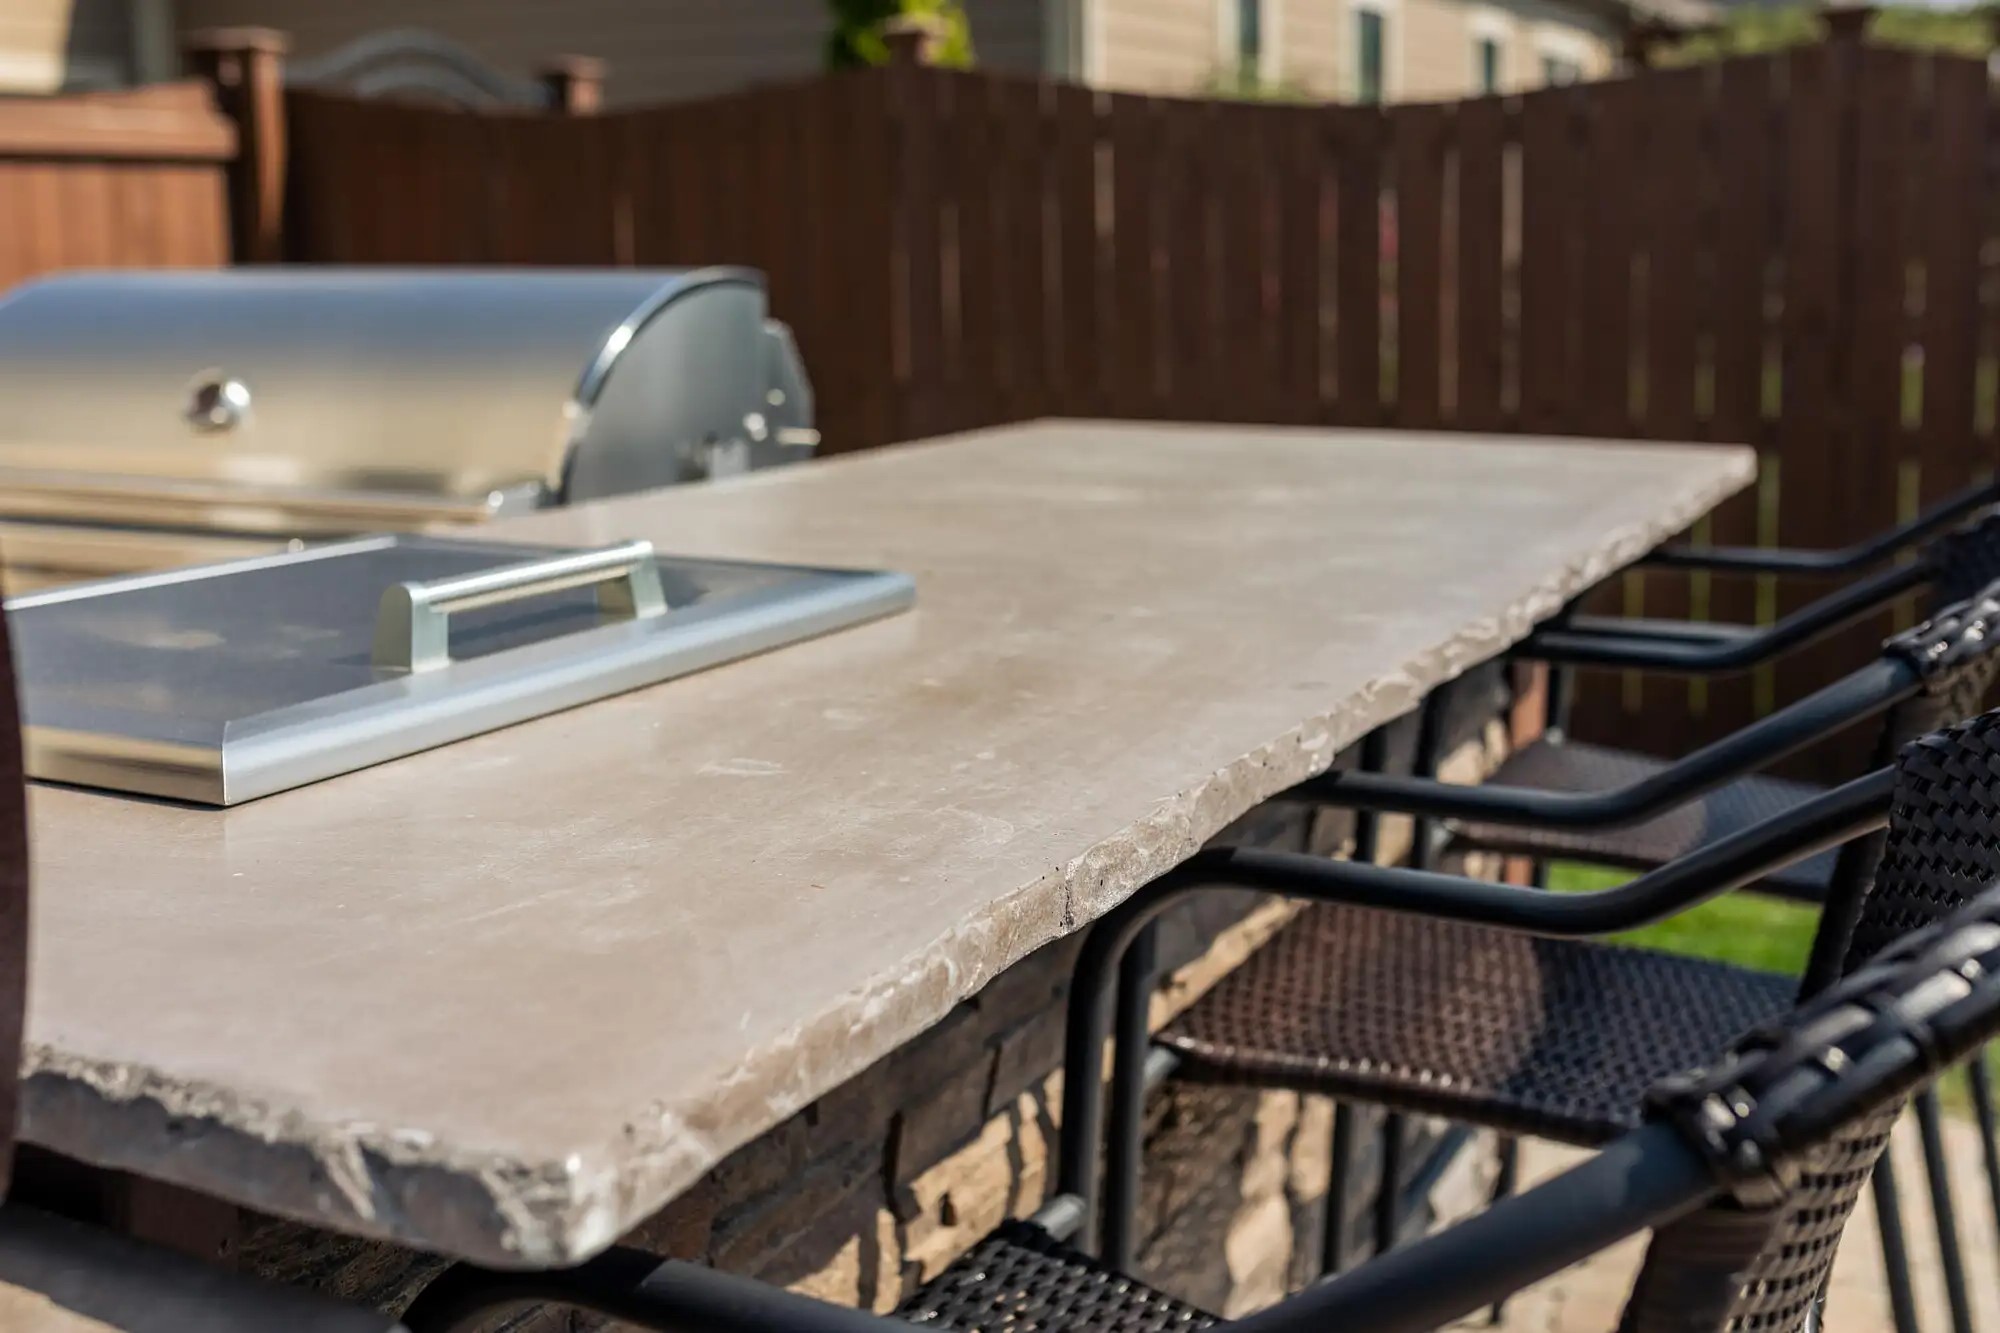
DIY Outdoor Concrete Countertops
Published: July 31, 2024
Discover how to create stunning DIY outdoor concrete countertops with our step-by-step guide. Perfect for enhancing your outdoor kitchen space with a durable, stylish surface.
(Many of the links in this article redirect to a specific reviewed product. Your purchase of these products through affiliate links helps to generate commission for Twigandthistle.com, at no extra cost. Learn more)
Imagine hosting a summer barbecue with a sleek, durable concrete countertop in your outdoor space. Building one yourself may sound challenging, but with some basic tools, a clear plan, and a bit of patience, creating a custom concrete countertop becomes entirely doable. This guide will walk you through the steps, from gathering materials to the final polish. Whether you're an experienced DIYer or a beginner, this project offers a blend of creativity and functionality perfect for any outdoor setting. Ready to transform your backyard? Let's get started on this exciting concrete countertop adventure!
Preparation Steps
Gather Materials: Get concrete mix, plywood, rebar, screws, and sealant. Have a mixing bucket, trowel, and safety gear ready.
Safety First: Wear gloves, safety goggles, and a mask. Concrete dust can irritate skin and lungs.
Workspace Setup: Choose a flat, open area. Lay down a tarp to catch spills. Ensure good ventilation if working indoors.
Measure and Cut: Measure the space for the countertop. Cut plywood to size for the mold. Double-check measurements to avoid mistakes.
Build the Mold: Assemble the plywood mold using screws. Make sure corners are square and edges are smooth.
Reinforce with Rebar: Cut rebar to fit inside the mold. Place it evenly to strengthen the countertop.
Mix Concrete: Follow instructions on the concrete mix. Add water slowly, mixing until smooth and lump-free.
Pour and Level: Pour concrete into the mold. Use a trowel to spread and level the surface. Tap the sides to remove air bubbles.
Cure the Concrete: Let the concrete set for at least 48 hours. Keep it moist by covering with plastic or spraying with water.
Remove the Mold: Carefully unscrew and remove the plywood mold. Sand any rough edges for a smooth finish.
Seal the Surface: Apply a concrete sealant to protect against stains and weather. Let it dry completely before use.
Materials and Tools Checklist
- Concrete Mix: A pre-mixed bag of concrete specifically designed for countertops. It provides strength and a smooth finish.
- Water: Essential for mixing with the concrete powder to create the right consistency.
- Mold/Forms: Usually made from melamine or plywood, these shapes hold the concrete in place while it sets.
- Reinforcement Mesh: Steel mesh or rebar to strengthen the concrete and prevent cracking.
- Concrete Sealer: Protects the surface from stains, water, and wear.
- Release Agent: Applied to the mold to ensure the concrete doesn't stick when removing the forms.
- Trowel: A flat tool used to smooth and level the concrete surface.
- Sander/Grinder: Helps achieve a smooth, polished finish on the countertop.
- Mixing Bucket: A large container for combining the concrete mix and water.
- Screed: A straight edge used to level the concrete within the mold.
- Rubber Gloves: Protects hands from the concrete mix, which can be harsh on skin.
- Safety Goggles: Shields eyes from dust and debris during mixing and sanding.
- Dust Mask: Prevents inhalation of fine particles while working with concrete.
- Measuring Tape: Ensures accurate measurements for the mold and countertop dimensions.
- Level: Ensures the countertop surface is even and flat.
- Plastic Sheeting: Covers the concrete during curing to retain moisture and prevent cracks.
- Bucket Trowel: Smaller trowel for detailed work and finishing edges.
- Concrete Vibrator: Removes air bubbles from the mix, ensuring a dense, solid countertop.
- Painter’s Tape: Used to create clean edges and protect areas from concrete splatter.
- Utility Knife: Cuts plastic sheeting and other materials as needed.
Required Skills and Time Commitment
Skill Level: Intermediate
Time Required:
- Planning and Preparation: 2-3 hours
- Building the Mold: 4-6 hours
- Mixing and Pouring Concrete: 2-3 hours
- Curing Time: 48-72 hours (waiting period)
- Finishing and Sealing: 3-4 hours
Total Active Time: 11-16 hours (excluding curing time)
Detailed Instructions
Gather Materials
- Concrete mix
- Water
- Mold (plywood or melamine board)
- Rebar or wire mesh
- Concrete sealer
- Trowel
- Sandpaper
- Buckets
- Mixing tools
Prepare the Mold
- Cut plywood or melamine board to desired countertop size.
- Assemble the mold using screws to hold the sides together.
- Apply a release agent inside the mold to prevent sticking.
Reinforce the Mold
- Place rebar or wire mesh inside the mold for added strength.
- Ensure reinforcement is centered and not touching the mold edges.
Mix Concrete
- Follow the instructions on the concrete mix bag.
- Combine concrete mix and water in a bucket.
- Stir until the mixture is smooth and lump-free.
Pour Concrete
- Pour the mixed concrete into the mold.
- Use a trowel to spread and level the surface.
- Tap the sides of the mold to remove air bubbles.
Smooth the Surface
- Use a trowel to smooth the top of the concrete.
- Allow it to set for about 30 minutes.
- Re-trowel to achieve a smooth finish.
Cure the Concrete
- Cover the mold with plastic sheeting.
- Let the concrete cure for at least 48 hours.
- Keep the surface moist by misting with water occasionally.
Remove the Mold
- Carefully unscrew and disassemble the mold.
- Lift the concrete countertop out of the mold.
Sand the Edges
- Use sandpaper to smooth any rough edges.
- Start with coarse grit, then move to finer grit for a polished look.
Seal the Concrete
- Apply a concrete sealer with a brush or roller.
- Let it dry according to the sealer's instructions.
- Apply a second coat if needed for extra protection.
Install the Countertop
- Place the concrete countertop on your outdoor base.
- Ensure it is level and secure.
- Enjoy your new outdoor concrete countertop!
Helpful Tips and Tricks
Plan your project carefully. Measure twice, cut once. Make sure you have all the necessary tools and materials before starting.
Use high-quality concrete mix. This ensures durability and a smooth finish. Adding a concrete sealer will protect your countertop from stains and weather damage.
Build a sturdy mold. Use melamine boards for the mold as they create a smooth surface. Seal the edges with silicone caulk to prevent leaks.
Reinforce with rebar or wire mesh. This adds strength and prevents cracking. Place the reinforcement in the middle of the concrete pour.
Vibrate the mold. Use a rubber mallet or a sander to vibrate the mold. This removes air bubbles and ensures a smooth finish.
Cure the concrete properly. Keep it moist and covered for at least a week. This prevents cracking and increases strength.
Sand and polish. After curing, sand the surface with progressively finer grits of sandpaper. Finish with a concrete polisher for a smooth, shiny surface.
Seal the countertop. Apply a concrete sealer to protect against stains and weather. Reapply every few years for maintenance.
Common mistakes to avoid: Not reinforcing the concrete, skipping the vibration step, and not curing the concrete properly. These can lead to weak, cracked countertops.
Alternatives: Use a pre-cast concrete countertop if you want to skip the mold-building step. Consider using concrete overlay for an existing countertop to save time and effort.
Budgeting Your Project
Concrete Mix: $50-$100 for a high-quality mix. Plywood: $20-$40 for the base mold. Rebar or Wire Mesh: $10-$20 for reinforcement. Melamine Sheets: $30-$50 for mold sides. Screws and Nails: $5-$10 for securing the mold. Concrete Sealer: $20-$40 for protection. Sandpaper: $5-$10 for smoothing edges. Trowel: $10-$20 for spreading concrete. Bucket: $5-$10 for mixing. Level: $10-$20 for ensuring a flat surface. Rubber Gloves: $5-$10 for safety. Plastic Sheeting: $5-$10 for curing.
Total Cost: $175-$340
Budget-Friendly Alternatives: Use recycled wood for molds, borrow tools from friends, or rent from a local hardware store.
Creative Variations
Colors: Use concrete stains or dyes to add color. Earth tones like browns, tans, and grays blend well with outdoor settings. For a bolder look, try blues, greens, or even reds.
Textures: Create different textures by using various finishing techniques. A smooth finish gives a sleek, modern look. For a rustic feel, use a broom to create a brushed texture. Adding pebbles or glass pieces can give a unique, decorative touch.
Edges: Customize the edges of your countertop. Rounded edges are safer and more kid-friendly. Straight edges offer a clean, contemporary appearance. For a decorative touch, use molds to create detailed edges.
Inlays: Embed objects like seashells, stones, or tiles into the concrete. This adds a personal touch and can match other outdoor decor.
Forms: Use different molds to change the shape of your countertop. Standard rectangular forms are classic, but you can also create L-shaped or curved designs to fit your space better.
Sealers: Choose a sealer that fits your needs. A matte sealer gives a natural look, while a glossy sealer adds shine and makes cleaning easier. Some sealers also offer UV protection to prevent color fading.
Reinforcements: Add steel rebar or wire mesh inside the concrete for extra strength. This is especially important for larger countertops to prevent cracking.
Alternative Materials: Instead of traditional concrete, consider using lightweight concrete or concrete mixed with recycled materials. These options can be easier to work with and more eco-friendly.
Built-in Features: Incorporate built-in features like a sink, cutting board, or grill space. This makes your countertop more functional and tailored to your needs.
Finishing Touches: Add a backsplash using tiles or stones that complement your countertop. This not only looks good but also protects the wall from splashes and stains.
Eco-Friendly Tips
Recycled concrete can be used as a base material. This reduces waste and saves resources. Fly ash or slag cement can replace some of the traditional cement. These byproducts from other industries help reduce the carbon footprint.
Natural pigments can be used for coloring. They are less harmful to the environment compared to synthetic dyes. Reclaimed wood can be used for forms or molds. This gives the project a rustic look and reuses materials that might otherwise be discarded.
Eco-friendly sealers made from natural oils or water-based products protect the countertop without releasing harmful chemicals. Recycled glass or crushed stone can be added to the concrete mix for a unique look. This also helps reduce waste.
Solar-powered tools can be used during the construction process. This reduces reliance on non-renewable energy sources. Rainwater can be collected and used for mixing concrete. This conserves tap water and makes use of a natural resource.
Local materials should be sourced whenever possible. This reduces transportation emissions and supports local businesses. Reusable molds can be used for multiple projects. This reduces waste and saves money in the long run.
Your Outdoor Kitchen Awaits
Building your own concrete countertops can be a game-changer for your outdoor space. You've learned the steps, gathered the materials, and tackled the project head-on. Now, you have a sturdy, stylish addition to your backyard. Remember, patience and attention to detail are key. Don't rush the curing process or skip sealing; these steps ensure durability. Enjoy the satisfaction of knowing you created something both functional and beautiful. Invite friends over, fire up the grill, and let your new countertops be the star of your outdoor gatherings. You've earned it.
How do I start making a concrete countertop?
Begin by measuring the area where you want the countertop. Build a sturdy mold using plywood and 2x4s. Make sure to seal the edges to prevent leaks.
What materials do I need?
You'll need concrete mix, water, rebar or wire mesh for reinforcement, a trowel, a concrete mixer, and a mold release agent.
How thick should the countertop be?
Aim for a thickness of 1.5 to 2 inches. This provides enough strength without being too heavy.
How long does the concrete take to cure?
Concrete typically takes about 28 days to fully cure. However, you can remove the mold after 48 hours if you're careful.
Can I add color to my concrete countertop?
Yes, you can mix in concrete pigments or stains to achieve your desired color. Just follow the manufacturer's instructions.
How do I make the surface smooth?
Use a trowel to smooth the surface right after pouring. For a polished look, you can sand it down with progressively finer grits of sandpaper after it cures.
Do I need to seal the countertop?
Absolutely. Sealing helps protect the concrete from stains and moisture. Apply a concrete sealer according to the product instructions.