
Home>Home & Furniture>Kitchen>DIY Kitchen Cabinet Ideas
Kitchen
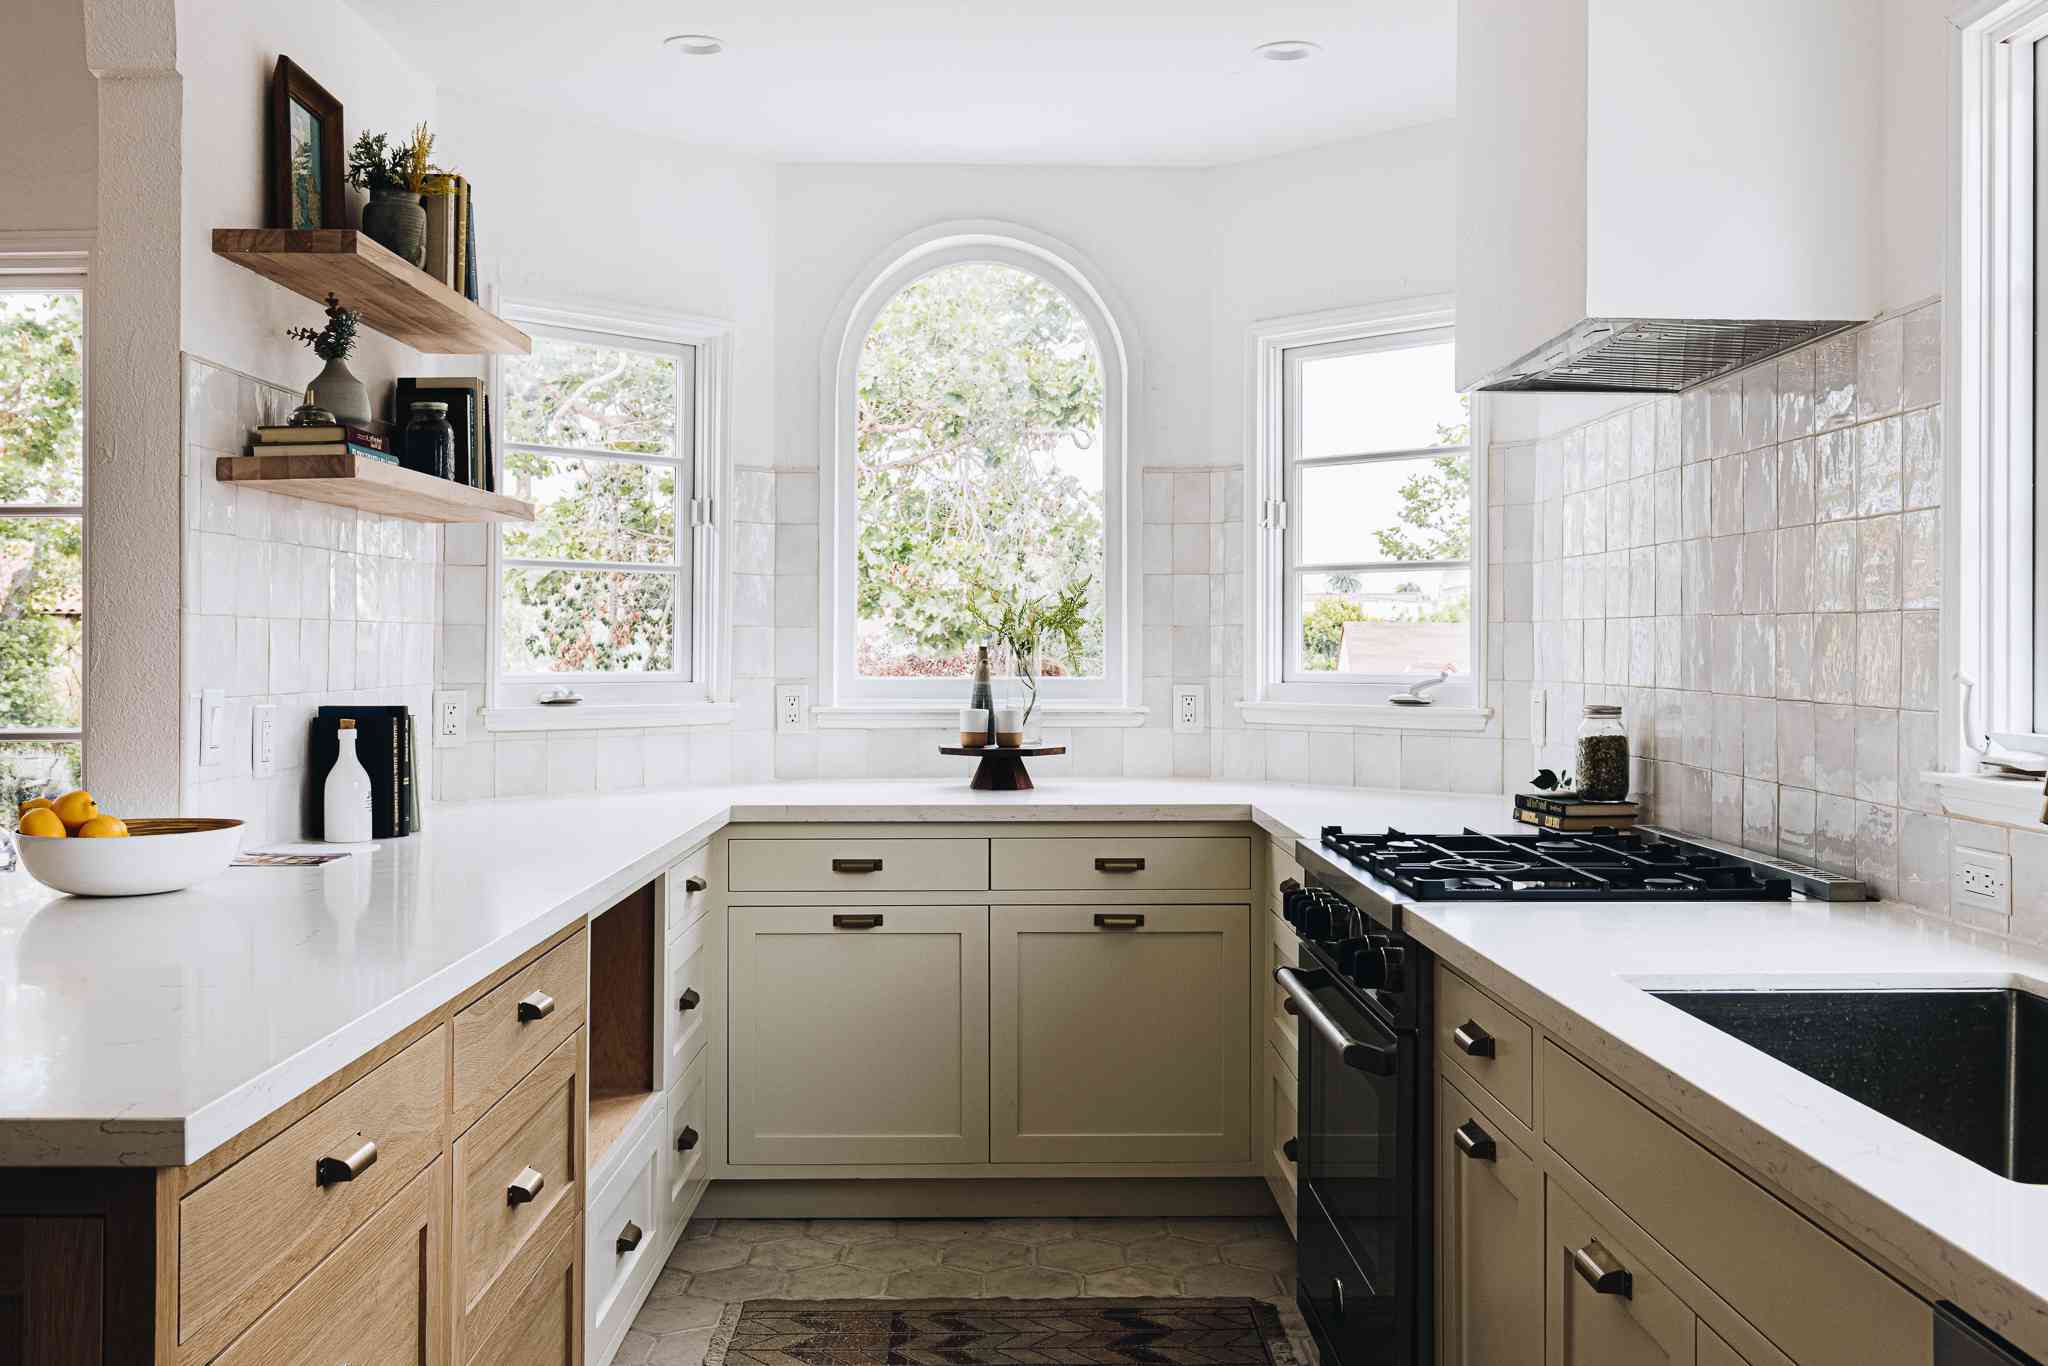
DIY Kitchen Cabinet Ideas
Published: July 29, 2024
Discover creative DIY kitchen cabinet ideas to transform your space. From painting tips to hardware upgrades, elevate your kitchen's style on a budget.
(Many of the links in this article redirect to a specific reviewed product. Your purchase of these products through affiliate links helps to generate commission for Twigandthistle.com, at no extra cost. Learn more)
Revamping your kitchen doesn't have to break the bank. With a bit of creativity and some elbow grease, you can transform your kitchen cabinets into something fresh and stylish. Whether you're looking to repaint, add new hardware, or completely reface them, there are countless DIY ideas to explore. Taking on a kitchen cabinet project can be a great way to add a personal touch to your space while saving money. Plus, it’s a fantastic way to spend a weekend and see immediate results that make your kitchen feel brand new. Ready to get started? Let's dive in!
Preparation Steps
Gather Materials: Collect all necessary tools and materials like screwdrivers, paint, sandpaper, and new hardware.
Clear the Area: Remove everything from the cabinets. Clear countertops to create a spacious workspace.
Safety Gear: Wear safety goggles and gloves to protect your eyes and hands. Use a mask if sanding or painting.
Workspace Setup: Lay down a drop cloth to catch any spills or debris. Ensure good ventilation if using paint or strong adhesives.
Label Doors and Hardware: Use masking tape to label each cabinet door and its corresponding hardware. This helps with reassembly.
Clean Surfaces: Wipe down all surfaces with a mild cleaner to remove grease and grime. This ensures paint or new finishes adhere properly.
Remove Doors and Hardware: Unscrew cabinet doors and remove all hardware. Place screws and small parts in labeled plastic bags to avoid losing them.
Sand Surfaces: Lightly sand all surfaces to create a smooth base for painting or staining. Wipe away dust with a tack cloth.
Prime if Needed: Apply a coat of primer if painting. This helps the paint stick better and last longer.
Test Paint or Stain: Apply a small amount of paint or stain to a hidden area to ensure you like the color and finish.
Plan Layout: Sketch a layout of where each cabinet door and drawer will go. This helps during reassembly.
Check for Repairs: Inspect cabinets for any damage. Fix any loose hinges or cracks before proceeding.
Organize Tools: Keep all tools within reach. This saves time and keeps the project moving smoothly.
Gathering Your Materials and Tools
- Measuring Tape: Essential for accurate measurements of your cabinets and spaces.
- Screwdriver Set: Needed for assembling and disassembling cabinet parts.
- Power Drill: Speeds up the process of drilling holes and driving screws.
- Level: Ensures your cabinets are perfectly horizontal and vertical.
- Stud Finder: Helps locate wall studs for secure cabinet mounting.
- Circular Saw: Useful for cutting wood to the required sizes.
- Jigsaw: Ideal for cutting curves or intricate shapes in wood.
- Clamps: Hold pieces of wood together while glue dries or during assembly.
- Wood Glue: Provides extra strength to joints and connections.
- Sandpaper: Smooths out rough edges and surfaces before painting or staining.
- Paintbrushes/Rollers: Needed for applying paint or stain to your cabinets.
- Primer and Paint/Stain: Primer prepares the wood, while paint or stain gives the desired finish.
- Cabinet Hardware: Includes handles, knobs, and hinges for functionality and style.
- Safety Gear: Gloves, goggles, and a dust mask protect you during the project.
Required Skill Level and Time
Skill Level: Intermediate
Time Required: 2-3 days
- Removing Old Cabinets: 2-3 hours
- Measuring and Planning: 1-2 hours
- Cutting and Assembling New Cabinets: 8-10 hours
- Painting or Staining: 4-6 hours (including drying time)
- Installing New Cabinets: 4-5 hours
- Adding Hardware: 1-2 hours
Detailed Step-by-Step Guide
Plan Your Design
- Measure your kitchen space.
- Sketch a layout for the cabinets.
- Decide on the style and color.
Gather Materials
- Purchase plywood or MDF for the cabinet boxes.
- Get wood for doors and trim.
- Buy screws, hinges, handles, and paint.
Cut the Wood
- Use a table saw to cut the plywood or MDF to size.
- Cut pieces for the sides, bottom, top, and shelves.
Assemble the Boxes
- Attach the sides to the bottom piece using screws.
- Add the top piece and secure it.
- Install shelves inside the box.
Build the Doors
- Cut wood for the door panels.
- Attach trim around the edges if desired.
- Sand the doors for a smooth finish.
Paint or Stain
- Apply primer to the cabinet boxes and doors.
- Paint or stain in your chosen color.
- Let everything dry completely.
Install Hinges and Handles
- Attach hinges to the doors.
- Screw handles onto the doors.
Mount the Cabinets
- Use a level to ensure cabinets are straight.
- Secure cabinets to the wall studs with screws.
- Install doors onto the cabinet boxes.
Add Finishing Touches
- Install any additional trim or molding.
- Touch up paint as needed.
- Clean up your workspace.
Helpful Tips and Tricks
Measure twice, cut once. Always double-check measurements before cutting materials. This saves time and prevents waste.
Use quality materials. Opt for solid wood or high-quality plywood. These last longer and look better.
Label everything. When dismantling old cabinets, label doors, drawers, and hardware. This makes reassembly easier.
Pre-drill holes. This prevents wood from splitting and ensures screws go in straight.
Paint or stain before assembly. It's easier to get a smooth finish on flat pieces than on assembled cabinets.
Use a level. Ensure cabinets are perfectly level. This prevents doors from swinging open or not closing properly.
Install soft-close hinges. These prevent doors from slamming and extend the life of your cabinets.
Common mistakes to avoid:
Skipping the primer. Always prime wood before painting. This ensures better paint adhesion and a smoother finish.
Ignoring wall studs. Secure cabinets to wall studs for stability. Drywall alone won't support the weight.
Rushing the process. Take your time. Rushing leads to mistakes and poor craftsmanship.
Not sanding properly. Sand surfaces smooth before painting or staining. This ensures a professional finish.
Alternatives for materials or methods:
Use peel-and-stick veneer. For a quick update, apply peel-and-stick veneer to existing cabinets.
Try open shelving. Replace upper cabinets with open shelves for a modern look and easy access.
Repurpose old furniture. Convert an old dresser or sideboard into a unique kitchen island or cabinet.
Use chalk paint. For a vintage look, use chalk paint. It requires minimal prep and gives a matte finish.
Install pull-out shelves. Instead of fixed shelves, use pull-out versions for easier access to items in the back.
Estimating Your Costs
Materials:
- Plywood: $50-$100 per sheet (4x8 feet)
- Cabinet Hardware: $50-$100 (handles, hinges)
- Paint or Stain: $20-$50 per gallon
- Wood Glue: $5-$10
- Screws and Nails: $10-$20
- Sandpaper: $5-$10
- Primer: $15-$25 per gallon
Tools:
- Circular Saw: $50-$100 (or rent for $20/day)
- Drill: $40-$100
- Screwdriver Set: $10-$20
- Paintbrushes/Rollers: $10-$20
- Measuring Tape: $5-$10
- Clamps: $10-$30
- Level: $10-$20
Total Cost: $290-$665
Budget-Friendly Alternatives:
- Reclaimed Wood: Often free or very cheap
- Second-Hand Hardware: $20-$50
- Basic Paint: $10-$20 per gallon
- Borrow Tools: From friends or family, reducing costs significantly
Different Variations and Customizations
Paint your cabinets with bold colors like navy blue, forest green, or even a bright yellow. For a more classic look, use neutral tones like white, gray, or beige.
Replace the cabinet doors with glass panels to showcase your dishes or add a touch of elegance. Frosted glass offers a bit of privacy while still looking stylish.
Swap out the hardware. Choose modern handles or knobs in materials like brushed nickel, matte black, or even brass for a vintage feel.
Add open shelving. Remove some cabinet doors entirely to create open shelves. This can make your kitchen feel more spacious and allows you to display decorative items.
Install under-cabinet lighting. LED strips or puck lights can brighten up your workspace and add a modern touch.
Use contact paper or peel-and-stick wallpaper inside the cabinets or on the back of open shelves for a pop of pattern or color.
Incorporate crown molding at the top of your cabinets for a more finished, high-end look.
Change the cabinet layout. If you’re up for a bigger project, consider rearranging the cabinets to create a more functional kitchen space.
Add pull-out shelves or lazy Susans inside the cabinets for better organization and easier access to items.
Mix and match different styles. Combine shaker-style doors with flat-front drawers for a unique, eclectic look.
Use reclaimed wood for a rustic, farmhouse vibe. This can be used for cabinet doors, open shelving, or even as an accent.
Apply a distressed finish. Sand down the edges and corners of your cabinets after painting to give them a worn, vintage appearance.
Install decorative trim or beadboard on the cabinet doors for added texture and interest.
Add a chalkboard panel to one of the cabinet doors for notes, grocery lists, or recipes.
Consider two-tone cabinets. Paint the upper cabinets one color and the lower cabinets another for a trendy, modern look.
Eco-Friendly Tips
Reclaimed wood is a fantastic choice for kitchen cabinets. It adds character and reduces the demand for new lumber. Look for old barn wood or salvaged wood from construction sites.
Bamboo is another eco-friendly option. It grows quickly and is very durable. Bamboo cabinets can give your kitchen a modern look.
Low-VOC paints and finishes are important for a healthier home. VOCs (volatile organic compounds) can be harmful to breathe in. Choose paints and finishes labeled as low-VOC or zero-VOC.
Recycled glass countertops can complement your cabinets beautifully. These countertops are made from crushed glass and resin, offering a unique and sustainable option.
Refacing existing cabinets instead of replacing them can save materials and money. You can update the look by changing the doors, handles, and applying a fresh coat of paint.
Upcycled materials like old doors or windows can be transformed into cabinet doors. This adds a unique touch and keeps materials out of landfills.
Energy-efficient lighting inside and under cabinets can reduce electricity use. LED lights are a great choice as they last longer and use less energy.
Natural fiber baskets or bins can be used inside cabinets for organization. Materials like wicker or jute are sustainable and add a rustic charm.
Compostable materials for drawer liners or shelf liners can be a green choice. Look for liners made from natural fibers like cork or recycled paper.
DIY handles and knobs from materials like driftwood, stones, or recycled metal can add a personal touch. This reduces the need for new hardware and adds a unique flair to your kitchen.
Your Kitchen, Your Masterpiece
Transforming your kitchen cabinets can be a game-changer. With a bit of creativity and elbow grease, you can breathe new life into your space. Whether you're painting, staining, or adding new hardware, each project brings a unique touch. Don't be afraid to experiment with bold colors or unconventional materials. Remember, it's your kitchen, so let your personality shine through. Small changes can make a big impact, turning a drab kitchen into a fab one. So grab your tools, roll up your sleeves, and get started. You'll be amazed at what you can achieve with some DIY spirit. Happy renovating!
How can I update my kitchen cabinets without replacing them?
You can paint or stain them. Adding new hardware like knobs and handles also makes a big difference. Consider adding crown molding or trim for a more polished look.
What tools do I need for a DIY cabinet makeover?
Basic tools include a screwdriver, sander, paintbrushes, and drill. For more advanced projects, you might need a jigsaw, clamps, and a level.
Can I reface my cabinets myself?
Yes, you can! Refacing involves replacing the cabinet doors and drawer fronts while keeping the existing cabinet boxes. It’s cheaper than a full replacement and can be done with some patience and the right tools.
How do I choose the right paint for my cabinets?
Use high-quality paint that’s durable and easy to clean. Semi-gloss or satin finishes work best for cabinets because they resist moisture and stains.
What’s the best way to organize my kitchen cabinets?
Use shelf risers, pull-out drawers, and lazy Susans to maximize space. Group similar items together and use clear bins for easy access and visibility.
How can I add more storage to my existing cabinets?
Install pull-out shelves, door-mounted racks, or under-shelf baskets. Adding hooks or magnetic strips inside cabinet doors can also help store small items.
Is it hard to install new cabinet hardware?
Not at all! Just measure and mark where you want the new hardware, then drill holes and screw them in. A template can help ensure consistent placement.
Can I add lighting to my cabinets?
Absolutely! LED strip lights or puck lights are easy to install and can be placed under cabinets or inside them for better visibility and ambiance.