
Home>Home & Furniture>Garage & Basement>How to Build a DIY Pulley System for Garage
Garage & Basement
How to Build a DIY Pulley System for Garage
Published: September 29, 2024
Learn how to build a DIY pulley system for your garage with our step-by-step guide. Maximize storage space and improve organization with this easy and cost-effective project.
(Many of the links in this article redirect to a specific reviewed product. Your purchase of these products through affiliate links helps to generate commission for Twigandthistle.com, at no extra cost. Learn more)
Tired of lifting heavy items in your garage? A pulley system can make things easier. Building one yourself is a fun project and saves money. Whether storing bulky boxes, bikes, or tools, a pulley system can handle it. With a few simple materials and some basic tools, you can create an efficient lifting setup in no time. This guide will walk you through the materials, the steps, and tips for ensuring safety. Soon, you’ll wonder how you ever managed without it. Ready to get started? Let's dive into the details and make life easier in your garage!
Preparation Steps
Gather Materials: Collect all necessary items like pulleys, ropes, screws, brackets, and a sturdy board. Ensure everything is in good condition.
Safety Gear: Wear safety goggles, gloves, and a helmet. Keep a first aid kit nearby.
Clear Workspace: Remove any clutter from the garage. Make sure you have enough space to move around freely.
Measure and Mark: Measure the area where the pulley system will be installed. Mark spots for pulleys and brackets using a pencil.
Check Ceiling Strength: Ensure the ceiling can support the weight of the items you plan to lift. Reinforce if needed.
Pre-Drill Holes: Use a drill to make holes for screws and brackets. This makes installation easier and prevents wood from splitting.
Install Brackets: Secure brackets to the ceiling using screws. Make sure they are tightly fastened.
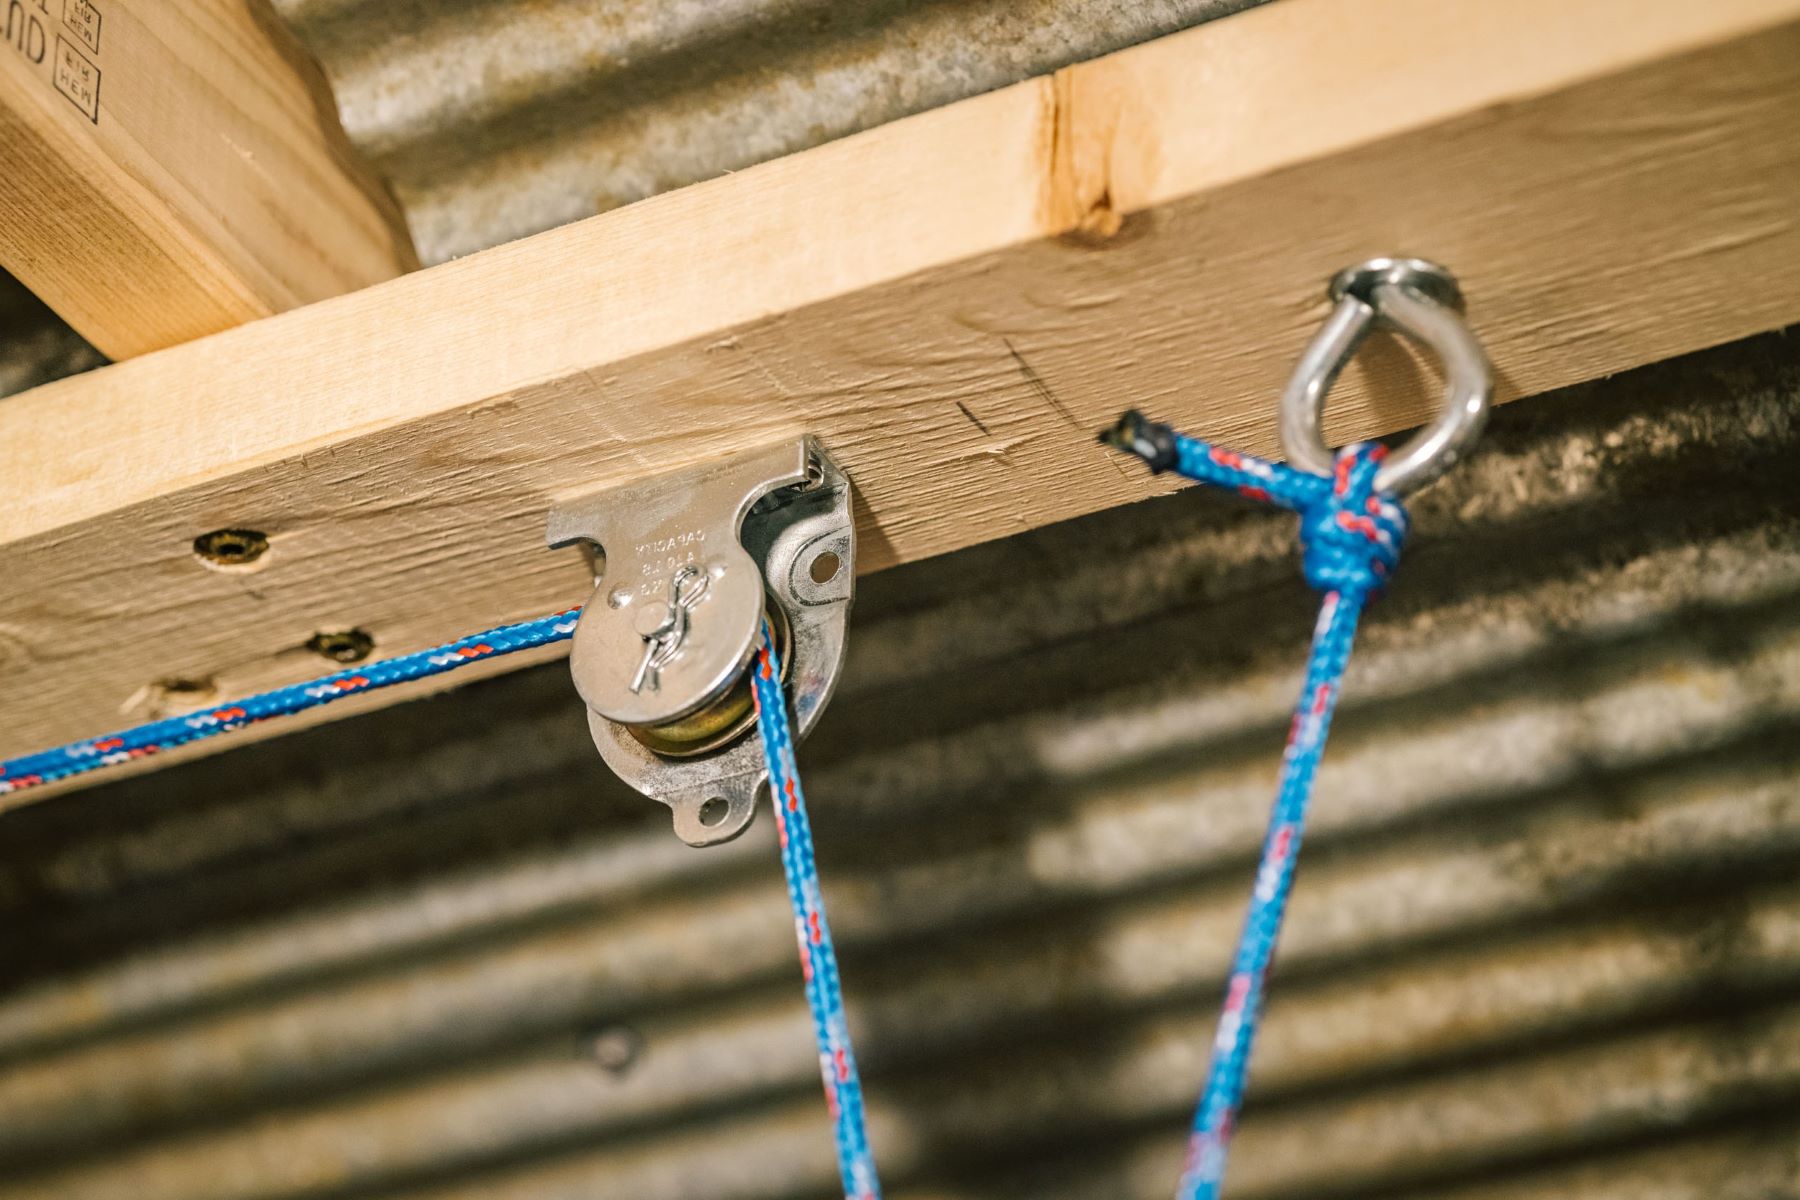
Attach Pulleys: Connect pulleys to the brackets. Ensure they move smoothly and are securely attached.
Thread Rope: Run the rope through the pulleys. Make sure it’s long enough to reach the ground and back up.
Test System: Lift a small, lightweight object first to test the pulley system. Check for any issues and make adjustments if needed.
Materials and Tools Needed for Your Pulley System
Pulleys: These are the wheels with grooves that the rope will run through. They reduce the effort needed to lift heavy objects.
Rope: Use a strong, durable rope that can handle the weight of the items you plan to lift. Nylon or polyester ropes are good choices.
Mounting Brackets: These secure the pulleys to the ceiling or wall. Make sure they are sturdy and can support the weight.
Eye Bolts: These are used to attach the rope to the objects you want to lift. They should be strong and securely fastened.
Drill: Needed for making holes in the ceiling or wall to install the mounting brackets and eye bolts.
Screws and Anchors: These will secure the mounting brackets and eye bolts. Use heavy-duty ones for added safety.
Measuring Tape: Helps ensure everything is aligned correctly and installed at the right height.
Wrench: Useful for tightening bolts and screws to ensure everything is secure.
Ladder: Needed to reach the ceiling or high walls where the pulleys will be installed.
Safety Goggles: Protect your eyes from dust and debris while drilling and installing.
Work Gloves: Protect your hands while handling tools and materials.
Skill Level and Time Required
Skill Level: Intermediate
Time Required: 3-4 hours
- Gather Materials: 30 minutes
- Measure and Mark: 20 minutes
- Install Anchors: 40 minutes
- Attach Pulleys: 30 minutes
- Thread Rope: 20 minutes
- Test System: 20 minutes
Step-by-Step Instructions for Building Your Pulley System
Gather Materials:
- Pulleys (2-4, depending on the system)
- Rope (strong, durable)
- Mounting brackets or hooks
- Screws and anchors
- Drill
- Measuring tape
- Pencil
Plan the Layout:
- Decide where to place the pulleys.
- Measure the distance between mounting points.
Install Mounting Brackets:
- Mark spots for brackets using a pencil.
- Drill holes for screws.
- Attach brackets securely with screws and anchors.
Attach Pulleys:
- Hook pulleys onto brackets.
- Ensure pulleys move freely.
Thread the Rope:
- Feed rope through pulleys.
- Leave enough length to reach desired lifting height.
Secure Rope Ends:
- Tie a strong knot at one end.
- Attach the other end to the object being lifted.
Test the System:
- Pull the rope to lift the object.
- Check for smooth operation and adjust if needed.
Make Adjustments:
- Ensure all components are tight.
- Adjust rope length if necessary.
Safety Check:
- Inspect for any weak points.
- Test with a heavier load to ensure stability.
Tips and Tricks for a Smooth Build
Measure your garage space carefully. Ensure you have enough room for the pulley system without obstructing other items. Use strong materials like steel or heavy-duty plastic for the pulleys and ropes. Anchor points should be secured into studs or ceiling joists to handle the weight.
Common mistakes include using weak materials that can break under pressure. Avoid installing pulleys too close together, which can cause tangling. Double-check all connections to ensure they are tight and secure.
Alternatives for materials include using nylon rope instead of steel cable for lighter loads. Carabiners can replace hooks for easier attachment and detachment. If ceiling space is limited, consider wall-mounted pulleys.
Cost Estimation for Your DIY Project
Pulleys: $10-$20 each, depending on size and quality. You’ll need at least two.
Rope: $15-$30 for a 50-foot length. Look for strong, durable rope.
Mounting brackets: $5-$10 each. You’ll need two to four, depending on your setup.
Screws and bolts: $5-$10 for a pack. Make sure they are heavy-duty.
Drill: $30-$50 if you don’t already have one. A basic model will do.
Measuring tape: $5-$10. Essential for accurate measurements.
Wrench: $10-$20. Needed for tightening bolts.
Safety gear: $10-$20. Gloves and safety glasses are a must.
Total cost: $90-$170, depending on the quality of materials and tools.
Budget-friendly alternatives:
- Pulleys: Use second-hand or repurposed pulleys from old equipment.
- Rope: Opt for a cheaper, yet still strong, synthetic rope.
- Mounting brackets: Use sturdy hooks or brackets you already have.
- Drill: Borrow one from a friend or neighbor.
- Safety gear: Use what you already own or buy from a dollar store.
Variations and Customizations for Your Pulley System
Materials: Instead of using metal pulleys, try plastic or nylon pulleys for a lighter, quieter system. For the rope, consider nylon, polyester, or even steel cable for added strength.
Colors: Paint the pulleys and brackets in bright colors like red, blue, or yellow to make them more visible. Use color-coded ropes to differentiate between different functions or loads.
Styles: Opt for a vintage look by using brass or bronze pulleys and fittings. For a modern touch, go with sleek, black or chrome finishes.
Mounting Options: Instead of mounting the system directly to the ceiling, consider using a wall-mounted track system. This allows for easier adjustments and repositioning.
Handles and Hooks: Customize the handles with foam grips for comfort. Use carabiners or quick-release hooks for easy attachment and detachment of items.
Safety Features: Add locking mechanisms to the pulleys to prevent accidental drops. Install safety nets or baskets to catch any falling items.
Automation: Integrate a motorized winch for effortless lifting. Use a remote control or smartphone app to operate the system from a distance.
Storage Solutions: Attach shelves or baskets to the pulley system for additional storage. Use adjustable hooks to accommodate different sizes and shapes of items.
Weatherproofing: If the garage is exposed to the elements, use weather-resistant materials like stainless steel or galvanized metal to prevent rust and corrosion.
Sustainability Tips for Your DIY Projects
Eco-friendly materials can make your DIY pulley system both functional and sustainable. Reclaimed wood can be used for the base and support structures. This reduces waste and gives old materials a new purpose.
Recycled metal parts, like brackets and hooks, can be sourced from old furniture or scrap yards. These parts are often just as strong as new ones but much cheaper and environmentally friendly.
Natural fiber ropes such as hemp or jute are biodegradable and strong enough for most garage tasks. Avoid synthetic ropes made from plastic, which can take hundreds of years to decompose.
For the pulleys themselves, consider using old bicycle gears or wheels. These can be repurposed to create a smooth, efficient pulley system.
When assembling, use non-toxic adhesives and finishes. Many conventional products contain harmful chemicals that can off-gas into your garage.
Finally, solar-powered lights can be installed to illuminate your pulley system. This reduces electricity consumption and makes your garage more eco-friendly.
Your DIY Pulley System Awaits
Building a DIY pulley system for your garage isn't just about saving space; it's about creating a more efficient and organized workspace. With some basic tools and a bit of effort, you can transform how you store bikes, ladders, and other bulky items. Remember to measure your space carefully, choose strong materials, and follow safety guidelines. Once installed, you'll wonder how you ever managed without it. This project not only adds functionality but also gives a sense of accomplishment. So, grab your tools, get started, and enjoy the benefits of a well-organized garage.
How does a pulley system work?
A pulley system uses wheels and a rope to lift or move heavy objects. When you pull the rope, the wheels turn, making it easier to lift stuff.
What materials do I need to build a garage pulley system?
You'll need pulleys, rope, hooks, screws, and a mounting bracket. Make sure the materials are strong enough to handle the weight you plan to lift.
How do I choose the right pulley?
Pick a pulley based on the weight you need to lift. Check the weight rating on the pulley package to ensure it can handle your load.
Where should I install the pulley system in my garage?
Install the pulley system on a sturdy ceiling beam or wall. Make sure it's in a spot where you have enough room to operate it safely.
How do I secure the pulley system?
Use heavy-duty screws and anchors to attach the mounting bracket to the ceiling or wall. Double-check that everything is tight and secure before using it.
Can I use any type of rope?
Use a strong, durable rope like nylon or polyester. Avoid ropes that can easily fray or break under pressure.
How do I maintain the pulley system?
Regularly check the pulleys and rope for wear and tear. Lubricate the wheels to keep them turning smoothly and replace any damaged parts immediately.