
Home>Home & Furniture>Garage & Basement>How to Build a DIY Garage Workbench
Garage & Basement
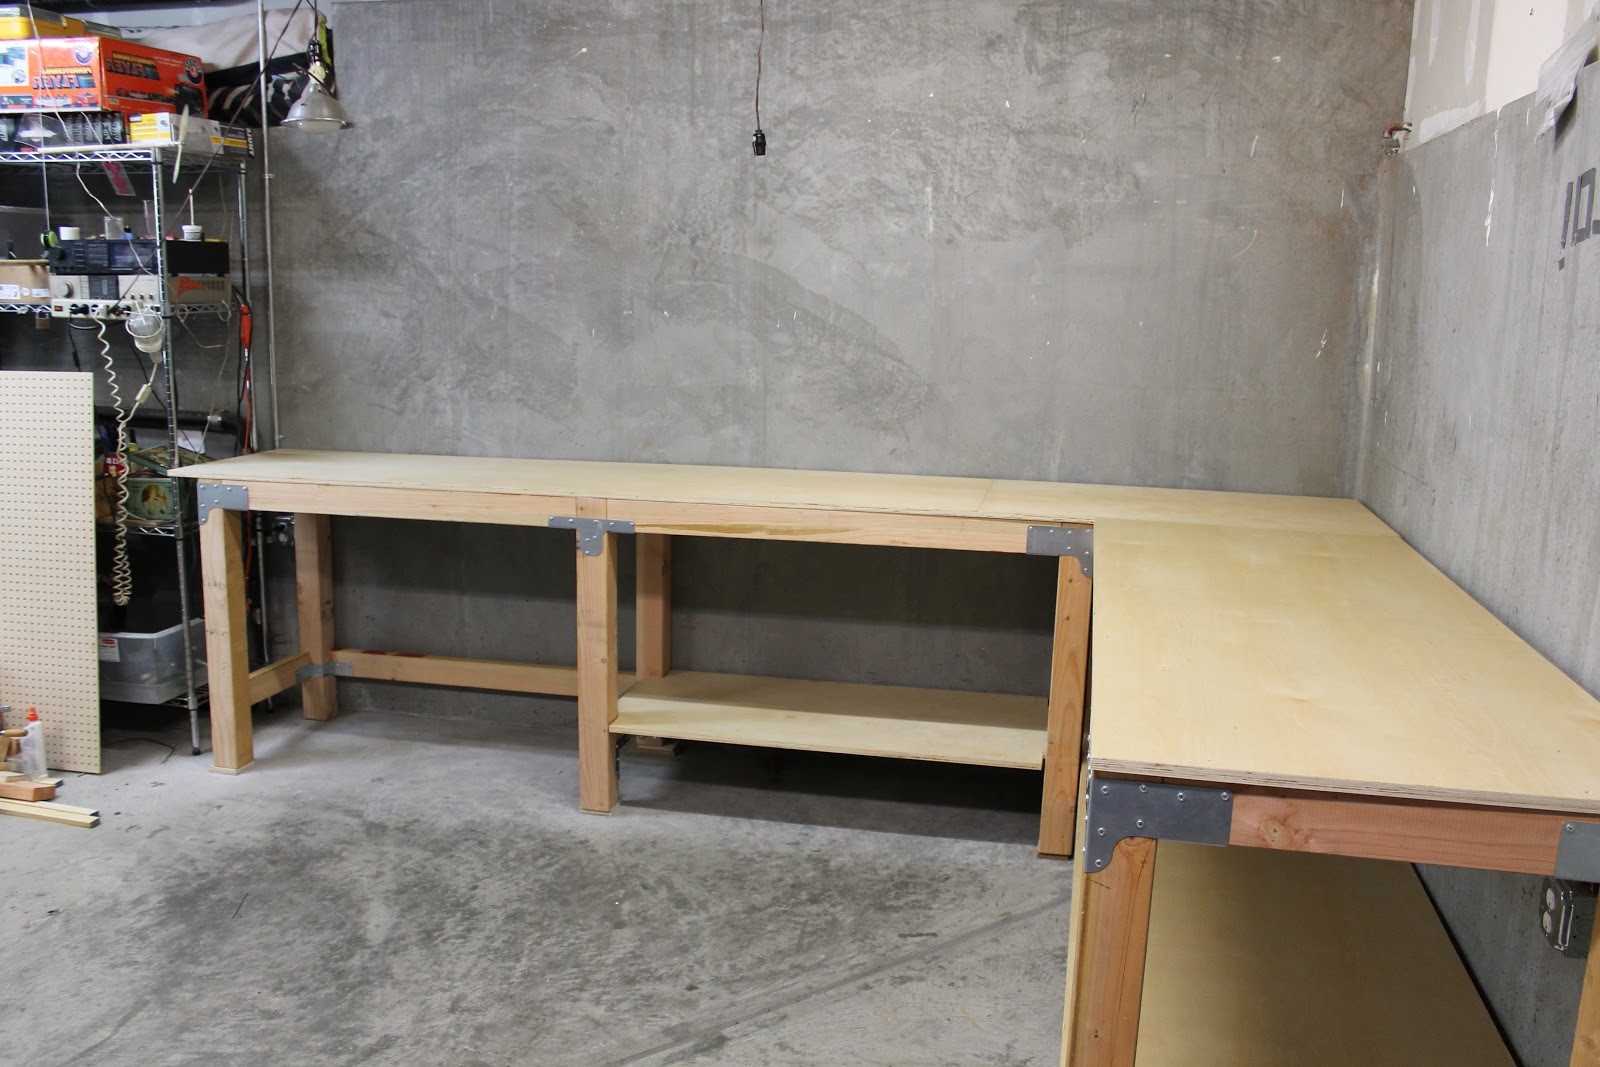
How to Build a DIY Garage Workbench
Published: September 30, 2024
Learn how to build a sturdy DIY garage workbench with our step-by-step guide. Perfect for any garage or basement, this project is ideal for beginners and seasoned DIYers alike.
(Many of the links in this article redirect to a specific reviewed product. Your purchase of these products through affiliate links helps to generate commission for Twigandthistle.com, at no extra cost. Learn more)
Building a DIY garage workbench can seem like a big project, but with a few tools and some basic materials, anyone can do it. Creating your own workbench lets you customize it to fit your needs, whether you need more storage, a larger workspace, or a specific height. This project can save money and give a sense of accomplishment. Plus, having a sturdy workbench in your garage makes all future projects easier. Let's get started on making a practical, durable workbench that will serve you for years.
Getting Ready for Your Project
Measure Your Space: Use a tape measure to determine the dimensions of your garage. Ensure the workbench will fit comfortably without obstructing movement.
Gather Materials: Collect all necessary materials like wood, screws, nails, and brackets. Check your tools, including a saw, drill, hammer, and level.
Safety Gear: Wear safety goggles, gloves, and ear protection. Keep a first aid kit nearby in case of minor injuries.
Clear the Area: Remove any clutter from the workspace. Ensure the floor is clean and free of debris to prevent accidents.
Plan Your Design: Sketch a simple blueprint of your workbench. Decide on the height, width, and any additional features like shelves or drawers.
Cut the Wood: Measure and mark the wood according to your design. Use a saw to cut the pieces accurately.
Pre-Drill Holes: Pre-drill holes for screws to prevent the wood from splitting. This makes assembly easier and more precise.
Assemble the Frame: Start by building the frame of the workbench. Use screws and brackets to secure the joints tightly.
Attach the Top: Secure the workbench top to the frame. Ensure it is level and sturdy.
Add Finishing Touches: Sand any rough edges and apply a protective finish if desired. This will extend the life of your workbench.
Organize Tools: Arrange your tools and materials on the new workbench. Keep frequently used items within easy reach.
Test Stability: Give the workbench a gentle shake to ensure it is stable. Make any necessary adjustments to reinforce weak spots.
Materials and Tools Needed
- Plywood: Used for the workbench top and shelves. Choose a sturdy, high-quality type.
- 2x4 Lumber: Forms the frame and legs of the workbench. Provides strong support.
- Wood Screws: Holds the frame and top together. Ensure they are long enough to secure the pieces.
- Wood Glue: Adds extra strength to joints. Helps keep everything in place.
- Measuring Tape: Ensures accurate measurements for cutting wood.
- Circular Saw: Cuts the plywood and lumber to the required sizes.
- Drill: Makes holes for screws and drives them in. A cordless one is handy.
- Screwdriver Bits: Attach to the drill for driving screws.
- Clamps: Hold pieces together while the glue dries.
- Sandpaper: Smooths rough edges on the wood. Makes the workbench safer to use.
- Safety Glasses: Protects your eyes while cutting and drilling.
- Work Gloves: Keeps your hands safe from splinters and sharp edges.
- Pencil: Marks measurements on the wood.
- Speed Square: Ensures straight cuts and accurate angles.
- Level: Checks that the workbench is even and stable.
- Paint or Sealant: Protects the wood from moisture and wear.
Skill Level and Time Required
Skill Level: Intermediate
Time Required: 4-6 hours
- Gather Materials: 30 minutes
- Cut Wood: 1 hour
- Assemble Frame: 1.5 hours
- Attach Work Surface: 1 hour
- Add Shelves/Storage: 1 hour
- Finishing Touches: 30 minutes
Step-by-Step Instructions
Gather Materials and Tools
- Plywood (4x8 feet)
- 2x4 lumber (8 pieces, 8 feet each)
- Wood screws (3-inch)
- Wood glue
- Measuring tape
- Circular saw
- Drill
- Screwdriver
- Sandpaper
Cut the Wood
- Cut two pieces of 2x4 lumber to 6 feet for the length of the workbench.
- Cut four pieces of 2x4 lumber to 3 feet for the width and legs.
- Cut one piece of plywood to 6x3 feet for the top surface.
Assemble the Frame
- Lay out the two 6-foot pieces and two 3-foot pieces to form a rectangle.
- Use wood screws and wood glue to secure the corners.
- Attach the remaining two 3-foot pieces in the middle for extra support.
Attach the Legs
- Stand the frame upright.
- Attach each 3-foot leg to the inside corners of the frame using wood screws and wood glue.
- Ensure the legs are flush with the top of the frame.
Secure the Top Surface
- Place the plywood on top of the frame.
- Use wood screws to secure the plywood to the frame, spacing the screws every 6 inches along the edges.
Sand the Edges
- Use sandpaper to smooth any rough edges on the plywood and frame.
- Ensure the surface is even and smooth.
Optional: Add a Bottom Shelf
- Measure and cut another piece of plywood to fit the bottom of the frame.
- Attach using wood screws and wood glue for additional storage space.
Finish
- Check all screws are tight.
- Ensure the workbench is stable and level.
Your DIY garage workbench is now ready for use!
Tips and Tricks
Measure Twice, Cut Once: Always double-check measurements before cutting wood. This saves time and materials.
Use a Level: Ensure your workbench is level. An uneven bench can cause problems with projects.
Pre-Drill Holes: Pre-drilling prevents wood from splitting. It also makes screwing easier.
Sand Edges: Sanding edges smooths out rough spots. This prevents splinters and gives a polished look.
Use Clamps: Clamps hold pieces together while you work. This keeps everything steady and aligned.
Choose the Right Wood: Plywood or MDF are good choices. They are sturdy and affordable.
Add Storage: Incorporate shelves or drawers. This keeps tools organized and within reach.
Reinforce Joints: Use corner braces or metal brackets. This adds strength to your workbench.
Common Mistakes to Avoid:
Skipping the Plan: Not having a clear plan leads to mistakes. Draw a simple sketch with measurements.
Using Weak Materials: Avoid flimsy wood. It won't hold up under heavy use.
Ignoring Safety: Always wear safety gear. Goggles, gloves, and ear protection are essential.
Alternatives for Materials or Methods:
Reclaimed Wood: Use old pallets or scrap wood. This is eco-friendly and often free.
Metal Frame: Consider a metal frame for extra durability. It can support more weight.
Adjustable Height: Build an adjustable-height workbench. This makes it versatile for different projects.
Cost Estimation
Materials:
- Wood: 2x4 lumber for the frame and legs, plywood for the top. Estimated cost: $50-$100.
- Screws: Wood screws for assembly. Estimated cost: $10.
- Wood glue: For added stability. Estimated cost: $5.
- Sandpaper: For smoothing edges. Estimated cost: $5.
- Paint or sealant: To protect the wood. Estimated cost: $10-$20.
Tools:
- Saw: Circular or hand saw for cutting wood. Estimated cost: $50-$100 (if not already owned).
- Drill: For screws. Estimated cost: $30-$60 (if not already owned).
- Measuring tape: For accurate cuts. Estimated cost: $5.
- Clamps: To hold pieces together while assembling. Estimated cost: $10-$20.
Total Estimated Cost: $175-$320.
Budget-Friendly Alternatives:
- Reclaimed wood: Use old pallets or scrap wood. Cost: Free or minimal.
- Hand tools: Borrow a saw and drill from a friend or neighbor. Cost: Free.
- Basic screws and nails: Use what you have at home. Cost: Free.
- Leftover paint: Use any leftover paint or sealant. Cost: Free.
Total Estimated Cost with Alternatives: $30-$50.
Variations and Customizations
Materials: Instead of using plywood for the top, consider hardwood like oak or maple for a more durable surface. Reclaimed wood can give a rustic look. For the frame, metal pipes or steel can replace wood for a more industrial style.
Colors: Paint the workbench in bright colors like red or blue to make it stand out. Use stain to highlight the natural grain of the wood. Chalkboard paint on the top can turn it into a writable surface for notes.
Styles: Add casters to make the workbench mobile. Install pegboards on the sides for tool storage. Include drawers or shelves underneath for extra storage. Attach a vice or clamps for holding materials in place.
Finishes: Apply a polyurethane finish for a glossy, protective layer. Use epoxy resin for a smooth, glass-like surface. Linseed oil can give a natural, matte finish while protecting the wood.
Accessories: Add power strips or USB ports for easy access to electricity. Install LED lights underneath for better visibility. Attach a magnetic strip for holding metal tools.
Sustainability Tips
Reclaimed wood is a great choice for building a garage workbench. Look for old pallets, barn wood, or leftover lumber from other projects. These materials add character and reduce waste.
Eco-friendly plywood made from sustainably sourced wood is another option. Check for certifications like FSC (Forest Stewardship Council) to ensure responsible sourcing.
Use non-toxic finishes like water-based stains or natural oils to protect the wood. These finishes are safer for you and the environment.
For the frame, consider recycled metal or repurpose old metal parts. This can provide strength while reducing the need for new materials.
Upcycle old furniture parts like table legs or shelves. These can be incorporated into your workbench design, giving new life to items that might otherwise be discarded.
Solar-powered tools can be used during construction to minimize energy consumption. If you have access to solar panels, this is a great way to make your project even greener.
Natural adhesives like plant-based glues are a good alternative to traditional adhesives, which often contain harmful chemicals.
Finally, use LED lighting for your workspace. LEDs are energy-efficient and have a longer lifespan compared to traditional bulbs.
Your New Workspace Awaits
Building a DIY garage workbench isn't just about having a place to work; it's about creating a space that fits your needs. You've got the tools, the materials, and the know-how. Now, it's time to put it all together. Measure twice, cut once, and don't be afraid to make adjustments as you go. This project will save you money, give you a sense of accomplishment, and provide a sturdy spot for all your future projects. Remember, the best part of DIY is making it your own. So, add those extra shelves, hooks, or whatever else you need. Your new workbench will be the heart of your garage, where ideas come to life. Happy building!
What materials do I need to build a DIY garage workbench?
You’ll need plywood, 2x4 lumber, screws, wood glue, and brackets. A saw, drill, measuring tape, and sander will also come in handy.
How much time will it take to build?
Depending on your skill level, it might take a weekend. Plan for 8-10 hours to cut, assemble, and finish the workbench.
Do I need any special tools?
Basic tools like a saw, drill, sander, and measuring tape should be enough. If you have a miter saw or circular saw, it’ll make the job easier.
How much will it cost?
Costs can vary, but expect to spend around $100-$200 on materials. If you already have some tools and wood, it could be cheaper.
Can I customize the size?
Absolutely! Measure your garage space and adjust the dimensions of the workbench to fit your needs. Just make sure it’s sturdy.
What kind of wood should I use?
Plywood for the top and 2x4 lumber for the frame are common choices. They’re durable and relatively inexpensive.
How do I make it sturdy?
Use wood glue and screws to secure joints. Adding brackets at the corners can provide extra stability. Make sure the legs are even to prevent wobbling.