
Home>Home & Furniture>Garage & Basement>DIY Garage Heater: How to Build Your Own
Garage & Basement
DIY Garage Heater: How to Build Your Own
Published: September 28, 2024
Learn how to build your own DIY garage heater with our step-by-step guide. Keep your garage warm and cozy this winter with affordable and efficient heating solutions.
(Many of the links in this article redirect to a specific reviewed product. Your purchase of these products through affiliate links helps to generate commission for Twigandthistle.com, at no extra cost. Learn more)
Building your own garage heater can save money and keep your workspace warm during cold months. With a few basic tools and materials you might already have, you can create a simple, effective heater. This project is beginner-friendly and doesn't require advanced skills. Whether you're a seasoned DIY enthusiast or just looking for a new project, making your heater is a rewarding experience. Follow along to learn the steps, gather materials, and transform your chilly garage into a cozy haven. Let's get started on this practical and fun DIY endeavor!
Getting Ready for Your Project
Gather Materials: Collect all necessary tools and materials like a heater kit, screws, brackets, and a power drill. Make sure everything is within reach.
Safety Gear: Wear safety goggles, gloves, and a dust mask. Safety first!
Clear the Workspace: Remove any clutter from the garage. Ensure there's enough room to move around freely.
Check Ventilation: Ensure the garage has proper ventilation. Open windows or doors to allow fresh air to circulate.
Turn Off Power: If working with electrical components, turn off the power at the breaker box to avoid any accidents.
Read Instructions: Go through the heater kit's manual. Understand each step before starting.
Mark Installation Spots: Use a pencil to mark where the heater and brackets will be installed. Double-check measurements.
Pre-Drill Holes: Pre-drill holes for screws to make installation smoother and prevent wood from splitting.
Test Heater: Before final installation, plug in the heater to ensure it works properly.
Have a Fire Extinguisher: Keep a fire extinguisher nearby just in case of emergencies.
Gathering Materials and Tools
- Electric Heater Element: Provides the heat source. Choose one with the right wattage for your garage size.
- Thermostat: Controls the temperature. Ensures the heater turns on and off at set temperatures.
- Insulated Wire: Connects the heater element to the power source. Prevents electrical hazards.
- Wire Nuts: Secures wire connections. Keeps them safe and insulated.
- Metal Housing: Encases the heater element. Protects from accidental contact.
- Mounting Brackets: Holds the heater in place. Ensures it stays securely attached to the wall or ceiling.
- Screws and Anchors: Fastens the mounting brackets. Keeps the heater stable.
- Drill: Makes holes for screws and anchors. Essential for mounting the heater.
- Screwdriver: Tightens screws. Helps secure all parts together.
- Wire Strippers: Removes insulation from wires. Prepares them for connections.
- Voltage Tester: Checks if wires are live. Ensures safety before working on electrical parts.
- Safety Glasses: Protects eyes from debris. Important when drilling or handling wires.
- Work Gloves: Shields hands from sharp edges. Provides grip and protection.
These materials and tools will help you build a safe, efficient garage heater.
Skill Level and Time Commitment
Skill Level: Intermediate
Time Required: Approximately 4-6 hours
Steps:
- Gather Materials: 30 minutes
- Prepare the Space: 1 hour
- Assemble the Heater: 2-3 hours
- Install and Test: 1-2 hours
Building Your Garage Heater: Step-by-Step
Gather Materials
- Metal container (like an old paint can)
- Ceramic flower pot
- Tea light candles
- Metal stand or bricks
- Aluminum foil
- Drill with a metal bit
- Sandpaper
Prepare the Metal Container
- Clean the container thoroughly.
- Use sandpaper to smooth any rough edges.
Drill Ventilation Holes
- Drill several small holes around the top edge of the container for ventilation.
- Ensure holes are evenly spaced.
Line the Container with Aluminum Foil
- Cut a piece of aluminum foil to fit inside the container.
- Press the foil against the sides and bottom to cover the interior.
Set Up the Metal Stand or Bricks
- Place the metal stand or arrange bricks in the garage where you want the heater.
- Ensure the stand or bricks are stable.
Position the Ceramic Flower Pot
- Place the ceramic flower pot upside down on the stand or bricks.
- Make sure it is centered and stable.
Place Tea Light Candles Inside the Container
- Arrange several tea light candles inside the metal container.
- Light the candles carefully.
Cover with the Metal Container
- Place the metal container over the lit candles.
- Ensure the ventilation holes are not blocked.
Monitor the Heater
- Check the heater periodically to ensure it is functioning properly.
- Never leave it unattended while in use.
Extinguish Candles Safely
- When done, carefully remove the metal container.
- Extinguish the candles using a snuffer or by blowing them out gently.
Helpful Tips and Tricks
Choose the Right Heater: Select a heater suitable for your garage size. Electric heaters work well for small spaces, while propane or natural gas heaters are better for larger areas.
Insulate Your Garage: Proper insulation keeps heat in and cold out. Use foam boards or fiberglass insulation on walls and ceilings.
Seal Gaps and Cracks: Check for gaps around windows, doors, and the garage door. Use weather stripping or caulk to seal them.
Install a Thermostat: A thermostat helps maintain a consistent temperature. Choose one compatible with your heater type.
Safety First: Ensure proper ventilation, especially with gas heaters. Install carbon monoxide detectors to prevent poisoning.
Use Reflective Insulation: Place reflective insulation behind the heater to direct heat into the garage, improving efficiency.
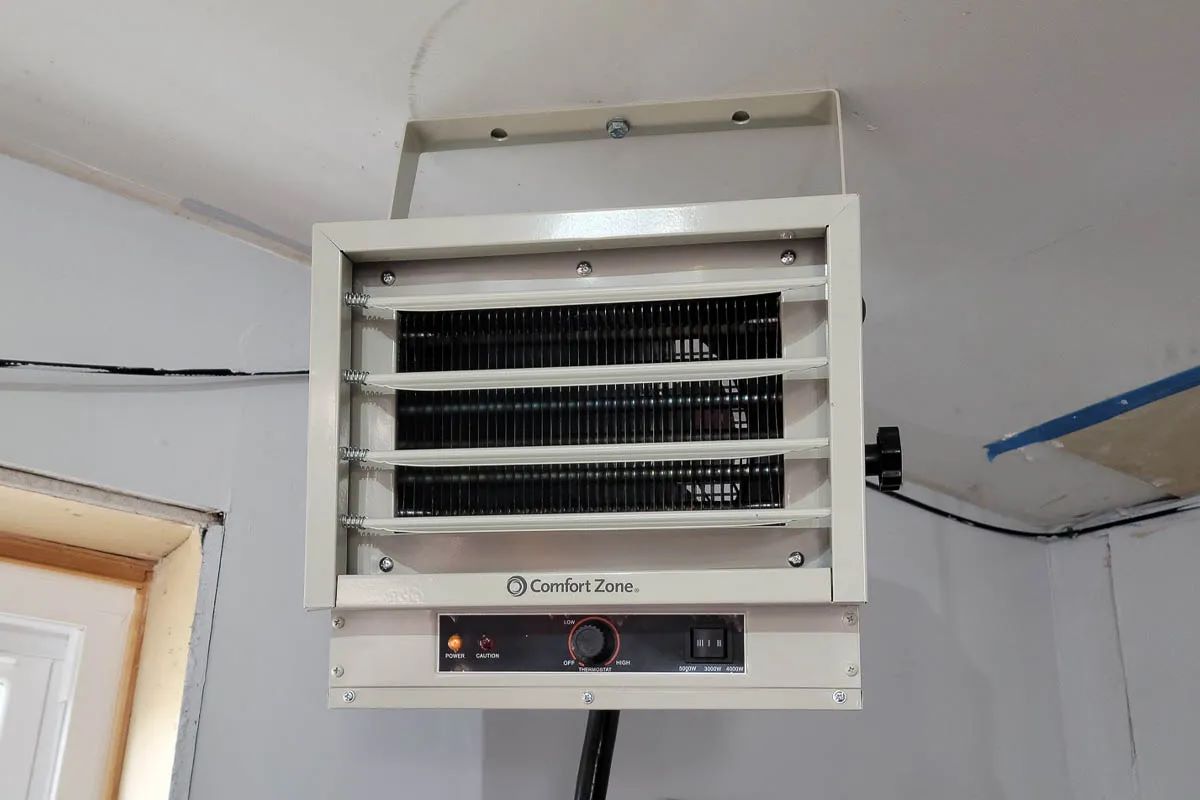
Mounting the Heater: Securely mount the heater on a wall or ceiling, following the manufacturer's instructions. Keep it away from flammable materials.
Common Mistakes to Avoid:
- Ignoring Ventilation: Lack of ventilation can lead to dangerous gas buildup.
- Overloading Circuits: Ensure your electrical system can handle the heater's power requirements.
- Improper Mounting: Incorrect mounting can cause the heater to fall or operate inefficiently.
Alternative Materials or Methods:
- Electric Space Heaters: Portable and easy to use, but less efficient for large garages.
- Radiant Floor Heating: More expensive but provides even heat distribution.
- Wood Stoves: Effective for heating but require proper ventilation and regular maintenance.
Estimating the Cost
Materials:
- Electric Heater Element: $20-$50
- Thermostat: $15-$30
- Insulated Wire: $10-$20
- Metal Housing: $20-$40
- Mounting Brackets: $5-$10
- Heat-Resistant Paint: $10-$15
- Screws and Nuts: $5-$10
Tools:
- Drill: $30-$60 (or borrow)
- Screwdriver Set: $10-$20
- Wire Strippers: $10-$15
- Multimeter: $15-$30
- Safety Gear (Gloves, Goggles): $10-$20
Total Cost: $160-$350
Budget-Friendly Alternatives:
- Reuse Old Heater Element: Free
- Find a Used Thermostat: $5-$10
- Scrap Metal for Housing: Free or $5
- Borrow Tools from Friends: Free
- Use Leftover Paint: Free
Total with Alternatives: $50-$100
Different Ways to Customize
Alternative Materials: Instead of using a metal drum, try a ceramic pot or fire bricks for the heater body. These materials can retain heat longer. For insulation, consider rock wool or ceramic fiber instead of fiberglass.
Colors: Paint the heater with high-temperature spray paint available in various colors like black, silver, or even red. This not only adds a personal touch but also protects the heater from rust.
Styles: For a rustic look, use reclaimed wood for the heater's exterior frame. For a modern style, opt for a sleek metal finish. You can also add decorative grilles or vent covers to enhance the appearance.
Fuel Options: Instead of traditional wood, consider using pellets or charcoal. These fuels can be more efficient and easier to store.
Safety Features: Add a thermocouple to monitor temperature and prevent overheating. Install a carbon monoxide detector nearby for added safety.
Portability: Attach wheels to the base of the heater for easy movement around the garage. Use foldable handles for convenient carrying.
Efficiency: Incorporate a heat exchanger to maximize heat output. Use a fan to circulate warm air more effectively throughout the garage.
Eco-Friendly Options: Use bio-bricks made from compressed sawdust as a sustainable fuel source. Install solar panels to power any electric components, reducing the carbon footprint.
Customization: Add a thermostat to control the temperature. Install LED lights around the heater for better visibility and a modern touch.
Eco-Friendly Ideas
Reclaimed Wood: Use old pallets or scrap wood for the heater's frame. Sand and treat the wood to ensure safety.
Insulation: Opt for recycled denim insulation instead of traditional fiberglass. It's safer to handle and more eco-friendly.
Solar Power: Consider integrating solar panels to power the heater. This reduces reliance on non-renewable energy sources.
Heat Retention: Use thermal curtains made from recycled materials to keep the heat in. These can be hung around the garage to create a warm zone.
Eco-Friendly Paint: If painting any parts, choose low-VOC or zero-VOC paints. These emit fewer harmful chemicals.
Recycled Metal: For any metal components, look for recycled metal options. This reduces the need for new raw materials.
Natural Gas Alternatives: If using a gas heater, consider biogas as a renewable alternative to natural gas. Biogas can be produced from organic waste.
DIY Heat Exchanger: Build a heat exchanger using copper pipes from old plumbing. Copper is an excellent conductor and can be repurposed effectively.
Upcycled Fans: Use old computer fans or other small fans to help circulate the warm air. These can often be found at thrift stores or recycling centers.
Thermostat Control: Install a programmable thermostat to manage the heater efficiently. This helps reduce energy consumption by only heating when necessary.
Your Cozy Garage Awaits
Building your own DIY garage heater isn't just about saving money. It's about creating a space where you can work comfortably year-round. With some basic materials and a bit of elbow grease, you can craft a heater that suits your needs perfectly. Remember to prioritize safety by following all guidelines and double-checking connections. Once your heater's up and running, you'll wonder how you ever managed without it. Plus, there's a certain satisfaction in knowing you built it yourself. So, gather your tools, follow the steps, and enjoy a warm, cozy garage. Happy building!
How much does it cost to build a DIY garage heater?
Building a DIY garage heater can cost anywhere from $50 to $200, depending on the materials you use and the type of heater you want to build. Using recycled or repurposed items can help keep costs down.
What materials do I need to build a garage heater?
You'll need metal pipes, a propane tank, heat-resistant paint, bolts, nuts, and a fan. Some designs might also require ceramic tiles or fire bricks for insulation.
Is it safe to build my own garage heater?
Yes, it can be safe if you follow proper safety guidelines. Make sure to use heat-resistant materials and ensure good ventilation to avoid carbon monoxide buildup. Always have a fire extinguisher nearby.
How long does it take to build a DIY garage heater?
Building a garage heater can take anywhere from a few hours to a weekend, depending on your experience and the complexity of the design. Simple heaters might be quicker, while more advanced ones could take longer.
Can I use a DIY garage heater in any type of garage?
Most DIY garage heaters can be used in any type of garage, but it's crucial to ensure proper ventilation and insulation. Garages with poor ventilation might not be suitable for certain types of heaters.
What type of fuel can I use for my DIY garage heater?
Common fuels include propane, kerosene, and wood. The type of fuel you choose will depend on the design of your heater and your personal preference. Make sure to follow safety guidelines for the specific fuel you use.
Do I need any special tools to build a garage heater?
Basic tools like a drill, wrench, screwdriver, and saw are usually sufficient. Some designs might require more specialized tools like a welding machine or pipe cutter.