
Home>Home & Furniture>Garage & Basement>DIY Basement Finishing with Bathroom with Cost Breakdown
Garage & Basement
DIY Basement Finishing with Bathroom with Cost Breakdown
Published: August 28, 2024
Transform your basement with a DIY finishing project, including a bathroom. Discover step-by-step guidance and a detailed cost breakdown to help you budget effectively.
(Many of the links in this article redirect to a specific reviewed product. Your purchase of these products through affiliate links helps to generate commission for Twigandthistle.com, at no extra cost. Learn more)
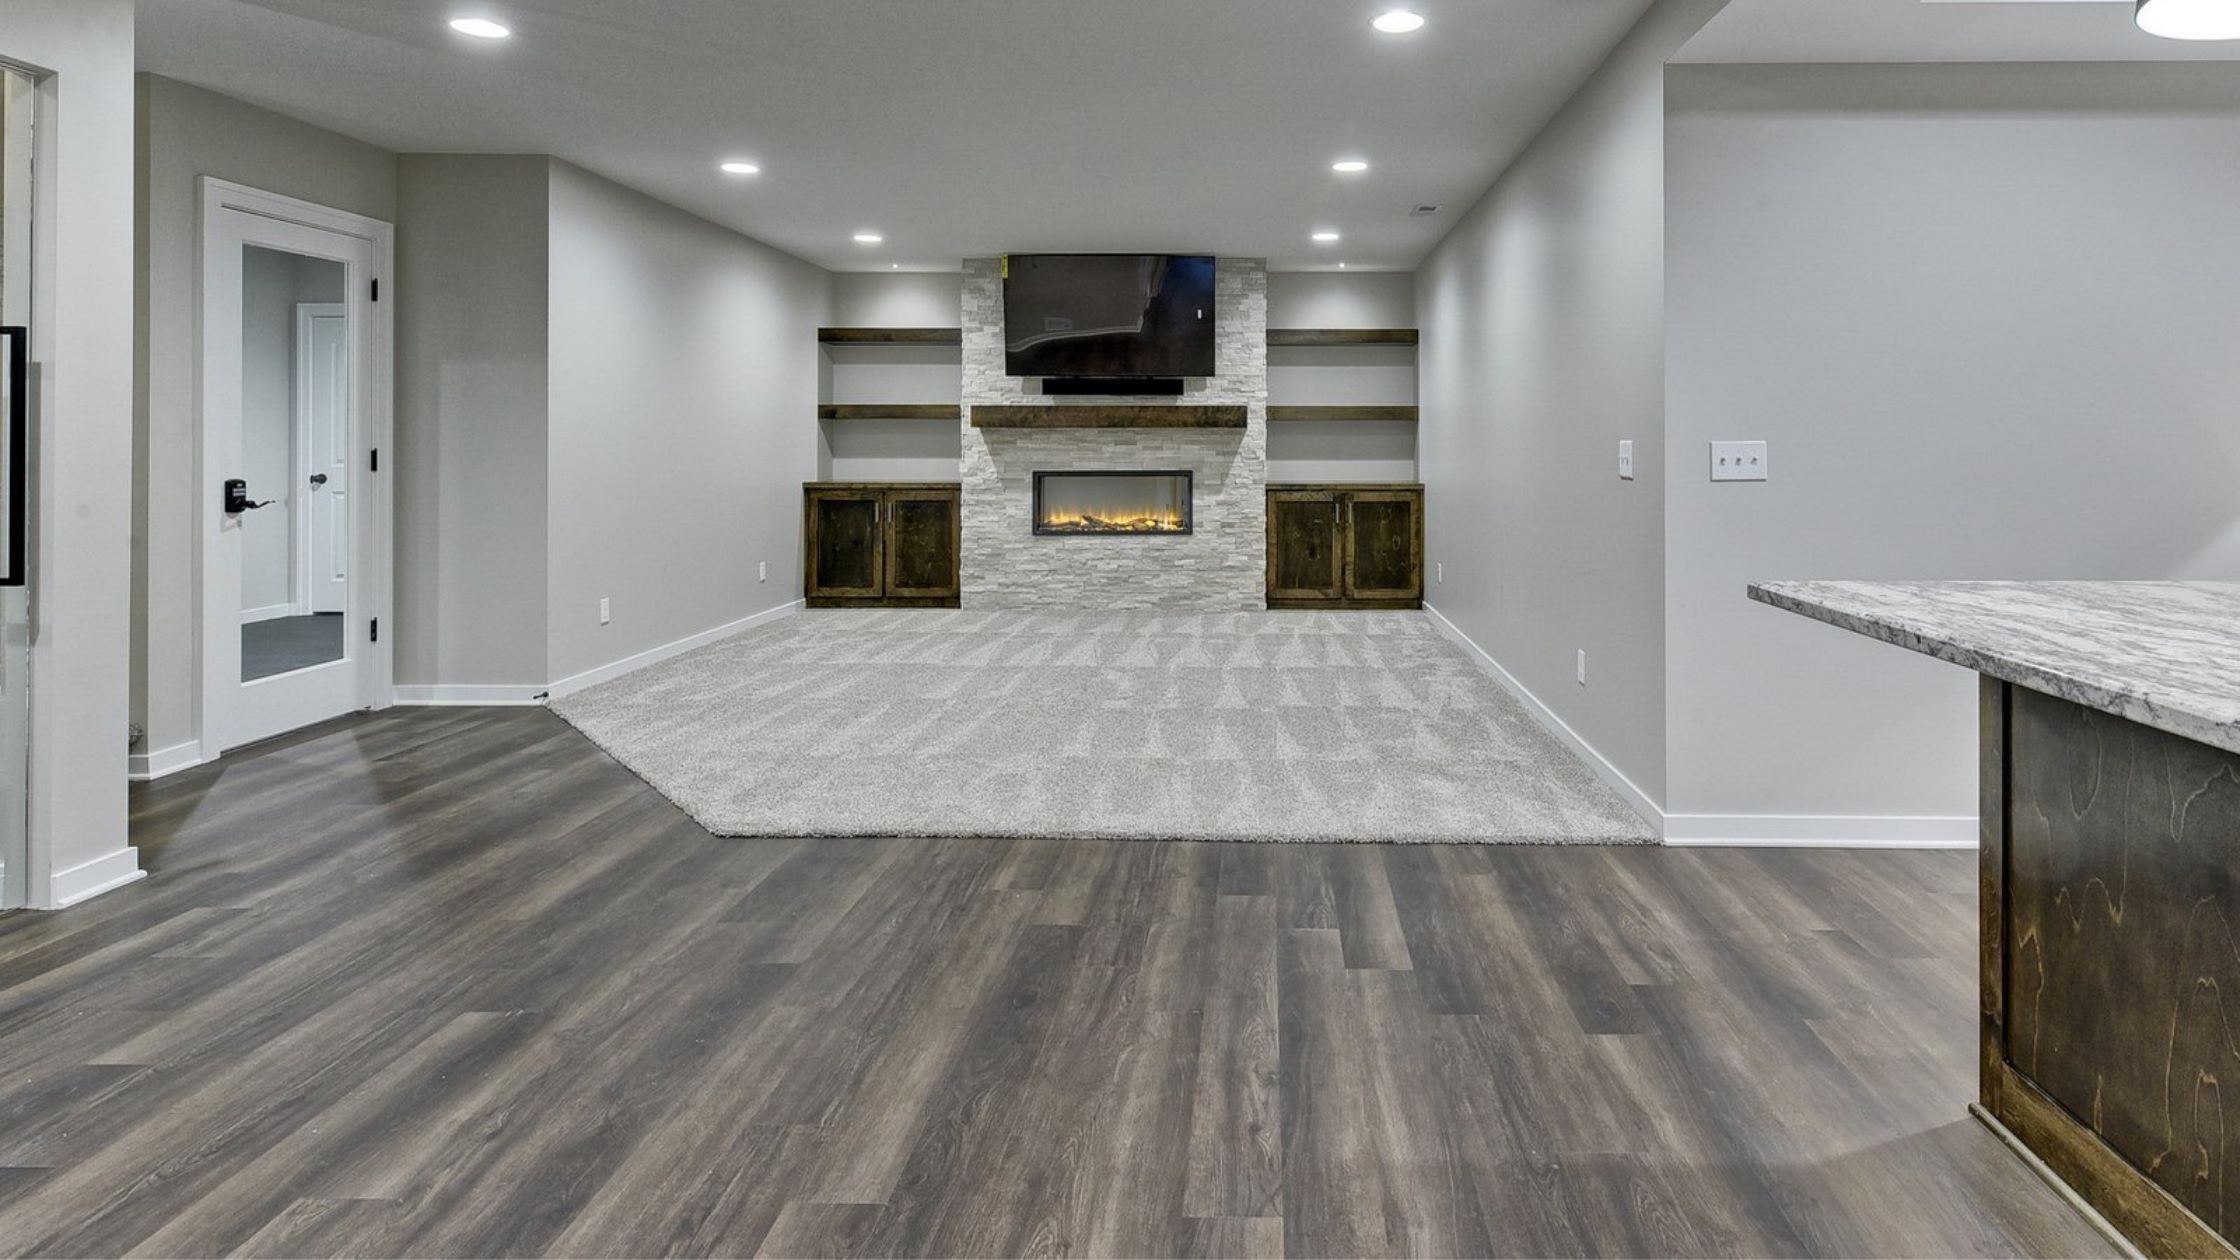
Transforming a basement into a comfortable living space, complete with a bathroom, can be a rewarding DIY project. This venture not only adds value to your home but also provides extra usable space for family activities or guests. Tackling this project requires careful planning, budgeting, and a bit of elbow grease. Understanding the costs involved, from materials to labor, helps keep the project on track and within budget. Whether you're adding a guest suite, a playroom, or simply extra storage, finishing a basement yourself is doable and satisfying with the right guidance and resources. Let's break it down step by step.
Getting Ready for Your Basement Project
Plan Your Layout: Sketch a detailed floor plan. Include the bathroom, walls, electrical outlets, plumbing, and any other features. This helps estimate costs and materials.
Check Local Codes: Research building codes and permits required in your area. This ensures your project meets legal standards.
Budgeting: List all materials and tools needed. Include drywall, insulation, flooring, fixtures, and plumbing supplies. Allocate funds for unexpected expenses.
Gather Materials: Purchase all necessary materials. Ensure you have enough to complete the project without frequent trips to the store.
Set Up Workspace: Clear the basement of clutter. Create a designated area for tools and materials. Ensure good lighting and ventilation.
Safety Gear: Wear protective gear like gloves, safety glasses, and a dust mask. Keep a first aid kit nearby.
Inspect for Moisture: Check for leaks or dampness. Fix any issues before starting to prevent future problems.
Electrical and Plumbing Prep: Turn off power and water supply. Mark where new outlets, switches, and plumbing fixtures will go.
Framing Walls: Measure and cut wood for framing. Assemble walls according to your layout. Secure them to the floor and ceiling.
Insulation and Drywall: Install insulation between studs. Attach drywall sheets to the framed walls. Tape and mud seams for a smooth finish.
Flooring: Choose moisture-resistant flooring. Install according to manufacturer instructions.
Bathroom Fixtures: Install the toilet, sink, and shower. Connect plumbing and ensure no leaks.
Electrical Work: Install outlets, switches, and lighting fixtures. Ensure all wiring is secure and up to code.
Final Touches: Paint walls, add trim, and install any additional features like shelves or cabinets.
Clean Up: Dispose of debris properly. Clean tools and workspace. Enjoy your newly finished basement!
Essential Materials and Tools
- Drywall: Sheets of gypsum board used to create walls and ceilings. Cost: $10-$15 per sheet.
- Insulation: Material like fiberglass or foam to keep the basement warm. Cost: $0.50-$1 per square foot.
- Framing Lumber: Wood studs to build the framework for walls. Cost: $2-$3 per 2x4 stud.
- Drywall Screws: Fasteners to attach drywall to the studs. Cost: $5-$10 per box.
- Joint Compound: Paste to fill seams between drywall sheets. Cost: $5-$10 per bucket.
- Drywall Tape: Paper or mesh tape to cover seams. Cost: $2-$5 per roll.
- Paint: Primer and paint for finishing walls. Cost: $20-$50 per gallon.
- Flooring: Options like carpet, tile, or laminate. Cost: $1-$5 per square foot.
- Lighting Fixtures: Ceiling lights or recessed lighting. Cost: $20-$100 per fixture.
- Electrical Wiring: Cables and outlets for electricity. Cost: $50-$100 for basic wiring.
- Plumbing Supplies: Pipes, fittings, and fixtures for the bathroom. Cost: $100-$500 depending on complexity.
- Toilet: Essential bathroom fixture. Cost: $100-$300.
- Sink and Vanity: Bathroom sink with a cabinet. Cost: $100-$400.
- Shower or Bathtub: Depending on preference. Cost: $200-$800.
- Ventilation Fan: To remove moisture from the bathroom. Cost: $50-$150.
- Tile and Grout: For bathroom walls and floors. Cost: $1-$5 per square foot.
- Caulk: Sealant for edges and corners. Cost: $5-$10 per tube.
- Tape Measure: For accurate measurements. Cost: $10-$20.
- Level: Ensures surfaces are even. Cost: $10-$30.
- Utility Knife: For cutting drywall and other materials. Cost: $5-$15.
- Hammer: Basic tool for nailing. Cost: $10-$20.
- Screwdriver Set: For various screws. Cost: $10-$30.
- Power Drill: Speeds up drilling and screwing. Cost: $50-$150.
- Saw: Hand saw or power saw for cutting wood. Cost: $20-$100.
- Safety Gear: Gloves, goggles, and masks for protection. Cost: $20-$50.
These materials and tools will help you finish your basement and add a bathroom efficiently.
How Much Skill and Time Do You Need?
Skill Level: Advanced
Time Required: 4-6 weeks
- Framing Walls: 1-2 days
- Electrical Work: 2-3 days
- Plumbing: 3-4 days
- Insulation: 1 day
- Drywall Installation: 3-5 days
- Flooring: 2-3 days
- Painting: 2-3 days
- Bathroom Fixtures Installation: 2-3 days
- Finishing Touches: 1-2 days
Detailed Steps to Finish Your Basement
Plan and Design
- Sketch the layout.
- Decide on the bathroom location.
- Measure the space.
Obtain Permits
- Check local building codes.
- Apply for necessary permits.
Prepare the Basement
- Clear out the basement.
- Inspect for moisture issues.
- Fix any leaks or cracks.
Frame the Walls
- Use 2x4 lumber for framing.
- Install studs 16 inches apart.
- Frame the bathroom separately.
Install Plumbing
- Lay out plumbing lines.
- Connect to the main sewer line.
- Install water supply lines.
Electrical Work
- Plan electrical outlets and lighting.
- Run electrical wires.
- Install outlets, switches, and fixtures.
Insulate Walls
- Use fiberglass or foam insulation.
- Place insulation between studs.
- Seal gaps with spray foam.
Drywall Installation
- Hang drywall sheets on framed walls.
- Cut openings for outlets and switches.
- Tape and mud the seams.
Flooring
- Choose moisture-resistant flooring.
- Install subfloor if needed.
- Lay down the chosen flooring material.
Bathroom Fixtures
- Install the toilet, sink, and shower.
- Connect plumbing fixtures.
- Ensure proper sealing to prevent leaks.
Paint and Finish
- Prime the walls.
- Apply paint or wallpaper.
- Add trim and baseboards.
Cost Breakdown
- Lumber and Framing: $500-$1,000
- Plumbing: $1,000-$2,500
- Electrical: $500-$1,500
- Insulation: $300-$800
- Drywall: $400-$1,000
- Flooring: $500-$2,000
- Bathroom Fixtures: $1,000-$3,000
- Paint and Finish: $200-$600
Total estimated cost: $4,400-$12,400
Helpful Tips and Tricks
Plan Your Layout: Sketch a detailed plan. Include plumbing, electrical outlets, and walls. This helps avoid costly mistakes.
Budget Wisely: Break down costs for materials like drywall, flooring, fixtures, and permits. Always add a 10-15% buffer for unexpected expenses.
Insulate Properly: Use moisture-resistant insulation to prevent mold. This keeps your basement warm and dry.
Choose Durable Flooring: Opt for vinyl plank flooring or ceramic tiles. These materials handle moisture better than carpet or hardwood.
Install a Sump Pump: Prevent flooding by installing a sump pump. This is crucial for basements prone to water issues.
Ventilation Matters: Ensure proper ventilation. Install an exhaust fan in the bathroom to reduce humidity.
Use Waterproof Drywall: In the bathroom, use green board or cement board. These resist moisture better than regular drywall.
Hire a Plumber for Rough-Ins: Even if you're handy, hire a professional for plumbing rough-ins. This ensures everything meets code.
Electrical Work: Use GFCI outlets in the bathroom and near any water sources. This prevents electrical shocks.
Lighting: Install recessed lighting to save headroom. Use LED bulbs for energy efficiency.
Common Mistakes to Avoid:
- Skipping Permits: Always get the necessary permits. This avoids fines and ensures safety.
- Ignoring Moisture Issues: Address any moisture problems before starting. This prevents mold and structural damage.
- Poor Planning: Not planning the layout can lead to costly changes mid-project.
- Cheap Materials: Using low-quality materials can lead to frequent repairs.
Material Alternatives:
- Instead of traditional drywall, use moisture-resistant drywall.
- For flooring, consider luxury vinyl tiles instead of ceramic. They’re easier to install and more forgiving on uneven surfaces.
- Use PEX piping instead of copper for plumbing. It’s easier to work with and more affordable.
Shortcuts:
- Use pre-fabricated shower units instead of custom-tiled showers. This saves time and money.
- Install snap-together flooring for a quicker, easier installation.
- Opt for painted concrete floors if you’re on a tight budget. Use area rugs for comfort.
Breaking Down the Costs
Framing and Insulation:
- Wood studs: $2-$3 each (need about 100) = $200-$300
- Insulation: $0.50-$1 per sq. ft. (for 500 sq. ft.) = $250-$500
Drywall and Finishing:
- Drywall sheets: $10 each (need about 40) = $400
- Joint compound: $15 per bucket (need 3) = $45
- Drywall screws: $30
- Tape: $10
- Sandpaper: $10
Flooring:
- Subfloor: $1 per sq. ft. (for 500 sq. ft.) = $500
- Flooring (laminate): $2-$4 per sq. ft. (for 500 sq. ft.) = $1,000-$2,000
Electrical:
- Wiring: $100
- Outlets and switches: $50
- Light fixtures: $100-$200
Plumbing for Bathroom:
- Pipes and fittings: $200
- Toilet: $150-$300
- Sink and vanity: $200-$500
- Shower or tub: $300-$700
Painting:
- Primer: $20 per gallon (need 2) = $40
- Paint: $30 per gallon (need 3) = $90
- Brushes and rollers: $30
Tools:
- Hammer: $20
- Screwdriver set: $20
- Power drill: $50-$100
- Saw: $50-$100
- Tape measure: $10
- Level: $20
Miscellaneous:
- Caulk: $10
- Nails and screws: $20
- Cleaning supplies: $20
Total Estimated Cost:
- Low end: $3,965
- High end: $6,305
Budget-Friendly Alternatives:
- Flooring: Use vinyl instead of laminate ($1-$2 per sq. ft.) = $500-$1,000
- Light fixtures: Opt for basic models ($50-$100)
- Vanity: Choose a simpler design ($100-$200)
- Tools: Borrow from friends or rent from a local store
Revised Total Cost:
- Low end: $3,365
- High end: $5,405
Different Ways to Customize
Flooring: Instead of traditional carpet, consider vinyl planks for a modern look. They are water-resistant and easy to install. For a more luxurious feel, use engineered hardwood. If you prefer a cozy atmosphere, choose cork flooring which is soft underfoot and eco-friendly.
Walls: Drywall is common, but wood paneling can add warmth. For a sleek, industrial vibe, use exposed brick or concrete. If you want a pop of color, paint one wall a bold shade like navy blue or emerald green.
Ceiling: Drop ceilings are practical, but exposed beams can give a rustic charm. For a modern touch, install recessed lighting in a drywall ceiling. If you need soundproofing, consider acoustic tiles.
Bathroom Fixtures: Standard fixtures are functional, but vintage-style faucets and showerheads add character. For a spa-like experience, install a rain showerhead. Choose a floating vanity for a contemporary look.
Lighting: Overhead lights are essential, but add wall sconces or pendant lights for ambiance. Use LED strips under cabinets or along baseboards for subtle illumination.
Storage: Built-in shelves are practical, but floating shelves offer a minimalist style. Use storage benches for seating and organization. For a unique touch, repurpose old crates or ladders as shelving units.
Colors: Neutral tones like beige or gray create a calm space. For a vibrant feel, use bold colors like red or yellow. If you prefer a natural look, choose earth tones like brown or olive green.
Materials: Instead of standard drywall, use shiplap or beadboard for texture. For countertops, consider quartz or granite instead of laminate. Use glass tiles for a modern backsplash in the bathroom.
Styles: For a modern look, use clean lines and minimal decor. A rustic style can be achieved with reclaimed wood and vintage pieces. If you prefer industrial, use metal accents and exposed ductwork.
Cost Breakdown: Save money by doing the work yourself. Use reclaimed materials for a budget-friendly option. Shop at thrift stores or online marketplaces for unique finds. Prioritize spending on key areas like plumbing and electrical work to ensure safety and functionality.
Eco-Friendly Tips for Your Project
Reclaimed Wood: Use reclaimed wood for framing and flooring. It’s eco-friendly and adds character. Cost: $2-$5 per square foot.
Recycled Insulation: Opt for insulation made from recycled materials like denim or cellulose. It’s effective and sustainable. Cost: $1.20-$1.50 per square foot.
Low-VOC Paint: Choose low-VOC (volatile organic compounds) paint to reduce harmful emissions. It’s better for indoor air quality. Cost: $30-$50 per gallon.
Energy-Efficient Lighting: Install LED lights. They use less energy and last longer. Cost: $5-$15 per bulb.
Water-Saving Fixtures: Use low-flow toilets and faucets to conserve water. Cost: $100-$300 for toilets, $20-$50 for faucets.
Recycled Tile: For bathroom flooring and walls, consider tiles made from recycled glass or ceramic. Cost: $10-$30 per square foot.
Salvaged Doors and Windows: Reuse old doors and windows. They add charm and reduce waste. Cost: $50-$200 each, depending on condition.
Eco-Friendly Drywall: Use drywall made from recycled materials. It’s just as durable and better for the environment. Cost: $10-$15 per sheet.
Natural Flooring: Choose bamboo or cork flooring. Both are renewable and stylish. Cost: $3-$8 per square foot.
DIY Tips: Reuse materials from other projects. Check local salvage yards or online marketplaces for deals. This can save money and reduce waste.
Labor: Doing the work yourself saves on labor costs, which can be significant. Professional labor can cost $50-$100 per hour.
Your DIY Basement Awaits
Finishing your basement with a bathroom can be a game-changer. It adds value to your home, provides extra living space, and gives you a sense of accomplishment. With careful planning, budgeting, and a bit of elbow grease, you can transform that unused space into something special. Remember to focus on insulation, plumbing, electrical work, and finishing touches. Don't cut corners on quality materials; they'll save you headaches down the road. Keep an eye on your budget, but don't be afraid to invest in areas that matter most. Whether it's a cozy family room, a guest suite, or a home office, the possibilities are endless. So grab your tools, roll up your sleeves, and get started. Your dream basement is just a few weekends away. Happy building!
How much does it cost to finish a basement with a bathroom?
Costs can vary, but on average, finishing a basement with a bathroom can range from $10,000 to $30,000. Factors like materials, labor, and the size of the space will affect the final price.
What permits are needed for basement finishing?
You’ll likely need building, electrical, and plumbing permits. Check with your local building department to ensure you have all the necessary paperwork.
How long does it take to finish a basement with a bathroom?
Typically, it takes 6 to 12 weeks to finish a basement with a bathroom. This depends on the complexity of the project and any unforeseen issues.
Can I do the plumbing myself?
While you can handle some aspects of the project, plumbing is best left to professionals. Mistakes can be costly and lead to bigger problems down the line.
What materials are best for basement flooring?
Vinyl, tile, and engineered wood are great options for basement flooring. They’re durable and handle moisture well.
How do I prevent moisture issues in my finished basement?
Install a vapor barrier, proper insulation, and a sump pump. These steps help keep your basement dry and prevent mold growth.
Do I need an egress window in my basement?
If you’re adding a bedroom, building codes require an egress window for safety. It provides an emergency exit in case of fire.