
Home>Home & Furniture>Doors & Windows>How to Weather Strip a Door for Energy Efficiency
Doors & Windows
How to Weather Strip a Door for Energy Efficiency
Published: September 23, 2024
Learn how to weather strip a door to improve energy efficiency, reduce drafts, and save on energy bills with our step-by-step guide. Keep your home cozy and efficient!
(Many of the links in this article redirect to a specific reviewed product. Your purchase of these products through affiliate links helps to generate commission for Twigandthistle.com, at no extra cost. Learn more)
Keeping your home cozy in winter and cool in summer can be challenging, especially if drafts sneak in through doors. Weather stripping is a simple DIY project that anyone can tackle. It helps seal gaps around doors, saving both energy and money. You don't need to be a handyman to do this. With just a few tools and some materials, you’ll improve your home’s energy efficiency. Keep your living space comfortable by learning the basics of weather stripping. Let's get started and make your home more energy-efficient!
Getting Ready for the Project
Gather Materials: Get weather stripping, a measuring tape, scissors, a utility knife, a screwdriver, and nails or adhesive.
Measure the Door: Measure the width and height of the door frame. This helps you cut the weather stripping to the correct size.
Clean the Area: Clean the door frame where the weather stripping will be applied. Remove any dirt, dust, or old adhesive.
Safety Gear: Wear safety glasses and gloves to protect your eyes and hands while cutting and installing the weather stripping.
Cut the Stripping: Use scissors or a utility knife to cut the weather stripping to match the measurements of the door frame.
Test Fit: Place the weather stripping along the door frame to ensure it fits properly before attaching it.
Attach the Stripping: Use nails, screws, or adhesive to attach the weather stripping to the door frame. Make sure it is snug but not too tight.
Check for Gaps: Close the door and check for any gaps where air might still be leaking. Adjust the weather stripping if necessary.
Workspace Setup: Ensure your workspace is well-lit and free of clutter to avoid accidents. Keep tools organized and within reach.
Final Inspection: Open and close the door several times to ensure the weather stripping stays in place and does not interfere with the door's operation.
Gather Your Materials and Tools
Weather Stripping: Comes in various types like foam tape, V-strip, or door sweeps. Helps seal gaps around the door to prevent drafts.
Measuring Tape: Used to measure the length and width of the door and gaps to ensure you buy the right amount of weather stripping.
Utility Knife: Handy for cutting weather stripping to the correct size.
Scissors: Another option for cutting weather stripping, especially foam tape.
Screwdriver: Needed if you’re installing a door sweep or other types of weather stripping that require screws.
Hammer and Nails: Sometimes required for securing certain types of weather stripping.
Adhesive: Some weather stripping comes with adhesive backing, but extra adhesive might be needed for a stronger hold.
Cleaning Supplies: A cloth and mild cleaner to clean the door frame before applying weather stripping. Ensures better adhesion.
Pencil: Useful for marking where to cut or place the weather stripping.
Level: Ensures the weather stripping is applied straight, especially for door sweeps.
Caulk and Caulk Gun: Optional but useful for sealing any remaining small gaps around the door frame.
Skill Level and Time Commitment
Skill Level: Beginner
Time Required: 1-2 hours
- Gather Materials: Weather stripping, scissors, measuring tape, adhesive.
- Measure Door: Measure the length of the door's sides and bottom.
- Cut Stripping: Cut the weather stripping to match the measurements.
- Apply Stripping: Peel off the adhesive backing and press the stripping along the door's edges.
- Check Fit: Ensure the door closes properly without gaps.
Detailed Instructions for Weather Stripping
Gather Materials:
- Weather stripping (foam, rubber, or vinyl)
- Scissors or utility knife
- Measuring tape
- Screwdriver (if needed)
- Adhesive (if not pre-attached)
Measure the Door:
- Use the measuring tape to measure the width and height of the door frame.
- Write down the measurements.
Cut the Weather Stripping:
- Cut the weather stripping to match the measurements of the door frame.
- Ensure the pieces fit snugly without gaps.
Clean the Door Frame:
- Wipe down the door frame with a damp cloth.
- Let it dry completely to ensure the adhesive sticks well.
Attach the Weather Stripping:
- Peel off the backing of the adhesive (if applicable).
- Press the weather stripping firmly along the top and sides of the door frame.
- If using screw-on types, use a screwdriver to secure the strips.
Check the Fit:
- Close the door to check for any gaps.
- Adjust the weather stripping if necessary to ensure a tight seal.
Test the Door:
- Open and close the door several times.
- Ensure the weather stripping stays in place and doesn’t hinder door movement.
Make Final Adjustments:
- Trim any excess material.
- Re-secure any loose sections.
Inspect Regularly:
- Check the weather stripping periodically.
- Replace any worn or damaged sections to maintain energy efficiency.
Helpful Tips and Tricks
Choose the Right Weather Stripping: Different types work best for different doors. Foam tape is great for irregular gaps, while V-strip is good for sealing the sides of a door.
Clean the Surface: Dirt and grime can prevent adhesive strips from sticking properly. Use a damp cloth to clean the door frame before applying weather stripping.
Measure Twice, Cut Once: Measure the length of the door frame accurately before cutting the weather stripping. This avoids waste and ensures a snug fit.
Apply Even Pressure: When sticking adhesive-backed weather stripping, press down firmly and evenly to ensure it adheres well.
Check for Gaps: After applying, close the door and check for any remaining gaps. Adjust or add more weather stripping if needed.
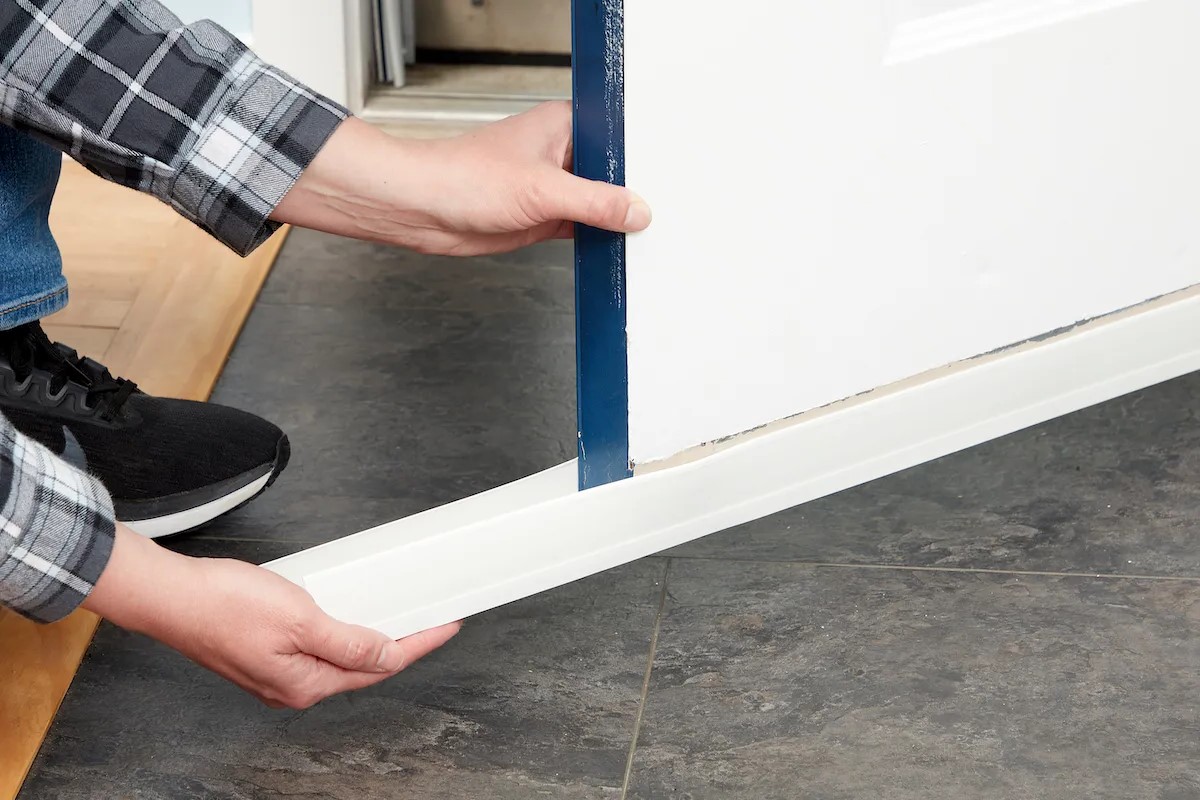
Use a Door Sweep: For the bottom of the door, install a door sweep to block drafts. Make sure it brushes lightly against the floor without dragging.
Common Mistakes to Avoid:
- Using the Wrong Type: Not all weather stripping is suitable for every door. Match the type to your specific needs.
- Not Cleaning the Surface: Adhesive won't stick well to dirty surfaces.
- Cutting Too Short: Always measure carefully to avoid gaps.
- Ignoring the Bottom: Don't forget to seal the bottom of the door with a sweep.
Alternative Materials or Methods:
- Caulk: For small gaps around the door frame, caulk can be a good alternative.
- Draft Stoppers: These can be placed at the bottom of the door as a temporary solution.
- Magnetic Strips: For metal doors, magnetic weather stripping can provide a strong seal.
Estimating the Cost
Weather stripping a door helps keep your home warm in winter and cool in summer. Here's a rough estimate of the total cost for materials and tools:
Weather Stripping Material: $10-$20
- Foam Tape: $5-$10
- V-Seal: $10-$15
- Door Sweep: $10-$20
Tools:
- Utility Knife: $5-$10
- Scissors: $5-$10
- Screwdriver: $5-$15
- Measuring Tape: $5-$10
Total estimated cost: $30-$65
Budget-friendly alternatives:
- Use foam tape instead of more expensive materials.
- Borrow tools from friends or neighbors.
- Look for discounts or sales at local hardware stores.
This should help you weather strip your door without breaking the bank.
Different Ways to Customize
Materials: Instead of standard foam tape, try rubber or vinyl weather stripping for better durability. Silicone strips offer flexibility and a tighter seal. Metal weather stripping, like bronze or aluminum, provides a more permanent solution.
Colors: Choose weather stripping that matches your door's color. White, brown, and black are common, but some brands offer custom colors. Paintable weather stripping allows you to match any door color.
Styles: Use door sweeps for the bottom of the door. They come in different styles like brush or rubber. V-strip weather stripping fits along the sides and top, creating a tight seal. Tubular weather stripping offers a snug fit for larger gaps.
Installation: For a more seamless look, consider recessed weather stripping that fits into a groove cut into the door frame. Adhesive-backed options are easier to install but may not last as long. Nail-on or screw-on types provide a more secure fit.
Additional Features: Some weather stripping includes built-in insulation for extra energy efficiency. Magnetic weather stripping creates an even tighter seal, ideal for metal doors. Self-adhesive options simplify installation but may need replacement sooner.
Eco-Friendly Tips
Weather stripping helps seal gaps around doors, keeping warm air inside during winter and cool air in during summer. Use eco-friendly materials like natural rubber or silicone instead of plastic. These materials last longer and are less harmful to the environment.
Reusing materials can also be a great option. Old bicycle inner tubes can be cut and used as weather stripping. They are durable and flexible, making them perfect for sealing gaps.
Recycled felt is another good choice. It’s made from recycled fibers and works well for insulating doors. You can find it in rolls or strips, and it’s easy to cut to size.
When installing, use non-toxic adhesives. Many adhesives contain harmful chemicals, but you can find eco-friendly options at most hardware stores. Look for labels that say low-VOC (volatile organic compounds).
Proper installation is key. Make sure the door is clean and dry before applying the weather stripping. Measure twice, cut once, and press firmly to ensure a good seal. This will help the materials last longer and work better.
By choosing sustainable materials and methods, you can make your home more energy-efficient while also being kind to the planet.
Keep the Cold Out
Weather stripping a door is a simple yet effective way to boost your home's energy efficiency. By sealing gaps, you prevent drafts, reduce energy bills, and maintain a comfortable indoor temperature. Measure your door, choose the right materials, and follow the steps to install the weather stripping properly. Don't forget to check for wear and tear periodically, replacing any damaged sections. With a bit of effort, you can enjoy a cozier home and save money on heating and cooling. So, grab your tools and get started!
How do I know if my door needs weather stripping?
If you feel drafts around your door or see light coming through the edges, it's time to weather strip. Higher energy bills can also be a sign.
What materials do I need for weather stripping a door?
You'll need weather stripping tape, scissors, a measuring tape, and possibly a screwdriver or hammer depending on the type of weather stripping.
How do I choose the right type of weather stripping?
There are several types like foam tape, felt, vinyl, and metal. Foam tape is easy to install, while metal offers durability. Choose based on your door's material and the climate.
Can I install weather stripping myself?
Absolutely! It's a simple DIY project. Measure your door, cut the weather stripping to size, and apply it to the door frame. No special skills needed.
How often should I replace weather stripping?
Weather stripping typically lasts 1-2 years. Check it annually for wear and tear. Replace it if it's cracked, peeling, or no longer sealing properly.
Will weather stripping affect how my door closes?
It might make the door a bit snugger, but it shouldn't prevent it from closing. If it does, you may need to adjust the door or trim the weather stripping.
Does weather stripping work for all types of doors?
Yes, you can use weather stripping on wood, metal, and fiberglass doors. Just make sure to choose the right type for your door material.