
Home>Home & Furniture>Doors & Windows>How to DIY Window Seal for Portable AC
Doors & Windows
How to DIY Window Seal for Portable AC
Published: August 26, 2024
Learn how to DIY a window seal for your portable AC with our step-by-step guide. Keep your home cool and energy-efficient with these easy and effective tips.
(Many of the links in this article redirect to a specific reviewed product. Your purchase of these products through affiliate links helps to generate commission for Twigandthistle.com, at no extra cost. Learn more)
Portable air conditioners are great for cooling rooms, but windows often let warm air back inside. Sealing gaps around the window can make a big difference. With a few tools and some patience, creating your own window seal becomes a straightforward project. This guide will show you step-by-step how to do it. No need for professional help! Just some basic materials and a little bit of your time. Whether you're new to DIY or have some experience, this project is simple enough for anyone to handle. Ready to give it a go? Let's get started!
Getting Ready for the Project
Gather Materials: Get foam seal tape, scissors, measuring tape, and a utility knife.
Measure Window: Use the measuring tape to find the dimensions of the window opening.
Cut Foam Tape: Cut foam seal tape to match the measurements of the window.
Clean Window Frame: Wipe down the window frame to remove dust and dirt for better adhesion.
Apply Foam Tape: Stick the foam tape around the window frame, ensuring no gaps.
Install AC Unit: Place the portable AC unit in the window, making sure it fits snugly against the foam tape.
Seal Gaps: Use extra foam tape to seal any remaining gaps around the AC unit.
Secure AC Unit: Ensure the AC unit is stable and won't move.
Safety Tips:
- Wear Gloves: Protect hands while cutting foam tape.
- Use Ladder Safely: If the window is high, use a sturdy ladder.
- Check Stability: Make sure the AC unit is secure to prevent it from falling.
What You Will Need
- Portable AC Unit: The main device that cools the room.
- Window Kit: Usually comes with the portable AC. Includes panels to fit in the window opening.
- Foam Seal Strips: Used to fill gaps around the window kit to prevent air leaks.
- Screwdriver: Needed to secure the window kit in place.
- Measuring Tape: Ensures accurate measurements for cutting foam strips and fitting the window kit.
- Utility Knife: Cuts foam strips to the correct size.
- Duct Tape: Secures foam strips and seals any remaining gaps.
- Marker: Marks measurements on foam strips and window kit panels.
- Cleaning Cloth: Wipes down the window area before installation to ensure a good seal.
- Scissors: Cuts duct tape and foam strips if a utility knife isn't available.
Skill Level and Time Commitment
Skill Level: Intermediate
Time Required: 1-2 hours
Steps:
- Measure the Window: 10 minutes
- Cut the Seal Material: 20 minutes
- Install the Seal: 30 minutes
- Secure the AC Hose: 20 minutes
- Check for Leaks: 10 minutes
How to Do It: Step-by-Step
Gather Materials:
- Foam weather stripping
- Scissors
- Measuring tape
- Duct tape
- Cardboard or plywood
- Utility knife
Measure the Window:
- Use the measuring tape to determine the dimensions of the window opening.
- Measure the width and height accurately.
Cut the Cardboard or Plywood:
- Mark the dimensions on the cardboard or plywood.
- Use the utility knife to cut the material to fit the window opening.
Create an Opening for the AC Hose:
- Measure the diameter of the AC hose.
- Mark a circle of the same diameter on the cardboard or plywood.
- Cut out the circle using the utility knife.
Attach the Foam Weather Stripping:
- Cut strips of foam weather stripping to fit the edges of the cardboard or plywood.
- Peel off the backing and stick the strips along the edges to create a tight seal.
Install the Cardboard or Plywood:
- Place the cardboard or plywood into the window opening.
- Ensure it fits snugly and covers the entire opening.
Secure with Duct Tape:
- Use duct tape to secure the edges of the cardboard or plywood to the window frame.
- Make sure there are no gaps for air to escape.
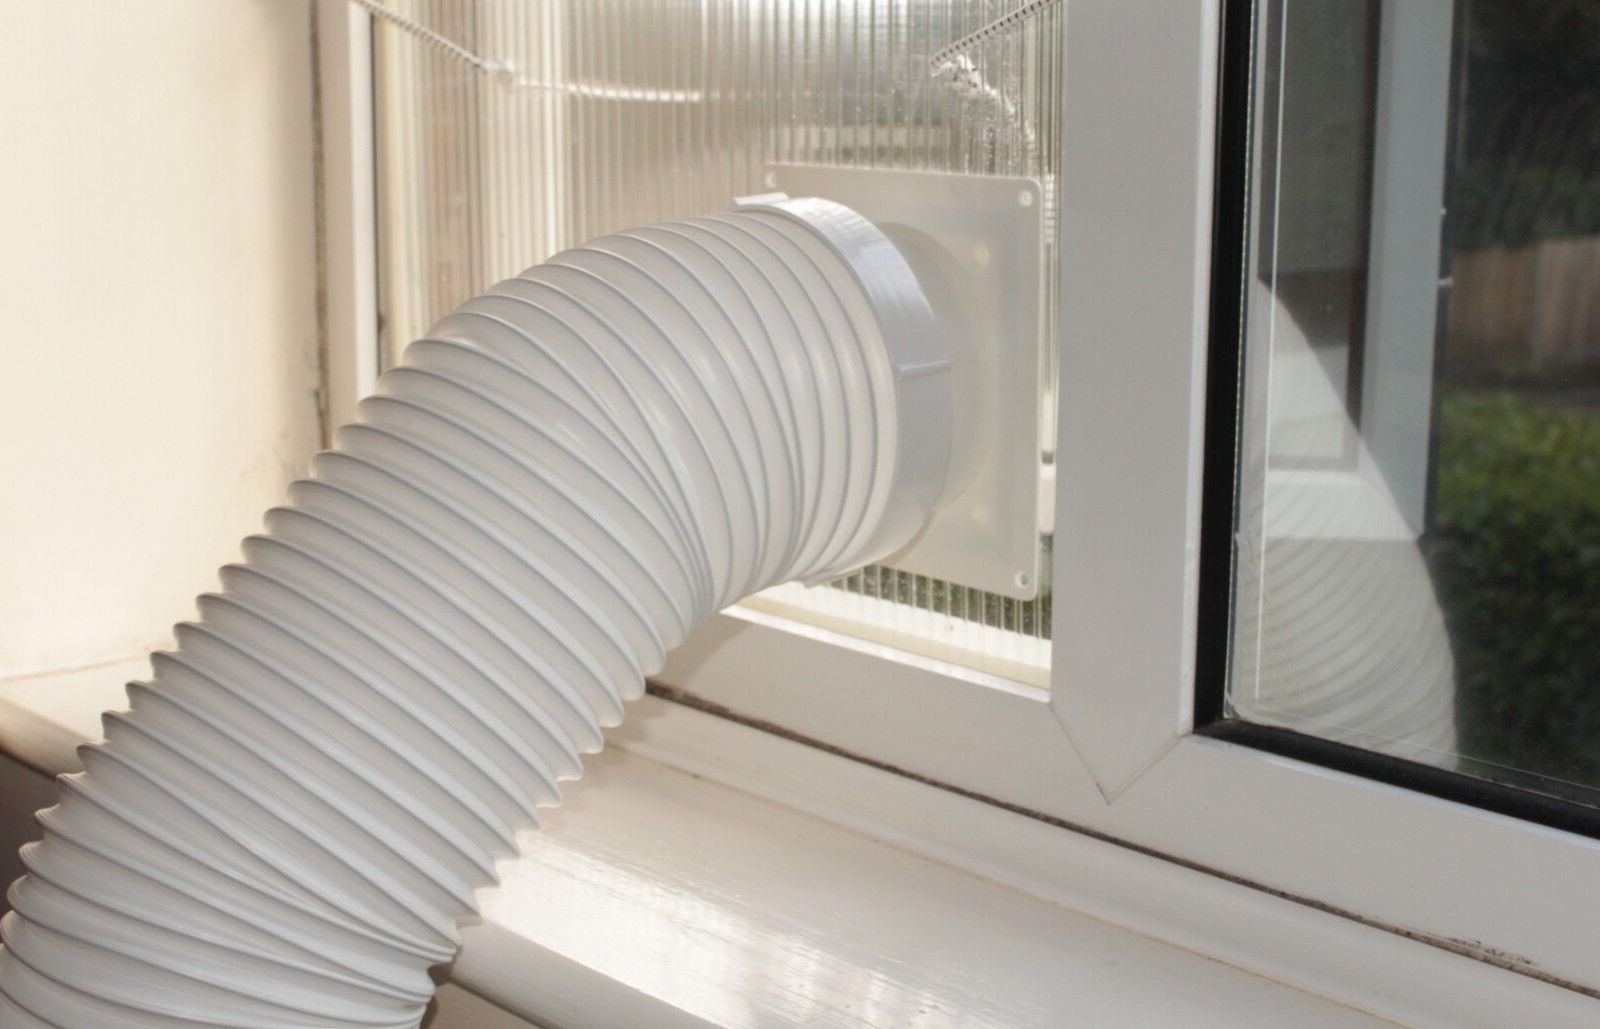
Connect the AC Hose:
- Insert the AC hose through the opening in the cardboard or plywood.
- Ensure the hose fits tightly to prevent air leaks.
Check for Gaps:
- Inspect the seal around the cardboard or plywood.
- Use additional duct tape or foam weather stripping to seal any gaps.
Test the Setup:
- Turn on the portable AC unit.
- Check for any air leaks and adjust the seal if necessary.
Helpful Tips and Tricks
Measure your window accurately before starting. Use foam weatherstripping for a snug fit around the edges. Velcro strips can help secure the seal and make it removable. Cut the material slightly larger than the window opening to ensure no gaps. Duct tape can reinforce the edges for extra durability.
Common mistakes include not measuring properly, which leads to gaps and poor insulation. Avoid using thin plastic that can tear easily. Don’t forget to seal all edges to prevent air leaks.
Instead of foam, you can use thick plastic sheeting or insulating fabric. For a more permanent solution, consider plexiglass or acrylic panels.
How Much Will It Cost?
Materials:
- Foam weather stripping: $10-$15
- Plywood or acrylic sheet: $20-$30
- Duct tape: $5-$10
- Velcro strips: $5-$10
- Screws and nails: $5
Tools:
- Measuring tape: $5-$10
- Utility knife: $5-$10
- Drill: $30-$50
- Screwdriver: $5-$10
Total cost: $90-$150
Budget-friendly alternatives:
- Cardboard instead of plywood: Free if you have some lying around
- Old towels or cloth instead of foam weather stripping: Free if you have extras
- Double-sided tape instead of Velcro: $3-$5
Different Ways to Customize
Alternative Materials: Instead of foam, use weatherstripping tape or insulating fabric. For a more eco-friendly option, try recycled rubber.
Colors: Choose white or black foam to match your window frame. For a pop of color, use brightly colored insulating fabric.
Styles: For a sleek look, use clear acrylic sheets instead of foam. If you prefer a rustic style, consider wooden planks with weatherstripping.
Sealing Methods: Use Velcro strips for easy removal or magnetic strips for a tighter seal. For a more permanent solution, apply silicone caulk around the edges.
Additional Features: Add a zipper to the fabric seal for easy access to the window. Install small vents to allow some airflow while keeping the seal intact.
Eco-Friendly Suggestions
Reusable materials can be a great choice. Old towels or blankets can be cut to fit the window gap. Weatherstripping tape made from recycled rubber is another option. Foam insulation can be eco-friendly if it’s made from natural materials like cork or sheep wool.
Cardboard from old boxes can be used as a base layer. Cover it with aluminum foil to reflect heat. Velcro strips can secure the seal, making it easy to remove and reuse.
Plastic bottles can be cut and flattened to create a barrier. Use duct tape to hold everything in place. Fabric scraps can be sewn together to make a custom-fit cover.
Window insulation kits often include plastic film and double-sided tape. Choose kits with biodegradable or recyclable materials. DIY solutions can be both effective and kind to the planet.
Your Window Seal is Ready
You've got all the tools and materials. Now, just follow the steps to create a tight seal for your portable AC. Measure the window frame, cut the foam to fit, and secure it with tape. Make sure there are no gaps. This will keep the cool air in and the hot air out. Your room will stay comfortable, and your AC will work more efficiently. Plus, you’ll save on energy bills. Remember, a good seal means better performance. If you ever need to remove the seal, just peel off the tape and foam. It's that simple. Now, enjoy your cool, comfy space without any hassle. Happy DIY-ing!
How do I measure my window for a portable AC seal?
Use a tape measure to get the width and height of the window opening. Note the measurements in inches or centimeters.
What materials do I need to make a window seal?
You'll need foam tape, plastic sheeting, Velcro strips, scissors, and a utility knife.
How do I attach the plastic sheeting to the window?
Cut the plastic sheeting to fit the window size. Use Velcro strips to secure the sheeting to the window frame.
Can I still open my window with the seal in place?
Yes, if you use Velcro strips, you can easily remove and reattach the plastic sheeting when needed.
How do I prevent air leaks around the AC hose?
Use foam tape around the hose opening to create a tight seal. Make sure there are no gaps.
Is it easy to remove the seal when I no longer need it?
Yes, just peel off the Velcro strips and foam tape. Clean any residue with a mild cleaner.
Will this DIY seal work for all window types?
This method works best for sliding and casement windows. For other types, you might need to adjust the materials and approach.