
Home>Home & Furniture>Doors & Windows>How to Build a DIY Panel Door
Doors & Windows
How to Build a DIY Panel Door
Published: September 18, 2024
Learn how to build a DIY panel door with our step-by-step guide. Perfect for beginners, this project will enhance your woodworking skills and upgrade your home decor.
(Many of the links in this article redirect to a specific reviewed product. Your purchase of these products through affiliate links helps to generate commission for Twigandthistle.com, at no extra cost. Learn more)
Making your own panel door can be a fun and rewarding project. It saves money and gives a personal touch to your home. Whether you're new to DIY or have some experience, this guide will help you through the process step-by-step. You will need basic tools, some materials, and a bit of patience. By the end, you'll have a custom door that fits your style and space perfectly. Let's get started and see how creating a panel door can be easier than you think.
Getting Ready for Your Project
Gather Materials: Get wood panels, screws, hinges, a door handle, sandpaper, wood glue, a saw, a drill, and a measuring tape.
Measure the Door Frame: Measure the height and width of the door frame. Write down these measurements to ensure the door fits perfectly.
Cut the Wood Panels: Use a saw to cut the wood panels to the correct size. Make sure to wear safety goggles and gloves while cutting.
Sand the Panels: Smooth out the edges and surfaces of the wood panels with sandpaper. This helps the panels fit together better and look nicer.
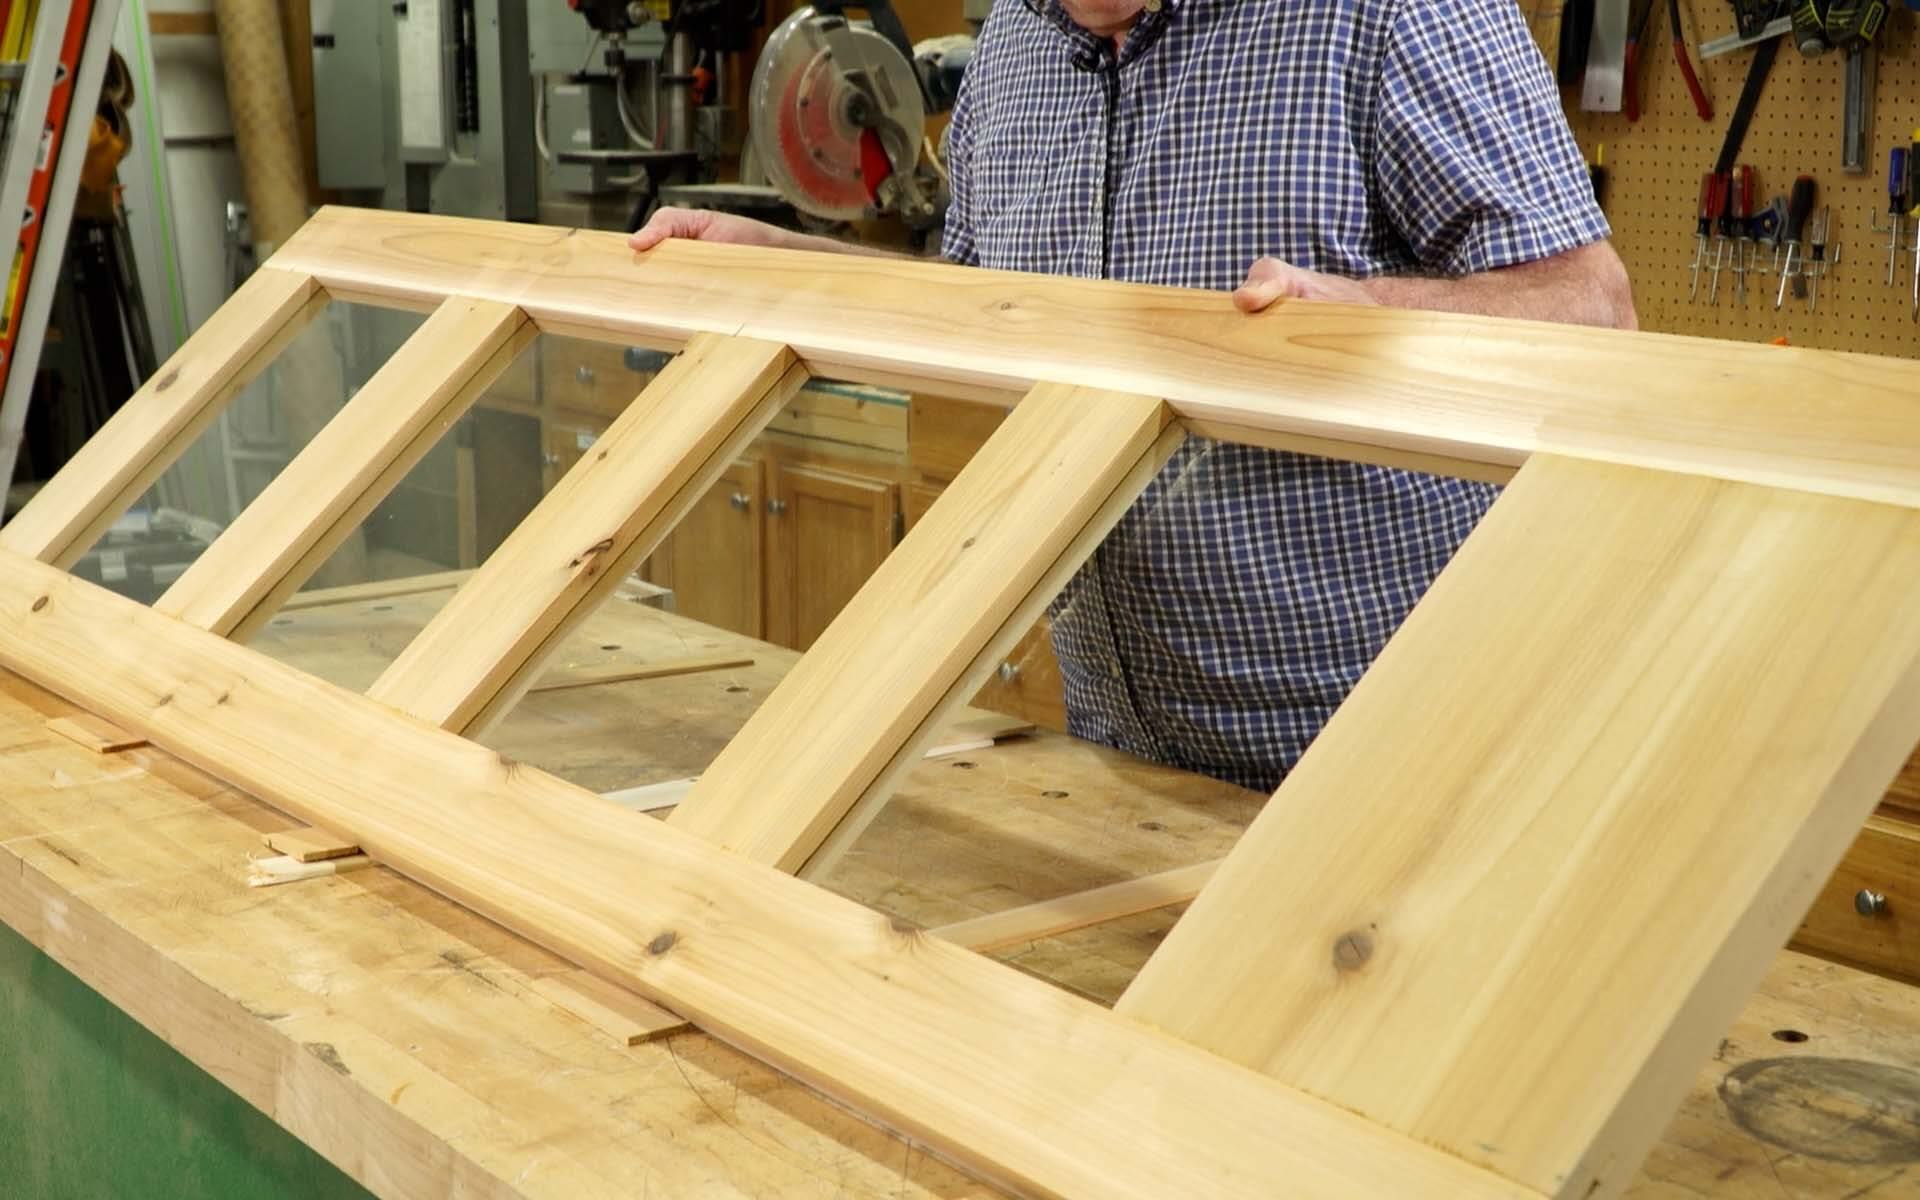
Assemble the Door: Lay out the panels on a flat surface. Use wood glue and screws to attach the panels together. Make sure everything is aligned properly.
Attach Hinges: Mark where the hinges will go on the door and the door frame. Use a drill to attach the hinges securely.
Install the Door Handle: Mark the spot for the door handle. Drill holes and attach the handle according to the instructions.
Check Alignment: Before finalizing, check if the door fits well in the frame. Make any necessary adjustments.
Workspace Setup: Ensure your workspace is clean and well-lit. Keep all tools within reach but organized to avoid accidents.
Safety Tips: Always wear safety gear like goggles and gloves. Keep a first aid kit nearby. Make sure the area is well-ventilated if using any adhesives or finishes.
Gather Your Materials and Tools
- Wood Panels: These form the main structure of the door. Choose high-quality wood like pine or oak for durability.
- Measuring Tape: Essential for accurate measurements to ensure all pieces fit together perfectly.
- Saw: A circular saw or hand saw will be needed to cut the wood panels to the correct size.
- Wood Glue: Used to bond the wood pieces together securely.
- Clamps: Hold the wood pieces in place while the glue dries.
- Screws: Provide additional strength and stability to the door structure.
- Drill: Necessary for making holes for the screws.
- Screwdriver: Used to drive screws into the wood.
- Sandpaper: Smooths out rough edges and surfaces for a polished finish.
- Paint or Stain: Adds color and protects the wood from damage.
- Paintbrushes: Apply paint or stain evenly across the door.
- Hinges: Attach the door to the frame, allowing it to swing open and closed.
- Doorknob: Provides a handle for opening and closing the door.
- Safety Gear: Includes gloves, goggles, and a dust mask to protect yourself while working.
Each of these materials and tools plays a crucial role in constructing a sturdy, functional, and attractive panel door.
Required Skills and Time Commitment
Skill Level: Intermediate
Time Required: 6-8 hours
- Gather Materials: 1 hour
- Cut Wood Panels: 1-2 hours
- Assemble Frame: 1 hour
- Attach Panels: 1 hour
- Sand and Finish: 1-2 hours
- Install Hardware: 1 hour
Follow These Steps
Gather Materials and Tools
- Wood panels (plywood or solid wood)
- Wood glue
- Screws
- Hinges
- Door handle
- Sandpaper
- Paint or stain
- Measuring tape
- Saw
- Drill
- Clamps
Measure and Cut Wood
- Measure the door frame.
- Cut wood panels to fit the frame.
- Cut additional pieces for the door stiles (vertical) and rails (horizontal).
Assemble the Frame
- Lay out stiles and rails on a flat surface.
- Apply wood glue to the joints.
- Clamp pieces together.
- Drill pilot holes and insert screws to secure.
Attach Panels
- Place wood panels inside the frame.
- Apply wood glue around edges.
- Secure panels with screws.
Sand the Door
- Sand all surfaces to smooth rough edges.
- Wipe off dust with a damp cloth.
Paint or Stain
- Apply paint or stain evenly.
- Let dry completely.
- Apply a second coat if needed.
Install Hinges
- Mark hinge placement on the door and frame.
- Drill pilot holes.
- Attach hinges with screws.
Attach Door Handle
- Mark placement for the handle.
- Drill holes for screws.
- Attach handle securely.
Hang the Door
- Align hinges with the door frame.
- Secure hinges to the frame with screws.
- Check that the door swings smoothly.
Final Touches
- Inspect for any rough spots.
- Sand and touch up paint or stain if necessary.
- Ensure all screws are tight.
Helpful Tips and Tricks
Measure twice, cut once. Always double-check measurements before cutting wood. This saves time and materials.
Use a straight edge when cutting panels. Ensures clean, straight cuts.
Sand edges after cutting. Smooth edges make assembly easier and safer.
Pre-drill holes for screws. Prevents wood from splitting.
Use wood glue along with screws. Adds extra strength to joints.
Clamp pieces together while glue dries. Keeps everything aligned.
Paint or stain before assembly. Easier to reach all areas.
Common mistakes to avoid:
Skipping measurements. Leads to misaligned panels.
Not sanding edges. Can cause rough joints and splinters.
Forgetting to pre-drill. Increases risk of splitting wood.
Rushing glue drying time. Weakens the bond.
Alternatives for materials or methods:
Use plywood instead of solid wood. Cheaper and easier to work with.
Pocket hole jig for hidden screws. Creates cleaner look.
Wood filler for gaps. Smooths out imperfections.
Electric sander instead of hand sanding. Saves time and effort.
Estimating the Cost
Wood: For a standard-sized door, you'll need about 20-25 board feet of hardwood. This can cost around $100-$150.
Plywood: A sheet of 1/4-inch plywood for the panels costs about $20-$30.
Glue: A bottle of wood glue costs around $5-$10.
Screws: A box of wood screws costs about $5.
Sandpaper: A pack of sandpaper costs around $5-$10.
Paint or Stain: A quart of paint or stain costs about $10-$20.
Brushes or Rollers: A set of brushes or rollers costs around $10.
Hinges: A set of door hinges costs about $10-$20.
Door Handle: A door handle costs around $10-$30.
Tools: If you don't have them, you might need a saw ($50-$100), drill ($50-$100), clamps ($20-$40), and a sander ($30-$60).
Total Cost: Roughly $300-$600, depending on the quality of materials and tools.
Budget-Friendly Alternatives:
- Use pine wood instead of hardwood to save $50-$100.
- Borrow or rent tools from a friend or local hardware store.
- Look for sales or discounts on materials.
Different Ways to Customize
Materials: Instead of traditional wood, try using MDF (Medium-Density Fiberboard) for a smoother finish or plywood for a more rustic look. For a lightweight option, consider hollow-core doors.
Colors: Paint the door in bold colors like navy blue or forest green for a modern touch. For a classic look, use white or cream. Experiment with stains to highlight the wood grain, giving it a natural appearance.
Styles: Add decorative molding to create a more intricate design. Use shiplap panels for a farmhouse style. For a contemporary look, opt for clean lines and minimalistic panels.
Hardware: Swap out standard door handles for vintage knobs or modern levers. Install hinges in contrasting colors like black or brass to make them stand out.
Glass Panels: Incorporate frosted glass or stained glass panels for added elegance and light. This can also create a semi-private space while maintaining an open feel.
Textures: Use reclaimed wood for a distressed, weathered look. Apply wallpaper or fabric to the panels for a unique texture and pattern.
Size: Customize the door size to fit non-standard doorways. Create double doors for a grand entrance or sliding barn doors for a space-saving solution.
Finishes: Apply a matte finish for a subtle, understated look or a high-gloss finish for a sleek, modern appearance. Use antiquing techniques to give the door a vintage feel.
Eco-Friendly Tips
Reclaimed Wood: Use old wood from barns, pallets, or other sources. It adds character and reduces waste.
Eco-Friendly Paint: Choose paints with low or zero VOCs (volatile organic compounds). They are better for your health and the environment.
Natural Finishes: Use natural oils like linseed or tung oil instead of chemical-based varnishes. They protect the wood and are biodegradable.
Recycled Hardware: Look for second-hand hinges, handles, and screws. Thrift stores or online marketplaces often have these items.
Insulation: Add natural insulation materials like wool or cotton batting inside the door panels. This improves energy efficiency.
Bamboo Panels: Bamboo grows quickly and is a sustainable alternative to traditional wood. Use it for the door panels.
Solar-Powered Tools: If possible, use tools powered by solar energy. This reduces your carbon footprint.
Minimal Waste: Plan your cuts carefully to minimize wood waste. Use leftover pieces for other projects or donate them.
Local Materials: Source materials locally to reduce transportation emissions. Local wood suppliers or salvage yards are good places to start.
Non-Toxic Adhesives: Use water-based or natural adhesives instead of synthetic ones. They are less harmful to the environment.
Your DIY Door Awaits
Building a DIY panel door isn't just about saving money, it's about creating something with your own hands. You've learned to measure, cut, assemble, and finish your door. Each step, from selecting the right wood to applying the final coat of paint, adds a personal touch. Mistakes might happen, but that's part of the learning process. Don't stress over small imperfections; they give your door character. Remember, patience and attention to detail are key. Take your time, follow the steps, and soon enough, you'll have a door that not only fits perfectly but also showcases your craftsmanship. Now, grab those tools, and get started on your project. Happy building!
What materials do I need to build a DIY panel door?
You'll need wood panels, hinges, screws, wood glue, sandpaper, paint or stain, and some basic tools like a saw, drill, and measuring tape.
How long does it take to build a panel door?
It usually takes about one weekend. Cutting and assembling the panels might take a day, and painting or staining could take another day, depending on drying time.
Do I need any special skills to build a panel door?
Not really! Basic carpentry skills and knowing how to use tools like a saw and drill are enough. If you can measure and cut wood, you're good to go.
Can I customize the design of my panel door?
Absolutely! You can choose different wood types, panel shapes, and finishes. Add decorative elements or unique handles to make it your own.
How do I ensure my door fits properly?
Measure the door frame carefully before cutting your wood. Leave a small gap around the edges for the door to swing freely. Double-check measurements to avoid mistakes.
What type of wood should I use?
Pine and oak are popular choices. Pine is cheaper and easier to work with, while oak is more durable and has a nicer grain. Choose based on your budget and needs.
How do I finish the door?
Sand the door smooth, then apply primer if you plan to paint. For staining, apply a wood conditioner first. Finish with paint or stain, then seal with a clear coat for protection.