
Home>Home & Furniture>Doors & Windows>DIY Window Air Conditioner Cover
Doors & Windows
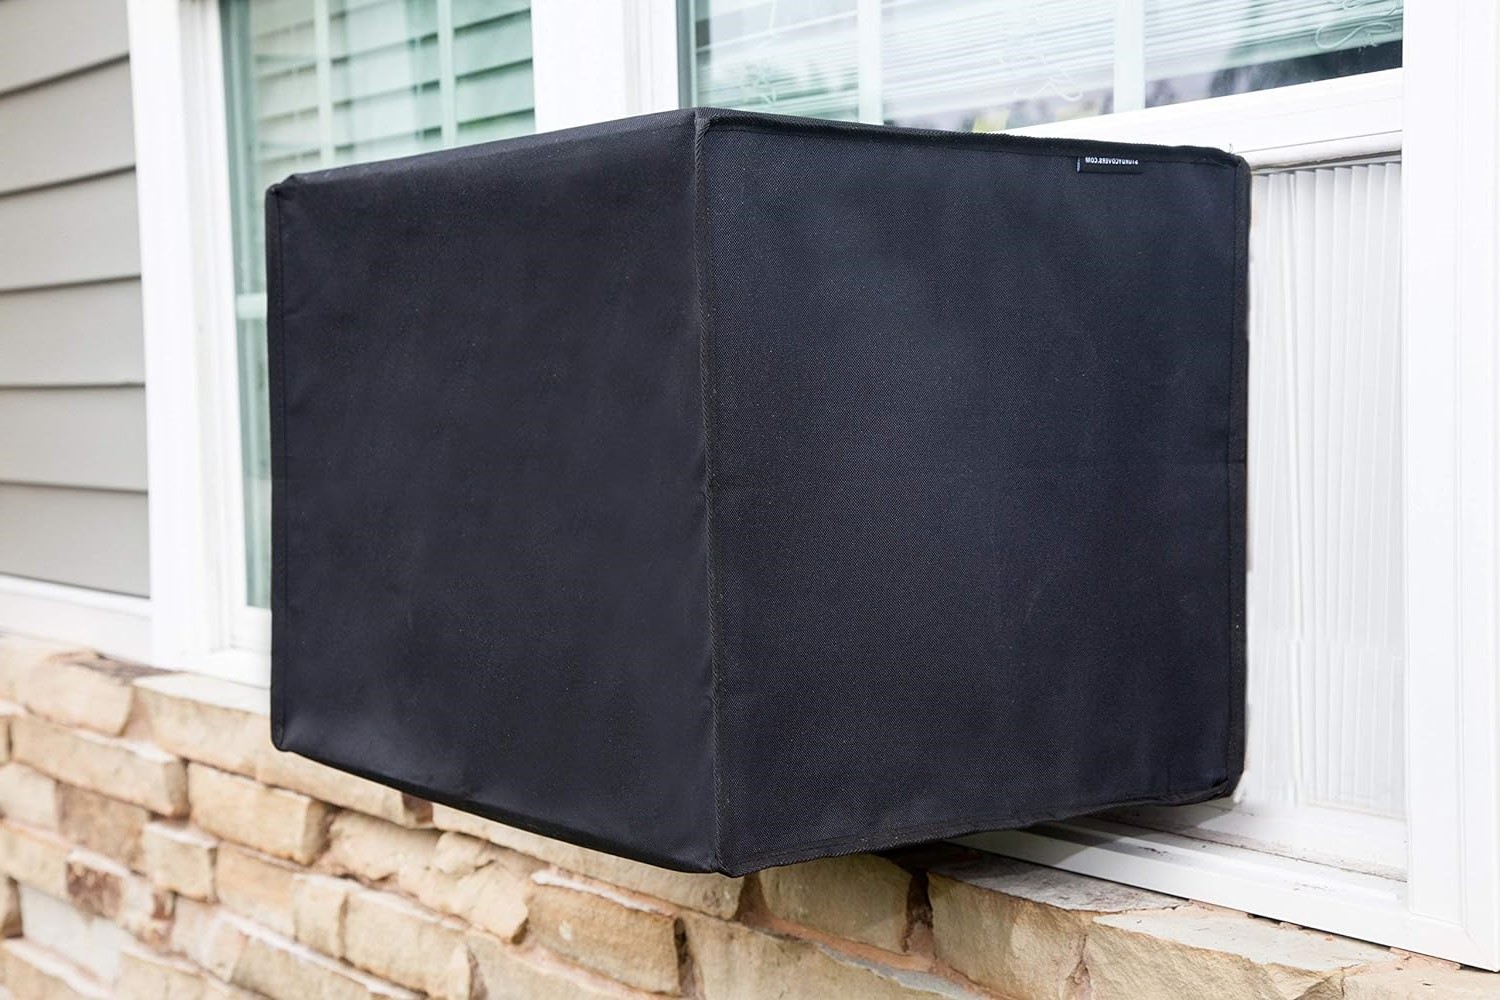
DIY Window Air Conditioner Cover
Published: August 25, 2024
Learn how to create a DIY window air conditioner cover to protect your unit from the elements, improve energy efficiency, and enhance your home's appearance.
(Many of the links in this article redirect to a specific reviewed product. Your purchase of these products through affiliate links helps to generate commission for Twigandthistle.com, at no extra cost. Learn more)
Do you live in a place where winter gets really cold? If so, you might want to protect your window air conditioner. Cold weather can damage your unit, causing it to work less efficiently later. Instead of buying an expensive cover, why not make one yourself? It's easy, cheap, and you can do it with materials you probably have at home. Plus, making your own cover means it will fit perfectly. Let's talk about why a DIY window air conditioner cover is a smart project. Get ready to save money and keep your air conditioner in top shape!
Getting Ready for Your Project
Measure the Unit: Use a tape measure to get the height, width, and depth of the air conditioner. Write these numbers down.
Gather Materials: Collect plywood, screws, weatherproof paint, foam insulation, and a saw. Make sure everything is within reach.
Safety Gear: Wear safety goggles and gloves. Keep a first aid kit nearby.
Clear Workspace: Find a flat, stable surface to work on. Ensure the area is well-lit and free of clutter.
Cut Plywood: Use the saw to cut the plywood according to your measurements. Sand the edges to avoid splinters.
Paint Plywood: Apply weatherproof paint to the plywood pieces. Let them dry completely.
Attach Foam Insulation: Cut foam insulation to fit the plywood. Use adhesive to attach it securely.
Assemble Cover: Use screws to attach the plywood pieces together, forming a box. Make sure it fits snugly over the air conditioner.
Test Fit: Place the cover over the air conditioner to ensure it fits properly. Adjust if needed.
Secure Cover: Use additional screws or brackets to secure the cover to the air conditioner, preventing it from being blown away by wind.
Materials and Tools Needed
Materials:
- Plywood: Provides a sturdy base for the cover.
- Foam Insulation: Helps keep out cold air and drafts.
- Weatherstripping: Seals gaps to prevent air leaks.
- Exterior Paint: Protects the plywood from weather damage.
- Screws: Secures the plywood and other components together.
- Caulk: Fills any small gaps for added insulation.
Tools:
- Measuring Tape: Ensures accurate measurements for cutting materials.
- Saw: Cuts the plywood to the required size.
- Drill: Makes holes for screws and helps in assembling the cover.
- Paintbrush: Applies paint evenly on the plywood.
- Caulk Gun: Dispenses caulk smoothly into gaps.
- Screwdriver: Tightens screws to secure the cover.
Plywood acts as the main structure, while foam insulation and weatherstripping keep out drafts. Exterior paint protects from rain and sun. Screws hold everything together, and caulk seals small gaps.
Measuring tape ensures precise cuts, and a saw cuts the plywood. A drill makes holes for screws, and a paintbrush applies paint. A caulk gun helps fill gaps, and a screwdriver tightens screws.
Skill Level and Time Required
Skill Level: Beginner
Time Required: 1-2 hours
Step-by-Step Instructions
Measure the Air Conditioner:
- Use a tape measure to get the height, width, and depth of the unit.
- Write down these measurements.
Choose the Material:
- Select a durable, weather-resistant fabric like vinyl or canvas.
- Ensure the fabric is large enough to cover the entire unit.
Cut the Fabric:
- Lay the fabric flat.
- Measure and mark the dimensions of the air conditioner on the fabric.
- Add 2 inches to each side for seams.
- Cut the fabric along the marked lines.
Sew the Seams:
- Fold the edges of the fabric over 1 inch and pin them in place.
- Use a sewing machine or needle and thread to sew the seams, creating a hem.
Create the Corners:
- Fold the fabric to form a box shape.
- Pin the corners together.
- Sew the corners to secure the shape.
Add Fasteners:
- Attach Velcro strips or ties to the edges of the cover.
- Ensure they are evenly spaced for a snug fit.
Fit the Cover:
- Place the cover over the air conditioner.
- Secure it using the Velcro strips or ties.
Check the Fit:
- Ensure the cover fits tightly around the unit.
- Adjust the fasteners if necessary.
Weatherproofing:
- Apply a waterproof spray to the fabric for extra protection.
- Let it dry completely before using the cover.
Store When Not in Use:
- Fold the cover neatly.
- Store it in a dry place when not needed.
Tips and Tricks
Measure Twice, Cut Once: Always double-check measurements before cutting materials. This saves time and prevents waste.
Use Weather-Resistant Materials: Choose waterproof fabric or vinyl to protect the air conditioner from rain and snow.
Add Insulation: Include a layer of foam board or bubble wrap inside the cover for extra insulation. This keeps cold air out during winter.
Secure with Velcro or Elastic: Attach Velcro strips or elastic bands to ensure the cover stays in place, even during windy conditions.
Leave Ventilation Gaps: Make small ventilation holes to prevent moisture buildup inside the cover. This helps avoid mold and mildew.
Label the Cover: Mark the cover with the front and back to make installation easier each season.
Common Mistakes to Avoid:
Skipping Measurements: Not measuring properly can lead to a cover that doesn’t fit well.
Ignoring Ventilation: Lack of ventilation can cause moisture buildup, leading to mold.
Using Non-Durable Materials: Weak materials may tear easily, offering little protection.
Alternatives for Materials or Methods:
Old Shower Curtains: Repurpose old shower curtains as a waterproof cover.
Tarp and Bungee Cords: Use a tarp secured with bungee cords for a quick, temporary solution.
Plastic Sheeting: Heavy-duty plastic sheeting can work as a budget-friendly alternative.
Cost Estimation
Plywood: $20 for a 4x8 sheet
Weatherstripping: $10 for a roll
Screws: $5 for a box
Paint or Sealant: $15 for a can
Foam Insulation: $10 for a sheet
Measuring Tape: $5
Saw: $20 (if you don't have one)
Drill: $30 (if you don't have one)
Total Cost: Around $115
Budget-Friendly Alternatives:
- Use scrap wood instead of buying new plywood.
- Borrow tools like a saw or drill from friends or neighbors.
- Use leftover paint or sealant from previous projects.
Variations and Customizations
Materials: Instead of wood, use PVC pipes or metal rods for a modern look. For a softer touch, try fabric or bamboo.
Colors: Paint the cover in bright colors like yellow or blue for a cheerful vibe. For a more classic look, go with neutral tones like beige or gray.
Styles: Add decorative trim or stencils for a personalized touch. Use weather-resistant paint to ensure durability.
Alternative Designs: Create a slatted design for better airflow. Use hinges to make a foldable cover for easy storage.
Additional Features: Attach hooks for hanging small plants or tools. Add a small shelf on top for extra storage or decoration.
Sustainability Tips
Use recycled cardboard for the base. Cut it to fit your window unit. Cover the cardboard with old fabric or towels to add insulation. Secure the fabric with reused buttons or safety pins. For extra insulation, add a layer of bubble wrap between the cardboard and fabric. Use old belts or straps to hold the cover in place. Attach Velcro strips from previous projects to make it easy to remove. Reuse plastic bags as a waterproof layer if needed.
Your DIY Project is Complete
You've done it! Your window air conditioner cover is ready to protect your unit from the elements. With just a few materials and some elbow grease, you've created a custom solution that fits perfectly. Not only does this save you money, but it also extends the life of your air conditioner. Remember to check the cover periodically for any wear and tear, making repairs as needed. This small maintenance step ensures your cover remains effective season after season. Now, sit back and enjoy the satisfaction of a job well done. Your air conditioner is safe, and your wallet is happy. Keep this project in mind for other DIY endeavors. Who knows what you'll tackle next? Happy DIY-ing!
How do I measure my window air conditioner for a cover?
Use a tape measure to get the width, height, and depth of your unit. Measure from edge to edge, including any protruding parts like knobs or vents.
What materials work best for making a cover?
Heavy-duty vinyl, canvas, or waterproof fabric are great choices. They’re durable and can withstand harsh weather conditions.
Do I need any special tools?
Not really! Basic tools like scissors, a sewing machine, measuring tape, and Velcro or ties will do the trick.
How do I secure the cover to the unit?
Use Velcro strips, elastic bands, or ties to keep the cover snug. Make sure it’s tight enough to stay put but not so tight it damages the unit.
Can I make a cover without sewing?
Absolutely! You can use fabric glue or iron-on adhesive to join the pieces. Just make sure the adhesive is strong enough to hold up over time.
How often should I replace the cover?
Check it annually for wear and tear. If it looks worn out or damaged, it’s time to make a new one.
Will a cover affect the unit’s performance?
Only if you forget to remove it before using the air conditioner. Always take off the cover before turning on the unit to ensure proper airflow.