
Home>Home & Furniture>Doors & Windows>DIY Garage Door Water Barrier Installation
Doors & Windows
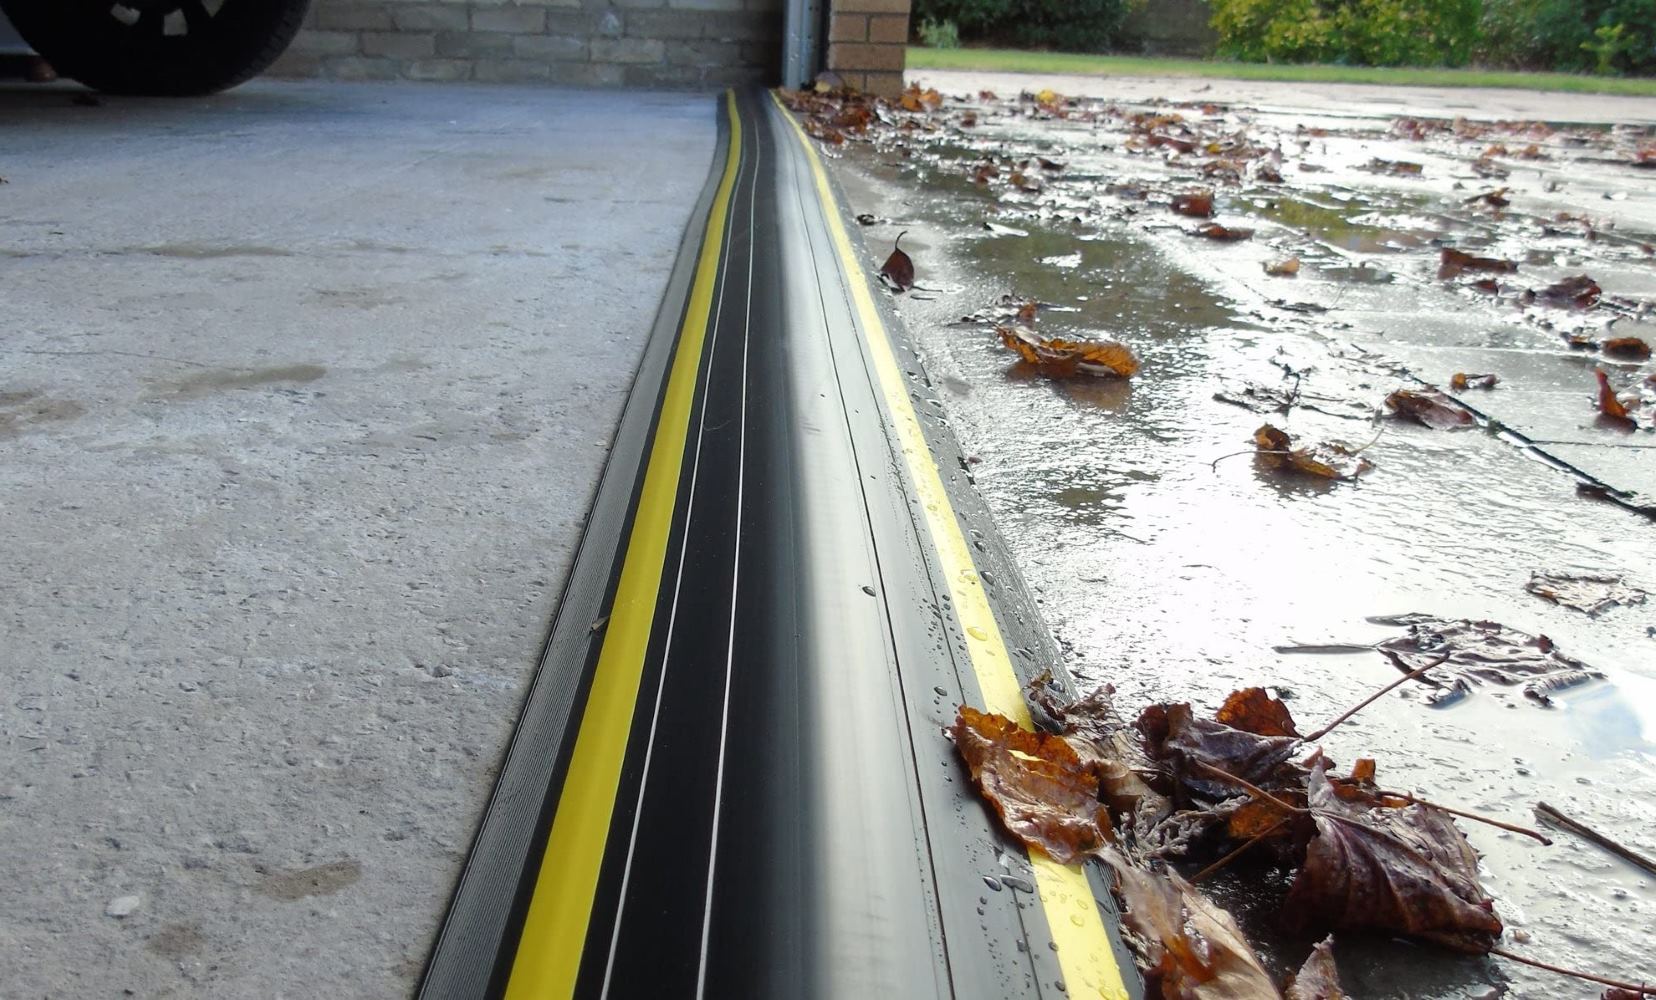
DIY Garage Door Water Barrier Installation
Published: September 15, 2024
Learn how to install a DIY garage door water barrier with our step-by-step guide. Protect your garage from water damage and enhance its longevity with these easy tips.
(Many of the links in this article redirect to a specific reviewed product. Your purchase of these products through affiliate links helps to generate commission for Twigandthistle.com, at no extra cost. Learn more)
Is water seeping into your garage every time it rains? Installing a water barrier at the base of your garage door can help keep things dry and protected. This straightforward project takes only a few hours and can save you lots of trouble later. With just a few tools and some materials from your local hardware store, you can create a strong barrier to keep unwanted water out. No need to be a professional handyman; this guide will walk you through the steps needed to tackle this task on your own. Let’s get started!
Getting Ready for the Project
Gather Materials: Get a water barrier kit, utility knife, measuring tape, adhesive, and a caulking gun.
Clear the Area: Remove any debris, dirt, or old sealant from the garage door threshold. Sweep and clean thoroughly.
Measure and Mark: Measure the width of the garage door. Mark the spots where the barrier will be placed.
Cut the Barrier: Use a utility knife to cut the water barrier to the correct length.
Apply Adhesive: Load the adhesive into the caulking gun. Apply a generous bead of adhesive along the marked line.
Position the Barrier: Place the water barrier onto the adhesive. Press down firmly to ensure it sticks well.
Seal the Edges: Apply additional adhesive along the edges of the barrier to create a watertight seal.
Let it Dry: Allow the adhesive to cure for the recommended time, usually 24 hours.
Safety Tips:
- Wear gloves to protect your hands from sharp tools and adhesive.
- Use safety goggles to shield your eyes from debris.
- Ensure the workspace is well-ventilated when using adhesive.
Workspace Setup:
- Work in a clean, dry area.
- Keep tools and materials within easy reach.
- Ensure good lighting to see clearly.
What You Will Need
Water Barrier Kit: Includes the barrier itself, adhesive, and instructions. Keeps water from entering the garage.
Utility Knife: Used to cut the barrier to the correct length.
Measuring Tape: Ensures accurate measurement of the garage door width.
Marker: Marks where to cut and place the barrier.
Caulk Gun: Applies adhesive evenly along the garage floor.
Adhesive: Secures the barrier to the floor. Usually included in the kit.
Cleaning Supplies: Rags, soap, and water to clean the garage floor before installation.
Heavy Object: Holds the barrier in place while the adhesive dries. A brick or similar item works well.
Gloves: Protects hands from adhesive and sharp edges.
Level: Ensures the barrier is installed straight.
These tools and materials will help you install a water barrier for your garage door effectively.
Required Skills and Time
Skill Level: Intermediate
Time Required: 2-3 hours
- Gather Materials: 15 minutes
- Measure and Cut Barrier: 30 minutes
- Clean Garage Floor: 20 minutes
- Apply Adhesive: 15 minutes
- Install Barrier: 30 minutes
- Let Adhesive Cure: 1 hour
Important Keywords: Skill Level, Time Required, Gather Materials, Measure and Cut, Clean Garage Floor, Apply Adhesive, Install Barrier, Let Adhesive Cure
How to Install the Water Barrier
Gather Materials
- Water barrier kit
- Utility knife
- Measuring tape
- Marker
- Adhesive (if not included in the kit)
- Cleaning supplies (broom, soap, water)
Clean the Area
- Sweep the garage floor where the barrier will be installed.
- Wash the area with soap and water.
- Let it dry completely.
Measure and Mark
- Use the measuring tape to measure the width of the garage door.
- Mark the measurement on the water barrier with the marker.
Cut the Barrier
- Use the utility knife to cut the water barrier to the correct length.
Apply Adhesive
- If the kit includes adhesive, apply it to the bottom of the barrier.
- If not, use your own adhesive and apply it evenly.
Position the Barrier
- Place the barrier along the marked line on the garage floor.
- Press down firmly to ensure it sticks.
Secure the Barrier
- Follow the kit instructions to secure the barrier in place.
- Some kits may include screws or additional adhesive.
Let it Set
- Allow the adhesive to dry for the recommended time.
- Avoid driving over the barrier until it is fully set.
Test the Barrier
- After the adhesive has dried, test the barrier by spraying water near the garage door.
- Check for any leaks or gaps.
Make Adjustments
- If there are leaks, adjust the barrier or apply more adhesive as needed.
Helpful Tips and Tricks
Measure Twice, Cut Once: Ensure accurate measurements of your garage door width before cutting the barrier. This saves time and material.
Use a Quality Sealant: Apply a high-quality waterproof sealant to the bottom of the barrier. This prevents water from seeping underneath.
Clean the Surface: Clean the garage floor thoroughly before installation. Dirt and debris can prevent the barrier from sticking properly.
Heat the Barrier: If using a rubber barrier, warm it up slightly with a hairdryer. This makes it more flexible and easier to install.
Secure with Screws: For extra security, use screws in addition to adhesive. This ensures the barrier stays in place during heavy rain.
Common Mistakes to Avoid:
Skipping Surface Prep: Not cleaning the floor can lead to poor adhesion and water leakage.
Using Low-Quality Adhesive: Cheap adhesives may not hold up, especially in extreme weather conditions.
Incorrect Placement: Placing the barrier too far from the door can leave gaps for water to enter.
Alternatives for Materials or Methods:
Foam Weatherstripping: Instead of rubber barriers, use foam weatherstripping. It's easier to install and provides good water resistance.
Concrete Sealant: Apply a concrete sealant to the garage floor. This can act as an additional water barrier.
Metal Thresholds: Metal thresholds offer a durable alternative. They can be more effective in high-traffic areas.
Budgeting for the Installation
Materials:
- Garage door water barrier kit: $30-$50
- Adhesive sealant: $10-$20
- Cleaning supplies (soap, water, rags): $5-$10
Tools:
- Utility knife: $10-$15
- Caulking gun: $5-$10
- Measuring tape: $5-$10
- Marker: $1-$3
Total Cost: $66-$118
Budget-friendly alternatives:
- Use a rubber threshold instead of a full kit: $20-$30
- Borrow tools from friends or neighbors: Free
- Use household cleaning supplies: Free
Total Cost with Alternatives: $26-$53
Different Ways to Customize
Materials: Instead of using standard rubber thresholds, consider vinyl or silicone options. These materials can be more flexible and easier to install. For a more eco-friendly choice, look into recycled rubber.
Colors: Most water barriers come in black, but you can paint them with outdoor-grade paint to match your garage door or driveway. Choose colors like gray, brown, or even white for a cleaner look.
Styles: For a more decorative touch, select barriers with a textured surface or patterned design. Some barriers come with a brick or stone appearance, adding a stylish element to your garage.
Installation Methods: Instead of adhesive, use screws or nails for a more secure fit. For a temporary solution, try removable barriers that can be taken down when not needed.
Additional Features: Add reflective strips for better visibility at night. Consider barriers with built-in drainage channels to direct water away more effectively.
Height and Width: Customize the height and width of the barrier to fit your specific needs. Taller barriers are better for areas with heavy rainfall, while shorter ones work well for light rain.
Combination: Combine the water barrier with a garage door seal for extra protection. This dual approach can help keep out not just water but also dust and pests.
DIY Kits: Look for DIY kits that include all necessary tools and materials. These kits often come with detailed instructions, making the installation process easier.
Eco-Friendly Installation Tips
Recycled rubber strips make excellent water barriers. They are durable and eco-friendly. Old garden hoses can be repurposed as barriers. Cut them lengthwise and attach them to the bottom of the door.
Use salvaged wood to create a raised threshold. Ensure it’s treated to withstand moisture. Reclaimed bricks or pavers can form a solid barrier at the base of the door.
For sealing gaps, consider natural cork strips. They expand when wet, providing a tight seal. Beeswax can waterproof wooden barriers effectively.
Recycled plastic sheets can be used for a waterproof layer. They are sturdy and long-lasting. Old tarps can also be cut and used as a protective layer.
When attaching materials, use eco-friendly adhesives. They are less harmful to the environment. Stainless steel screws are durable and can be reused if needed.
For added protection, consider installing a rain diverter above the garage door. This can be made from recycled metal sheets. It directs water away from the door, reducing the risk of leaks.
Always check local recycling centers for materials. They often have items that can be repurposed for projects like this.
Keep Water Out for Good
Installing a garage door water barrier is a smart move. It keeps your garage dry, protects your stuff, and saves you from future headaches. With some basic tools and a bit of time, you can tackle this project yourself. Just measure carefully, cut the barrier to fit, and secure it in place. Make sure to check for gaps and seal them well. Regular maintenance helps too. Keep an eye out for wear and tear, and replace the barrier if needed. By doing this, you’ll extend the life of your garage and keep it in top shape. So, grab your tools, roll up your sleeves, and get to work. Your garage will thank you, and you’ll feel proud of a job well done. Happy DIY-ing!
How do I know if I need a water barrier for my garage door?
If you notice water pooling inside your garage after rain, or if the bottom of your garage door looks worn or damaged, you probably need a water barrier. It helps keep water out and protects your belongings.
What materials do I need to install a water barrier?
You'll need a garage door threshold kit, a utility knife, a caulking gun, and some adhesive. Most kits come with everything you need, but double-check before starting.
How long does it take to install a water barrier?
It usually takes about an hour or two, depending on your experience with DIY projects. Just make sure to follow the instructions carefully for the best results.
Can I install a water barrier by myself?
Absolutely! This is a straightforward DIY project. Just follow the steps in the kit's instructions, and you'll have it done in no time.
Will the water barrier affect my garage door's operation?
No, a properly installed water barrier won't interfere with your garage door's function. It sits at the base and seals the gap without hindering movement.
How often should I replace the water barrier?
Typically, a good-quality water barrier lasts several years. Check it annually for wear and tear, especially after heavy rains, and replace it if you see significant damage.
Can I paint the water barrier to match my garage?
Yes, many water barriers are paintable. Just make sure to use a paint that's suitable for the material of your barrier. This way, it blends seamlessly with your garage.