
Home>Home & Furniture>Dining Room>DIY Buffet Table: How to Build Your Own
Dining Room
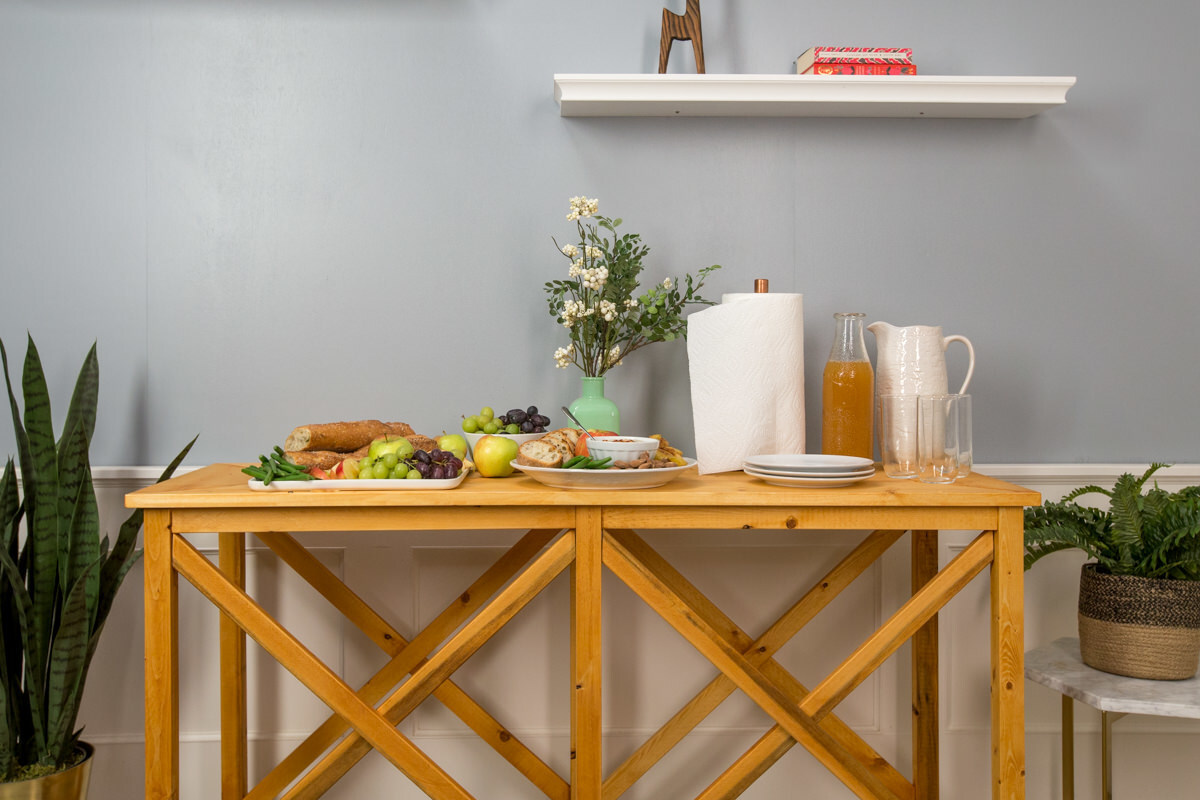
DIY Buffet Table: How to Build Your Own
Published: August 7, 2024
Learn how to build your own DIY buffet table with our step-by-step guide. Perfect for dining rooms, this project combines functionality and style. Get started today!
(Many of the links in this article redirect to a specific reviewed product. Your purchase of these products through affiliate links helps to generate commission for Twigandthistle.com, at no extra cost. Learn more)
Building your own buffet table can be a fun and rewarding project. Not only will you end up with a piece of furniture that fits your space perfectly, but you’ll also have the satisfaction of knowing you made it yourself. This guide will help you through each step, from gathering materials to final touches. No need for advanced carpentry skills; even beginners can successfully complete this project. Grab your tools, clear some space, and get ready to create a functional and stylish addition to your home. Let’s dive into the world of DIY furniture with confidence and creativity.
Getting Ready for Your Project
Gather Materials: Collect all necessary materials like wood, screws, nails, sandpaper, paint, and tools such as a saw, drill, and measuring tape.
Measure and Cut: Measure the dimensions for your buffet table. Cut the wood pieces according to these measurements.
Safety Gear: Wear safety goggles, gloves, and a dust mask to protect yourself from wood dust and sharp tools.
Workspace Setup: Clear a spacious area in your garage or backyard. Ensure good lighting and ventilation.
Check Tools: Make sure all tools are in good working condition. Charge any battery-operated tools.
Sand Wood: Sand all wood pieces to smooth out rough edges and surfaces.
Pre-Drill Holes: Pre-drill holes where screws will go to prevent wood from splitting.
Lay Out Pieces: Arrange all cut pieces on the floor to visualize the assembly process.
Read Instructions: If following a specific plan, read through all instructions before starting.
Organize Hardware: Sort screws, nails, and other hardware into separate containers for easy access.
Gathering Materials and Tools
Materials:
- Wood Boards: Used for the tabletop and shelves. Choose sturdy wood like pine or oak.
- Wood Screws: Secure the boards together. Ensure they are the right length for your wood thickness.
- Wood Glue: Adds extra strength to joints.
- Sandpaper: Smooths rough edges and surfaces. Use different grits for best results.
- Wood Stain or Paint: Gives the table a finished look. Pick a color that matches your decor.
- Polyurethane Finish: Protects the wood from scratches and spills.
- Table Legs: Supports the tabletop. Metal or wooden legs can be used.
- Brackets: Provides additional support for shelves.
Tools:
- Tape Measure: Measures wood pieces accurately.
- Saw: Cuts wood to the required sizes. A circular saw or handsaw works well.
- Drill: Makes holes for screws and attaches them. A cordless drill is convenient.
- Screwdriver: Tightens screws. A power screwdriver saves time.
- Clamps: Holds wood pieces together while glue dries.
- Paintbrushes or Rollers: Applies stain, paint, and finish evenly.
- Sanding Block or Electric Sander: Speeds up the sanding process.
- Level: Ensures the table is even and balanced.
Skill Level and Time Commitment
Skill Level: Intermediate
Time Required: 6-8 hours
Steps:
- Gather Materials: Wood, screws, nails, paint, and tools.
- Cut Wood: Measure and cut wood pieces for the table top, legs, and supports.
- Assemble Frame: Attach legs to the table top using screws and nails.
- Add Supports: Secure additional supports for stability.
- Sand and Paint: Smooth surfaces and apply paint or stain.
- Final Touches: Let the paint dry and add any decorative elements.
Building Instructions
Gather Materials and Tools
- Wood planks (for the top and shelves)
- Four table legs
- Screws and nails
- Wood glue
- Sandpaper
- Paint or stain
- Paintbrush
- Measuring tape
- Saw
- Drill
- Screwdriver
Measure and Cut Wood
- Measure the desired length and width of the table top.
- Cut the wood planks to size for the top.
- Cut additional planks for shelves if needed.
Assemble the Frame
- Attach the table legs to the corners of the top plank using screws and wood glue.
- Ensure legs are straight and secure.
Add Shelves
- Measure the height where shelves will be placed.
- Attach shelf supports to the legs using screws.
- Place and secure the shelf planks on the supports.
Sand the Wood
- Smooth all surfaces with sandpaper.
- Focus on edges and corners to avoid splinters.
Paint or Stain
- Apply paint or stain to the entire table.
- Allow it to dry completely.
- Apply a second coat if needed.
Final Assembly
- Check all screws and joints for tightness.
- Make any necessary adjustments.
Place and Enjoy
- Position your new buffet table in the desired location.
- Decorate and use as needed.
Helpful Tips and Tricks
Measure Twice, Cut Once: Always double-check measurements before cutting wood. This saves time and materials.
Use Quality Wood: Opt for hardwood like oak or maple. They are durable and look great.
Pre-Drill Holes: Prevent wood from splitting by pre-drilling holes for screws.
Sand Smooth: Sand all surfaces before assembly. This ensures a smooth finish and easier painting or staining.
Level Legs: Make sure the table legs are even. Use a level to avoid wobbling.
Secure Joints: Use wood glue in addition to screws for stronger joints.
Stain Before Assembly: Stain or paint pieces before putting them together. This prevents missed spots.
Protect Surfaces: Apply a clear sealant to protect the wood from spills and scratches.
Common Mistakes to Avoid:
Skipping Plans: Don’t start without a clear plan. Sketch out dimensions and design first.
Wrong Tools: Using incorrect tools can damage wood and slow progress. Invest in basic tools like a saw, drill, and sander.
Ignoring Safety: Always wear safety gear like goggles and gloves. Safety first!
Rushing: Take your time. Rushing leads to mistakes and poor craftsmanship.
Alternatives for Materials or Methods:
Plywood: If hardwood is too expensive, use high-quality plywood. It’s cheaper and still sturdy.
Pocket Holes: Instead of traditional joints, use pocket hole screws. They are easier for beginners.
Prefabricated Legs: Buy pre-made table legs if cutting your own is too challenging.
Varnish: Use varnish instead of paint for a natural wood look. It’s easier to apply and maintain.
Estimating Your Costs
Wood: For a standard buffet table, you'll need about 20-25 board feet of hardwood. Cost: $100-$150.
Screws and Nails: A box of each should suffice. Cost: $10.
Wood Glue: One bottle. Cost: $5.
Sandpaper: Various grits for smoothing. Cost: $10.
Stain or Paint: One quart. Cost: $15.
Brushes/Rollers: For applying stain or paint. Cost: $10.
Drawer Pulls/Knobs: If adding drawers, you'll need 4-6 pulls or knobs. Cost: $20.
Hinges: For cabinet doors, if included. Cost: $10.
Tools:
- Saw: Circular or miter saw. Cost: $50-$100 (if not already owned).
- Drill: For screws and holes. Cost: $30-$50 (if not already owned).
- Clamps: To hold pieces together while gluing. Cost: $20.
- Measuring Tape: For accurate cuts. Cost: $5.
- Level: Ensures the table is even. Cost: $10.
Total Cost: $295-$460.
Budget-Friendly Alternatives:
- Plywood instead of hardwood: $50-$75.
- Second-hand tools: Check garage sales or online marketplaces.
- Basic drawer pulls/knobs: $10.
- Skip the paint/stain: Use natural wood finish.
Total Budget-Friendly Cost: $175-$250.
Creative Variations
Materials: Instead of using traditional wood, try reclaimed wood for a rustic look. Metal or glass can give a modern touch. Bamboo offers an eco-friendly option.
Colors: Paint the table in bold colors like teal or red for a statement piece. For a more subtle look, use neutral tones like beige or gray. Staining the wood can highlight its natural beauty.
Styles: Add decorative trim or molding for a classic style. Use hairpin legs for a mid-century modern vibe. Incorporate industrial elements like pipe legs or metal accents.
Storage: Include drawers or shelves for extra storage. Install wine racks or glass holders underneath. Add baskets or bins for a farmhouse feel.
Top Surface: Use tile or marble for a durable, easy-to-clean surface. A butcher block top can add warmth and functionality. Glass tops can make the table look sleek and modern.
Hardware: Swap out standard knobs and pulls for vintage or decorative hardware. Use leather pulls for a unique touch. Brass or copper hardware can add a touch of elegance.
Lighting: Install under-cabinet lighting to highlight the table's features. Use LED strips for a modern look. Add pendant lights above for a dramatic effect.
Finishes: Apply a distressed finish for a shabby chic look. Use high-gloss paint for a contemporary feel. A matte finish can give a more understated, elegant appearance.
Eco-Friendly Tips
Reclaimed wood makes an excellent choice for building a buffet table. You can find old wood from barns, pallets, or even discarded furniture. This not only saves trees but also gives your table a unique, rustic look.
Eco-friendly paints and finishes are another great option. Look for products labeled as low-VOC or zero-VOC. These paints release fewer harmful chemicals into the air, making them safer for you and the environment.
Bamboo is a fast-growing, renewable resource. Using bamboo plywood or planks can add a modern touch to your buffet table while being kind to the planet.
Recycled metal can be used for handles, knobs, or even legs. Old pipes or metal scraps can be repurposed to add an industrial flair to your project.
Natural adhesives like soy-based or water-based glues are less toxic than traditional options. They work just as well and are better for your health and the environment.
Upcycling old furniture is another sustainable method. An old dresser or sideboard can be transformed into a stunning buffet table with some creativity and elbow grease.
Solar-powered tools can reduce your carbon footprint. If you have access to solar energy, using solar-powered drills, saws, and sanders can make your project even more eco-friendly.
Local materials reduce transportation emissions. Sourcing wood, metal, or other materials from local suppliers supports your community and cuts down on the carbon footprint associated with shipping.
Natural oils like linseed or tung oil can be used to finish your table. These oils are biodegradable and non-toxic, providing a beautiful finish without harmful chemicals.
Recycled glass can be used for tabletops or decorative elements. Broken glass pieces can be smoothed and set into resin for a unique, eco-friendly surface.
Your DIY Buffet Table Awaits
Building your own buffet table isn't just about saving money. It's about creating something unique that fits your style. You’ve learned how to choose the right materials, measure accurately, and assemble everything securely. With a bit of patience and some elbow grease, you've got a piece of furniture that’s both functional and personal. Don't worry if it’s not perfect; imperfections add character. Now, you can proudly show off your handiwork at your next gathering. Plus, every time you use it, you'll remember the effort you put into making it. So, grab those tools, get creative, and start building. Your custom buffet table is just a few steps away. Happy building!
What materials do I need to build a buffet table?
You'll need wood (like pine or oak), screws, wood glue, sandpaper, paint or stain, and varnish. Don't forget tools like a saw, drill, and measuring tape.
How long will it take to build a buffet table?
Depending on your skill level, it might take a weekend or a few days. Cutting, assembling, sanding, and finishing all take time.
Do I need any special skills to build a buffet table?
Basic carpentry skills are helpful. If you can measure, cut, and use a drill, you should be good to go.
Can I customize the design of my buffet table?
Absolutely! You can choose the size, shape, and finish. Add drawers, shelves, or even a wine rack if you like.
How much will it cost to build my own buffet table?
Costs vary based on materials and tools. On average, expect to spend between $100 and $300. Using reclaimed wood can save money.
What type of wood is best for a buffet table?
Hardwoods like oak or maple are durable and look great. Pine is cheaper but softer, so it may dent more easily.
How do I finish my buffet table?
Sand the wood smooth, then apply stain or paint. Finish with a coat of varnish to protect the surface.