
Home>Home & Furniture>Bedroom>DIY Lighting Ideas for Your Bedroom
Bedroom
DIY Lighting Ideas for Your Bedroom
Published: July 21, 2024
Discover creative DIY lighting ideas to transform your bedroom into a cozy haven. From fairy lights to custom lamps, brighten your space with these easy, budget-friendly tips!
(Many of the links in this article redirect to a specific reviewed product. Your purchase of these products through affiliate links helps to generate commission for Twigandthistle.com, at no extra cost. Learn more)
Transforming your bedroom with DIY lighting ideas can be fun and budget-friendly. Imagine creating a cozy space that reflects your style and mood with just a few simple projects. Whether you prefer soft, warm glows or bright, colorful lights, you can easily craft your own unique lighting solutions. From fairy lights to custom lampshades, the possibilities are endless. Not only will these projects save you money, but they will also give your room a personal touch. Get ready to roll up your sleeves and brighten your bedroom in ways you’ve never imagined.
Getting Ready for Your DIY Lighting Project
Gather Materials: Collect all necessary tools and materials like light fixtures, bulbs, wires, a screwdriver, and a ladder.
Safety First: Turn off the power at the circuit breaker to avoid electric shocks. Wear gloves and safety goggles.
Workspace Setup: Clear the area where you’ll be working. Make sure you have enough light to see what you’re doing.
Measure and Plan: Measure the space where you want to install the lights. Sketch a simple plan to visualize the placement.
Check Fixtures: Ensure the light fixtures are compatible with your existing wiring and can support the bulbs you plan to use.
Test Bulbs: Test the bulbs before installation to make sure they work properly.
Organize Tools: Lay out all tools and materials in an organized manner so you can easily access them during the project.
Read Instructions: Go through the installation instructions for each light fixture to understand the steps involved.
Prepare Mounting Points: Mark and prepare the mounting points on the wall or ceiling where the lights will be installed.
Secure Loose Wires: Make sure all wires are secure and not frayed. Use electrical tape if needed.
Have a Helper: If possible, have someone assist you, especially when handling heavy or awkward fixtures.
Gathering Materials and Tools
- LED Strip Lights: Flexible lights that can be stuck to surfaces, perfect for under-bed or behind-headboard lighting.
- Fairy Lights: Small, twinkling lights that add a magical touch when draped over furniture or hung on walls.
- Pendant Light Kit: Includes a cord, socket, and ceiling mount for hanging a stylish light fixture.
- Lampshade: Covers the light bulb, diffusing light and adding style.
- Light Bulbs: Choose energy-efficient LED bulbs for long-lasting, bright light.
- Command Hooks: Damage-free hooks for hanging lights without nails or screws.
- Extension Cord: Provides extra reach for plugging in lights far from outlets.
- Wire Cutters: Essential for cutting and stripping wires when installing lights.
- Screwdriver: Needed for assembling light fixtures and securing them in place.
- Measuring Tape: Ensures precise placement of lights and fixtures.
- Double-Sided Tape: Useful for attaching LED strips or fairy lights to surfaces.
- Drill: Required for making holes to mount pendant lights or other fixtures.
- Electrical Tape: Insulates and secures wire connections.
- Battery Pack: Powers lights without needing an outlet, ideal for fairy lights.
- Decorative Elements: Items like mason jars, lanterns, or fabric to customize and enhance lighting designs.
Skill Level and Time Commitment
Skill Level: Intermediate
Estimated Time Required: 3-5 hours
String Lights Installation
- Skill Level: Beginner
- Time Required: 1-2 hours
DIY Pendant Light
- Skill Level: Intermediate
- Time Required: 2-3 hours
Wall Sconces
- Skill Level: Advanced
- Time Required: 3-4 hours
LED Strip Lights
- Skill Level: Beginner
- Time Required: 1-2 hours
Mason Jar Lights
- Skill Level: Intermediate
- Time Required: 2-3 hours
Instructions for Creating Your Light
Gather Materials
- String lights
- Command hooks or adhesive strips
- Lampshades
- LED light strips
- Extension cords
- Batteries (if needed)
Plan Layout
- Decide where each light will go.
- Measure spaces to ensure proper fit.
Install String Lights
- Use command hooks to hang string lights.
- Arrange them around windows, headboards, or walls.
Add Lampshades
- Choose lampshades that match your room’s decor.
- Place them on existing lamps or buy new bases.
Attach LED Strips
- Peel off adhesive backing from LED strips.
- Stick them under shelves, behind the bed, or along the ceiling.
Connect Power
- Plug lights into extension cords if outlets are far.
- Use batteries for lights that don’t reach an outlet.
Test Lights
- Turn on all lights to check placement.
- Adjust as needed for even lighting.
Secure Cords
- Use clips or tape to keep cords out of the way.
- Ensure cords are not tripping hazards.
Add Finishing Touches
- Incorporate decorative elements like fairy lights in jars.
- Use dimmers for adjustable brightness.
Helpful Tips and Tricks
Use LED strip lights under your bed or along the ceiling for a modern look. They are energy-efficient and come in various colors.
Fairy lights can be draped over a headboard or around a mirror to create a cozy atmosphere. Battery-operated ones are easy to install without needing an outlet.
Table lamps with adjustable brightness are great for reading. Choose ones with a dimmer switch to control the light level.
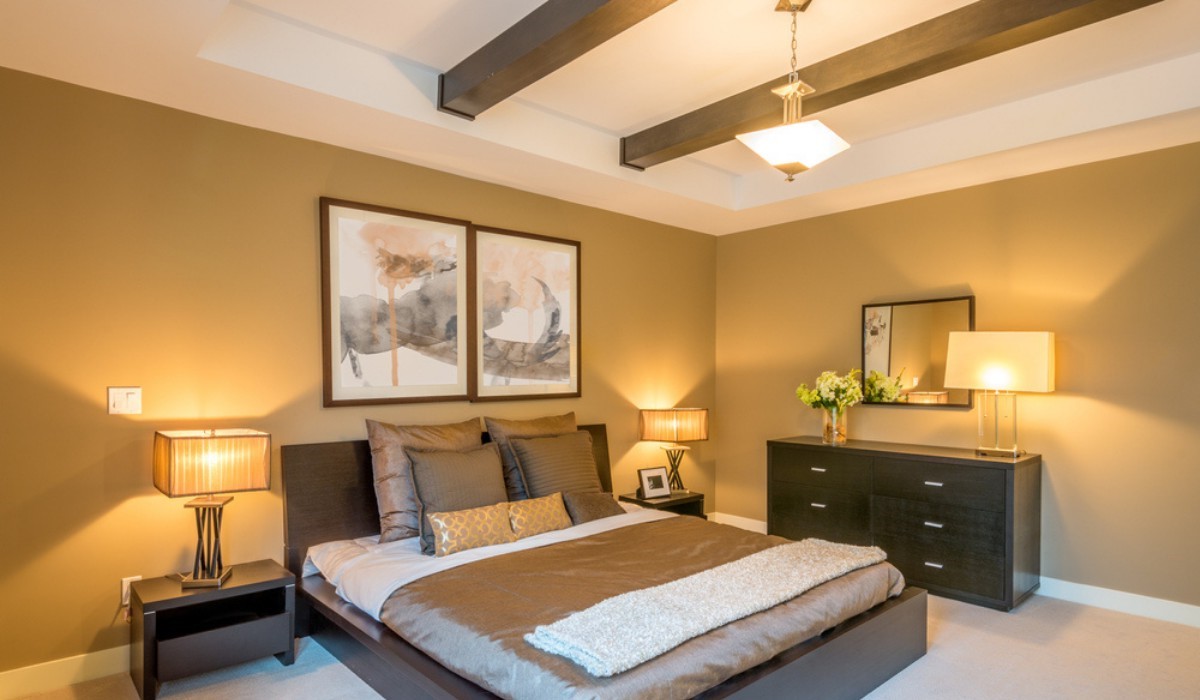
Wall sconces save space on nightstands. Install them at eye level for the best lighting effect.
Pendant lights hung from the ceiling can add a stylish touch. Use them over a reading nook or desk area.
Common mistakes to avoid include using lights that are too bright or harsh. Soft, warm lights create a more relaxing environment. Avoid overloading outlets with too many plugs. This can be dangerous and cause electrical issues.
Alternatives for materials or methods include using solar-powered lights for an eco-friendly option. Battery-operated lights are great for areas without easy access to outlets. Instead of buying new fixtures, consider upcycling old jars or bottles into unique light holders.
Estimating the Cost
String Lights: $10-$30. Budget-friendly option: Fairy Lights for $5-$15.
Pendant Lights: $20-$50. Cheaper alternative: Paper Lanterns for $10-$20.
LED Strip Lights: $15-$40. Affordable choice: Rope Lights for $10-$25.
Table Lamps: $15-$60. Inexpensive substitute: Clip-on Lamps for $10-$20.
Wall Sconces: $25-$70. Lower-cost option: Battery-operated Wall Lights for $15-$30.
Smart Bulbs: $10-$30 each. Budget option: Regular LED Bulbs for $5-$10 each.
Dimmer Switches: $10-$25. Cheaper alternative: Plug-in Dimmer for $8-$15.
Tools: Basic toolkit (screwdriver, pliers, etc.) $20-$50. Budget-friendly: Borrow tools from friends or family.
Total estimated cost: $135-$355. Budget-friendly total: $73-$165.
Different Ways to Customize
String Lights: Use fairy lights for a soft, magical glow. Opt for colored bulbs to match your room's theme or warm white for a cozy feel. Hang them around your bed frame, window, or create a canopy.
Pendant Lights: Choose industrial-style metal shades for a modern look or woven rattan for a boho vibe. Paint the shades in bold colors or metallic finishes to add a personal touch.
Lampshades: Customize with fabric paint or decoupage using patterned paper or fabric. Add trims like tassels or beads for extra flair.
Wall Sconces: Use reclaimed wood or metal piping for a rustic touch. Paint them to match your room's color scheme or leave them natural for a more organic feel.
LED Strips: Place under your bed, behind your headboard, or along shelves. Choose color-changing LEDs for a dynamic effect or single-color strips for a more subtle look.
Mason Jar Lights: Fill jars with battery-operated fairy lights or LED candles. Hang them from the ceiling or place them on shelves for a charming, rustic touch.
Paper Lanterns: Use plain white for a minimalist look or colorful patterns for a festive feel. Hang them at different heights for a layered effect.
Chandeliers: Create a DIY chandelier using crystals, beads, or recycled materials like plastic spoons or bottle caps. Paint or decorate to match your room's style.
Neon Signs: Purchase a neon light kit and bend the tubing into your favorite shape or word. Choose colors that complement your room's palette.
Candle Holders: Use vintage teacups, glass jars, or metal tins as unique candle holders. Decorate with paint, ribbon, or lace for added charm.
Eco-Friendly Lighting Ideas
Recycled Jars: Use old glass jars to create unique lamps. Paint or decorate them, then add LED fairy lights inside.
Driftwood Lamps: Collect driftwood from beaches or rivers. Attach a light bulb socket to the wood for a rustic lamp.
Wine Bottle Pendants: Clean and cut the bottoms off old wine bottles. Insert a light bulb and hang them for stylish pendant lights.
Paper Lanterns: Use recycled paper to craft lanterns. Decorate with natural dyes or leaves for a soft, ambient glow.
Tin Can Lights: Clean and punch holes in tin cans. Place a candle or LED light inside for patterned lighting.
Fabric Scraps: Wrap old fabric around a wire frame to create a colorful lampshade. Use natural fabrics like cotton or linen.
Pallet Wood: Disassemble old pallets to make a wooden lamp base. Sand and finish the wood for a polished look.
Upcycled Chandeliers: Use old bicycle wheels or metal frames. Attach multiple light bulbs for a modern chandelier.
Solar Lights: Place solar panels outside and run the wiring inside. Use these to power your bedroom lights for an eco-friendly option.
Mason Jar Chandeliers: Group several mason jars together. Insert LED bulbs for a charming chandelier.
Brighten Up Your Space
DIY lighting projects can transform any bedroom into a cozy retreat. From string lights to custom lampshades, these ideas add a personal touch without breaking the bank. Experimenting with different light sources and designs lets you create a unique ambiance that reflects your style. Plus, making your own lighting fixtures can be a fun and rewarding experience.
Remember, safety first. Always follow instructions and take necessary precautions when working with electricity. With a bit of creativity and effort, you can brighten up your space in no time. So grab those tools, gather your materials, and start crafting your perfect bedroom lighting today. Happy DIY-ing!
How can I make my own string lights?
Grab some fairy lights and ping pong balls. Cut a small X in each ball and push a light through. Hang them around your room for a cozy glow.
What's an easy way to create a DIY lampshade?
Use parchment paper and markers. Draw your favorite designs, then wrap the paper around an old lampshade frame. Secure with tape or glue.
Can I make a bedside lamp from scratch?
Sure! Use a mason jar, fill it with pebbles or fairy lights, and top it with a lamp kit from a hardware store. Easy peasy!
How do I make a wall sconce without wiring?
Use battery-operated puck lights and decorative wall brackets. Attach the puck light to the bracket, and you've got a sconce with no wiring needed.
What's a fun way to use LED strips?
Stick LED strips under your bed frame or along the edges of your shelves. They add a cool, modern touch and are super easy to install.
Can I create a chandelier with household items?
Absolutely! Use an old hula hoop, wrap it in fairy lights, and hang it from the ceiling with fishing line. Instant chandelier!
How do I make a reading light from a clip-on lamp?
Attach a clip-on lamp to your headboard or a nearby shelf. Aim the light where you need it, and you've got a perfect reading spot.