
Home>Home & Furniture>Bedroom>DIY Enchanted Forest Bedroom Ideas
Bedroom
DIY Enchanted Forest Bedroom Ideas
Published: July 20, 2024
Transform your bedroom into a magical retreat with our DIY enchanted forest ideas. Discover tips, decor, and inspiration to create your own woodland sanctuary.
(Many of the links in this article redirect to a specific reviewed product. Your purchase of these products through affiliate links helps to generate commission for Twigandthistle.com, at no extra cost. Learn more)
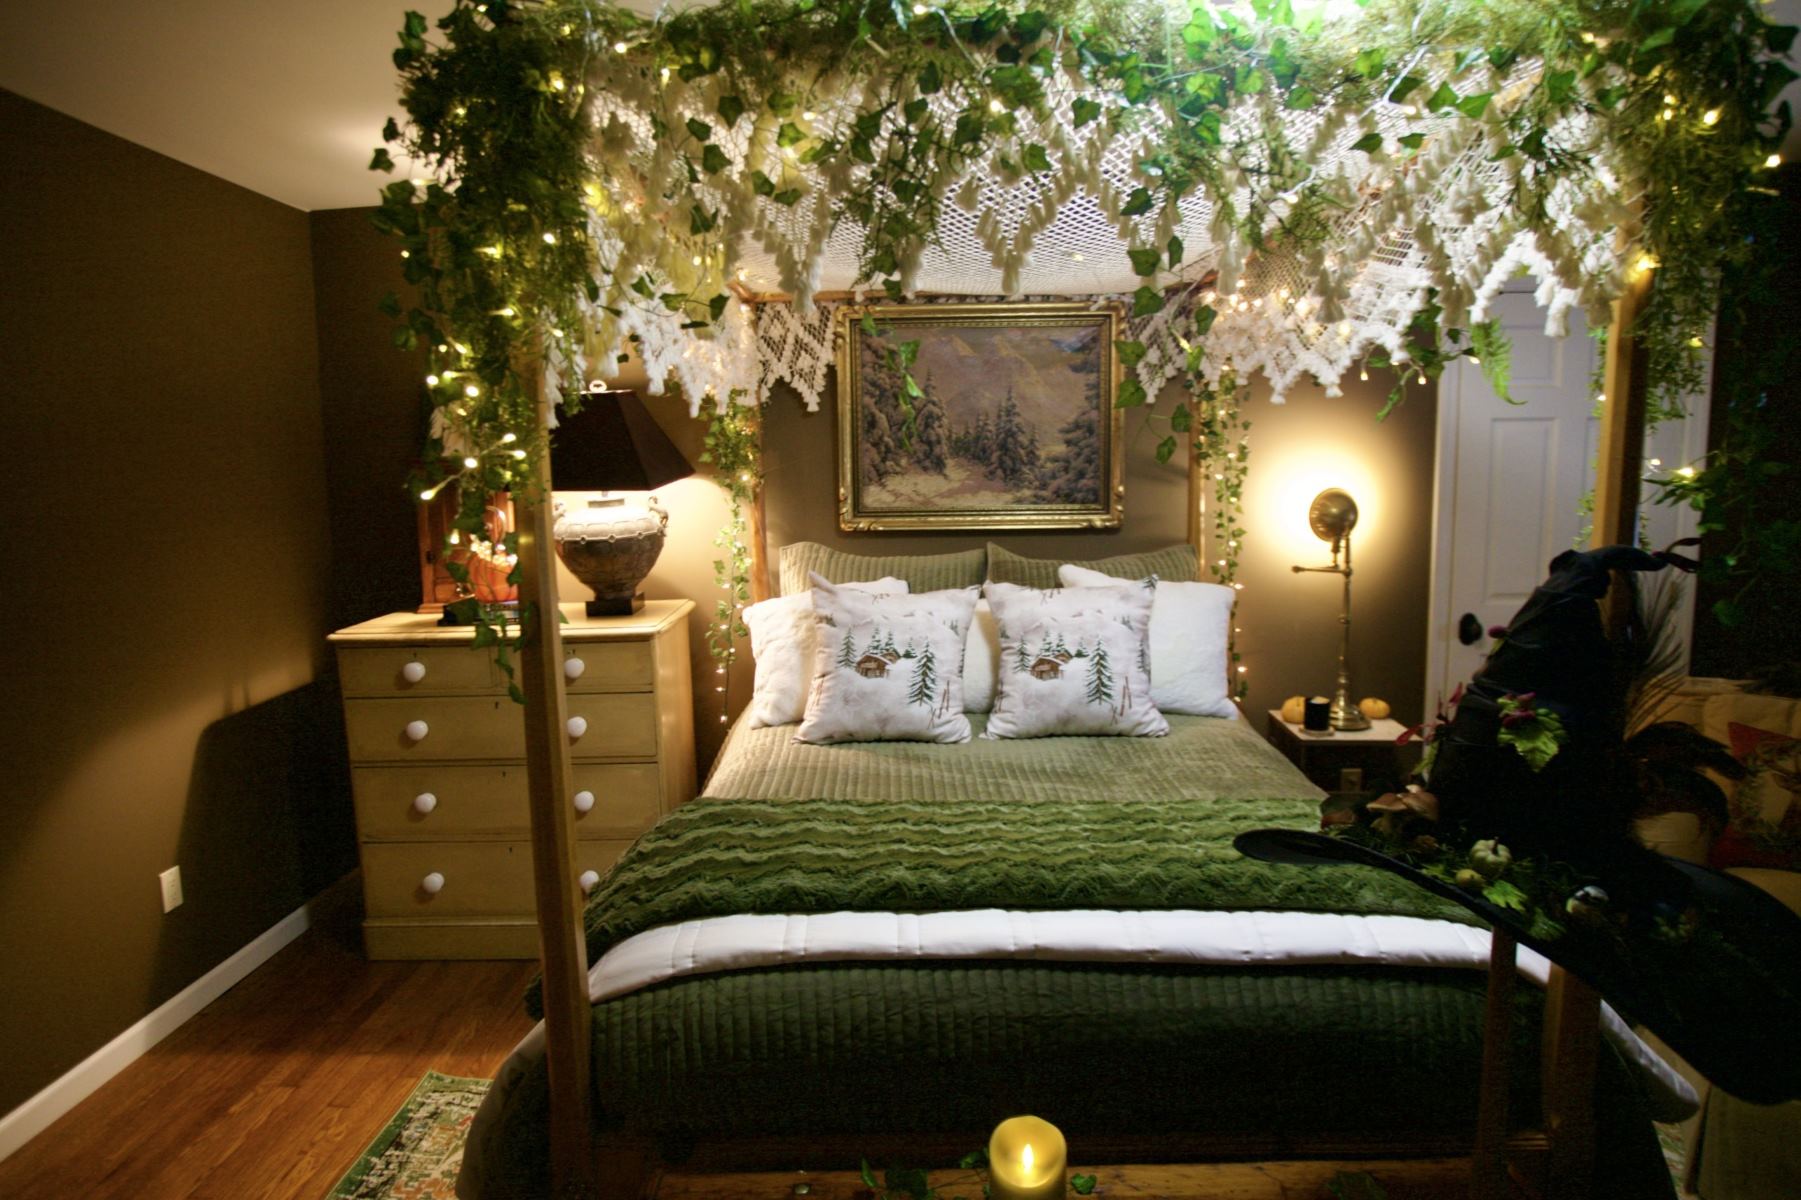
Transforming a bedroom into an enchanted forest can be a magical project. Imagine stepping into a room filled with twinkling lights, lush greenery, and cozy nooks perfect for dreaming. This adventure lets creativity run wild, utilizing simple materials and a bit of imagination. With a few DIY hacks, any bedroom can become a serene woodland retreat. From creating tree murals to making fairy light canopies, there’s a world of possibilities. Dive into this guide to craft your own enchanted forest bedroom, where dreams and nature blend seamlessly.
Getting Ready for Your Project
Plan Your Design: Sketch out your ideas for the enchanted forest theme. Decide on colors, furniture, and decorations.
Gather Materials: Collect paint, brushes, wallpaper, stencils, and any forest-themed decorations like fairy lights, artificial plants, or tree decals.
Clear the Room: Remove furniture and other items from the bedroom. This makes it easier to paint and decorate without obstacles.
Set Up a Workspace: Create a designated area for your tools and materials. Use a drop cloth to protect the floor from paint spills.
Safety Gear: Wear gloves, safety goggles, and a mask to protect yourself from paint fumes and dust.
Prep the Walls: Clean the walls thoroughly. Fill any holes or cracks with spackle and sand them smooth.
Tape Off Areas: Use painter's tape to cover edges, trim, and any areas you don't want to paint.
Prime the Walls: Apply a coat of primer to ensure the paint adheres well and the colors pop.
Paint Base Colors: Start with the base colors for your forest scene. Let each layer dry completely before adding details.
Add Details: Use stencils or freehand painting to add trees, leaves, and other forest elements. Incorporate fairy lights and artificial plants for a magical touch.
Reassemble the Room: Once the paint is dry and decorations are in place, move the furniture back in and arrange it to fit your enchanted forest theme.
What You Need to Get Started
Paint and Brushes: Use green, brown, and blue paints to create forest-themed walls. Brushes of various sizes help with detailed work.
Stencils: Tree and leaf stencils make it easier to paint intricate designs on walls.
Fairy Lights: String lights add a magical glow to the room, mimicking fireflies or stars.
Artificial Plants: Fake vines, flowers, and small trees bring nature indoors without maintenance.
Wooden Furniture: Rustic wooden beds, nightstands, and shelves enhance the forest vibe.
Fabric: Green and brown fabrics for curtains, bedspreads, and cushions create a cohesive look.
Hot Glue Gun: Essential for attaching decorations like artificial plants to walls or furniture.
Scissors: Needed for cutting fabric, stencils, and other materials.
Ladder: Helps reach high places for painting or hanging lights.
Tape Measure: Ensures accurate measurements for furniture placement and fabric cutting.
Nails and Hammer: Useful for hanging pictures, shelves, or other decorations.
Wall Decals: Easy-to-apply stickers with forest themes add extra detail without much effort.
Rugs: Green or brown rugs mimic forest floors and add comfort.
Pillows: Leaf or animal-shaped pillows add a whimsical touch.
Canopy: A green or brown canopy over the bed can resemble a forest canopy.
How Much Time and Skill You Need
Skill Level: Intermediate
Time Required: 2-3 weekends
- Painting Walls: 1 weekend
- Installing Fairy Lights: 3-4 hours
- Creating Tree Canopy: 1 day
- Decorating with Forest-themed Accessories: 1 day
- Building Custom Furniture (optional): 1 weekend
Follow These Steps
Plan Your Design
- Sketch your ideas on paper.
- Decide on a color scheme (greens, browns, and earthy tones work well).
Paint the Walls
- Choose a base color like forest green or sky blue.
- Use a sponge or brush to add texture for a more natural look.
Create a Canopy
- Hang sheer green or brown fabric from the ceiling.
- Use hooks or curtain rods to drape the fabric around the bed.
Add Tree Decals or Murals
- Purchase tree decals or paint your own tree mural.
- Place them strategically on the walls to create a forest effect.
Install Fairy Lights
- String fairy lights around the canopy and walls.
- Use battery-operated lights for easier setup.
Incorporate Natural Elements
- Add potted plants or faux greenery.
- Use wooden furniture or accents to enhance the natural feel.
Create a Forest Floor
- Lay down a green or brown area rug.
- Scatter faux leaves or moss around the room.
Add Forest-Themed Decor
- Use animal-themed pillows and blankets.
- Hang pictures or artwork of forest scenes.
Install a Starry Sky
- Use glow-in-the-dark stars on the ceiling.
- Consider a star projector for a more immersive experience.
Personalize Your Space
- Add personal touches like favorite books or trinkets.
- Use items that make the room feel cozy and magical.
Helpful Hints for Success
Use natural materials like wood, stone, and moss to create an authentic forest feel. Fairy lights can add a magical glow, especially when draped around the bed or ceiling. Wall murals or decals of trees, animals, and plants can transform plain walls into a forest scene. Canopy beds with sheer, green fabric can mimic the look of a forest canopy.
Common mistakes to avoid include overloading the room with too many decorations, which can make it feel cluttered. Avoid using artificial plants that look too fake; opt for real or high-quality faux plants. Don’t forget about lighting; a mix of soft, warm lights can create a cozy atmosphere.
Alternatives for materials or methods include using bamboo instead of traditional wood for a more eco-friendly option. Instead of painting a mural, consider using removable wallpaper with forest designs. For a budget-friendly canopy, use tulle fabric instead of more expensive materials.
How Much Will It Cost?
Paint: $30-$50 per gallon. You might need 2-3 gallons for a room.
Wall Decals: $20-$50 for a set. Look for tree, animal, or fairy decals.
Fairy Lights: $15-$30 per string. You might need 2-3 strings.
Artificial Plants: $5-$20 each. Plan on 5-10 plants.
Canopy or Sheer Curtains: $20-$40. These can create a magical feel around the bed.
Moss or Grass Rugs: $30-$60. One or two should cover the floor.
Wooden Furniture: $100-$300 per piece. Look for second-hand options to save money.
DIY Treehouse Bed: $200-$500 in materials. Plywood, screws, paint, and tools.
Paint Brushes and Rollers: $10-$20. Essential for painting walls and furniture.
Budget-Friendly Alternatives:
- Use green fabric instead of moss rugs: $10-$20.
- Make your own wall decals with stencils and paint: $10-$15.
- Thrift stores for wooden furniture: $50-$150 per piece.
- DIY fairy lights using LED strips: $10-$20.
Total estimated cost: $450-$1,200.
Make It Your Own
Alternative Materials: Use reclaimed wood for furniture and wall accents to give a rustic feel. Try bamboo for a more eco-friendly option. For a softer touch, consider faux fur rugs and pillows.
Colors: Go for earthy tones like deep greens, browns, and soft grays. Add pops of color with mossy greens or floral hues like lavender and rose. For a magical touch, incorporate glow-in-the-dark paint on the ceiling to mimic stars.
Styles: Create a fairy-tale vibe with delicate fairy lights and canopy beds draped in sheer fabric. For a more woodland look, use tree branch curtain rods and leaf-shaped wall decals. Add a mystical element with crystal accents and dreamcatchers.
Furniture: Opt for a treehouse-style loft bed or a moss-covered headboard. Use mushroom-shaped stools and log side tables. Consider a swing chair for a playful touch.
Decor: Hang butterfly or bird mobiles from the ceiling. Use mason jars filled with fairy lights as nightlights. Add nature-inspired artwork like forest landscapes or animal prints.
Textures: Mix velvet and linen fabrics for bedding. Use woven baskets for storage. Incorporate stone or pebble accents in decor items.
Lighting: Install twinkling fairy lights around the room. Use lantern-style lamps for a cozy glow. Consider a chandelier made of twigs and crystals for a dramatic effect.
Eco-Friendly Ideas
Reclaimed wood can be used for furniture or wall panels, giving a rustic, forest-like feel. Natural fabrics like organic cotton or linen work well for bedding and curtains. Eco-friendly paint with low VOCs (volatile organic compounds) helps keep the air clean. Upcycled items such as old jars can become fairy light holders or terrariums. Bamboo is a sustainable option for flooring or furniture. Live plants add greenery and improve air quality. Recycled paper can be used for DIY wall art or decorations. Solar-powered lights can create a magical ambiance while saving energy. Second-hand furniture can be repainted or reupholstered to fit the theme. Natural dyes can be used for coloring fabrics or creating artwork.
Bringing It All Together
Creating an enchanted forest bedroom is easier than you think. Start with earthy colors for walls and furniture. Add fairy lights and canopy beds to give a magical touch. Use nature-inspired decor like tree branches, leaves, and animal figurines. Don’t forget soft textures like plush rugs and cozy blankets. Personalize with DIY projects like hand-painted murals or custom-made pillows. Remember, the key is to blend natural elements with whimsical touches. With a bit of creativity and effort, you’ll transform any bedroom into a magical forest retreat. So grab your tools, gather your materials, and let your imagination run wild. Happy decorating!
How can I create a forest canopy effect in my bedroom?
Use sheer green fabric or netting draped from the ceiling. Hang fairy lights or LED vines to mimic the look of a forest canopy. You can also add fake leaves or branches for a more realistic touch.
What kind of furniture works best for an enchanted forest theme?
Opt for wooden furniture with a rustic finish. Think of tree stump stools, log beds, and branch-like shelves. Adding a mossy rug or leaf-patterned cushions can enhance the forest vibe.
How do I incorporate nature sounds into my enchanted forest bedroom?
Use a white noise machine or nature sound app that plays bird songs, rustling leaves, or running water. Placing a small indoor fountain can also add a calming water sound.
What colors should I use for the walls?
Go for earthy tones like forest green, bark brown, and mossy gray. An accent wall with a forest mural or tree decals can make a big impact.
How can I add a magical touch to my enchanted forest bedroom?
Incorporate fairy lights, glow-in-the-dark stars, and crystal decorations. A dreamcatcher or hanging lanterns can add to the mystical feel.
Are there any DIY projects I can do to enhance the theme?
Create your own moss wall art or twig photo frames. You can also make leaf garlands or pinecone mobiles. These projects add a personal touch and make the room feel more enchanted.