
Home>Home & Furniture>Bathroom>Step-by-step Guide to Installing a Bathroom
Bathroom
Step-by-step Guide to Installing a Bathroom
Published: July 14, 2024
Learn how to install a bathroom with our step-by-step guide. From plumbing to tiling, get expert tips and detailed instructions for a successful bathroom installation.
(Many of the links in this article redirect to a specific reviewed product. Your purchase of these products through affiliate links helps to generate commission for Twigandthistle.com, at no extra cost. Learn more)
Installing a bathroom yourself can seem like a big job, but breaking it down into steps makes it manageable. Whether you're adding a new bathroom or renovating an old one, having a clear plan helps a lot. You'll save money, learn new skills, and get a sense of accomplishment. This guide will walk you through everything from planning and gathering materials to the final touches. Roll up your sleeves and get ready to create a space you can be proud of. Let’s dive into the process and make your bathroom project a success!
Preparation
Gather Tools and Materials: Collect a wrench, screwdriver, plumber’s tape, caulk, level, measuring tape, and new fixtures.
Turn Off Water Supply: Locate the main water valve and turn it off to prevent any leaks or flooding.
Clear the Area: Remove any furniture, decorations, or obstacles from the bathroom to create a clean workspace.
Wear Safety Gear: Use gloves, safety goggles, and knee pads to protect yourself from sharp edges and chemicals.
Check for Leaks: Inspect existing pipes and fixtures for any leaks or damage that need fixing before starting the installation.
Measure and Mark: Use a measuring tape to mark the exact spots where new fixtures will be installed. This ensures accuracy and proper alignment.
Ventilation: Ensure the bathroom is well-ventilated by opening windows or using a fan to avoid inhaling dust or fumes.
Read Instructions: Carefully read the installation manuals for all new fixtures to understand the specific steps and requirements.
Lay Down Protective Covering: Place drop cloths or plastic sheets on the floor to protect it from debris and spills.
Disconnect Old Fixtures: Use a wrench to carefully remove old fixtures, making sure to keep all screws and parts in a safe place.
Check Electrical Connections: If installing fixtures with electrical components, ensure the power supply is turned off and follow safety guidelines.
Prepare Plumbing: Clean and prepare the plumbing connections by removing any old sealant or debris.
Test Fit: Before final installation, do a test fit of the new fixtures to ensure they fit properly and make any necessary adjustments.
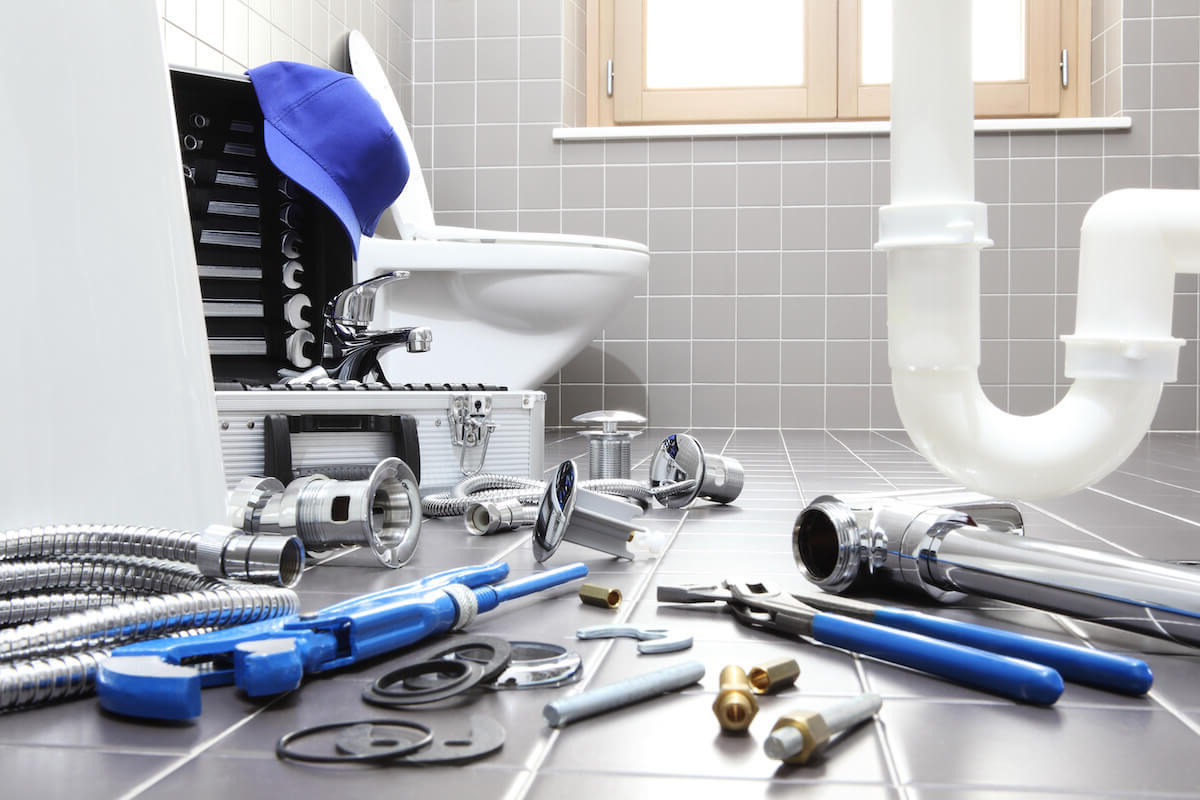
Materials and Tools Needed
Materials:
- Toilet: The main fixture for the bathroom.
- Wax Ring: Creates a seal between the toilet and the floor.
- Toilet Bolts: Secure the toilet to the floor.
- Water Supply Line: Connects the toilet to the water source.
- Caulk: Seals gaps around the toilet base.
- Teflon Tape: Ensures a tight seal on threaded pipe connections.
Tools:
- Adjustable Wrench: Tightens or loosens nuts and bolts.
- Screwdriver: Used for securing screws.
- Putty Knife: Scrapes off old wax ring residue.
- Level: Ensures the toilet is even.
- Bucket: Catches any water spills.
- Towels: Absorb excess water.
- Utility Knife: Cuts caulk and other materials.
- Tape Measure: Measures distances accurately.
These materials and tools will help you install a bathroom toilet efficiently.
Skill Level and Time Required
Skill Level: Intermediate
Time Required: 2-3 days
- Preparation and Planning: 2-3 hours
- Removing Old Fixtures: 3-4 hours
- Plumbing Work: 4-6 hours
- Installing New Fixtures: 6-8 hours
- Finishing Touches: 2-3 hours
Step-by-Step Instructions
Plan the Layout
- Measure the bathroom space.
- Decide where fixtures like the toilet, sink, and shower will go.
- Draw a rough sketch.
Gather Materials and Tools
- Purchase fixtures (toilet, sink, shower).
- Get plumbing supplies (pipes, fittings).
- Collect tools (wrench, screwdriver, level).
Prepare the Space
- Turn off the water supply.
- Remove old fixtures if any.
- Clean the area thoroughly.
Install Plumbing
- Lay out the pipes according to your plan.
- Connect pipes to the main water supply.
- Ensure all connections are tight to prevent leaks.
Install the Shower
- Position the shower base.
- Attach the showerhead and controls.
- Seal edges with waterproof caulk.
Install the Toilet
- Place the wax ring on the flange.
- Position the toilet bowl over the ring.
- Secure the bowl with bolts, then attach the tank.
Install the Sink
- Mount the sink basin on the countertop or wall.
- Connect the faucet and drain.
- Ensure all connections are secure.
Check for Leaks
- Turn on the water supply.
- Check all connections for leaks.
- Tighten any loose connections.
Finish Up
- Install any additional accessories (towel racks, mirrors).
- Clean up the workspace.
- Test all fixtures to ensure they work properly.
Tips and Tricks
Plan Ahead: Measure your space twice before buying fixtures. This ensures everything fits perfectly.
Turn Off Water: Always shut off the main water supply before starting. This prevents accidental flooding.
Use a Level: Keep a level handy to make sure everything is straight. Crooked installations look unprofessional.
Seal Properly: Use waterproof sealant around sinks, tubs, and toilets. This prevents water damage.
Ventilation: Install an exhaust fan to reduce moisture buildup. This helps prevent mold.
Common Mistakes to Avoid:
- Skipping Prep Work: Don’t skip cleaning and prepping surfaces. Paint and tiles won’t stick properly otherwise.
- Ignoring Instructions: Follow manufacturer instructions for all fixtures. Improper installation can void warranties.
- Wrong Tools: Using incorrect tools can damage materials. Invest in a good set of basic tools.
Alternatives for Materials or Methods:
- PVC Pipes: Use PVC instead of metal pipes. They’re easier to cut and install.
- Peel-and-Stick Tiles: Consider peel-and-stick tiles for a quick and easy flooring option.
- Eco-Friendly Paint: Choose low-VOC or eco-friendly paint. It’s better for your health and the environment.
Cost Estimation
Toilet: $100 - $300
Sink: $50 - $200
Vanity: $100 - $400
Shower/Tub: $300 - $1,000
Faucets: $50 - $150 each
Tiles: $1 - $5 per square foot
Drywall: $10 per sheet
Paint: $20 - $50 per gallon
Plumbing Supplies: $100 - $300
Electrical Supplies: $50 - $200
Tools: $100 - $300 (if you don't already have them)
Budget-friendly alternatives:
- Toilet: Basic models for $100
- Sink: Pedestal sinks for $50
- Vanity: Simple designs for $100
- Shower/Tub: Basic fiberglass units for $300
- Tiles: Vinyl tiles for $1 per square foot
- Paint: Lower-cost brands for $20 per gallon
- Tools: Borrow or rent tools to save money
Variations and Customizations
Alternative Materials:
- Flooring: Instead of traditional tiles, consider vinyl planks or waterproof laminate. Both are durable and easier to install.
- Countertops: Swap out standard laminate for quartz or granite for a more luxurious feel. Butcher block can add warmth.
- Walls: Use beadboard or shiplap for a rustic look. Waterproof wallpaper can add unique patterns without the hassle of tiles.
Colors:
- Walls: Light colors like soft blues, pale greens, or neutral grays can make the space feel larger. Bold colors like navy or charcoal add drama.
- Cabinets: Paint cabinets in contrasting colors like white with black hardware or navy with brass handles.
- Tiles: Mix and match tile colors. Use white subway tiles with a colored grout for a pop of color.
Styles:
- Modern: Opt for sleek fixtures, minimalist designs, and monochromatic color schemes. Use glass shower doors and floating vanities.
- Vintage: Incorporate clawfoot tubs, pedestal sinks, and antique brass fixtures. Use patterned tiles and vintage lighting.
- Industrial: Use exposed pipes, concrete sinks, and metal accents. Edison bulbs and reclaimed wood add character.
Fixtures:
- Sinks: Swap a standard sink for a vessel sink or a farmhouse sink. Wall-mounted faucets can save space.
- Showers: Install a rain showerhead or a dual shower system. Consider a frameless glass shower for a modern touch.
- Toilets: Choose a wall-mounted toilet for a sleek look. Dual-flush toilets save water.
Lighting:
- Ceiling: Use recessed lighting for a clean look. Chandeliers or pendant lights add elegance.
- Vanity: Install sconces on either side of the mirror for even lighting. Backlit mirrors provide a modern touch.
- Accent: Add LED strips under cabinets or around mirrors for ambient lighting.
Storage:
- Shelving: Use floating shelves for a modern look. Built-in niches in the shower provide storage without taking up space.
- Cabinets: Install tall cabinets for extra storage. Open shelving can make the room feel larger.
- Baskets: Use woven baskets for a rustic touch. Metal bins add an industrial feel.
Sustainability Tips
Plan and Design: Start by planning the layout. Reuse existing plumbing if possible to reduce waste. Consider using low-flow fixtures to save water.
Demolition: Carefully remove old fixtures and materials. Recycle or donate items like sinks, toilets, and cabinets. Avoid breaking tiles if they can be reused.
Flooring: Choose eco-friendly flooring like bamboo, cork, or recycled tiles. These materials are sustainable and durable.
Walls: Use VOC-free paint or recycled glass tiles for walls. These options are better for air quality and the environment.
Insulation: Install recycled or natural insulation like denim or wool. This helps with energy efficiency and reduces waste.
Fixtures: Opt for water-saving fixtures like dual-flush toilets and low-flow showerheads. These reduce water usage significantly.
Cabinetry: Use reclaimed wood or cabinets made from sustainable materials. This adds character and reduces the need for new resources.
Lighting: Install LED lights. They use less energy and last longer than traditional bulbs.
Ventilation: Ensure proper ventilation to prevent mold. Use energy-efficient fans to maintain air quality.
Finishing Touches: Decorate with recycled or upcycled items. This adds a unique touch while being eco-friendly.
Your Bathroom Awaits
You've got all the tools and know-how to tackle this project. Installing a bathroom isn't just about plumbing and tiles; it's about creating a space that feels like home. Remember to measure twice, cut once, and always double-check your work. Mistakes happen, but they're just part of the learning process. Don't rush; take your time to ensure everything fits perfectly.
From laying the tiles to installing the fixtures, each step brings you closer to a finished bathroom. You've learned how to handle unexpected issues and make adjustments on the fly. Now, stand back and admire your hard work. You've transformed a simple room into a functional, beautiful space. Enjoy the satisfaction of a job well done. Happy DIY-ing!
How do I start installing a bathroom?
First, plan your layout. Measure the space, decide where fixtures like the toilet, sink, and shower will go. Make sure you have all the tools and materials ready.
What tools will I need?
You'll need a wrench, screwdriver, pipe cutter, level, drill, and safety gear like gloves and goggles. A plumber's tape and sealant are also handy.
How do I install the plumbing?
Turn off the water supply first. Then, follow your layout plan to install pipes and fixtures. Use plumber's tape to seal connections and check for leaks before moving on.
How do I install a toilet?
Position the toilet flange over the drain pipe. Secure it with bolts. Place the toilet bowl over the flange, pressing down to seal. Attach the tank, connect the water supply, and test for leaks.
How do I install a sink?
Mount the sink on the vanity or wall. Connect the faucet and drain pipe. Attach the water supply lines to the faucet. Turn on the water and check for leaks.
How do I install a shower?
Install the shower base first. Then, attach the shower walls or tiles. Connect the showerhead and faucet to the water supply. Seal all edges with caulk to prevent leaks.
How do I ensure everything is working properly?
Turn on the water supply and test each fixture. Check for leaks and make sure water pressure is good. Adjust as needed and make sure all seals are tight.