
Home>Home & Furniture>Bathroom>DIY: Painting Bathroom Cabinets Step-by-Step
Bathroom
DIY: Painting Bathroom Cabinets Step-by-Step
Published: July 15, 2024
Transform your bathroom with our step-by-step guide to painting cabinets. Learn expert tips and tricks for a stunning, durable finish. Perfect for DIY enthusiasts!
(Many of the links in this article redirect to a specific reviewed product. Your purchase of these products through affiliate links helps to generate commission for Twigandthistle.com, at no extra cost. Learn more)
Thinking about giving your bathroom a fresh look without spending a fortune? Painting your bathroom cabinets can do just that! It's an easy and affordable way to update your space. This guide will take you through every step, from gathering your materials to applying that final coat of paint. Whether you're new to DIY projects or have some experience, these instructions will help you achieve a professional-looking finish. Get ready to transform your bathroom cabinets and make your bathroom feel brand new. Let’s dive into the process together, and soon, you'll see impressive results!
Preparation
Gather Supplies: Get paint, primer, brushes, rollers, painter's tape, sandpaper, drop cloths, and screwdrivers.
Clear the Area: Remove all items from the cabinets and surrounding area. Lay down drop cloths to protect the floor.
Remove Cabinet Doors: Use a screwdriver to take off doors, drawers, and hardware. Label each piece to make reassembly easier.
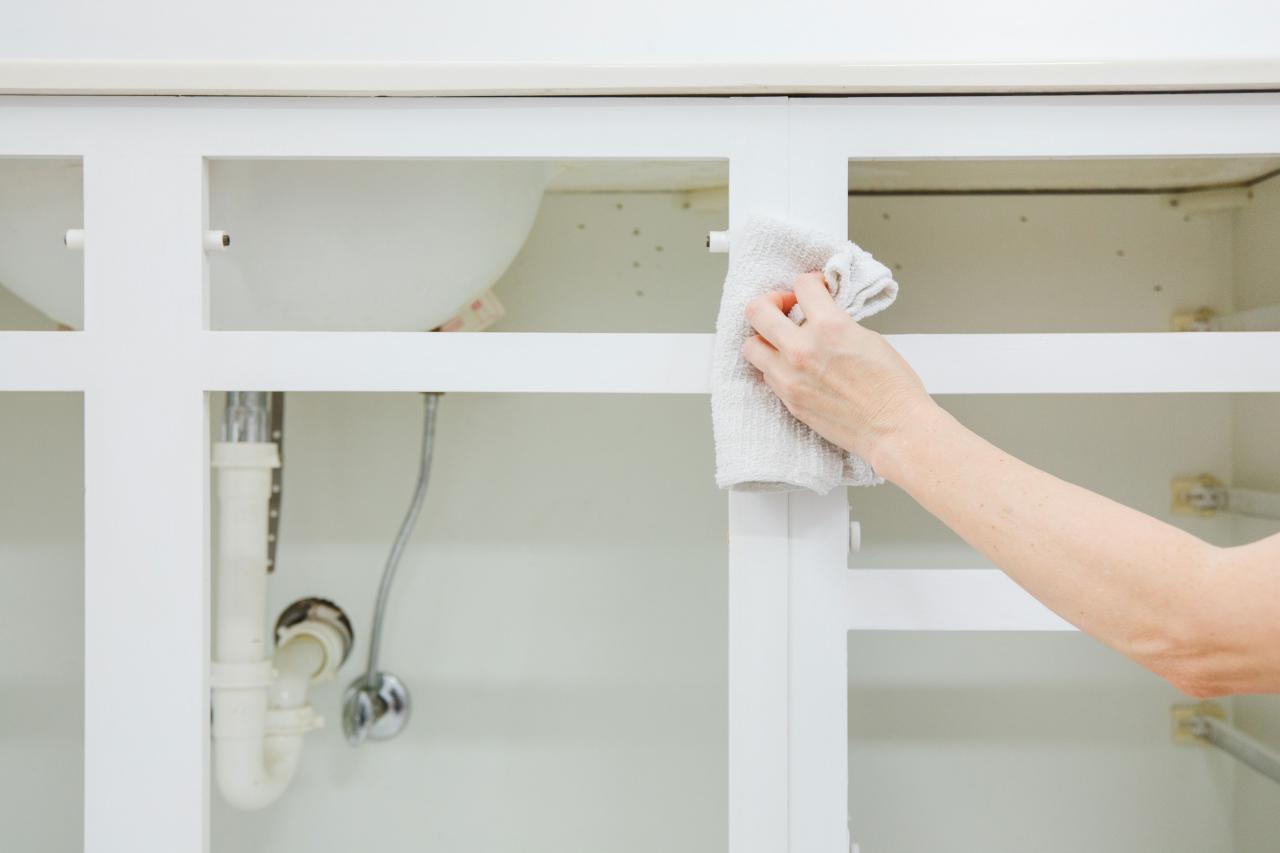
Clean Surfaces: Wipe down cabinets with a degreaser to remove dirt and grime. Let them dry completely.
Sand Cabinets: Lightly sand all surfaces to help the paint adhere better. Wipe away dust with a damp cloth.
Fill Holes and Cracks: Use wood filler to patch any imperfections. Sand smooth once dry.
Tape Off Areas: Apply painter's tape around edges, hinges, and any areas you don't want painted.
Prime Cabinets: Apply a coat of primer to ensure even paint coverage. Let it dry according to the manufacturer's instructions.
Set Up Ventilation: Open windows or use fans to ensure good airflow while painting. Wear a mask to avoid inhaling fumes.
Organize Workspace: Arrange tools and supplies within easy reach. Keep a trash bag nearby for used materials.
Safety Gear: Wear gloves, goggles, and old clothes to protect yourself from paint splatters.
Materials and Tools Needed
- Screwdriver: Used to remove cabinet doors and hardware.
- Sandpaper (120 and 220 grit): Smooths surfaces and removes old finish.
- Painter's Tape: Protects areas you don't want painted.
- Drop Cloths: Covers floors and counters to catch drips.
- Degreaser/Cleaner: Cleans cabinets before painting.
- Primer: Prepares the surface for paint, ensuring better adhesion.
- Paint: Choose a durable, moisture-resistant paint for bathrooms.
- Paint Brushes: For detailed areas and edges.
- Paint Rollers: Covers larger surfaces quickly.
- Paint Tray: Holds paint for easy access.
- Putty Knife: Fills holes or imperfections with wood filler.
- Wood Filler: Repairs any dents or holes in the cabinets.
- Tack Cloth: Removes dust after sanding.
- Protective Gear (gloves, mask, goggles): Keeps you safe from fumes and dust.
- Stir Sticks: Mixes paint and primer thoroughly.
- Sponge or Cloth: Wipes down surfaces after cleaning.
Each item ensures a smooth, professional finish for your bathroom cabinets.
Skill Level and Time Required
Skill Level: Intermediate
Time Required: Approximately 1-2 days
Preparation: 2-3 hours
- Remove cabinet doors, drawers, and hardware.
- Clean surfaces with a degreaser.
- Sand surfaces lightly.
Priming: 1-2 hours
- Apply primer to all surfaces.
- Allow to dry completely.
Painting: 4-6 hours
- Apply the first coat of paint.
- Let it dry for 4-6 hours.
- Apply a second coat if needed.
Reassembly: 1-2 hours
- Reattach doors, drawers, and hardware.
- Touch up any missed spots.
Step-by-Step Instructions
Gather Supplies:
- Paint
- Primer
- Sandpaper (120-grit and 220-grit)
- Painter's tape
- Drop cloths
- Paintbrushes and rollers
- Screwdriver
- Cleaning supplies (soap, water, sponge)
Prepare the Area:
- Lay down drop cloths to protect the floor.
- Remove all items from the cabinets.
Remove Cabinet Doors and Hardware:
- Use a screwdriver to take off doors, drawers, and hardware.
- Label each piece to remember where it goes.
Clean Surfaces:
- Wash cabinets, doors, and drawers with soap and water.
- Let everything dry completely.
Sand the Surfaces:
- Sand all surfaces with 120-grit sandpaper.
- Wipe off dust with a damp cloth.
- Sand again with 220-grit sandpaper for a smooth finish.
- Clean off dust again.
Tape and Protect:
- Use painter's tape to cover areas you don't want painted.
- Ensure edges and corners are well-covered.
Apply Primer:
- Use a brush or roller to apply primer to all surfaces.
- Let primer dry according to the manufacturer's instructions.
Sand Lightly After Priming:
- Lightly sand primed surfaces with 220-grit sandpaper.
- Wipe off dust with a damp cloth.
Paint the Cabinets:
- Apply the first coat of paint using a brush or roller.
- Let the first coat dry completely.
- Apply a second coat for even coverage.
- Allow the second coat to dry thoroughly.
Reattach Doors and Hardware:
- Once paint is fully dry, reattach doors, drawers, and hardware.
- Use the labels to ensure everything goes back in the right place.
Clean Up:
- Remove painter's tape carefully.
- Clean brushes, rollers, and any spills immediately.
Admire Your Work:
- Put items back into the cabinets.
- Enjoy your refreshed bathroom cabinets!
Tips and Tricks
Clean the cabinets thoroughly before painting. Use a mixture of water and mild detergent to remove grease and grime. Sand the surfaces lightly to help the paint adhere better. Use a fine-grit sandpaper for this step.
Prime the cabinets with a good-quality primer. This helps the paint stick and provides a smooth finish. Use a brush for corners and a roller for flat surfaces.
Choose the right paint. Use a semi-gloss or gloss finish for durability and easy cleaning. Apply thin, even coats and let each coat dry completely before adding another.
Remove cabinet doors and hardware before painting. This makes it easier to paint and prevents drips on hinges and handles. Label each door and its corresponding hardware to make reassembly easier.
Use painter's tape to protect areas you don't want painted. This includes walls, countertops, and floors.
Ventilate the area well. Open windows and use fans to keep the air circulating and reduce paint fumes.
Common mistakes to avoid:
Skipping the cleaning step. Paint won't stick well to dirty surfaces. Not sanding the cabinets. This can lead to peeling paint. Applying thick coats of paint. This can cause drips and uneven coverage. Not allowing enough drying time between coats. This can result in a sticky finish.
Alternatives:
Instead of traditional paint, consider using chalk paint. It requires less prep work and gives a matte finish. For a more durable option, use cabinet-specific paint. This type is designed to withstand moisture and frequent cleaning. If you don't want to paint, consider refacing the cabinets with new doors and drawer fronts. This gives a fresh look without the mess of painting.
Cost Estimation
Paint: A gallon of high-quality paint costs around $30-$50. For a small bathroom, one gallon should be enough.
Primer: A gallon of primer costs about $20-$30. This helps the paint stick better and last longer.
Sandpaper: A pack of sandpaper costs around $5-$10. You'll need this to smooth the surface before painting.
Painter's Tape: A roll of painter's tape costs about $5-$7. This helps keep paint off areas you don't want painted.
Paint Brushes/Rollers: A set of paint brushes and rollers costs around $10-$20. Brushes are good for detailed work, while rollers cover larger areas quickly.
Drop Cloths: A pack of drop cloths costs about $10-$15. These protect your floors and counters from paint spills.
Cleaning Supplies: A bottle of degreaser or cleaning solution costs around $5-$10. Clean the cabinets before painting to remove any grease or dirt.
Screwdriver: A basic screwdriver costs about $5-$10. Use this to remove cabinet doors and hardware.
Budget-Friendly Alternatives:
- Paint: Opt for store-brand paint at $20-$30 per gallon.
- Primer: Use a paint-and-primer-in-one for $25-$40.
- Sandpaper: Buy bulk packs for $3-$5.
- Painter's Tape: Use masking tape for $2-$4.
- Brushes/Rollers: Buy a basic set for $5-$10.
- Drop Cloths: Use old sheets or newspapers for free.
- Cleaning Supplies: Use vinegar and water mix for cleaning.
Total estimated cost: $90-$150. Budget-friendly alternatives can reduce this to $60-$100.
Variations and Customizations
Alternative Materials: Instead of traditional paint, consider using chalk paint for a matte finish or milk paint for a vintage look. Gel stain can provide a rich, wood-like appearance without stripping the existing finish.
Colors: Go bold with navy blue or emerald green for a modern touch. For a classic look, white or soft gray works well. Two-tone cabinets, such as dark lower cabinets and light upper cabinets, add visual interest.
Styles: Add decorative molding or trim to cabinet doors for a custom look. Replace plain knobs with vintage glass or modern metal handles. For a rustic style, consider distressing the paint by lightly sanding edges after painting.
Finishes: Use a high-gloss finish for a sleek, contemporary look or a satin finish for a more subtle sheen. A matte finish can give a soft, understated appearance.
Techniques: Try faux finishes like marbling or wood grain to add texture. Stenciling designs or patterns on cabinet doors can create a unique, personalized touch.
Hardware: Swap out old hardware for brushed nickel, oil-rubbed bronze, or matte black to match your new cabinet color. Hidden hinges can give a cleaner, more modern look.
Interior Customization: Paint the inside of the cabinets a contrasting color for a pop of surprise when opened. Add shelf liners in fun patterns or colors to protect shelves and add style.
Lighting: Install under-cabinet lighting to highlight your newly painted cabinets and make the bathroom feel more luxurious. LED strip lights are easy to install and energy-efficient.
Protective Coating: Apply a polyurethane topcoat for extra durability, especially in a humid bathroom environment. Choose between water-based for a clear finish or oil-based for a slight amber tint.
Sustainability Tips
Gather Materials: Use eco-friendly paint, which has low or zero VOCs (volatile organic compounds). Reuse old brushes and rollers if possible. If you need new ones, choose those with recycled handles.
Prep the Cabinets: Remove cabinet doors and hardware. Clean surfaces with a mixture of vinegar and water instead of harsh chemicals. Sand lightly using recycled sandpaper or a sanding sponge.
Prime the Surface: Apply a coat of eco-friendly primer. This helps the paint adhere better and last longer. Use a brush or roller you already have, or buy one made from sustainable materials.
Paint the Cabinets: Stir the eco-friendly paint well. Apply the first coat using smooth, even strokes. Let it dry completely. Apply a second coat if needed. Use leftover paint from other projects if the color matches.
Seal the Paint: Once the paint is dry, apply a non-toxic sealer to protect the finish. This step is optional but recommended for durability.
Reassemble the Cabinets: Reattach the doors and hardware. Consider reusing old hardware or buying recycled options.
Clean Up: Clean brushes and rollers with water and biodegradable soap. Dispose of any waste responsibly, following local guidelines for eco-friendly disposal.
Final Touches: Add any decorative elements using recycled or sustainable materials. This could include new knobs or handles made from reclaimed wood or metal.
Your Bathroom Cabinets Look Amazing!
You've transformed your bathroom cabinets into a stunning focal point. With some paint, sandpaper, and a bit of elbow grease, you've given your space a fresh, new look. Remember, the key steps were prepping the surface, applying primer, and then layering on that beautiful paint.
Don't forget to let each coat dry thoroughly to avoid any smudges or imperfections. Now, every time you step into your bathroom, you'll feel a sense of pride knowing you did it yourself. Plus, you've saved a bunch of money by not hiring a professional.
Keep those brushes handy because who knows what you'll tackle next? Maybe the kitchen cabinets or a piece of old furniture? The possibilities are endless. Enjoy your refreshed bathroom and the satisfaction of a job well done!
How do I prep my bathroom cabinets for painting?
First, remove the cabinet doors and hardware. Clean everything with a degreaser to get rid of grime. Sand the surfaces lightly to help the paint stick better. Wipe off the dust with a damp cloth.
What kind of paint should I use?
Use a high-quality latex or oil-based paint. Latex dries faster and has less odor, while oil-based is more durable. Semi-gloss or satin finishes work best for bathrooms since they resist moisture.
Do I need to use a primer?
Yes, using a primer is crucial. It helps the paint adhere better and provides a smoother finish. Choose a stain-blocking primer if your cabinets have any stains or dark colors.
How many coats of paint are necessary?
Usually, two coats of paint are enough. Apply the first coat and let it dry completely before adding the second. This ensures a more even and durable finish.
How long should I wait between coats?
Wait at least 4-6 hours between coats, but check the paint can for specific drying times. Humidity and temperature can affect drying time, so make sure the first coat is fully dry before applying the next.
Can I paint over laminate cabinets?
Yes, you can paint over laminate. Just make sure to sand the surface well and use a bonding primer designed for slick surfaces. This helps the paint adhere properly.
How do I avoid brush marks?
Use a high-quality brush or foam roller for a smoother finish. Apply thin, even coats and avoid over-brushing. You can also lightly sand between coats with fine-grit sandpaper for a flawless look.