
Home>Home & Furniture>Bathroom>DIY Bathroom Sink Countertop Guide
Bathroom
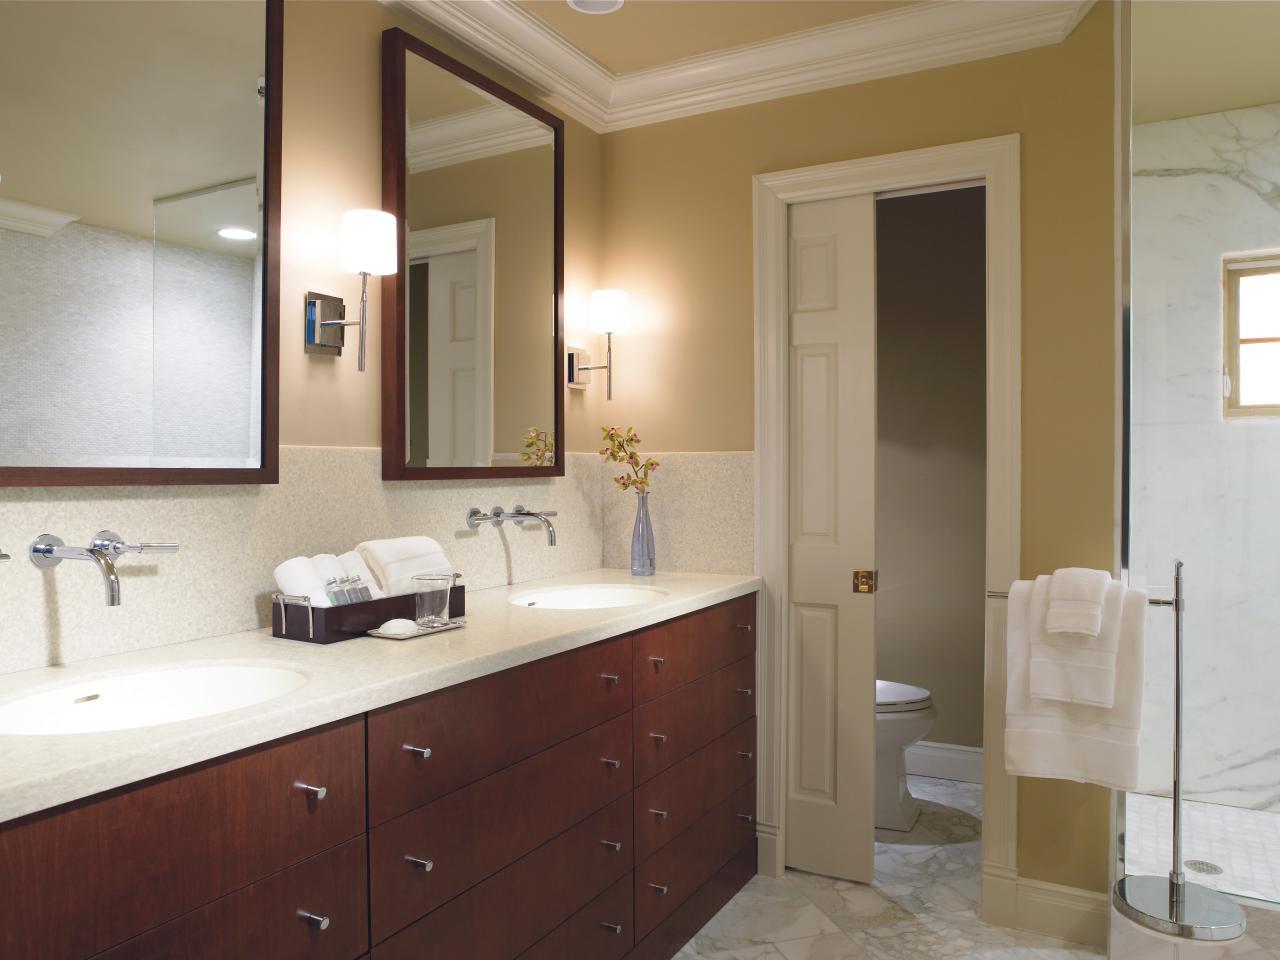
DIY Bathroom Sink Countertop Guide
Published: July 11, 2024
Transform your bathroom with our DIY sink countertop guide. Learn step-by-step instructions, material choices, and expert tips for a stunning, budget-friendly upgrade.
(Many of the links in this article redirect to a specific reviewed product. Your purchase of these products through affiliate links helps to generate commission for Twigandthistle.com, at no extra cost. Learn more)
Creating your own bathroom sink countertop can be a fun and rewarding project. With some basic tools, materials, and a bit of patience, you can transform your bathroom with a custom countertop. Whether you want to replace an old, worn-out surface or update the look of your space, this guide will walk you through the steps needed to achieve a professional finish. From choosing the right materials to installing the final product, you’ll find out what you need to know. Dive in and get ready to give your bathroom a fresh, new look with your own hands.
Getting Ready for Your Project
Gather Materials: Collect all necessary tools and materials like a new countertop, adhesive, caulk, screws, and a screwdriver. Make sure you have everything before starting.
Measure: Measure the dimensions of your current countertop. Double-check these measurements to ensure accuracy.
Safety Gear: Wear safety goggles, gloves, and a mask to protect yourself from dust and debris.
Turn Off Water: Shut off the water supply to the sink. This prevents any accidental leaks or water damage.
Clear the Area: Remove all items from the countertop and under the sink. This provides a clear workspace.
Disconnect Plumbing: Carefully disconnect the plumbing fixtures. Use a bucket to catch any remaining water in the pipes.
Remove Old Countertop: Unscrew and lift off the old countertop. Be cautious to avoid damaging the surrounding area.
Clean Surface: Clean the surface where the new countertop will be placed. Remove any old adhesive or debris.
Dry Fit: Place the new countertop on the sink area to ensure it fits properly. Make any necessary adjustments.
Workspace Setup: Set up a sturdy workbench or table nearby to hold tools and materials. Keep everything organized for easy access.
Gathering Materials and Tools
Materials:
- Countertop Material: Choose between laminate, granite, marble, or quartz. Each has different looks and durability.
- Sink: Select a sink that fits your countertop's cutout.
- Faucet: Pick a faucet that matches your sink and countertop style.
- Silicone Sealant: Ensures a waterproof seal around the sink.
- Adhesive: Used to secure the countertop to the vanity.
- Caulk: Fills gaps between the countertop and walls.
- Plywood: Provides a base for the countertop if needed.
- Screws: Fasten the countertop to the vanity.
Tools:
- Tape Measure: Measures dimensions accurately.
- Jigsaw: Cuts the sink hole in the countertop.
- Drill: Makes holes for screws and faucet installation.
- Level: Ensures the countertop is even.
- Caulk Gun: Applies silicone sealant and caulk.
- Screwdriver: Tightens screws.
- Clamps: Holds the countertop in place while the adhesive dries.
- Utility Knife: Trims excess sealant and caulk.
Each item plays a crucial role in ensuring your DIY bathroom sink countertop project is successful.
Skill Level and Time Commitment
Skill Level: Intermediate
Time Required:
- Planning and Measuring: 1-2 hours
- Removing Old Countertop: 1-2 hours
- Cutting New Countertop: 2-3 hours
- Installing New Countertop: 2-3 hours
- Sealing and Finishing: 1-2 hours
Total Time: 7-12 hours
Detailed Steps to Follow
Measure the Space
- Use a tape measure to get the length and width of your current countertop.
- Write down these measurements.
Choose Your Material
- Decide on the material for your countertop (e.g., granite, marble, laminate).
- Purchase the material based on your measurements.
Remove the Old Countertop
- Turn off the water supply.
- Disconnect the plumbing under the sink.
- Use a utility knife to cut through any sealant between the countertop and wall.
- Unscrew and lift off the old countertop.
Prepare the New Countertop
- Place the new countertop on a stable surface.
- Mark where the sink and faucet holes need to be cut.
- Use a jigsaw to cut out these holes.
Install the New Countertop
- Apply a bead of silicone adhesive along the top edges of the vanity.
- Carefully place the new countertop onto the vanity.
- Press down firmly to ensure it sticks.
Reconnect the Plumbing
- Reattach the sink to the countertop.
- Reconnect the plumbing under the sink.
- Turn the water supply back on.
Seal the Edges
- Apply a bead of silicone sealant along the edges where the countertop meets the wall.
- Smooth the sealant with a wet finger or a sealant tool.
Clean Up
- Wipe down the new countertop with a damp cloth.
- Dispose of any debris from the old countertop.
Check for Leaks
- Turn on the faucet and check for any leaks under the sink.
- Tighten connections if necessary.
Helpful Tips and Tricks
Measure Twice, Cut Once: Always double-check measurements before cutting materials. This prevents costly mistakes.
Use a Template: Create a cardboard template of your sink and countertop. This helps visualize placement and ensures accurate cuts.
Seal Edges Properly: Apply a waterproof sealant around the sink cutout and edges. This prevents water damage and prolongs the life of your countertop.
Choose the Right Material: For durability, consider materials like granite, quartz, or solid surface. Laminate is a budget-friendly option but less durable.
Level the Countertop: Use a level to ensure the countertop is even. An uneven surface can cause water pooling and improper sink installation.
Secure Properly: Use brackets or adhesive to secure the countertop to the vanity. This keeps it stable and prevents shifting.
Common Mistakes to Avoid:
Skipping the Sealant: Not sealing edges can lead to water damage and mold growth.
Incorrect Measurements: Misjudging dimensions can result in a poorly fitting countertop.
Using the Wrong Tools: Ensure you have the right tools for cutting and installing. Improper tools can damage materials.
Alternatives for Materials or Methods:
Butcher Block: For a warm, rustic look, consider butcher block. It requires regular sealing but adds character.
Concrete: For a modern, industrial feel, use concrete. It can be DIYed with molds and offers a unique look.
Tile: For a customizable and budget-friendly option, use tile. It allows for creative designs and easy repairs.
Estimating the Cost
Materials:
- Countertop Material (Laminate, Wood, or Granite): $50 - $300
- Sink: $40 - $150
- Faucet: $30 - $100
- Plumbing Supplies (Pipes, Sealant, etc.): $20 - $50
- Adhesive: $10 - $20
- Caulk: $5 - $10
Tools:
- Measuring Tape: $5 - $15
- Jigsaw: $30 - $100
- Drill: $40 - $100
- Caulk Gun: $5 - $15
- Screwdriver Set: $10 - $20
- Safety Gear (Gloves, Goggles): $10 - $20
Total Cost: $255 - $900
Budget-Friendly Alternatives:
- Countertop Material: Use laminate instead of granite. Cost: $50 - $100
- Sink: Opt for a basic ceramic sink. Cost: $40 - $60
- Faucet: Choose a simple design. Cost: $30 - $50
- Tools: Borrow from friends or rent from a local hardware store. Cost: $0 - $50
Different Ways to Customize
Materials: Instead of traditional granite, try concrete for an industrial look. Wood can add warmth, but ensure it’s sealed properly. Recycled glass countertops are eco-friendly and colorful. Laminate is budget-friendly and comes in many patterns.
Colors: Use bold colors like navy blue or emerald green for a statement piece. Neutral tones like beige or gray create a calm atmosphere. White countertops make the space look larger and cleaner. Black adds a touch of elegance.
Styles: For a modern look, choose sleek lines and minimalistic designs. Rustic styles benefit from distressed wood and natural stone. Vintage styles can use patterned tiles or retro colors. Farmhouse styles often include butcher block countertops and apron-front sinks.
Edges: Straight edges offer a clean, modern appearance. Beveled edges add a touch of sophistication. Bullnose edges are rounded and safer for families. Ogee edges provide a classic, ornate look.
Finishes: Matte finishes hide fingerprints and smudges. Glossy finishes reflect light and make the room appear brighter. Textured finishes add depth and interest. Polished finishes are smooth and easy to clean.
Add-ons: Incorporate built-in soap dispensers for convenience. Integrated sinks create a seamless look. Backsplashes can be customized with tiles, glass, or metal. Under-cabinet lighting highlights the countertop and adds ambiance.
Hardware: Choose brushed nickel or chrome for a modern touch. Oil-rubbed bronze or antique brass fits well with vintage or rustic styles. Matte black hardware adds a contemporary edge. Glass knobs or ceramic pulls can add a unique flair.
Eco-Friendly Suggestions
Reclaimed wood can be an excellent choice for a bathroom sink countertop. It adds a rustic charm and reduces the need for new materials. Recycled glass countertops are another eco-friendly option. These countertops are made from crushed glass mixed with resin or concrete, creating a unique and durable surface.
Bamboo is a sustainable material that grows quickly and can be used for countertops. It’s strong, water-resistant, and adds a natural look to your bathroom. Concrete countertops can be eco-friendly if you use a mix that includes recycled materials like fly ash or slag cement.
Paper composite countertops are made from recycled paper and resin. They are durable, heat-resistant, and come in various colors. Recycled metal countertops, such as those made from aluminum or stainless steel, are also sustainable and give a modern look.
When installing your countertop, use low-VOC (volatile organic compounds) sealants and adhesives to reduce indoor air pollution. Consider repurposing old furniture like dressers or tables as a base for your sink. This not only saves money but also gives new life to old items.
Your DIY Adventure Awaits
You've got the know-how to tackle your bathroom sink countertop project. With the right materials, a bit of patience, and some elbow grease, you can transform your space. Remember, measure twice, cut once. Don't rush the sealing process; it ensures longevity. If you hit a snag, take a step back and reassess. Mistakes happen, but they're part of the learning curve. Celebrate each small victory, whether it's a perfectly cut piece or a smooth finish. Your effort will pay off with a beautiful, custom countertop that reflects your style. So, gather your tools, roll up your sleeves, and dive in. Your dream bathroom is just a few steps away. Happy DIY-ing!
How do I measure my bathroom sink countertop?
Use a tape measure to get the length and width of your current countertop. Don’t forget to measure the depth of the sink area too. Write down these numbers so you can get the right size material.
What materials can I use for a DIY countertop?
You can use laminate, granite, quartz, concrete, or even wood. Each has its pros and cons, so pick one that fits your budget and style.
How do I remove the old countertop?
First, turn off the water supply and disconnect the plumbing. Then, use a utility knife to cut through any caulk or adhesive. Carefully lift the old countertop off the vanity.
Do I need special tools to install a new countertop?
Basic tools like a tape measure, utility knife, caulk gun, screwdriver, and level should do the trick. For cutting materials like granite or quartz, you might need a wet saw.
How do I secure the new countertop?
Apply adhesive to the top of the vanity and carefully place the new countertop on it. Press down firmly and let it set. Use caulk to seal the edges and prevent water from seeping in.
Can I install a sink myself?
Yes, you can! Place the sink in the cutout, apply plumber’s putty around the edges, and secure it with the provided clips. Reconnect the plumbing and turn the water back on.
How do I maintain my new countertop?
Clean it regularly with a mild cleaner and a soft cloth. Avoid harsh chemicals that can damage the surface. For materials like wood or concrete, you might need to seal them periodically.