
Home>Create & Decorate>DIY & Crafts>Metal Building DIY: How To Construct Your Own
DIY & Crafts
Metal Building DIY: How To Construct Your Own
Published: June 17, 2024

Content Creator specializing in woodworking and interior transformations. Caegan's guides motivate readers to undertake their own projects, while his custom furniture adds a personal touch.
Learn how to build your own metal building with our comprehensive DIY guide. Get expert tips and tricks for constructing your dream structure. Perfect for DIY & Crafts enthusiasts!
(Many of the links in this article redirect to a specific reviewed product. Your purchase of these products through affiliate links helps to generate commission for Twigandthistle.com, at no extra cost. Learn more)
Introduction
So, you've decided to take on the challenge of constructing your own metal building. Congratulations! Building your own metal structure can be a rewarding and cost-effective project, but it also requires careful planning and execution. In this guide, we'll walk you through the essential steps of constructing a metal building DIY style. From planning and choosing the right materials to assembling the components and adding the finishing touches, we've got you covered. Let's dive in and get you on your way to creating a sturdy and functional metal building that you can be proud of.
Planning Your Metal Building Project
When embarking on a metal building DIY project, thorough planning is crucial for a successful outcome. Here are the key steps to consider:
-
Determine the Purpose: First and foremost, identify the purpose of your metal building. Will it be a storage space, a workshop, or something else? Understanding the intended use will guide the design and size of the structure.
-
Check Local Regulations: Before diving into your project, familiarize yourself with local building codes and regulations. Some areas may have specific requirements for metal buildings, such as size limitations or zoning restrictions.
-
Create a Design: Sketch out a basic design for your metal building. Consider factors such as dimensions, roof style, and any additional features you may want to include, such as windows or doors.
-
Set a Budget: Determine how much you are willing to invest in your metal building project. This will help you make informed decisions when selecting materials and components.
-
Gather Necessary Permits: Depending on your location and the size of the structure, you may need to obtain permits before starting construction. Check with your local building authority to ensure compliance.
By carefully planning your metal building project, you can set a solid foundation for a successful DIY construction endeavor.
Choosing the Right Materials
Selecting the appropriate materials is a critical aspect of constructing a durable and functional metal building. Here's what you need to consider when choosing the right materials for your DIY project:
-
Metal Options: Decide on the type of metal you want to use for your building. Common options include steel and aluminum. Steel is known for its strength and durability, making it a popular choice for metal buildings. On the other hand, aluminum is lightweight and resistant to corrosion, making it suitable for certain applications.
-
Roofing and Siding: The roofing and siding materials you choose will impact the overall appearance and longevity of your metal building. Options such as metal panels, corrugated metal sheets, or metal shingles offer different aesthetics and durability. Consider factors such as weather resistance, maintenance requirements, and energy efficiency when making your selection.
-
Insulation: Depending on the intended use of your metal building, insulation may be necessary to regulate temperature and reduce energy costs. There are various insulation materials available, including fiberglass, foam board, and reflective insulation. Evaluate the climate in your area and the desired interior comfort to determine the most suitable insulation option.
-
Fasteners and Connectors: The quality of fasteners and connectors used in your metal building can significantly impact its structural integrity. Opt for high-quality screws, bolts, and anchors designed for metal construction. Additionally, consider using galvanized or stainless steel fasteners to prevent corrosion and ensure long-term stability.
-
Doors and Windows: When selecting doors and windows for your metal building, prioritize durability and security. Look for options that are designed specifically for metal structures and offer proper insulation and weather sealing. Consider the placement of doors and windows to maximize natural light and ventilation within the building.
By carefully evaluating and selecting the right materials for your metal building DIY project, you can ensure that your structure meets your functional and aesthetic requirements while standing the test of time.
Preparing the Site
Before you can start erecting your metal building, it's crucial to prepare the site properly. Here's a detailed look at the essential steps involved in site preparation for your DIY metal building project:
-
Clearing the Area: Begin by clearing the designated area where the metal building will be constructed. Remove any vegetation, rocks, debris, or other obstructions that could interfere with the building process. This step ensures a clean and level surface for the foundation and construction work.
-
Surveying and Marking: Use surveying tools to mark the boundaries and layout of the building site. Accurately marking the corners and dimensions of the structure will guide the subsequent construction stages and help maintain alignment throughout the project.
-
Grading and Leveling: Proper grading and leveling of the site are essential for creating a stable foundation. Use grading equipment to ensure that the ground is level and adequately compacted. This step is crucial for preventing uneven settling of the building and ensuring structural integrity.
-
Excavation and Foundation Preparation: If your metal building requires a concrete foundation, excavation may be necessary. Excavate the area to the required depth and dimensions for the foundation. Remove any excess soil and debris, and compact the ground to create a solid base for the foundation.
-
Drainage Considerations: Evaluate the site's drainage patterns and make provisions for proper water runoff. Implementing effective drainage solutions, such as grading the land away from the building or installing drainage systems, can prevent water accumulation around the structure and protect it from potential water damage.
-
Access and Safety: Ensure that the construction site has adequate access for equipment and materials. Additionally, prioritize safety by identifying potential hazards, securing the site perimeter, and implementing safety measures to protect workers and visitors during the construction process.
By meticulously preparing the site for your metal building project, you can lay the groundwork for a smooth and successful construction process, setting the stage for the next crucial phase of building the foundation.
Constructing the Foundation
The foundation serves as the anchor and support system for your metal building, playing a pivotal role in its stability and longevity. Here's a comprehensive guide to constructing the foundation for your DIY metal building:
-
Foundation Design: Begin by determining the type of foundation required for your metal building. Common options include concrete slab, pier and beam, or concrete piers. The choice of foundation will depend on factors such as soil conditions, building size, and local building codes.
-
Excavation and Formwork: If you opt for a concrete foundation, excavation is the first step. Excavate the designated area to the required depth and dimensions, accounting for the thickness of the concrete slab or footings. Next, construct formwork using lumber or metal stakes and boards to contain the concrete during pouring.
-
Reinforcement and Drainage: Prior to pouring the concrete, consider incorporating reinforcement such as rebar or wire mesh to enhance the foundation's strength. Additionally, install any necessary drainage components, such as perforated pipes or gravel, to manage water accumulation and prevent moisture-related issues.
-
Concrete Pouring: Once the preparation is complete, it's time to pour the concrete. Ensure that the concrete mix meets the required specifications and is properly consolidated to eliminate air pockets. Use screeds and floats to level and finish the surface, achieving a smooth and even foundation.
-
Curing and Drying: After the concrete is poured, it's crucial to allow sufficient time for curing and drying. Follow the recommended curing practices, which may involve keeping the concrete moist and protected from rapid temperature changes to promote optimal strength development.
-
Anchor Bolt Installation: If your metal building requires anchor bolts to secure it to the foundation, carefully measure and install the anchor bolts during the concrete pouring process. Proper placement and alignment of anchor bolts are essential for ensuring a secure connection between the building and the foundation.
-
Inspection and Compliance: Once the foundation is constructed, it's advisable to have it inspected to ensure compliance with building codes and structural integrity. Address any identified issues promptly to avoid complications during the subsequent phases of the construction process.
By meticulously following these steps and paying attention to detail during the foundation construction, you can establish a solid and reliable base for your metal building, laying the groundwork for the assembly of the structural components and the completion of your DIY project.
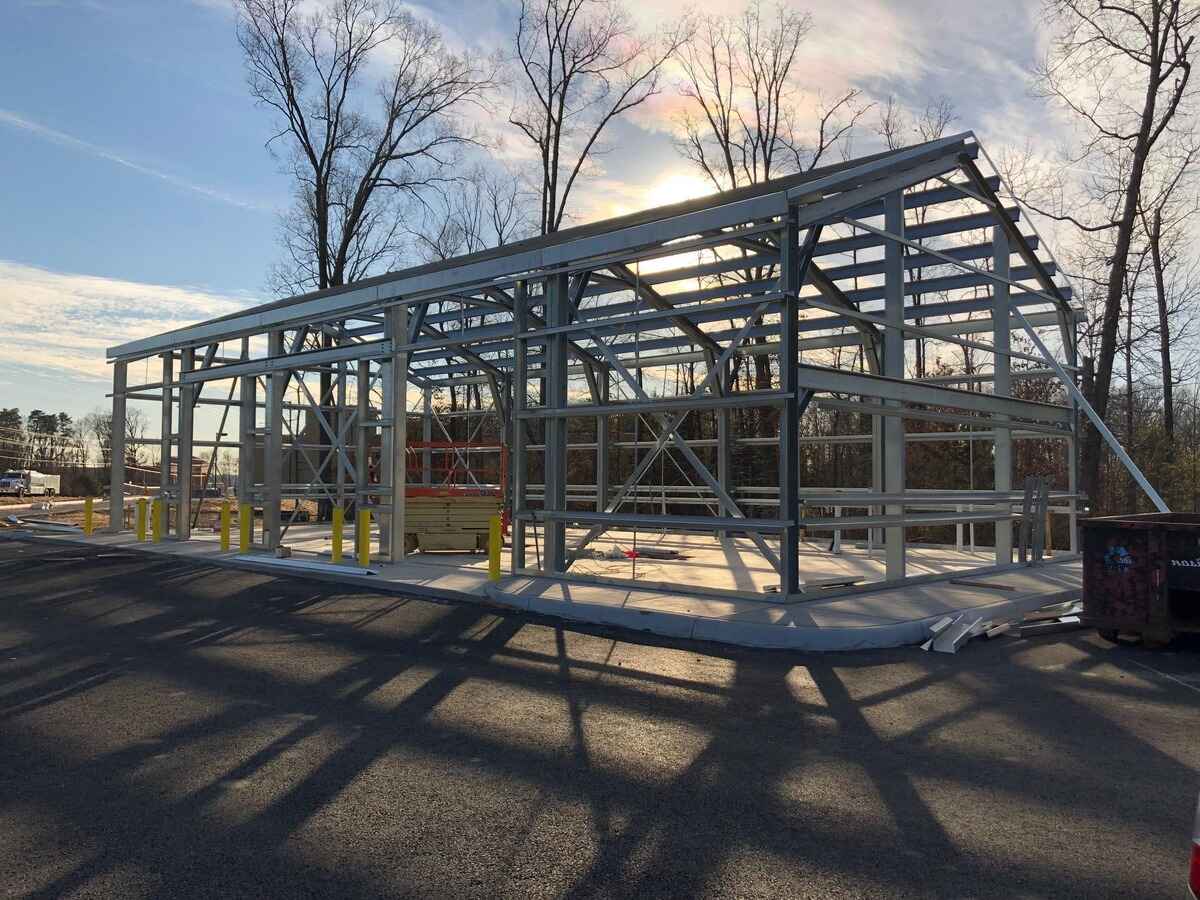
Assembling the Metal Building Components
Once the foundation is in place, it's time to move on to the exciting phase of assembling the metal building components. This stage involves erecting the structural framework, installing the roofing and siding, and bringing your metal building to life. Here's a detailed breakdown of the essential steps involved in assembling the metal building components for your DIY project:
-
Structural Framework Assembly: Begin by laying out the components of the structural framework, including the main support columns, rafters, and purlins. Follow the manufacturer's instructions and design specifications to ensure accurate placement and alignment of the framework elements. Use appropriate lifting equipment and safety measures to position and secure the structural members in place.
-
Roof and Wall Panel Installation: Once the framework is in position, it's time to install the roofing and wall panels. Whether you're using metal panels, sheets, or shingles, carefully fasten them to the framework according to the manufacturer's guidelines. Pay attention to proper overlap, sealing, and fastening techniques to ensure weather-tight and secure panel installation.
-
Door and Window Integration: If your metal building includes doors and windows, this is the stage to integrate them into the structure. Follow the provided instructions for framing, anchoring, and sealing the openings to accommodate the doors and windows. Proper installation is crucial for ensuring structural integrity, energy efficiency, and security.
-
Secondary Structural Additions: Depending on the design and purpose of your metal building, you may need to add secondary structural components such as mezzanines, interior partitions, or additional bracing. Ensure that these elements are integrated seamlessly with the primary framework and contribute to the overall stability and functionality of the building.
-
Safety and Quality Checks: Throughout the assembly process, conduct regular safety inspections and quality checks to verify the integrity of the structural components. Look for signs of misalignment, loose fasteners, or any deviations from the design specifications. Address any issues promptly to maintain the structural integrity of the building.
-
Finishing Touches and Customizations: Once the primary components are in place, consider adding finishing touches and customizations to personalize your metal building. This may include trim work, gutter installation, insulation, and interior finishes. Pay attention to details that enhance the aesthetics and functionality of the building while ensuring compliance with relevant building codes and standards.
By meticulously following these steps and adhering to the manufacturer's guidelines, you can successfully assemble the metal building components, bringing your DIY project closer to completion. The assembly phase sets the stage for adding the final touches and preparing your metal building for practical use and enjoyment.
Installing Doors and Windows
When it comes to installing doors and windows in your metal building, precision and attention to detail are paramount. Here's a detailed breakdown of the essential steps involved in the installation process:
-
Preparation and Framing: Before installing doors and windows, ensure that the openings in the metal building are properly framed and prepared. The framing should provide adequate support for the doors and windows and allow for seamless integration with the building's structural framework.
-
Selecting Appropriate Openings: Determine the locations and sizes of the doors and windows based on your building design and functional requirements. Consider factors such as natural light, ventilation, accessibility, and aesthetic appeal when positioning the openings.
-
Weatherproofing and Sealing: Prior to installing the doors and windows, it's crucial to implement effective weatherproofing measures. Apply appropriate sealants and flashing around the openings to prevent water infiltration and ensure a tight seal between the metal building and the door or window frames.
-
Door Installation: When installing doors, carefully follow the manufacturer's instructions for framing, anchoring, and securing the doors in place. Pay attention to proper alignment, hardware installation, and weather sealing to ensure smooth operation, security, and weather resistance.
-
Window Installation: Similarly, when installing windows, ensure that the frames are securely anchored and sealed to prevent air and water infiltration. Follow the recommended installation techniques for securing the windows in place and integrating them with the surrounding wall panels.
-
Hardware and Accessories: Once the doors and windows are in position, install the necessary hardware and accessories, such as handles, locks, hinges, and latches. Verify that the hardware functions correctly and provides the desired level of security and convenience.
-
Insulation and Trim: After the doors and windows are installed, consider adding insulation around the openings to enhance energy efficiency and indoor comfort. Additionally, install trim components to provide a finished and polished look, covering any gaps and enhancing the overall aesthetics of the doors and windows.
-
Operational Testing: Once the installation is complete, conduct thorough operational testing of the doors and windows. Open and close them to ensure smooth operation, check for proper sealing, and verify that they meet safety and performance standards.
By meticulously following these steps and adhering to best practices for door and window installation, you can ensure that these essential components contribute to the functionality, security, and visual appeal of your metal building. Properly installed doors and windows enhance the usability and comfort of the building while providing a seamless integration with the overall structure.
Finishing Touches and Maintenance
As you near the completion of your DIY metal building project, it's time to focus on the finishing touches that will enhance the overall appearance, functionality, and longevity of the structure. Additionally, understanding the importance of ongoing maintenance is crucial for preserving the integrity of your metal building. Here's a detailed look at the essential aspects of adding finishing touches and implementing a maintenance plan for your metal building:
Exterior Finishes
Consider adding exterior finishes that not only enhance the visual appeal of your metal building but also provide protection against the elements. This may include applying a durable coat of paint or protective coatings to the metal surfaces, which can help prevent corrosion, fading, and weathering. Choose finishes that complement the surrounding environment and contribute to the overall aesthetics of the building.
Landscaping and Surroundings
Integrate landscaping elements around your metal building to create a cohesive and inviting environment. Planting shrubs, trees, or creating flower beds can soften the appearance of the structure and blend it harmoniously with the surroundings. Additionally, consider pathways, lighting, and other outdoor features that enhance accessibility and curb appeal.
Interior Finishes
If your metal building includes interior spaces, focus on interior finishes that contribute to comfort and functionality. This may involve installing insulation, wall coverings, flooring, and lighting fixtures to create a welcoming and practical interior environment. Pay attention to details that enhance the usability and aesthetics of the interior spaces.
Maintenance Plan
Developing a proactive maintenance plan is essential for preserving the structural integrity and performance of your metal building. Regular inspections, cleaning, and upkeep of the building components can help identify and address potential issues before they escalate. Consider factors such as roof maintenance, checking for corrosion, inspecting doors and windows, and addressing any signs of wear and tear.
Weatherproofing and Sealing
Periodically inspect and maintain the weatherproofing elements of your metal building, including seals, flashing, and caulking. Ensure that these components remain intact and effective in preventing water infiltration, air leakage, and moisture-related issues. Address any damaged or deteriorated weatherproofing materials promptly to maintain the building's resilience against the elements.
Structural Integrity Checks
Schedule routine structural integrity checks to assess the condition of the metal building components. Look for signs of rust, corrosion, or structural damage, and address any issues in a timely manner. Pay attention to areas prone to moisture accumulation or stress points that may require reinforcement.
Professional Maintenance Services
Consider engaging professional maintenance services for specialized tasks such as roof inspections, coating applications, or structural repairs. Professional maintenance providers can offer expertise and resources to ensure that your metal building remains in optimal condition and complies with industry standards.
By incorporating these finishing touches and implementing a comprehensive maintenance plan, you can ensure that your DIY metal building not only looks impressive but also stands the test of time. Regular maintenance and care are essential for preserving the value and functionality of your metal building, allowing you to enjoy its benefits for years to come.
Conclusion
In conclusion, embarking on a DIY metal building project requires meticulous planning, careful execution, and a commitment to quality. By following the essential steps outlined in this guide, from planning and material selection to site preparation, foundation construction, component assembly, and finishing touches, you can successfully create a sturdy and functional metal building that meets your specific needs. The satisfaction of constructing your own metal building, tailored to your requirements and preferences, is a rewarding achievement that reflects your creativity and resourcefulness. Additionally, prioritizing ongoing maintenance and care for your metal building will ensure its longevity and continued performance. With the knowledge and guidance provided in this guide, you are well-equipped to take on the challenge of constructing your own metal building DIY style. Happy building!