
Home>Create & Decorate>DIY & Crafts>How To Build A Stool
DIY & Crafts
How To Build A Stool
Published: June 9, 2024

Content Creator specializing in woodworking and interior transformations. Caegan's guides motivate readers to undertake their own projects, while his custom furniture adds a personal touch.
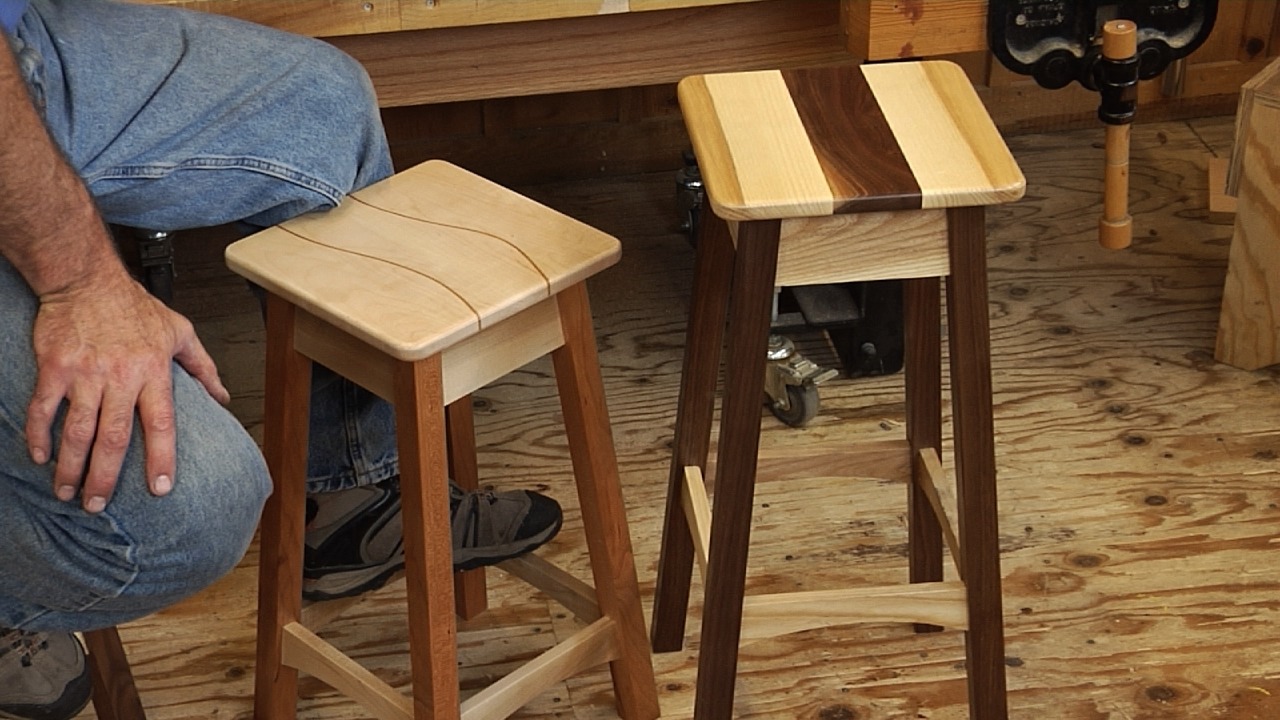
Learn how to build a stylish and functional stool with our easy DIY & Crafts guide. Create your own custom piece for your home today!
(Many of the links in this article redirect to a specific reviewed product. Your purchase of these products through affiliate links helps to generate commission for Twigandthistle.com, at no extra cost. Learn more)
Introduction
So, you want to learn how to build a stool? Well, you've come to the right place! Building your own stool can be a fun and rewarding DIY project that adds a personal touch to your home. Whether you're a seasoned woodworker or a beginner looking to try your hand at a new hobby, constructing a stool is a great way to showcase your skills and creativity. In this guide, we'll take you through the step-by-step process of building a sturdy and stylish stool that you can proudly display in your kitchen, living room, or any other space in your home. Are you ready to roll up your sleeves and get started? Let's dive in!
Materials Needed
When it comes to building a stool, having the right materials is crucial for a successful project. Here's a list of the essential items you'll need to gather before you get started:
-
Wood: Select high-quality wood for the stool's construction. You'll need pieces for the seat, legs, and support braces. Opt for a sturdy wood type such as oak, maple, or pine.
-
Wood Screws: Choose screws that are appropriate for woodworking projects. The size of the screws will depend on the thickness of the wood you're using.
-
Wood Glue: A reliable wood glue is essential for reinforcing the joints and ensuring the stool's durability.
-
Sandpaper: To achieve a smooth and polished finish, you'll need sandpaper with varying grits. Coarse grits for initial sanding and finer grits for a smooth finish.
-
Wood Stain or Paint: Decide whether you want to stain the wood to enhance its natural beauty or paint it to match your existing decor.
-
Polyurethane: If you opt for a natural wood finish, polyurethane will protect the wood and give it a glossy appearance.
-
Measuring Tape: Accurate measurements are key to a well-constructed stool, so a measuring tape is a must-have.
-
Pencil and Ruler: These basic tools will help you mark and measure the wood accurately.
-
Safety Gear: Don't forget to prioritize safety. Equip yourself with safety goggles, gloves, and a dust mask to protect yourself during the construction process.
-
Optional: If you want to add a cushion to your stool, you'll also need foam padding, fabric, and a staple gun.
Gathering these materials before you begin will ensure a smooth and efficient construction process. Now that you have your materials ready, it's time to move on to the next step!
Tools Required
Now that you have all the necessary materials, it's essential to have the right tools to bring your stool to life. Here's a list of the tools you'll need for this project:
-
Saw: A reliable saw, such as a circular saw or a handsaw, will be essential for cutting the wood to the required dimensions.
-
Drill: A power drill with various drill bits will be used for creating holes and driving screws into the wood.
-
Screwdriver: Both a manual and electric screwdriver will come in handy for assembling the stool and securing the screws in place.
-
Clamps: Clamps are essential for holding the wood pieces together firmly during the assembly process, ensuring precise and secure joints.
-
Wood Chisel: A wood chisel will be useful for shaping and refining the wood joints, ensuring a snug fit for a professional-looking finish.
-
Sandpaper or Sander: To achieve a smooth and polished surface, sandpaper or a power sander will be necessary for smoothing out rough edges and surfaces.
-
Paintbrushes or Stain Applicators: If you choose to paint or stain your stool, having the right brushes or applicators will ensure an even and professional finish.
-
Square: A carpenter's square will help ensure that your cuts and angles are precise, resulting in a well-constructed and stable stool.
-
Workbench: A sturdy workbench or a flat, stable surface to work on will provide the necessary support for assembling and finishing your stool.
Having these tools at your disposal will make the construction process more efficient and enjoyable. Now that you're equipped with the right materials and tools, it's time to roll up your sleeves and start building your custom stool!
Step 1: Cutting the Wood
The first step in building your stool is to cut the wood to the required dimensions. Start by measuring and marking the wood according to your stool design. Use a measuring tape, pencil, and ruler to ensure accuracy. Once you have your measurements marked, it's time to bring out the saw. Whether you're using a circular saw or a handsaw, make sure it's sharp and suitable for cutting wood.
Carefully cut the wood along the marked lines, following your measurements precisely. If you're creating multiple stool legs, ensure that each piece is cut to the same length to maintain uniformity. For the seat and support braces, cut the wood to the desired dimensions, keeping in mind the overall size and stability of your stool.
After cutting the wood, use a wood chisel to refine any rough edges and ensure that the pieces fit together seamlessly. Accurate and precise cutting is crucial for the structural integrity and visual appeal of your stool. Once the wood pieces are cut and refined, you're ready to move on to the next step of assembling the legs.
Step 2: Assembling the Legs
Assembling the legs is a critical step in constructing your stool. It's essential to ensure that the legs are securely joined to provide stability and support. Begin by laying out the leg pieces on a flat surface, ensuring that they are positioned correctly according to your design. Use a square to verify that the angles are precise, as this will contribute to the overall stability of the stool.
Next, apply wood glue to the joints where the legs will be connected. This will reinforce the connections and provide additional strength to the stool. Once the glue is applied, carefully position the pieces together, ensuring that they are aligned correctly. Use clamps to hold the pieces in place while the glue sets. The clamps will help maintain pressure on the joints, ensuring a tight and secure bond.
After the glue has dried, use a drill and screws to further secure the joints. Pre-drill guide holes to prevent the wood from splitting, then drive the screws into place. This additional reinforcement will enhance the structural integrity of the stool, making it capable of withstanding regular use.
Once the legs are assembled and secured, it's important to double-check the stability of the structure. Test the legs to ensure that they are level and that the stool sits evenly on the ground. Making any necessary adjustments at this stage will prevent issues later in the construction process.
With the legs securely assembled, you've completed a significant portion of the stool construction. The next step will involve attaching the seat, bringing your stool one step closer to completion.
Step 3: Attaching the Seat
Attaching the seat is a crucial step in completing your stool. It's essential to ensure that the seat is securely fastened to the legs, providing a stable and functional surface. Begin by positioning the seat on top of the assembled legs, ensuring that it is centered and aligned properly. Use a measuring tape and a square to confirm that the seat is positioned symmetrically on the legs.
Once the seat is in the desired position, it's time to secure it to the legs. Apply wood glue to the top of the legs where they will come into contact with the seat. This will create a strong bond between the seat and the legs, adding to the overall stability of the stool. Carefully lower the seat onto the legs, ensuring that the glue makes full contact with both surfaces.
After the glue is applied, use screws to further secure the seat to the legs. Pre-drill guide holes to prevent the wood from splitting, then drive the screws through the seat and into the legs. This combination of wood glue and screws will create a durable and long-lasting connection, ensuring that the seat remains firmly attached to the legs.
Once the seat is securely attached, it's important to test the stool's stability. Sit on the stool and apply pressure to ensure that the seat is firmly in place and can support weight without wobbling or shifting. Making any necessary adjustments at this stage will guarantee that your stool is ready for use.
With the seat successfully attached, your stool is nearing completion. The next step will involve sanding and finishing the wood to achieve a polished and professional appearance.
Step 4: Sanding and Finishing
After the structural components of the stool are assembled, the next crucial step is sanding and finishing the wood to enhance its appearance and ensure a smooth, polished surface. Begin by using coarse-grit sandpaper to remove any rough spots, uneven edges, or imperfections on the wood. Sand in the direction of the wood grain to achieve a consistent and uniform finish. Once the rough areas are smoothed out, transition to finer-grit sandpaper to further refine the surface and create a silky texture.
After sanding, wipe the wood with a clean, damp cloth to remove any dust or debris. This step is essential to prepare the wood for the finishing process. Depending on your preference, you can choose to stain the wood to accentuate its natural grain and color, or paint it to complement your existing decor. Apply the stain or paint evenly using a paintbrush or a stain applicator, ensuring full coverage and a consistent finish.
Once the stain or paint has dried, apply a coat of polyurethane to protect the wood and provide a glossy, durable finish. Polyurethane not only enhances the visual appeal of the wood but also safeguards it from wear and tear, making it suitable for everyday use. Allow the polyurethane to dry completely before applying additional coats for added protection and sheen.
After the finishing process is complete, inspect the stool for any remaining rough spots or imperfections. Use fine-grit sandpaper to gently smooth out any areas that may require additional attention. Once the wood is smooth and the finish is flawless, your custom-built stool will be ready to take its place as a functional and stylish addition to your home.
By following these steps, you can transform a few pieces of wood into a beautiful and practical piece of furniture that reflects your craftsmanship and creativity. With the right materials, tools, and attention to detail, you can create a custom stool that adds a personal touch to your living space.
Conclusion
Congratulations! You have successfully completed the journey of building your very own custom stool. From selecting high-quality wood to assembling the legs, attaching the seat, and finally sanding and finishing the wood, you've demonstrated skill, creativity, and dedication to the craft of woodworking. Your newly constructed stool is not only a functional piece of furniture but also a reflection of your craftsmanship and personal style.
As you admire your finished stool, take pride in the fact that you've created a unique and practical addition to your home. Whether it's placed in your kitchen, living room, or any other space, your custom stool will serve as a testament to your DIY prowess. Embrace the satisfaction of completing a hands-on project and the joy of showcasing your creation to family and friends.
Now that you've mastered the art of building a stool, consider applying your newfound skills to other woodworking projects. Whether it's crafting additional furniture pieces, creating decorative items, or tackling more ambitious woodworking endeavors, the possibilities are endless. Your journey as a DIY enthusiast and woodworker has only just begun, and there's a world of creativity and innovation waiting for you.
As you continue to explore the realm of DIY and home improvement, remember that each project is an opportunity to learn, grow, and unleash your imagination. With the right materials, tools, and a passion for craftsmanship, you can turn your ideas into tangible, functional, and beautiful creations. So, what are you waiting for? Let your creativity soar and embark on your next woodworking adventure. The world of DIY and home improvement is yours to explore!