
Home>Create & Decorate>DIY & Crafts>Easy Potting Bench Plans For Your DIY Garden Project
DIY & Crafts
Easy Potting Bench Plans For Your DIY Garden Project
Published: June 1, 2024

Senior Editor in Create & Decorate, Kathryn combines traditional craftsmanship with contemporary trends. Her background in textile design and commitment to sustainable crafts inspire both content and community.
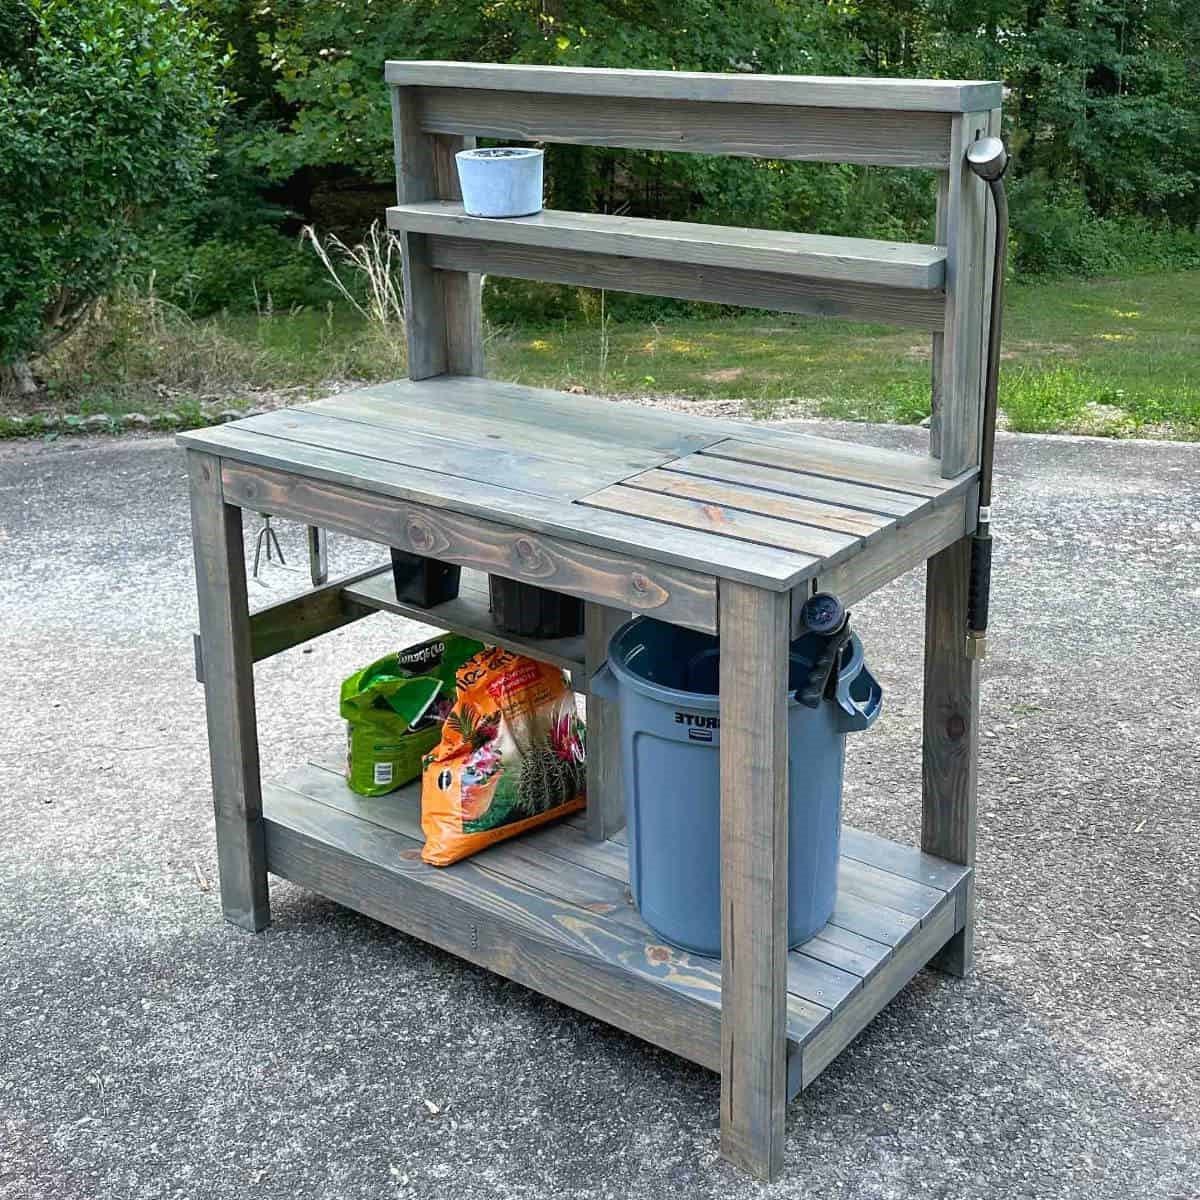
Discover easy potting bench plans for your DIY garden project. Get creative with DIY & Crafts and build the perfect potting bench for your outdoor space.
(Many of the links in this article redirect to a specific reviewed product. Your purchase of these products through affiliate links helps to generate commission for Twigandthistle.com, at no extra cost. Learn more)
Introduction
Are you a gardening enthusiast looking to take your green thumb to the next level? A potting bench is an essential addition to any garden or outdoor space, providing a dedicated area for repotting plants, storing gardening tools, and organizing your outdoor workspace. Building your own potting bench can be a rewarding and cost-effective DIY project that adds both functionality and charm to your garden. In this guide, we'll walk you through easy potting bench plans that you can tackle with basic carpentry skills and a few essential tools. Whether you're a seasoned DIYer or a novice looking to hone your skills, these plans will help you create a practical and stylish potting bench for your outdoor oasis.
Materials and Tools Needed
Before you embark on your potting bench project, it's essential to gather all the necessary materials and tools. Here's what you'll need:
Materials:
- Pressure-treated lumber: 4×4, 2×4, and 1×4 boards for the frame and shelves.
- Plywood: 3/4-inch thick for the work surface and shelf panels.
- Exterior wood screws: Assorted sizes for joining the frame and attaching the work surface.
- Wood glue: For added strength in joining the wood pieces.
- Exterior wood finish: To protect the potting bench from the elements.
Tools:
- Circular saw: For cutting the lumber to size.
- Drill/driver: To drive screws and create pilot holes.
- Tape measure: For accurate measurements.
- Clamps: To hold the pieces in place during assembly.
- Sanding block or electric sander: For smoothing rough edges and surfaces.
- Paintbrushes or a paint sprayer: For applying the wood finish.
Gathering these materials and tools beforehand will streamline the construction process and ensure that you have everything you need to bring your potting bench to life.
Step 1: Cutting and Preparing the Wood
The first step in building your potting bench is to cut and prepare the wood for the frame, work surface, and shelves. Follow these guidelines to get started:
-
Measure and Mark: Begin by measuring and marking the lumber according to the dimensions of your potting bench. Use a tape measure and a pencil to mark where you'll make your cuts.
-
Cut the Frame Pieces: Using a circular saw, carefully cut the 4×4 and 2×4 pressure-treated lumber to create the legs and frame components of the potting bench. Remember to measure twice and cut once to ensure accuracy.
-
Prepare the Work Surface and Shelves: Cut the plywood to the desired dimensions for the work surface and shelves. A circular saw or a table saw can be used to make precise cuts on the plywood.
-
Sand the Edges: After cutting the wood, use a sanding block or an electric sander to smooth out any rough edges and surfaces. This will help prevent splinters and give your potting bench a polished look.
By carefully cutting and preparing the wood, you'll set the foundation for assembling a sturdy and functional potting bench. With the pieces ready, you can move on to the next step of assembling the frame.
Step 2: Assembling the Frame
Once you have the wood pieces cut and prepared, it's time to assemble the frame of your potting bench. Follow these steps to put together the sturdy foundation for your outdoor workspace:
-
Lay Out the Pieces: Begin by laying out the 4×4 and 2×4 pieces according to your potting bench design. Arrange the pieces on a flat, level surface, ensuring that the measurements and angles align with your plan.
-
Join the Legs and Frame: Using exterior wood screws and wood glue for added strength, attach the 2×4 pieces to the 4×4 legs to form the frame of the potting bench. A drill/driver can be used to drive the screws and create secure joints.
-
Check for Squareness: As you assemble the frame, periodically check for squareness using a carpenter's square. This will ensure that the frame is properly aligned and will result in a stable and balanced potting bench.
-
Add Support Braces (Optional): Depending on the size and design of your potting bench, you may want to add additional support braces to reinforce the frame. These can be attached diagonally or horizontally between the legs for extra stability.
By carefully assembling the frame, you'll create a solid base for your potting bench that can withstand the rigors of gardening tasks. With the frame in place, you can move on to the next step of adding the work surface to complete your DIY potting bench project.
Step 3: Adding the Work Surface
With the frame of your potting bench securely assembled, it's time to add the work surface where you'll be potting plants and tending to your gardening tasks. Follow these steps to complete this crucial stage of your DIY project:
-
Position the Plywood: Place the pre-cut plywood piece on top of the assembled frame, ensuring that it aligns with the edges and overhangs evenly on all sides. This will create a functional and spacious work surface for your potting activities.
-
Secure the Work Surface: Using exterior wood screws, attach the plywood to the frame, driving the screws through the plywood and into the underlying frame components. Make sure to space the screws evenly along the edges to create a secure and stable attachment.
-
Create Drainage Holes (Optional): If you plan to use your potting bench for repotting plants, consider drilling small drainage holes in the work surface. This will allow excess water to escape, preventing waterlogged soil and maintaining a healthy environment for your plants.
-
Apply Wood Finish (Optional): To protect the work surface from moisture and outdoor elements, consider applying a coat of exterior wood finish. This will not only enhance the appearance of the potting bench but also prolong its lifespan, especially if it will be exposed to the elements.
By adding the work surface to your potting bench, you're one step closer to creating a functional and organized space for your gardening endeavors. With the work surface in place, the next step involves installing the storage shelves to further enhance the utility of your DIY potting bench.
Step 4: Installing the Storage Shelves
After completing the work surface, the next crucial step in building your potting bench is installing the storage shelves. These shelves will provide valuable space for organizing pots, gardening tools, and supplies, keeping everything within easy reach as you work in your outdoor space. Here's how to proceed with this essential stage of your DIY project:
-
Measure and Cut the Shelf Panels: Begin by measuring and cutting the plywood or lumber to the desired dimensions for the storage shelves. The size and number of shelves can be customized based on your specific storage needs and the available space on your potting bench.
-
Position the Shelves: Once the shelf panels are cut to size, position them within the frame of the potting bench. You can install the shelves at different heights to accommodate items of various sizes, ensuring that they are level and securely placed.
-
Attach the Shelves: Using exterior wood screws, attach the shelf panels to the frame of the potting bench. Drive the screws through the panels and into the frame components, creating sturdy and reliable support for the storage shelves.
-
Consider Backing or Siding (Optional): Depending on your preference, you may choose to add a backing or siding to the storage shelves. This can be achieved using additional plywood or lattice panels, providing a finished look and preventing items from falling off the back of the shelves.
-
Organize and Customize: With the storage shelves in place, take the opportunity to organize your gardening tools, pots, and supplies on the newly installed shelves. Consider adding hooks, small containers, or dividers to further customize the storage space and keep everything neatly arranged.
By installing the storage shelves, you'll maximize the functionality of your potting bench, creating a dedicated area for storing and accessing essential gardening items. With the shelves in place, the final step involves adding finishing touches to complete your DIY potting bench project.
Step 5: Finishing Touches
As you near the completion of your DIY potting bench project, adding the finishing touches will not only enhance the aesthetic appeal of the bench but also contribute to its durability and functionality. Here's how to put the final details in place:
-
Smooth Edges and Surfaces: Before applying any finish, take the time to sand down any remaining rough edges and surfaces. This will not only give your potting bench a polished look but also prevent any splinters while working on the bench.
-
Apply Exterior Finish: To protect the wood from moisture, UV rays, and other outdoor elements, consider applying an exterior wood finish. Whether it's a clear sealant to showcase the natural wood grain or a colorful stain to complement your outdoor decor, the finish will help prolong the life of your potting bench.
-
Add Hooks and Tool Hangers: Installing hooks or tool hangers on the sides or back of the potting bench can provide convenient storage for hand tools, gloves, or other accessories. This not only keeps your work area organized but also ensures that essential tools are always within reach.
-
Personalize with Paint or Stencils (Optional): If you're looking to add a personal touch to your potting bench, consider painting or stenciling a design, your favorite gardening quote, or even your name onto the surface or sides of the bench. This creative addition can make your potting bench a unique and charming feature in your garden.
-
Accessorize with Pots and Plants: Once your potting bench is complete, adorn it with potted plants, herbs, or flowers to infuse life and color into the space. This not only adds a decorative element but also showcases the purpose of the bench as a hub for all things green and growing.
By adding these finishing touches, you'll elevate your DIY potting bench from a functional workspace to a visually appealing and personalized asset in your garden. With the completion of these final details, your potting bench is ready to serve as a practical and stylish centerpiece for your outdoor gardening activities.
Conclusion
Congratulations on completing your DIY potting bench! By following these easy plans and putting your carpentry skills to work, you've created a valuable addition to your garden or outdoor space. Your new potting bench provides a dedicated area for repotting plants, organizing gardening tools, and tending to your greenery. With a sturdy frame, functional work surface, storage shelves, and personalized finishing touches, your potting bench is ready to support your gardening endeavors. Whether you're a seasoned DIY enthusiast or a novice looking to embark on more home improvement projects, the satisfaction of building and using your own potting bench is a testament to your creativity and resourcefulness. Now, it's time to put your new outdoor workspace to good use and enjoy the convenience and charm it brings to your gardening activities. Happy potting!