
Home>Create & Decorate>DIY & Crafts>DIY Splash Pad: Create Your Own Backyard Water Fun
DIY & Crafts
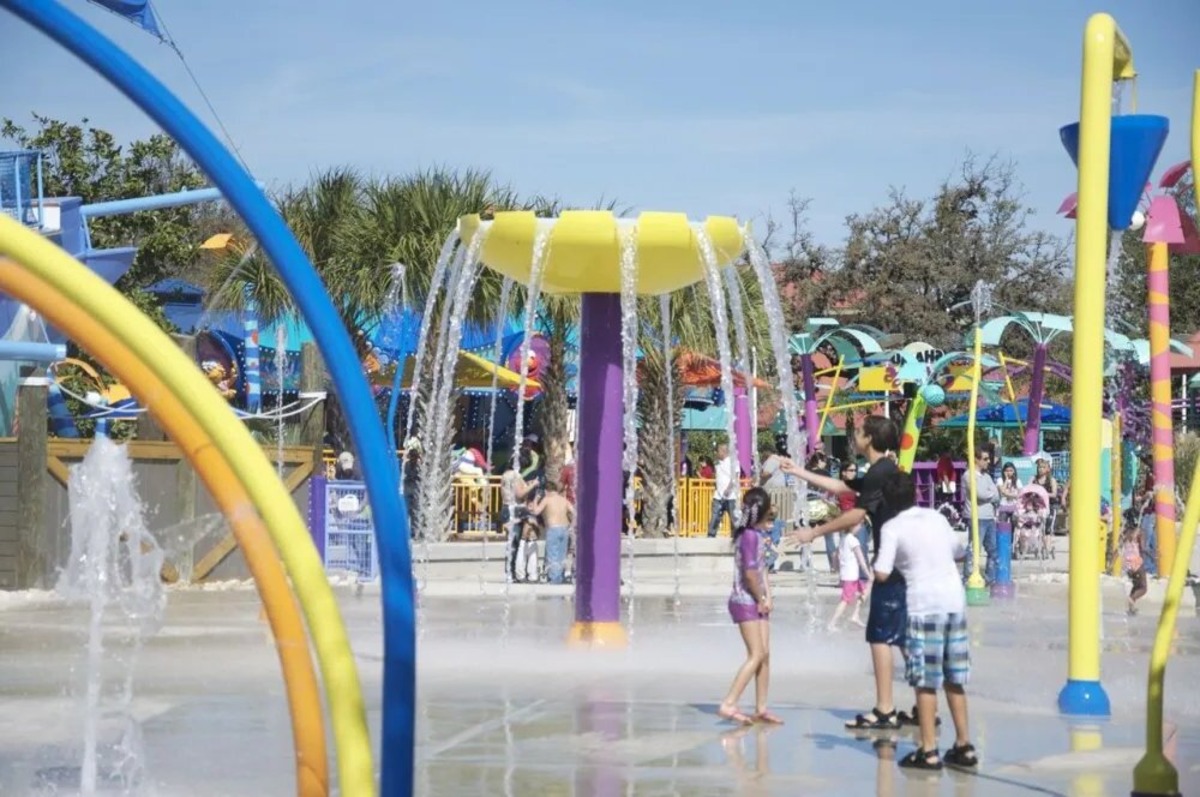
DIY Splash Pad: Create Your Own Backyard Water Fun
Published: June 17, 2024

Content Creator specializing in woodworking and interior transformations. Caegan's guides motivate readers to undertake their own projects, while his custom furniture adds a personal touch.
Create a DIY splash pad in your backyard for endless water fun! Get creative with DIY & Crafts to build your own water play area.
(Many of the links in this article redirect to a specific reviewed product. Your purchase of these products through affiliate links helps to generate commission for Twigandthistle.com, at no extra cost. Learn more)
Introduction
Are you looking for a fun and refreshing way to keep the kids entertained in your backyard? Creating your own DIY splash pad could be the perfect solution! With a little creativity and some basic materials, you can design a water play area that will provide hours of entertainment for the whole family. In this article, we'll guide you through the process of planning, building, and maintaining your very own backyard splash pad. Get ready to bring the excitement of a water park right to your doorstep!
Planning Your DIY Splash Pad
Before you dive into building your DIY splash pad, it's essential to start with a solid plan. Here are some key steps to consider during the planning phase:
-
Set a Budget: Determine how much you're willing to invest in your splash pad project. This will help you make decisions about the size, materials, and additional features.
-
Design Considerations: Think about the age of the children who will be using the splash pad. Consider incorporating features like gentle water sprays, fountains, and shallow pools for younger kids, while older children might enjoy more interactive elements like water cannons and tipping buckets.
-
Space and Layout: Evaluate the available space in your backyard and decide where the splash pad will be located. Consider the proximity to utilities and the overall aesthetic of your outdoor area.
-
Regulatory Compliance: Check with your local municipality to ensure that you comply with any regulations or permits required for installing a water feature on your property.
By carefully planning these aspects, you can ensure that your DIY splash pad meets your family's needs and provides a safe and enjoyable water play area for everyone to enjoy.
Choosing the Right Location
Selecting the perfect location for your DIY splash pad is crucial to ensure that it's both functional and visually appealing. Here are some essential factors to consider when choosing the right spot for your backyard water fun:
-
Level Ground: Look for a flat and level area in your backyard to serve as the foundation for your splash pad. This will make the installation process easier and ensure that the water is distributed evenly across the surface.
-
Proximity to Utilities: Consider the proximity to water and electricity sources. You'll need access to a water supply for the splash pad's features, as well as a power source if you plan to incorporate water pumps or other electrical components.
-
Sun Exposure: Take note of the sun's path throughout the day. While some sun exposure is ideal for drying the splash pad after use, excessive heat can make the surface too hot for bare feet. Aim for a balance of sun and shade to create a comfortable environment.
-
Visibility and Accessibility: Choose a location that allows for easy supervision from your home or outdoor living space. Additionally, ensure that the splash pad is easily accessible from the rest of your backyard, making it convenient for everyone to enjoy.
By carefully considering these factors, you can select a location that maximizes the functionality, safety, and enjoyment of your DIY splash pad.
Gathering Materials and Tools
When it comes to creating your DIY splash pad, having the right materials and tools is essential for a successful build. Here's a comprehensive list of what you'll need to gather before getting started:
Materials
- PVC Piping: This will be used to create the framework for the water distribution system.
- PVC Connectors and Adapters: Ensure you have a variety of fittings to customize the layout of the piping.
- Rubber or PVC Sheeting: This will serve as the base of the splash pad, providing a waterproof surface.
- Waterproof Sealant: Use this to secure the edges of the rubber or PVC sheeting and prevent leaks.
- Water Features: Depending on your design, you may need water sprayers, fountains, or other interactive elements.
- Water Pump: Select a pump that can circulate water through the splash pad's features effectively.
- Decorative Tiles or Mosaic Pieces: If you want to add a decorative touch to the splash pad surface.
Tools
- Measuring Tape and Marking Tools: Accurate measurements are crucial for laying out the splash pad's design.
- PVC Pipe Cutter: This tool will make it easier to customize the length of the piping to fit your design.
- Utility Knife: Use this for cutting and trimming the rubber or PVC sheeting to the desired size.
- Drill and Bits: You'll need these to create holes for the water features and secure the PVC piping.
- Waterproof Adhesive: Choose a strong adhesive to secure the water features and ensure they remain in place during use.
- Level: Maintaining a level surface is important for the functionality and aesthetics of the splash pad.
By gathering these materials and tools, you'll be well-prepared to tackle the construction of your DIY splash pad. Remember to prioritize safety when using tools and equipment, and consider enlisting the help of friends or family members for certain aspects of the project.
Building Your DIY Splash Pad
Now that you've completed the planning phase and gathered all the necessary materials and tools, it's time to roll up your sleeves and start building your DIY splash pad. Follow these step-by-step instructions to bring your backyard water fun to life:
-
Lay the Foundation: Begin by clearing and leveling the chosen area for your splash pad. Remove any debris, rocks, or uneven surfaces to create a smooth base for the installation.
-
Lay the Sheeting: Once the area is prepped, lay the rubber or PVC sheeting over the designated space. Ensure that it is taut and free of wrinkles, and use the waterproof sealant to secure the edges and prevent any potential leaks.
-
Install the PVC Piping: Use the PVC piping and connectors to create the framework for the water distribution system. Plan the layout according to your design, ensuring that the pipes are securely connected and positioned to provide even water distribution across the splash pad.
-
Incorporate Water Features: Install the chosen water features, such as sprayers, fountains, or interactive elements, according to your design plan. Secure them in place using waterproof adhesive and ensure that they are connected to the PVC piping for water circulation.
-
Set Up the Water Pump: Install the water pump according to the manufacturer's instructions, ensuring that it is capable of circulating water through the splash pad's features effectively. Test the pump to ensure proper functionality and adjust as needed.
-
Test for Leaks and Functionality: Before finalizing the construction, thoroughly test the splash pad for any leaks, ensuring that the water distribution is even and that all features are functioning as intended. Make any necessary adjustments or repairs before proceeding.
-
Add a Decorative Touch: If desired, consider adding decorative tiles or mosaic pieces to the surface of the splash pad to enhance its visual appeal. Ensure that these elements are securely attached and won't pose a safety hazard during use.
-
Finalize the Surroundings: Complete the construction by adding any finishing touches to the surrounding area, such as landscaping, seating, or safety barriers, to create a welcoming and safe environment for water play.
By following these steps and paying attention to detail, you can successfully build your DIY splash pad and create a fantastic water play area for your family and friends to enjoy. Remember to prioritize safety throughout the construction process and seek assistance if needed to ensure a smooth and successful build.
Adding Fun Features
Incorporating fun and interactive features into your DIY splash pad can take the excitement to the next level. Here are some creative ideas to enhance the playfulness and enjoyment of your backyard water fun:
Water Sprayers and Fountains
Integrating water sprayers and fountains into your splash pad design can add an element of surprise and delight for the users. Consider positioning adjustable sprayers at varying heights to create a refreshing mist or gentle water jets. Fountains can also provide a visually appealing and dynamic water element, adding a touch of elegance to the splash pad.
Interactive Water Toys
Including interactive water toys such as water cannons, spinning wheels, or tipping buckets can encourage imaginative and active play. These features can engage children in cooperative or competitive water games, promoting social interaction and physical activity while keeping them cool and entertained.
Colorful LED Lights
Enhance the visual appeal of your splash pad by incorporating colorful LED lights. These lights can be installed around the perimeter or within the water features, creating a vibrant and inviting atmosphere, especially during evening or nighttime use. The combination of water and light effects can elevate the overall sensory experience for users of all ages.
Water Play Structures
Integrating water play structures, such as arches, tunnels, or mini water slides, can add an element of adventure and exploration to the splash pad. These structures can provide opportunities for climbing, sliding, and imaginative play, offering a dynamic and engaging water play experience for children.
Musical Water Features
For an extra touch of creativity, consider incorporating musical water features that produce sounds in response to water movement. These features can create a multisensory experience, allowing users to interact with the splash pad through auditory stimulation, adding an element of whimsy and entertainment.
By incorporating these fun features into your DIY splash pad, you can create an engaging and dynamic water play environment that will captivate and entertain users of all ages. These elements can elevate the overall experience, making your backyard splash pad a go-to destination for endless summer fun.
Safety Considerations
When creating a DIY splash pad, prioritizing safety is paramount to ensure a secure and enjoyable water play environment for everyone. Here are essential safety considerations to keep in mind throughout the planning, construction, and use of your backyard splash pad:
Slip-Resistant Surface
To prevent slips and falls, it's crucial to ensure that the surface of the splash pad is slip-resistant, even when wet. Consider using materials with textured surfaces or adding non-slip coatings to the flooring to provide traction and reduce the risk of accidents.
Rounded Edges and Corners
When designing and constructing the splash pad, opt for rounded edges and corners to minimize the risk of injuries from sharp or protruding surfaces. Smooth, rounded edges can help prevent cuts, bruises, and other potential hazards, especially for active and playful users.
Water Depth and Supervision
If your splash pad includes shallow pools or water features, ensure that the water depth is appropriate for the intended users. Additionally, always supervise young children during water play to prevent accidents and ensure their safety. Implementing clear rules and guidelines for water play can also contribute to a safe and controlled environment.
Water Quality and Maintenance
Regularly monitor and maintain the water quality of the splash pad to prevent the growth of bacteria and algae. Use appropriate water treatment products and cleaning methods to keep the water clean and safe for use. Additionally, establish a routine maintenance schedule to inspect the equipment, plumbing, and overall condition of the splash pad.
Electrical Safety
If your splash pad incorporates electrical components such as water pumps or lighting, ensure that all electrical connections are properly installed and protected from water exposure. Use ground fault circuit interrupters (GFCIs) to minimize the risk of electrical hazards and follow electrical safety guidelines to prevent shocks or short circuits.
Clear Signage and Rules
Install clear and visible signage around the splash pad area, including safety rules, age restrictions, and emergency contact information. Communicating safety guidelines to users and visitors can help prevent accidents and promote responsible behavior during water play.
Accessibility and Barrier Safety
Ensure that the splash pad area is accessible to all users, including those with mobility challenges. Implement safety barriers or fencing around the perimeter to prevent unauthorized access and to create a secure and controlled environment for water play.
By addressing these safety considerations, you can create a DIY splash pad that prioritizes the well-being and security of its users, providing a safe and enjoyable water play experience for all.
Maintenance and Upkeep
Once your DIY splash pad is up and running, it's essential to establish a regular maintenance routine to ensure its longevity, functionality, and safety. Here's a comprehensive guide to maintaining and upkeeping your backyard water fun:
Daily Inspections
Perform daily visual inspections of the splash pad to check for any signs of damage, wear, or debris accumulation. Look for loose fittings, damaged water features, or foreign objects that may affect the safety and performance of the splash pad. Remove any debris or leaves to maintain a clean and inviting water play area.
Water Quality Management
Monitor the water quality of the splash pad regularly, especially if it includes standing water features. Test the water for pH levels, chlorine concentration (if applicable), and clarity. Use appropriate water treatment products to maintain balanced and clean water, preventing the growth of algae or bacteria. Consider implementing a filtration system to ensure continuous water circulation and cleanliness.
Equipment Maintenance
Inspect and maintain the functionality of the water pump, filtration system, and any electrical components used in the splash pad. Check for leaks, unusual noises, or malfunctions and address them promptly. Lubricate moving parts as needed and replace worn-out or damaged components to ensure the efficient operation of the splash pad's equipment.
Surface Cleaning
Regularly clean the surface of the splash pad to remove dirt, grime, and any potential slip hazards. Use mild soap and water to scrub the surface, and consider using a pressure washer for thorough cleaning. Pay attention to textured surfaces, grout lines, and decorative elements to maintain the visual appeal and cleanliness of the splash pad.
Seasonal Maintenance
Adjust the maintenance routine according to seasonal changes and weather conditions. In colder climates, prepare the splash pad for winter by draining water from the system, protecting exposed pipes, and storing removable features. In warmer climates, consider additional measures to prevent heat-related issues, such as surface overheating or water evaporation.
Structural Integrity
Regularly assess the structural integrity of the splash pad, including the base material, piping, and water distribution system. Look for signs of wear, deterioration, or damage, and address any issues promptly to prevent safety hazards and maintain the longevity of the splash pad.
User Education
Educate users, especially children, about responsible and safe behavior when using the splash pad. Establish clear rules for water play, including guidelines for running, roughhousing, and sharing the space with others. Encourage users to report any safety concerns or malfunctions they observe during their use of the splash pad.
By implementing a comprehensive maintenance and upkeep plan, you can ensure that your DIY splash pad remains a safe, enjoyable, and long-lasting addition to your backyard. Regular maintenance not only preserves the functionality and aesthetics of the splash pad but also promotes a positive and secure water play experience for all users.
Conclusion
In conclusion, creating your own DIY splash pad can bring endless joy and excitement to your backyard, providing a refreshing and entertaining water play area for the whole family. By carefully planning the design, selecting the right location, gathering the necessary materials and tools, and incorporating fun features, you can customize a splash pad that suits your preferences and meets the needs of your users. Prioritizing safety considerations throughout the planning, construction, and maintenance stages is crucial to ensure a secure and enjoyable water play environment. With regular maintenance and upkeep, your DIY splash pad can continue to be a source of summer fun and relaxation for years to come. So, roll up your sleeves, unleash your creativity, and get ready to make a splash with your very own DIY splash pad!