
Home>Create & Decorate>DIY & Crafts>DIY Rabbit Hutch Plans: Step-by-Step Guide To Building A Spacious And Cozy Home For Your Bunny
DIY & Crafts
DIY Rabbit Hutch Plans: Step-by-Step Guide To Building A Spacious And Cozy Home For Your Bunny
Published: June 18, 2024

Content Creator specializing in woodworking and interior transformations. Caegan's guides motivate readers to undertake their own projects, while his custom furniture adds a personal touch.
Discover step-by-step DIY rabbit hutch plans to create a spacious and cozy home for your bunny with our easy-to-follow guide. Perfect for DIY & Crafts enthusiasts!
(Many of the links in this article redirect to a specific reviewed product. Your purchase of these products through affiliate links helps to generate commission for Twigandthistle.com, at no extra cost. Learn more)
Introduction
Are you considering building a cozy and spacious home for your beloved bunny? DIY rabbit hutch plans are a fantastic way to provide your furry friend with a safe and comfortable living space while also adding a charming addition to your backyard or garden. In this comprehensive guide, we will walk you through the step-by-step process of constructing a rabbit hutch that meets your bunny's needs and your design preferences. From choosing the right location to adding the finishing touches, you'll learn everything you need to know to create a perfect home for your pet rabbit. Let's hop right into it!
Choosing the Right Location for Your Rabbit Hutch
When selecting the ideal location for your rabbit hutch, it's crucial to consider both the well-being of your bunny and the practicality for you as the caretaker. Here are some key factors to keep in mind:
-
Shade and Shelter: Look for a spot that offers ample shade and protection from the elements. This will help keep your rabbit cool in the summer and shielded from harsh weather conditions.
-
Ventilation: Ensure that the location allows for good airflow to prevent the hutch from becoming stuffy or overheated.
-
Predator Protection: Choose a location that minimizes the risk of predators accessing the hutch. Avoid areas where predators like raccoons or stray dogs may pose a threat to your rabbit.
-
Accessibility: Consider a location that is easily accessible for cleaning, feeding, and interacting with your bunny. This will make daily care and maintenance more convenient for you.
-
Visibility: While your rabbit needs a sense of security, it's also beneficial for the hutch to be placed in an area where you can keep an eye on your pet. This allows you to monitor their well-being and provide companionship.
-
Proximity to Your Home: Placing the hutch relatively close to your house can make it easier for you to check on your rabbit regularly and provide quick attention if needed.
By carefully considering these factors, you can select a location that ensures the comfort, safety, and well-being of your pet rabbit while also accommodating your own needs as a caretaker.
Gathering Materials and Tools
Before diving into the construction of your rabbit hutch, it's essential to gather all the necessary materials and tools. Here's a comprehensive list to help you prepare for the project:
Materials:
- Lumber: Purchase high-quality, untreated lumber for the frame, walls, and other structural components of the hutch. Opt for wood that is durable and resistant to weathering.
- Wire Mesh: Choose a sturdy wire mesh to create the hutch's enclosure. Ensure that the mesh has small enough gaps to prevent your rabbit from escaping and to keep predators out.
- Screws and Nails: Stock up on an assortment of screws and nails in various sizes to secure the hutch's components together.
- Hinges and Latches: Select durable hinges and latches for the doors and windows of the hutch, providing easy access for cleaning and maintenance.
- Roofing Material: Depending on your design preference, acquire roofing material such as shingles, corrugated metal, or waterproof tarp to protect the hutch from rain and other elements.
- Insulation (Optional): If you live in a region with extreme temperatures, consider adding insulation to the hutch to provide additional comfort for your rabbit.
- Paint or Stain: If you wish to add a pop of color or protect the wood from weathering, choose a pet-safe paint or stain to finish the hutch.
Tools:
- Measuring Tape and Level: Accurate measurements and a level surface are crucial for constructing a sturdy and level hutch.
- Saw: A handsaw or power saw will be essential for cutting the lumber to the required dimensions.
- Drill and Bits: A drill with a variety of drill bits will be necessary for creating pilot holes and securing screws.
- Wire Cutters: Use wire cutters to trim the wire mesh to fit the hutch's openings and windows.
- Hammer: A hammer will come in handy for driving nails and securing components.
- Paintbrushes or Rollers: If you plan to paint or stain the hutch, have the appropriate brushes or rollers on hand.
By gathering these materials and tools, you'll be well-prepared to embark on the construction of your DIY rabbit hutch. With everything in place, you can proceed to the next steps with confidence and efficiency.
Designing the Layout of Your Rabbit Hutch
When it comes to designing the layout of your rabbit hutch, thoughtful planning is key to creating a comfortable and functional living space for your bunny. Here are the essential steps to consider as you map out the layout:
-
Size and Space: Determine the appropriate size of the hutch based on the breed and number of rabbits you plan to accommodate. A general rule of thumb is to provide at least 12 square feet of living space per rabbit. Consider both the main living area and any additional compartments for nesting, feeding, and play.
-
Compartmentalization: If you have multiple rabbits, consider dividing the hutch into separate compartments to prevent conflicts and provide individual living spaces. Each compartment should have its own access to food, water, and a comfortable resting area.
-
Accessibility: Ensure that the layout allows for easy access to all areas of the hutch for cleaning, feeding, and monitoring your rabbits. Incorporate removable panels or doors to facilitate cleaning and maintenance tasks.
-
Ventilation and Light: Plan for adequate ventilation by incorporating windows or vents into the design. Natural light is also important for your rabbits' well-being, so consider the placement of windows to allow sunlight to enter the hutch.
-
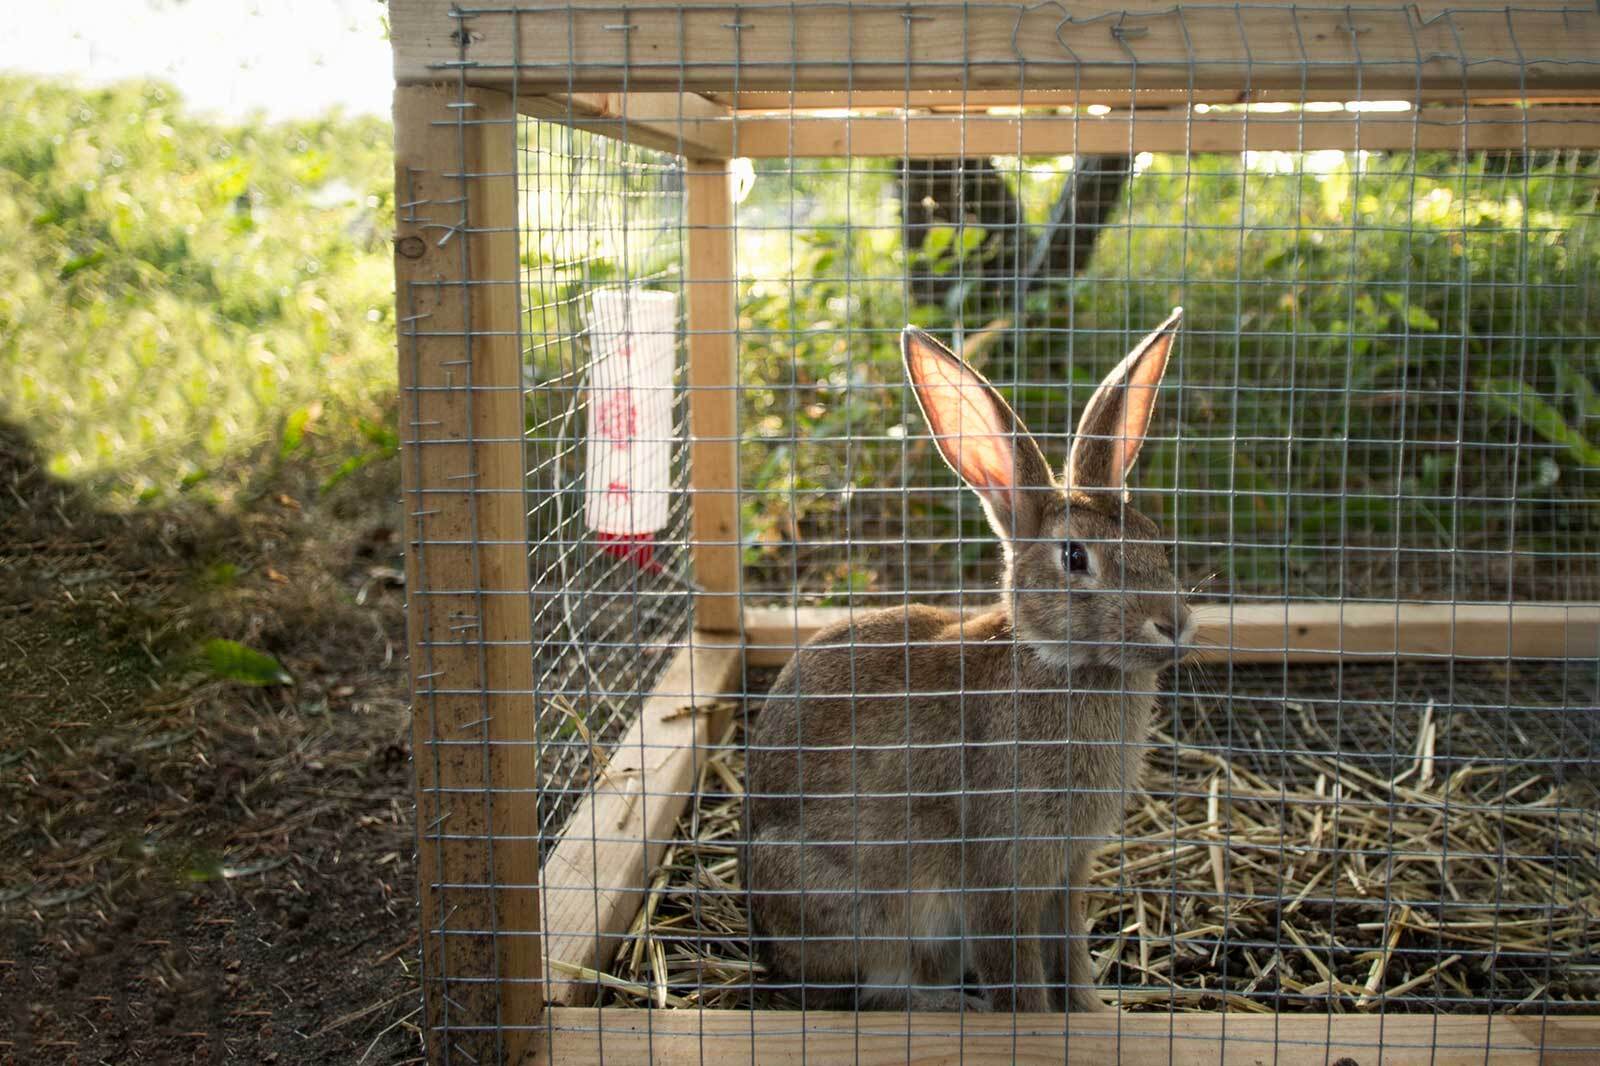
Flooring and Bedding: Decide on the type of flooring for the hutch, keeping in mind the comfort and hygiene of your rabbits. Options include solid wood flooring, wire mesh flooring (with a solid resting area), or a combination of both. Choose suitable bedding material, such as straw or wood shavings, to provide a cozy and clean living environment.
-
Enrichment and Play Areas: Integrate features that promote physical activity and mental stimulation for your rabbits. Consider adding ramps, platforms, and toys to keep your rabbits engaged and entertained.
-
Safety Considerations: Ensure that the layout prioritizes the safety of your rabbits. Smooth out any sharp edges, secure wire mesh firmly, and avoid any potential hazards within the hutch.
By carefully considering these aspects, you can create a well-designed layout that caters to the comfort, health, and happiness of your pet rabbits. Once the layout is finalized, you can proceed to the construction phase with a clear vision of the hutch's structure and functionality.
Building the Frame and Walls
The construction of the frame and walls forms the foundational structure of your rabbit hutch, providing stability and security for your furry friends. Here's a detailed breakdown of the essential steps involved in building the frame and walls:
1. Frame Construction
Begin by assembling the frame of the hutch using the selected lumber. Cut the lumber to the required dimensions based on your layout design, ensuring precision and accuracy in measurements. Use a level surface to align the pieces and create a sturdy framework. Secure the frame components together using appropriate screws and ensure that the corners are square to maintain structural integrity.
2. Wall Installation
Once the frame is in place, it's time to install the walls of the hutch. Cut the lumber or plywood to fit the dimensions of each section of the frame, accounting for openings such as doors and windows. Secure the walls to the frame using screws, ensuring a snug and secure fit. If using wire mesh for certain sections, such as the enclosure, carefully attach the mesh to the frame using staples or suitable fasteners.
3. Door and Window Placement
As you progress with the wall installation, consider the placement of doors and windows. Cut openings in the walls for the doors and windows, ensuring that they are appropriately sized for easy access and ventilation. Install hinges and latches for the doors, allowing them to open and close smoothly. For windows, consider adding mesh or transparent panels to provide ventilation while keeping your rabbits secure.
4. Reinforcement and Stability
To reinforce the frame and walls, add additional support where necessary. Braces or crossbars can be installed to enhance the stability of the hutch, especially for larger designs. Ensure that all components are securely fastened to withstand the elements and the activities of your rabbits.
5. Weatherproofing
Consider weatherproofing measures to protect the frame and walls from moisture and environmental wear. Apply a pet-safe sealant or paint to the exterior surfaces, providing a protective barrier against the elements. This step is crucial for ensuring the longevity of the hutch and maintaining a comfortable living environment for your rabbits.
By following these detailed steps, you can effectively build the frame and walls of your rabbit hutch, laying the groundwork for the subsequent phases of construction. With a sturdy and well-constructed framework in place, you are one step closer to providing your rabbits with a secure and cozy home.
Adding the Roof and Flooring
Once the frame and walls of your rabbit hutch are in place, the next crucial steps involve adding the roof and flooring to complete the enclosure and provide essential protection and comfort for your rabbits.
1. Roof Installation
Begin by selecting the appropriate roofing material based on your design preferences and the local climate. Common options include shingles, corrugated metal, or waterproof tarp. Cut the roofing material to fit the dimensions of the hutch, ensuring an overhang to provide adequate protection from rain and sunlight. Secure the roofing material to the top of the hutch, ensuring a tight and weatherproof fit. If using shingles, overlap them to create a water-resistant barrier. Properly installed roofing will shield the hutch from the elements, keeping your rabbits dry and comfortable.
2. Flooring Considerations
When it comes to the flooring of the hutch, the primary goal is to provide a comfortable and hygienic surface for your rabbits. Depending on your preferences and the needs of your rabbits, consider the following options:
-
Solid Wood Flooring: If using solid wood flooring, ensure that it is untreated and provides a comfortable surface for your rabbits to move around and rest. Regularly inspect the wood for signs of wear and replace any damaged sections as needed.
-
Wire Mesh Flooring: Some hutch designs incorporate wire mesh flooring to allow droppings to fall through, keeping the living area cleaner. However, it's essential to provide a solid resting area within the hutch to prevent foot injuries. Consider covering a portion of the wire mesh with a solid material, such as plywood, to create a comfortable resting space.
-
Combination Flooring: For added versatility, consider a combination of solid and wire mesh flooring. This approach allows for a designated resting area while still facilitating waste management.
3. Flooring Maintenance
Regardless of the flooring type, regular maintenance is crucial to ensure a clean and healthy living environment for your rabbits. Clean the flooring regularly, removing any waste and soiled bedding. Replace the bedding material as needed to maintain a fresh and comfortable living space for your rabbits.
4. Insulation (Optional)
In regions with extreme temperatures, consider adding insulation to the hutch to provide additional comfort for your rabbits. Insulation materials such as foam board or insulating fabric can help regulate the temperature inside the hutch, keeping your rabbits cozy during cold weather and providing relief from excessive heat.
By carefully addressing the roof and flooring aspects of your rabbit hutch, you can create a secure and comfortable living space for your rabbits. These elements play a vital role in protecting your rabbits from the elements and providing a cozy environment where they can thrive. With the roof and flooring in place, your DIY rabbit hutch is well on its way to becoming a perfect home for your beloved pets.
Installing Doors and Windows
The installation of doors and windows in your rabbit hutch is a critical step that contributes to the functionality, accessibility, and comfort of the living space for your rabbits. Here's a detailed guide on how to effectively install doors and windows in your DIY rabbit hutch:
1. Door Installation
Begin by selecting the appropriate location for the door based on your hutch's layout and design. The door should provide easy access for cleaning, feeding, and interacting with your rabbits. Once the location is determined, measure and mark the dimensions for the door opening on the hutch's wall.
Next, cut the opening for the door using a saw, ensuring precision and smooth edges. Install hinges on one side of the door frame and the corresponding location on the hutch's wall. Attach the door to the hinges, ensuring that it opens and closes smoothly without any obstructions.
For added security, install a latch or lock mechanism on the door to prevent unauthorized access and ensure the safety of your rabbits. Test the door to ensure that it opens and closes securely, providing a convenient entry point for caretaking activities.
2. Window Placement
Windows play a crucial role in providing ventilation, natural light, and a view for your rabbits. When determining the placement of windows, consider the airflow within the hutch and the potential for sunlight to enter the living space.
Carefully measure and mark the locations for the windows on the hutch's walls, ensuring that they are strategically positioned to promote airflow and provide a glimpse of the surrounding environment. Cut the window openings using appropriate tools, taking care to create smooth and even edges.
Once the openings are prepared, install transparent panels or wire mesh to cover the windows, providing a barrier that allows light and air to enter while keeping your rabbits secure. Secure the panels or mesh firmly to the hutch's frame, ensuring that they are resistant to tampering and provide a clear view for your rabbits.
3. Ventilation and Safety Considerations
As you install the doors and windows, prioritize ventilation and safety for your rabbits. Ensure that the openings allow for adequate airflow without compromising the security of the hutch. Consider adding adjustable vents or mesh-covered openings to regulate the airflow and maintain a comfortable environment for your rabbits.
To enhance safety, inspect the edges of the doors and windows to ensure that they are smooth and free from any sharp protrusions that could pose a risk to your rabbits. Smooth out any rough areas and secure the edges to prevent injuries or entanglement.
By effectively installing doors and windows in your rabbit hutch, you can create a well-ventilated, accessible, and secure living space for your rabbits. These elements contribute to the overall functionality and comfort of the hutch, providing a welcoming environment where your rabbits can thrive and enjoy their new home.
Adding Finishing Touches and Accessories
As you near the completion of your DIY rabbit hutch, adding finishing touches and accessories will not only enhance the aesthetic appeal but also contribute to the overall comfort and functionality of the living space for your rabbits. Here are the essential steps to consider when adding the final touches to your rabbit hutch:
1. Paint or Stain
Applying a fresh coat of paint or stain to the exterior of the hutch can add a pop of color and protect the wood from weathering. Choose a pet-safe paint or stain that is non-toxic and durable, ensuring that it complements the surrounding environment. Consider using bright and cheerful colors to create a visually appealing hutch that stands out in your backyard or garden.
2. Nesting Boxes and Hideaways
Incorporating nesting boxes and hideaways within the hutch provides your rabbits with private and cozy spaces for resting and nesting. These compartments can be constructed from wood or other suitable materials, offering a sense of security and comfort for your rabbits. Ensure that the nesting boxes are easily accessible for cleaning and monitoring your rabbits' activities.
3. Feeding and Watering Stations
Designate specific areas within the hutch for feeding and watering your rabbits. Install sturdy and easy-to-clean feeding and watering stations, ensuring that they are positioned to prevent spillage and contamination. Consider using elevated platforms or containers to keep the food and water off the ground, maintaining a clean and hygienic living space for your rabbits.
4. Enrichment and Play Accessories
To promote physical activity and mental stimulation for your rabbits, consider adding enrichment and play accessories to the hutch. Incorporate ramps, platforms, tunnels, and chew toys to keep your rabbits engaged and entertained. These accessories provide opportunities for exercise and play, contributing to the overall well-being and happiness of your rabbits.
5. Weatherproofing and Maintenance
Before completing the hutch, conduct a thorough inspection to ensure that all components are weatherproof and secure. Seal any gaps or joints to prevent moisture from entering the hutch, and address any potential areas of wear or vulnerability. Establish a regular maintenance routine to keep the hutch clean, tidy, and in optimal condition for your rabbits' comfort and safety.
By adding these finishing touches and accessories, you can transform your DIY rabbit hutch into a welcoming and functional home for your beloved rabbits. These elements not only enhance the visual appeal of the hutch but also contribute to the well-being and enrichment of your rabbits' living environment. With the finishing touches in place, your rabbits can enjoy a cozy and inviting space that meets their needs and provides a delightful addition to your home.
Conclusion
In conclusion, constructing a DIY rabbit hutch is a rewarding and fulfilling endeavor that allows you to provide a safe, comfortable, and personalized home for your pet rabbits. By carefully considering the location, gathering the necessary materials and tools, designing the layout, and following the step-by-step construction process, you can create a spacious and cozy living space that meets the needs of your furry friends. From the frame and walls to the roof, flooring, doors, windows, and finishing touches, every aspect of the hutch contributes to the well-being and happiness of your rabbits.
As you complete the construction of your rabbit hutch, remember to prioritize ventilation, safety, and accessibility to ensure a welcoming and secure environment for your rabbits. Regular maintenance and care will be essential to uphold the hutch's functionality and cleanliness, providing a comfortable and enjoyable living space for your rabbits.
With your DIY rabbit hutch in place, you can take pride in knowing that you have created a special and personalized home for your beloved pets. Whether placed in your backyard, garden, or outdoor space, the hutch serves as a charming addition to your home while offering a dedicated space for your rabbits to thrive. Embrace the joy of seeing your rabbits enjoy their new home and take delight in the bond that grows between you and your furry companions within the comfort of their custom-built hutch.