
Home>Create & Decorate>DIY & Crafts>DIY Pavilion: Create Your Own Outdoor Retreat
DIY & Crafts
DIY Pavilion: Create Your Own Outdoor Retreat
Published: June 14, 2024

Content Creator specializing in woodworking and interior transformations. Caegan's guides motivate readers to undertake their own projects, while his custom furniture adds a personal touch.
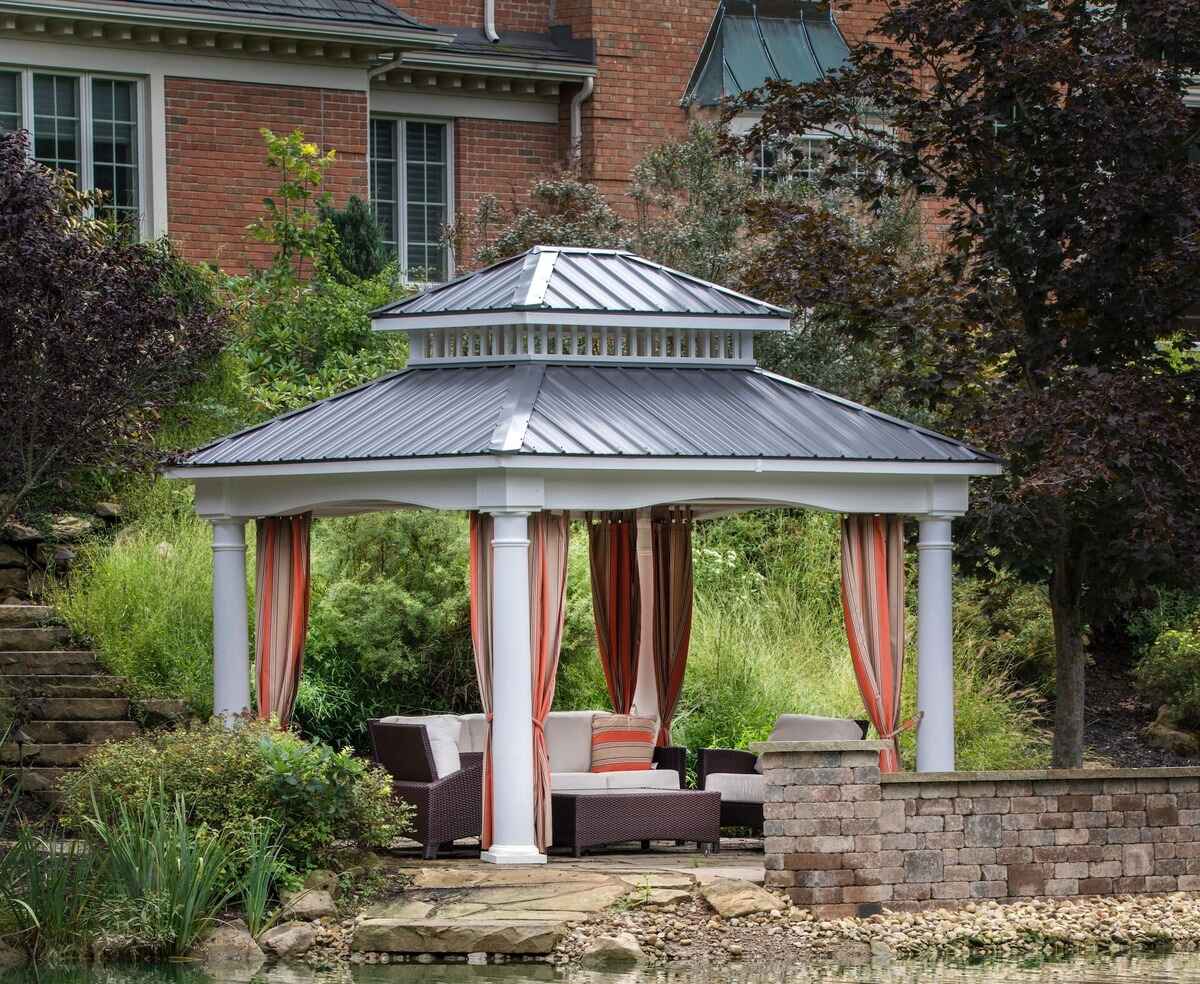
Create your own outdoor retreat with our DIY Pavilion ideas and crafts. Transform your space into a cozy haven with our easy-to-follow DIY projects. Discover the joy of crafting and relaxation in your backyard.
(Many of the links in this article redirect to a specific reviewed product. Your purchase of these products through affiliate links helps to generate commission for Twigandthistle.com, at no extra cost. Learn more)
Introduction
Are you looking to enhance your outdoor space and create a cozy retreat right in your backyard? Building your own pavilion can be a rewarding and enjoyable DIY project that adds both beauty and functionality to your property. Whether you want a peaceful spot for reading, a space for entertaining guests, or simply a sheltered area to enjoy the outdoors, a DIY pavilion can be the perfect solution. In this guide, we'll take you through the steps to create your own outdoor retreat with a custom-built pavilion.
Choosing the Perfect Location
When selecting the ideal location for your DIY pavilion, consider the layout of your outdoor space and how you plan to use the pavilion. Here are some factors to keep in mind:
-
Sunlight and Shade: Determine the path of the sun throughout the day to find a location that offers a balance of sunlight and shade. This will ensure that you can enjoy your pavilion at any time without being overwhelmed by the sun's heat.
-
Scenic Views: If you have a picturesque garden, a serene pond, or any other natural beauty in your backyard, position your pavilion to take advantage of these views. It will create a tranquil and visually appealing retreat.
-
Proximity to the House: Consider the distance of the pavilion from your home. You may want it close enough for convenience, but not so close that it feels cramped.
-
Privacy: If privacy is important, choose a location that is shielded from neighboring properties or public view. This can be achieved by positioning the pavilion near existing trees, shrubs, or fences.
-
Accessibility: Ensure that the location is easily accessible from your house and other outdoor areas. This will make the pavilion more inviting and practical for everyday use.
By carefully considering these factors, you can select a location that maximizes the enjoyment and functionality of your DIY pavilion.
Designing Your Pavilion
Designing your pavilion is an exciting phase that allows you to personalize the structure to suit your preferences and needs. Here are some key considerations to keep in mind as you plan the design:
-
Size and Shape: Determine the dimensions and shape of your pavilion based on the available space and your intended use. Whether you prefer a cozy square structure or a spacious rectangular design, the size and shape will set the foundation for the entire project.
-
Style and Aesthetics: Choose a style that complements your home's architecture and your outdoor landscape. Whether you prefer a rustic, traditional, or modern look, the pavilion's design should harmonize with its surroundings.
-
Roof Design: Select a roof style that not only complements the overall aesthetic but also provides the desired level of shade and protection. Options include gable, hip, or even a simple pergola-style roof.
-
Material Selection: Decide on the materials for the pavilion's construction. Whether you opt for wood, metal, or a combination of materials, ensure that they are durable and suitable for outdoor use.
-
Functional Features: Consider incorporating functional features such as built-in benches, a fireplace, or a serving counter to enhance the pavilion's utility and comfort.
By carefully considering these design elements, you can create a pavilion that reflects your personal style while meeting your outdoor living needs.
Gathering Materials and Tools
Before you embark on building your DIY pavilion, it's essential to gather all the necessary materials and tools to ensure a smooth construction process. Here's a comprehensive list to help you get started:
Materials
- Lumber: Purchase high-quality lumber for the frame, posts, and any decorative elements. Pressure-treated wood is an excellent choice for outdoor structures due to its durability and resistance to rot and insects.
- Roofing Materials: Depending on your chosen roof design, gather shingles, metal roofing panels, or other roofing materials. Ensure they are suitable for the local climate and provide adequate protection from the elements.
- Fasteners: Stock up on galvanized screws, nails, and bolts to securely assemble the pavilion frame and attach the roofing materials.
- Concrete: If your pavilion requires a concrete foundation, gather bags of concrete mix and gravel for the footings.
- Decorative Finishes: Consider any decorative finishes such as paint, stain, or sealant to protect the wood and enhance the pavilion's appearance.
Tools
- Power Tools: Essential power tools include a circular saw, drill/driver, and a nail gun for efficient cutting and fastening.
- Hand Tools: Gather a hammer, tape measure, level, framing square, and a set of wrenches for precise and accurate assembly.
- Ladder or Scaffolding: Depending on the height of your pavilion, ensure you have a stable and secure means of reaching elevated areas during construction.
- Safety Gear: Prioritize safety by having protective gear such as gloves, safety glasses, and ear protection to prevent injuries during construction.
- Workbench or Sawhorses: Set up a designated work area with a sturdy workbench or sawhorses to facilitate the assembly of pavilion components.
By ensuring you have all the necessary materials and tools at the outset, you can streamline the construction process and minimize potential delays or interruptions.
Building the Pavilion Frame
Building the pavilion frame is a crucial step that forms the structural backbone of your outdoor retreat. Follow these detailed steps to construct a sturdy and well-built frame for your pavilion:
-
Prepare the Site: Begin by marking the locations for the pavilion's support posts. Use a post hole digger to create holes at these marked spots, ensuring that the depths are in accordance with local building codes and frost line requirements.
-
Install the Posts: Place the prepared posts into the holes and fill the surrounding areas with concrete mix to secure them in place. Use a level to ensure that the posts are perfectly vertical and aligned before the concrete sets.
-
Frame Assembly: Once the post footings have cured, it's time to assemble the frame. Cut the lumber to the required dimensions for the beams, rafters, and any additional framing components. Secure the beams to the posts using appropriate fasteners, ensuring that the frame is level and square as you progress.
-
Bracing and Support: Install diagonal bracing between the posts to provide additional stability and prevent lateral movement. This step is crucial for reinforcing the frame and ensuring its resilience against external forces such as wind.
-
Roof Support Structure: If your pavilion design includes a pitched roof, construct the necessary support structure for the rafters. This may involve installing ridge beams and additional bracing to accommodate the roof's weight and provide structural integrity.
-
Inspect and Reinforce: Once the frame is fully assembled, conduct a thorough inspection to identify any areas that may require additional reinforcement. Address any structural concerns promptly to ensure the frame is robust and capable of supporting the roof and other pavilion components.
By meticulously following these steps, you can build a solid and reliable frame for your pavilion, setting the stage for the subsequent phases of construction.
Adding the Roof and Walls
After successfully constructing the frame of your pavilion, the next crucial step is to add the roof and walls to provide shelter and enclosure. Follow these detailed steps to complete this phase of the construction process:
-
Roof Installation: Begin by installing the roofing materials according to the design specifications. Whether you're using shingles, metal panels, or another roofing material, ensure that it is securely attached to the roof structure. Follow the manufacturer's guidelines for proper installation to guarantee weatherproofing and longevity.
-
Weatherproofing: Apply appropriate weatherproofing measures to seal any gaps or joints in the roofing materials. This may involve using flashing, sealant, or other weather-resistant barriers to prevent water infiltration and protect the pavilion's interior.
-
Wall Construction: If your pavilion design includes walls or partial walls, proceed with their construction. Frame the walls using the designated lumber, ensuring that they align with the overall dimensions and design aesthetic. Incorporate openings for doors, windows, or any desired architectural features.
-
Cladding and Finishing: Once the wall framing is in place, apply the chosen cladding material, whether it's siding, panels, or another decorative finish. Ensure that the cladding provides both aesthetic appeal and functional protection against the elements. Apply a weather-resistant barrier beneath the cladding to enhance durability.
-
Door and Window Installation: If your pavilion includes doors and windows, install them according to the manufacturer's instructions. Ensure that they are properly sealed and aligned to prevent air and water infiltration. Consider adding weather-stripping and appropriate hardware for security and functionality.
-
Interior Finishing (Optional): If you intend to use the pavilion for extended periods or as a multi-functional space, consider interior finishing touches such as insulation, wall treatments, and electrical wiring. These elements can enhance comfort and usability, especially if the pavilion will serve as a year-round retreat.
By meticulously following these steps, you can successfully add the roof and walls to your pavilion, creating a sheltered and inviting outdoor space for relaxation, entertainment, and enjoyment.
Finishing Touches and Decor
Once the structural elements of your pavilion are in place, it's time to focus on the finishing touches and decor to elevate the aesthetics and functionality of your outdoor retreat. Here are the essential steps to add those final flourishes to your DIY pavilion:
-
Flooring Selection: Choose a flooring material that suits your design preferences and practical needs. Options include wood decking, stone pavers, or even decorative concrete. Ensure that the chosen flooring material is durable, slip-resistant, and complements the overall style of the pavilion.
-
Ceiling Treatments: Enhance the visual appeal of your pavilion by adding ceiling treatments such as exposed beams, beadboard, or decorative paneling. These elements can add character and warmth to the space while concealing structural components for a polished look.
-
Lighting Installation: Incorporate lighting fixtures to extend the functionality of your pavilion into the evening hours. Consider options such as string lights, pendant lights, or even a ceiling fan with integrated lighting. Proper illumination can create a welcoming ambiance and ensure practicality after dark.
-
Furnishings and Accessories: Select outdoor furniture and accessories that align with your intended use of the pavilion. Whether it's cozy seating for relaxation, a dining set for al fresco meals, or decorative elements such as planters and artwork, the right furnishings can transform the pavilion into a comfortable and inviting space.
-
Privacy and Screening: If desired, implement privacy features such as latticework, outdoor curtains, or decorative screens to create a sense of seclusion within the pavilion. These elements can enhance comfort and create a more intimate atmosphere for relaxation and socializing.
-
Greenery and Landscaping: Integrate landscaping elements such as potted plants, climbing vines, or a trellis with trailing foliage to soften the pavilion's edges and connect it with the surrounding outdoor environment. Greenery can add a refreshing touch of nature and enhance the overall appeal of the space.
-
Personalized Touches: Consider adding personal touches such as outdoor rugs, throw pillows, and decorative accents that reflect your individual style and create a welcoming atmosphere. These details can infuse the pavilion with personality and make it a true extension of your home.
By carefully attending to these finishing touches and decor elements, you can transform your DIY pavilion into a captivating and functional outdoor retreat that suits your lifestyle and enhances your enjoyment of your outdoor living space.
Enjoying Your Outdoor Retreat
Now that your DIY pavilion is complete, it's time to savor the fruits of your labor and fully embrace the outdoor retreat you've created. Here are some delightful ways to make the most of your pavilion:
-
Relaxation and Unwinding: Set up a cozy seating area with plush cushions and throws, creating a tranquil space for unwinding with a good book or simply enjoying the serenity of your outdoor sanctuary.
-
Al Fresco Dining: Arrange a dining table and chairs to indulge in al fresco meals, whether it's a leisurely breakfast, a casual lunch, or a delightful dinner under the stars. The pavilion provides the perfect setting for memorable dining experiences.
-
Entertaining Guests: Invite friends and family to gather in your pavilion for social gatherings, from intimate conversations to festive celebrations. The sheltered space offers a welcoming environment for hosting guests.
-
Outdoor Activities: Utilize the pavilion as a hub for various outdoor activities, such as yoga sessions, art and craft workshops, or even impromptu dance parties. The open-air setting encourages creativity and movement.
-
Stargazing and Nature Watching: Embrace the natural surroundings by using the pavilion as a vantage point for stargazing at night or observing the local wildlife during the day. The sheltered space allows for uninterrupted connection with the outdoors.
-
Seasonal Enjoyment: Tailor the pavilion to suit different seasons, whether it's adding a portable heater for chilly evenings, setting up a cooling fan for hot days, or adorning the space with seasonal decorations to mark special occasions.
-
Quiet Contemplation: Create a peaceful corner within the pavilion for moments of quiet contemplation, meditation, or mindfulness practice. The tranquil atmosphere fosters inner reflection and relaxation.
-
Creative Pursuits: Use the pavilion as a dedicated space for creative pursuits, such as painting, writing, or crafting. The inspiring outdoor setting can fuel artistic endeavors and provide a refreshing change of scenery.
-
Family Bonding: Foster family bonding by engaging in board games, storytelling, or shared hobbies within the pavilion. The space encourages quality time and meaningful connections.
-
Wellness and Self-Care: Transform the pavilion into a wellness retreat by incorporating elements such as a yoga mat, meditation cushions, or aromatherapy essentials. It becomes a nurturing space for self-care practices.
By embracing these activities and experiences, you can fully appreciate the beauty and functionality of your DIY pavilion, creating lasting memories and finding joy in your outdoor retreat.