
Home>Create & Decorate>DIY & Crafts>DIY Garden Bridge: Step-by-Step Guide To Building Your Own
DIY & Crafts
DIY Garden Bridge: Step-by-Step Guide To Building Your Own
Published: June 7, 2024

Content Creator specializing in woodworking and interior transformations. Caegan's guides motivate readers to undertake their own projects, while his custom furniture adds a personal touch.
Learn how to build your own DIY garden bridge with our step-by-step guide. Perfect for DIY & Crafts enthusiasts looking to enhance their outdoor space.
(Many of the links in this article redirect to a specific reviewed product. Your purchase of these products through affiliate links helps to generate commission for Twigandthistle.com, at no extra cost. Learn more)
Introduction
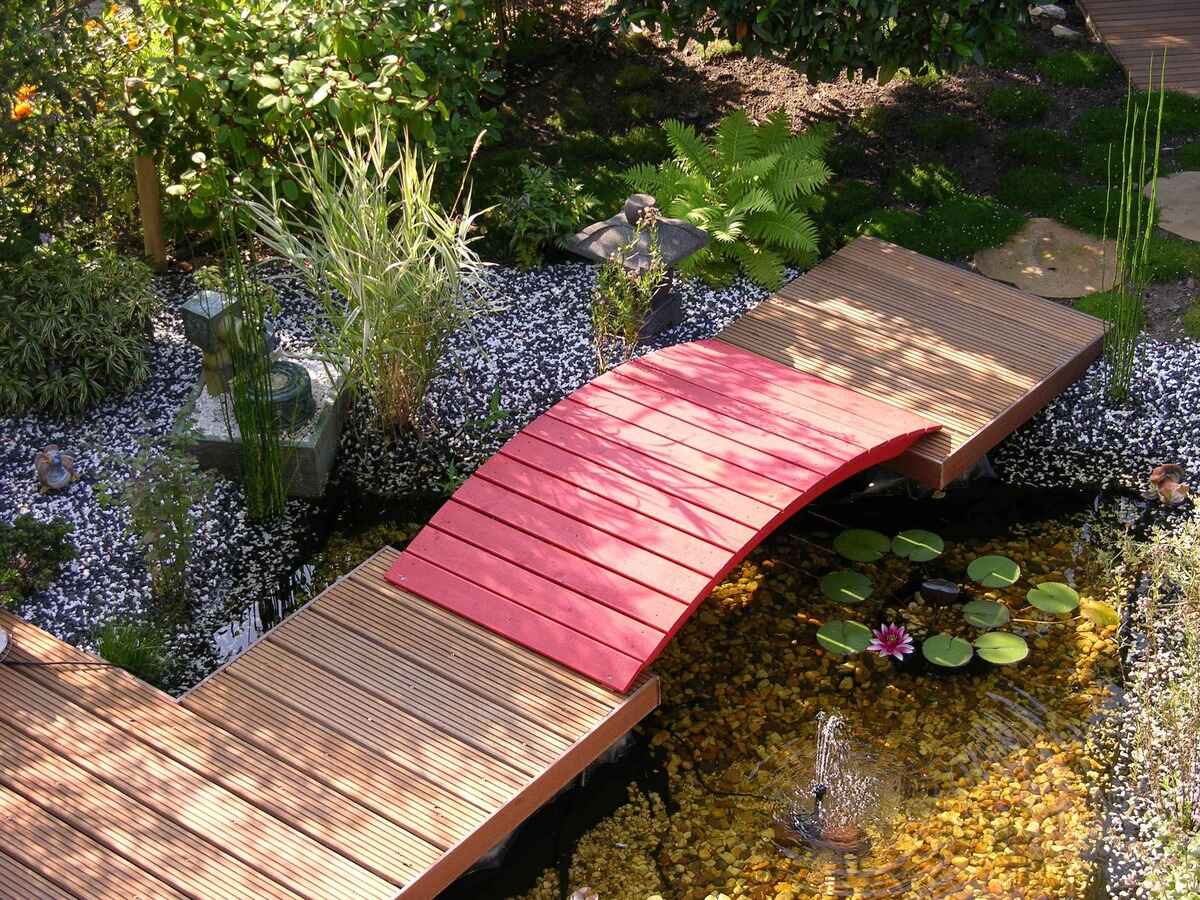
Are you looking to add a charming and functional element to your garden? Building your own garden bridge can be a rewarding and enjoyable DIY project that enhances the aesthetic appeal of your outdoor space. Whether you have a small stream, pond, or simply want to create a picturesque pathway, a garden bridge can be a beautiful addition to your landscape. In this step-by-step guide, we will walk you through the process of designing and constructing your very own garden bridge, allowing you to showcase your creativity and craftsmanship while adding a unique feature to your garden.
Choosing the Right Location
When it comes to building a garden bridge, selecting the right location is crucial for both functionality and aesthetics. Here are some key factors to consider when choosing the perfect spot for your garden bridge:
-
Survey Your Landscape: Take a stroll around your garden and identify potential locations for your bridge. Consider the natural features of your landscape, such as water bodies, slopes, or garden beds, and envision how a bridge would complement these elements.
-
Focus on Focal Points: Look for focal points in your garden, such as a tranquil pond, a meandering stream, or a vibrant flower bed. Placing your bridge near these focal points can create a visually appealing and harmonious setting.
-
Consider Accessibility: Think about the practicality of the bridge's location. Ensure that it provides convenient access to different areas of your garden while maintaining a natural flow within the landscape.
-
Evaluate the Surroundings: Take into account the surrounding vegetation and hardscaping. A bridge should seamlessly blend with its surroundings, so consider how it will interact with trees, shrubs, and other garden features.
-
Factor in Safety: If your bridge will span over water or uneven terrain, prioritize safety. Choose a location where the bridge can be securely anchored and where users can traverse it with ease and confidence.
By carefully considering these factors, you can select a location that not only enhances the visual appeal of your garden but also ensures that your garden bridge serves its intended purpose effectively.
Gathering Materials and Tools
Before embarking on your garden bridge construction project, it's essential to gather all the necessary materials and tools. Here's a comprehensive list to ensure you have everything you need to bring your vision to life:
Materials
- Lumber: Select high-quality, weather-resistant lumber for the bridge's frame and decking. Pressure-treated or cedar lumber is ideal for outdoor structures due to their durability and resistance to decay.
- Fasteners: Stock up on galvanized or stainless steel screws, nails, and bolts to secure the bridge components. These materials are corrosion-resistant and suitable for outdoor applications.
- Support Posts: Depending on the design and size of your bridge, you'll need sturdy support posts to bear the weight of the structure. Choose treated or rot-resistant posts for longevity.
- Braces and Brackets: Consider adding braces and brackets for additional structural support. These components contribute to the stability and strength of the bridge.
- Hardware Cloth or Mesh: If your bridge will span over water, consider using hardware cloth or mesh to create a protective barrier beneath the decking, preventing small objects from falling through.
- Waterproof Sealant or Stain: To protect the wood from moisture and UV damage, invest in a high-quality waterproof sealant or stain for the finishing touch.
Tools
- Measuring and Marking Tools: Equip yourself with a tape measure, carpenter's square, and marking tools to ensure accurate measurements and layout.
- Cutting Tools: A circular saw, jigsaw, or handsaw will be essential for cutting lumber to the desired lengths and shapes.
- Fastening Tools: A power drill with drill bits and a screwdriver attachment, as well as a hammer, will be indispensable for securing the bridge components.
- Level and Plumb Line: These tools are crucial for ensuring that the bridge components are installed level and plumb, promoting structural integrity.
- Safety Gear: Prioritize safety by wearing protective gear, including gloves, safety glasses, and hearing protection, especially when using power tools.
By gathering these materials and tools, you'll be well-prepared to tackle the construction of your garden bridge with confidence and efficiency.
Designing Your Garden Bridge
Designing your garden bridge is an exciting phase that allows you to unleash your creativity while considering the practical aspects of the structure. Here are the key steps to guide you through the design process:
-
Determine the Bridge Type: Begin by deciding on the type of bridge that best suits your garden and landscape. Whether it's a simple flat bridge, an arched bridge, or a more elaborate Japanese-style bridge, consider the overall aesthetic you want to achieve.
-
Measure the Span and Width: Take precise measurements of the span across the area where the bridge will be installed. Additionally, determine the desired width of the bridge to accommodate foot traffic and complement the surrounding environment.
-
Select a Style and Material: Choose a style that harmonizes with your garden's theme and architectural elements. Whether you opt for a rustic, natural wood bridge or a modern, sleek design, ensure that the chosen material aligns with the overall look and feel of your garden.
-
Incorporate Decorative Elements: Enhance the visual appeal of your bridge by incorporating decorative elements such as railings, lattice work, or ornamental details. These features can add character and charm to the bridge while complementing the surrounding landscape.
-
Consider Safety and Accessibility: Prioritize safety by designing the bridge with sturdy railings and a non-slip surface. Additionally, ensure that the bridge is accessible and user-friendly for individuals of all ages and mobility levels.
-
Account for Weight Capacity: If the bridge will span over water or uneven terrain, consider the weight capacity to accommodate foot traffic and potential loads. This is particularly important for larger bridges or those intended for heavy foot traffic.
-
Create a Detailed Plan: Once you've finalized the design elements, create a detailed plan or sketch that outlines the dimensions, materials, and structural features of the bridge. This plan will serve as a valuable reference during the construction phase.
By carefully considering these design aspects, you can create a garden bridge that not only enhances the visual appeal of your outdoor space but also reflects your personal style and vision.
Preparing the Site
Before commencing the construction of your garden bridge, thorough site preparation is essential to ensure a stable foundation and optimal placement. Follow these steps to prepare the site for your upcoming project:
-
Clear the Area: Begin by clearing the designated area where the bridge will be installed. Remove any vegetation, rocks, or debris to create a clean and level surface for the foundation.
-
Mark the Layout: Use marking tools to outline the exact location and dimensions of the bridge. This will serve as a guide for excavating the foundation and positioning the support posts.
-
Excavate the Foundation: Depending on the bridge design and local building codes, excavate the foundation to the recommended depth. Typically, this involves digging holes for the support posts and creating a level trench for the foundation beams.
-
Level the Ground: Ensure that the ground within the marked area is level and compacted. This will provide a stable base for the foundation and prevent shifting or settling over time.
-
Install Drainage (if necessary): If the bridge will span over a water feature or low-lying area, consider incorporating proper drainage to prevent water accumulation and potential damage to the bridge structure.
-
Verify Alignment and Grade: Use a level and string line to verify the alignment and grade of the site. This step is crucial for ensuring that the bridge will be installed on a level surface, promoting structural integrity.
-
Secure Permits (if required): Check with local authorities to determine if any permits are required for building a garden bridge. Compliance with local regulations is essential to avoid potential issues in the future.
By meticulously preparing the site, you can lay the groundwork for a successful and durable garden bridge construction project. This phase sets the stage for the subsequent stages of building the foundation and constructing the bridge structure.
Building the Foundation
Building a solid foundation is crucial for the stability and longevity of your garden bridge. The foundation serves as the base on which the entire structure rests, providing support and distributing the load evenly. Here's a detailed guide on how to build a sturdy foundation for your garden bridge:
-
Select the Right Materials: Depending on the soil composition and local climate, choose appropriate materials for the foundation. Common options include concrete footings, gravel, or compacted soil. Consider consulting with a local building expert to determine the best choice for your specific location.
-
Prepare the Footing Holes: If using concrete footings, dig holes at the designated locations according to the bridge design and local building codes. The depth and diameter of the holes should align with the recommended specifications to ensure stability.
-
Install Support Posts: For bridges with support posts, place the posts into the footing holes and use a level to ensure they are perfectly vertical. Temporary bracing can be used to hold the posts in position while the concrete sets.
-
Pour Concrete Footings: If using concrete footings, mix and pour the concrete into the holes around the support posts. Ensure that the concrete is thoroughly compacted and leveled to create a solid base for the posts.
-
Compact Gravel or Soil: For bridges without concrete footings, compact gravel or soil in the trench to create a stable foundation. Use a compactor or tamper to achieve a firm and level surface.
-
Verify Alignment and Level: Once the footings are in place, verify the alignment and levelness of the support posts or foundation beams. Adjust as necessary to ensure that the foundation is perfectly level and aligned with the bridge design.
-
Allow for Proper Curing: If concrete footings are used, allow sufficient time for the concrete to cure and gain strength before proceeding with the construction of the bridge superstructure. Follow the manufacturer's recommendations for curing time.
By following these steps, you can establish a robust foundation that forms the backbone of your garden bridge. A well-built foundation provides the necessary support for the bridge structure and ensures its resilience against environmental factors and regular use.
Constructing the Bridge
Once the foundation is in place, you can proceed to the exciting phase of constructing the bridge superstructure. This involves assembling the framework, decking, and any additional features that contribute to the functionality and visual appeal of the bridge. Here's a comprehensive guide to help you navigate the construction process with confidence:
-
Assemble the Frame: Begin by assembling the frame of the bridge according to the design specifications. This typically involves connecting the support posts or foundation beams with cross beams to create a sturdy framework. Use galvanized or stainless steel fasteners to secure the components, ensuring structural integrity.
-
Install Decking: With the frame in place, it's time to install the decking material. Whether you opt for traditional wooden planks, composite decking, or other suitable materials, ensure that the decking is securely attached to the frame. Leave small gaps between the decking boards to allow for water drainage and expansion.
-
Add Railings and Handrails: If your bridge design includes railings and handrails, carefully install these components to enhance safety and aesthetics. Ensure that the railings are at the appropriate height and securely anchored to the bridge structure, providing support for individuals crossing the bridge.
-
Incorporate Decorative Elements: Enhance the visual appeal of the bridge by incorporating decorative elements such as lattice work, ornamental carvings, or custom accents. These details can add character and charm to the bridge while complementing the surrounding landscape.
-
Ensure Structural Stability: Throughout the construction process, prioritize structural stability by verifying the alignment, levelness, and overall integrity of the bridge components. Use a level, plumb line, and measuring tools to confirm that the bridge is built to the intended specifications.
-
Consider Weight Distribution: If the bridge will accommodate heavy foot traffic or decorative features such as planters or seating, ensure that the structure can safely distribute the weight. Reinforce areas that may experience additional stress to maintain the bridge's durability over time.
-
Apply Protective Finishes: Once the construction is complete, apply a high-quality waterproof sealant or stain to protect the wood from moisture, UV exposure, and other environmental factors. This finishing touch not only enhances the appearance of the bridge but also extends its lifespan.
By following these steps and paying attention to detail, you can construct a garden bridge that not only serves as a functional pathway but also stands as a beautiful focal point in your outdoor space. The construction phase allows you to bring your vision to life and create a feature that adds both practical and aesthetic value to your garden.
Adding Finishing Touches
After the construction of the bridge structure is complete, adding the finishing touches is the final step to elevate the visual appeal and functionality of your garden bridge. These details not only enhance the overall aesthetics but also contribute to the long-term durability and enjoyment of the bridge. Here's a detailed guide on how to add the perfect finishing touches to your garden bridge:
-
Landscaping Integration: Integrate landscaping elements around the bridge to seamlessly blend it with the surrounding environment. Consider planting colorful flowers, ornamental grasses, or climbing vines near the bridge to create a picturesque setting that complements the structure.
-
Lighting: Incorporate lighting features to illuminate the bridge and its surroundings, extending its functionality into the evening hours. Solar-powered LED lights, low-voltage pathway lighting, or strategically placed spotlights can enhance the ambiance and safety of the bridge.
-
Seating and Decor: If space allows, consider adding seating options such as benches or chairs near the bridge, providing a tranquil spot for relaxation and contemplation. Additionally, adorn the bridge with decorative elements such as potted plants, hanging baskets, or artistic sculptures to infuse personality and charm.
-
Signage and Personalization: Add personalized signage or plaques to the bridge, showcasing a meaningful name, inspirational quotes, or custom engravings. This personal touch adds a unique and sentimental aspect to the bridge, making it a cherished feature in your garden.
-
Regular Maintenance Plan: Develop a maintenance plan to ensure the longevity and pristine condition of the bridge. This may include periodic inspections, cleaning, and reapplication of protective finishes to safeguard the wood from the elements.
-
Safety Considerations: Prioritize safety by installing non-slip treads on the bridge surface, ensuring that it remains safe to traverse, especially during wet or icy conditions. Additionally, inspect and maintain the railings and handrails to uphold their stability and integrity.
-
Seasonal Decor: Embrace seasonal changes by incorporating seasonal decor elements such as festive lights for holidays, seasonal wreaths, or thematic adornments that reflect the time of year. This allows the bridge to adapt to different seasons and celebrations, adding a dynamic and festive touch to your garden.
By attending to these finishing touches, you can transform your garden bridge into a captivating and functional feature that harmonizes with your outdoor space. These details not only enhance the bridge's visual appeal but also contribute to a welcoming and enchanting atmosphere in your garden.
Conclusion
In conclusion, building your own garden bridge can be a fulfilling and rewarding endeavor that adds both beauty and functionality to your outdoor space. By carefully selecting the location, gathering the necessary materials and tools, designing the bridge, preparing the site, building a sturdy foundation, constructing the bridge, and adding the finishing touches, you can create a stunning and durable garden feature that complements your landscape.
As you embark on this DIY project, remember to prioritize safety, structural integrity, and harmonious integration with your garden environment. Whether you choose a simple and rustic design or an elaborate and decorative bridge, the process of planning, constructing, and enhancing your garden bridge allows you to showcase your creativity and craftsmanship while enjoying the tranquil and picturesque allure it brings to your garden.
With proper care and maintenance, your garden bridge can stand as a timeless centerpiece, providing a charming pathway and a captivating focal point for years to come. Embrace the opportunity to personalize and embellish your bridge, infusing it with your unique style and creating a space that beckons relaxation, contemplation, and appreciation of the natural beauty that surrounds it.