
Home>Create & Decorate>DIY & Crafts>DIY Closet Shoe Rack: Organize Your Footwear In Style
DIY & Crafts
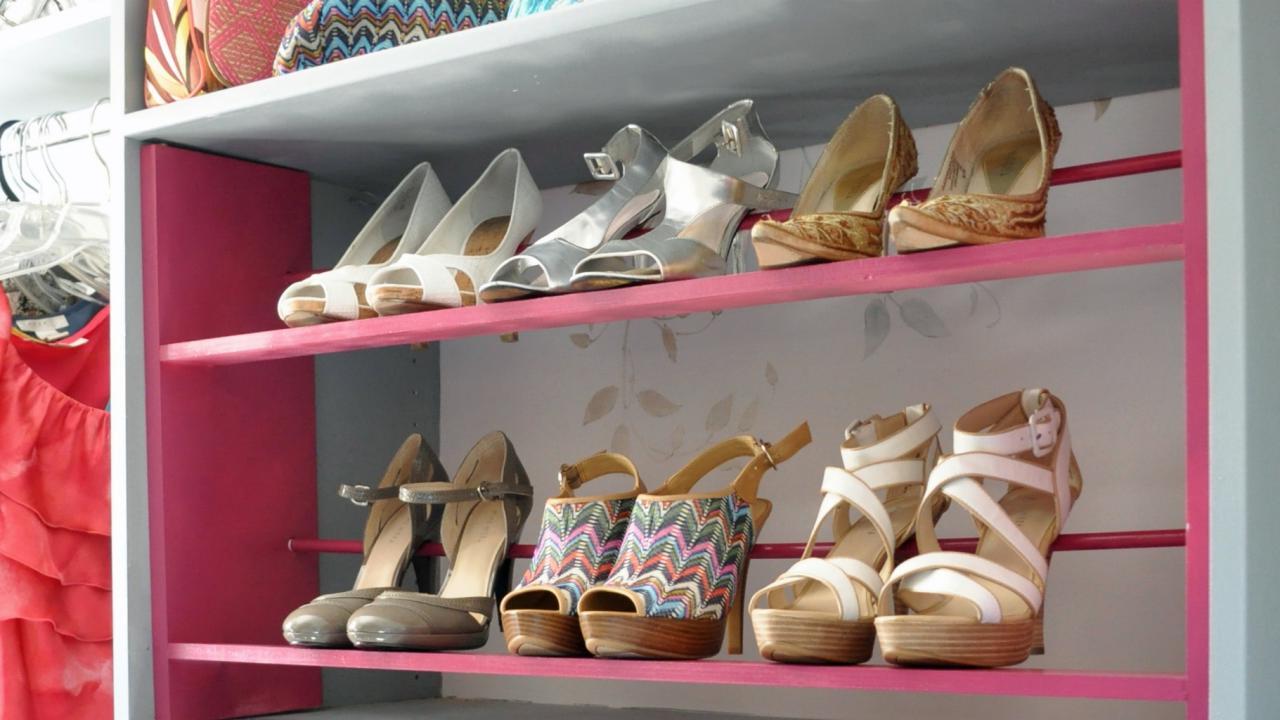
DIY Closet Shoe Rack: Organize Your Footwear In Style
Published: June 17, 2024

Content Creator specializing in woodworking and interior transformations. Caegan's guides motivate readers to undertake their own projects, while his custom furniture adds a personal touch.
Discover creative DIY closet shoe rack ideas to organize your footwear in style. Get inspired with these DIY & Crafts projects for a clutter-free closet.
(Many of the links in this article redirect to a specific reviewed product. Your purchase of these products through affiliate links helps to generate commission for Twigandthistle.com, at no extra cost. Learn more)
Introduction
Are you tired of tripping over your shoes every time you walk into your closet? Do you struggle to find the right pair of shoes when you're in a rush? If so, it's time to take control of your footwear situation and organize your closet with a DIY closet shoe rack. This simple and cost-effective project will not only help you keep your shoes neatly arranged but also add a touch of style to your closet. In this article, we'll guide you through the process of building your own closet shoe rack so you can say goodbye to clutter and hello to a more organized space. Let's get started!
Materials Needed
To get started on your DIY closet shoe rack, you'll need the following materials:
-
Wooden boards: These will be used to create the frame and shelves of the shoe rack. Make sure to choose sturdy and durable boards that can support the weight of your shoes.
-
Saw: A saw will be essential for cutting the wooden boards to the desired lengths. You can use a circular saw, miter saw, or even a hand saw, depending on your preference and the tools you have available.
-
Screws and nails: These will be used to secure the frame and shelves together. Make sure to have a variety of sizes on hand to accommodate different parts of the project.
-
Drill: A drill will be necessary for creating holes for the screws and for assembling the various components of the shoe rack.
-
Sandpaper: You'll need sandpaper to smooth out any rough edges on the wooden boards and to prepare the surface for painting or staining.
-
Paint or stain: Depending on your preference, you can choose to paint or stain the shoe rack to match your closet's aesthetic.
-
Paintbrushes or a paint sprayer: If you opt for painting the shoe rack, you'll need brushes or a sprayer to apply the paint evenly.
-
Measuring tape: Accurate measurements are crucial for ensuring that the shoe rack fits perfectly in your closet, so a measuring tape is a must-have tool.
-
Level: To ensure that the shoe rack is installed straight and level in your closet, a level will come in handy during the installation process.
Gathering these materials before you begin the project will ensure a smoother and more efficient building process.
Step 1: Measure and Plan
Before diving into the construction of your DIY closet shoe rack, it's crucial to start with accurate measurements and a well-thought-out plan. Here's how to get started:
-
Measure Your Closet: Begin by measuring the available space in your closet where you intend to install the shoe rack. Take precise measurements of the width, height, and depth to ensure that the shoe rack will fit perfectly without obstructing other items in the closet.
-
Assess Your Shoe Collection: Take stock of your shoe collection to determine how many pairs you need the shoe rack to accommodate. This will help you decide on the number of shelves and the spacing between them.
-
Sketch Your Design: With the measurements in hand, sketch out a rough design for your shoe rack. Consider the layout of the shelves, the overall dimensions, and any additional features you may want to incorporate, such as a slanted shelf for high heels or a section for boots.
-
Plan for Accessibility: Think about how you want to access your shoes. Do you prefer open shelves for easy visibility, or do you want to incorporate compartments or drawers for a more organized look?
By taking the time to measure your space accurately and plan out the design of your shoe rack, you'll set yourself up for a successful and functional end result.
Step 2: Gather Tools
Gathering the necessary tools is a crucial step in preparing for your DIY closet shoe rack project. Here's a detailed look at the tools you'll need:
-
Saw: A saw is an essential tool for cutting the wooden boards to the required lengths. Depending on your preference and the tools available, you can use a circular saw, miter saw, or a hand saw.
-
Screws and Nails: To secure the frame and shelves together, you'll need an assortment of screws and nails in various sizes to accommodate different parts of the project.
-
Drill: A drill is indispensable for creating holes for the screws and assembling the various components of the shoe rack. Make sure to have the appropriate drill bits for the screws you'll be using.
-
Sandpaper: Smooth out any rough edges on the wooden boards and prepare the surface for painting or staining using sandpaper. It's essential to ensure a polished and professional finish.
-
Paint or Stain: Depending on your aesthetic preference, you can choose to paint or stain the shoe rack. Ensure you have the appropriate paint or stain and the necessary brushes or a paint sprayer for application.
-
Measuring Tape: Accurate measurements are critical for ensuring that the shoe rack fits perfectly in your closet. A measuring tape will be your go-to tool for precision.
-
Level: To ensure that the shoe rack is installed straight and level in your closet, a level will be indispensable during the installation process.
Having these tools at your disposal will streamline the construction process and contribute to the successful completion of your DIY closet shoe rack.
Step 3: Cut and Assemble the Frame
Once you have gathered the necessary materials and tools, it's time to move on to cutting and assembling the frame of your DIY closet shoe rack. Follow these steps to bring your shoe rack to life:
-
Cut the Wooden Boards: Using the measurements and design plan you created in the previous steps, carefully cut the wooden boards to the required lengths. A saw, such as a circular saw or miter saw, will come in handy for this task. Ensure that the cuts are precise and that the boards are uniform in size to create a sturdy and visually appealing frame.
-
Assemble the Sides and Shelves: Begin by assembling the sides of the shoe rack. Use screws and a drill to secure the boards together, creating a sturdy frame. Once the sides are in place, add the shelves at your desired intervals. Make sure to use a level to ensure that the shelves are straight and evenly spaced. This step is crucial for the structural integrity of the shoe rack.
-
Reinforce the Joints: To enhance the durability of the frame, consider reinforcing the joints with additional screws or brackets. This extra step will provide added stability, especially if you plan to store a substantial number of shoes on the rack.
-
Test for Stability: Before proceeding to the next steps, test the stability of the frame by applying gentle pressure and ensuring that it can support the weight of the intended shoe collection. Making any necessary adjustments at this stage will prevent issues during the later stages of the project.
By carefully cutting and assembling the frame of your DIY closet shoe rack, you'll lay the foundation for a functional and visually appealing storage solution for your footwear.
Step 4: Add Shelves
Adding shelves to your DIY closet shoe rack is a pivotal step in creating a functional and organized storage solution for your footwear. Here's a detailed guide on how to add shelves to your shoe rack:
-
Measure and Mark: Begin by measuring and marking the positions where you want to install the shelves within the frame of the shoe rack. Use a measuring tape and a pencil to ensure accuracy in the placement of the shelves.
-
Cut the Shelf Boards: Once you have determined the shelf positions, cut the shelf boards to the appropriate lengths using a saw. Ensure that the boards fit snugly within the frame and align with your measurements.
-
Secure the Shelves: With the shelf boards cut to size, use screws and a drill to secure them in place within the frame. Ensure that the shelves are level and evenly spaced to accommodate different types of footwear, from flats to boots.
-
Consider Adjustable Shelves: If you want added flexibility in organizing your shoe collection, consider incorporating adjustable shelves. This can be achieved by using shelf support pegs or brackets that allow you to reposition the shelves as needed.
-
Add Backing or Sides: Depending on your design preference, you may choose to add a backing to the shoe rack for a more enclosed look, or leave the sides open for easy access to your shoes. Secure the backing or sides in place to complete the shelf installation.
By following these steps, you'll successfully add shelves to your DIY closet shoe rack, providing a designated space for each pair of shoes and contributing to a clutter-free and visually appealing closet.
Step 5: Sand and Paint
After the construction of the frame and shelves, the next crucial step in creating your DIY closet shoe rack is to sand and paint the entire structure. This step not only adds a polished and professional look to the shoe rack but also protects the wood from wear and tear. Here's a detailed guide on how to sand and paint your shoe rack:
-
Sand the Surfaces: Begin by using sandpaper to smooth out any rough edges, imperfections, or splinters on the wooden boards. This step is essential for creating a clean and refined surface for the paint or stain to adhere to. Pay attention to the corners and edges to ensure a uniform finish.
-
Prepare for Painting or Staining: If you choose to paint the shoe rack, ensure that the surface is clean and free of any dust or debris from sanding. If staining, make sure the wood is free of any previous finishes or coatings. This preparation will allow the paint or stain to adhere effectively and result in a professional-looking finish.
-
Apply Primer (Optional): Depending on the type of paint or stain you plan to use, applying a primer may be beneficial. A primer can enhance the adhesion of the paint or stain and provide a more even finish. Use a paintbrush or a paint sprayer to apply the primer evenly across the entire shoe rack and allow it to dry according to the manufacturer's instructions.
-
Choose Your Paint or Stain: Select a paint color or wood stain that complements the aesthetic of your closet and aligns with your personal style. Whether you opt for a bold color to make a statement or a natural wood stain for a classic look, ensure that the chosen finish enhances the overall appeal of the shoe rack.
-
Apply the Paint or Stain: Using a paintbrush or a paint sprayer, apply the paint or stain evenly across the entire surface of the shoe rack. Ensure that the coverage is uniform and that you reach all the nooks and crannies. Multiple thin coats are often better than one thick coat, as they result in a smoother and more durable finish.
-
Allow for Drying Time: After applying the paint or stain, allow the shoe rack to dry completely according to the manufacturer's instructions. This drying time is crucial for achieving a durable and long-lasting finish.
By following these steps, you'll successfully sand and paint your DIY closet shoe rack, adding a personalized touch and a stylish finish to your organized footwear storage solution.
Step 6: Install in Closet
Once your DIY closet shoe rack is constructed, sanded, and painted to perfection, it's time to install it in your closet. Follow these steps to seamlessly integrate your shoe rack into your closet space:
-
Prepare the Closet: Before installing the shoe rack, clear out the designated area in your closet to create ample space for the installation process. Remove any items that may obstruct the placement of the shoe rack and ensure that the area is clean and free of debris.
-
Position the Shoe Rack: Carefully position the shoe rack in the desired location within your closet. Use a measuring tape to ensure that the rack is centered and aligned with the dimensions of the closet space. This step is crucial for achieving a balanced and visually appealing installation.
-
Secure the Shoe Rack: Once the shoe rack is positioned correctly, use screws and a drill to secure it to the walls or the floor of the closet, depending on the design of your rack and the available space. Ensure that the rack is stable and securely anchored to prevent any movement or instability when loading and unloading your shoes.
-
Check for Level: Use a level to verify that the shoe rack is installed straight and level within the closet. This step is essential for both the visual appeal of the installation and the functionality of the rack. A level installation ensures that your shoes are stored securely and prevents any potential damage to the rack.
-
Test the Stability: After securing the shoe rack in place, test its stability by gently applying pressure and ensuring that it can support the weight of your shoe collection. This step is crucial for confirming that the installation is secure and that the rack can withstand the everyday use of accessing and organizing your shoes.
-
Organize Your Shoes: With the shoe rack securely installed, take the opportunity to organize your shoes neatly on the shelves. Arrange your footwear according to your preference, whether by style, color, or frequency of use. This final step completes the installation process and allows you to enjoy a clutter-free and organized closet space.
By following these steps, you'll successfully install your DIY closet shoe rack, transforming your closet into a functional and stylish storage area for your footwear.
Conclusion
Congratulations on completing your DIY closet shoe rack! By following the step-by-step guide provided in this article, you've not only organized your footwear in style but also added a personalized touch to your closet. With a well-constructed and visually appealing shoe rack, you can now enjoy a clutter-free and organized space, making it easier to find the perfect pair of shoes for any occasion. Whether you opted for a sleek painted finish or a natural wood stain, your DIY shoe rack is a reflection of your personal style and creativity. Embrace the sense of accomplishment that comes with creating a practical and aesthetically pleasing storage solution for your shoes. Now, step back, admire your handiwork, and revel in the joy of a beautifully organized closet.