
Home>Create & Decorate>DIY & Crafts>DIY Barrel Sauna: Step-by-Step Guide To Building Your Own
DIY & Crafts
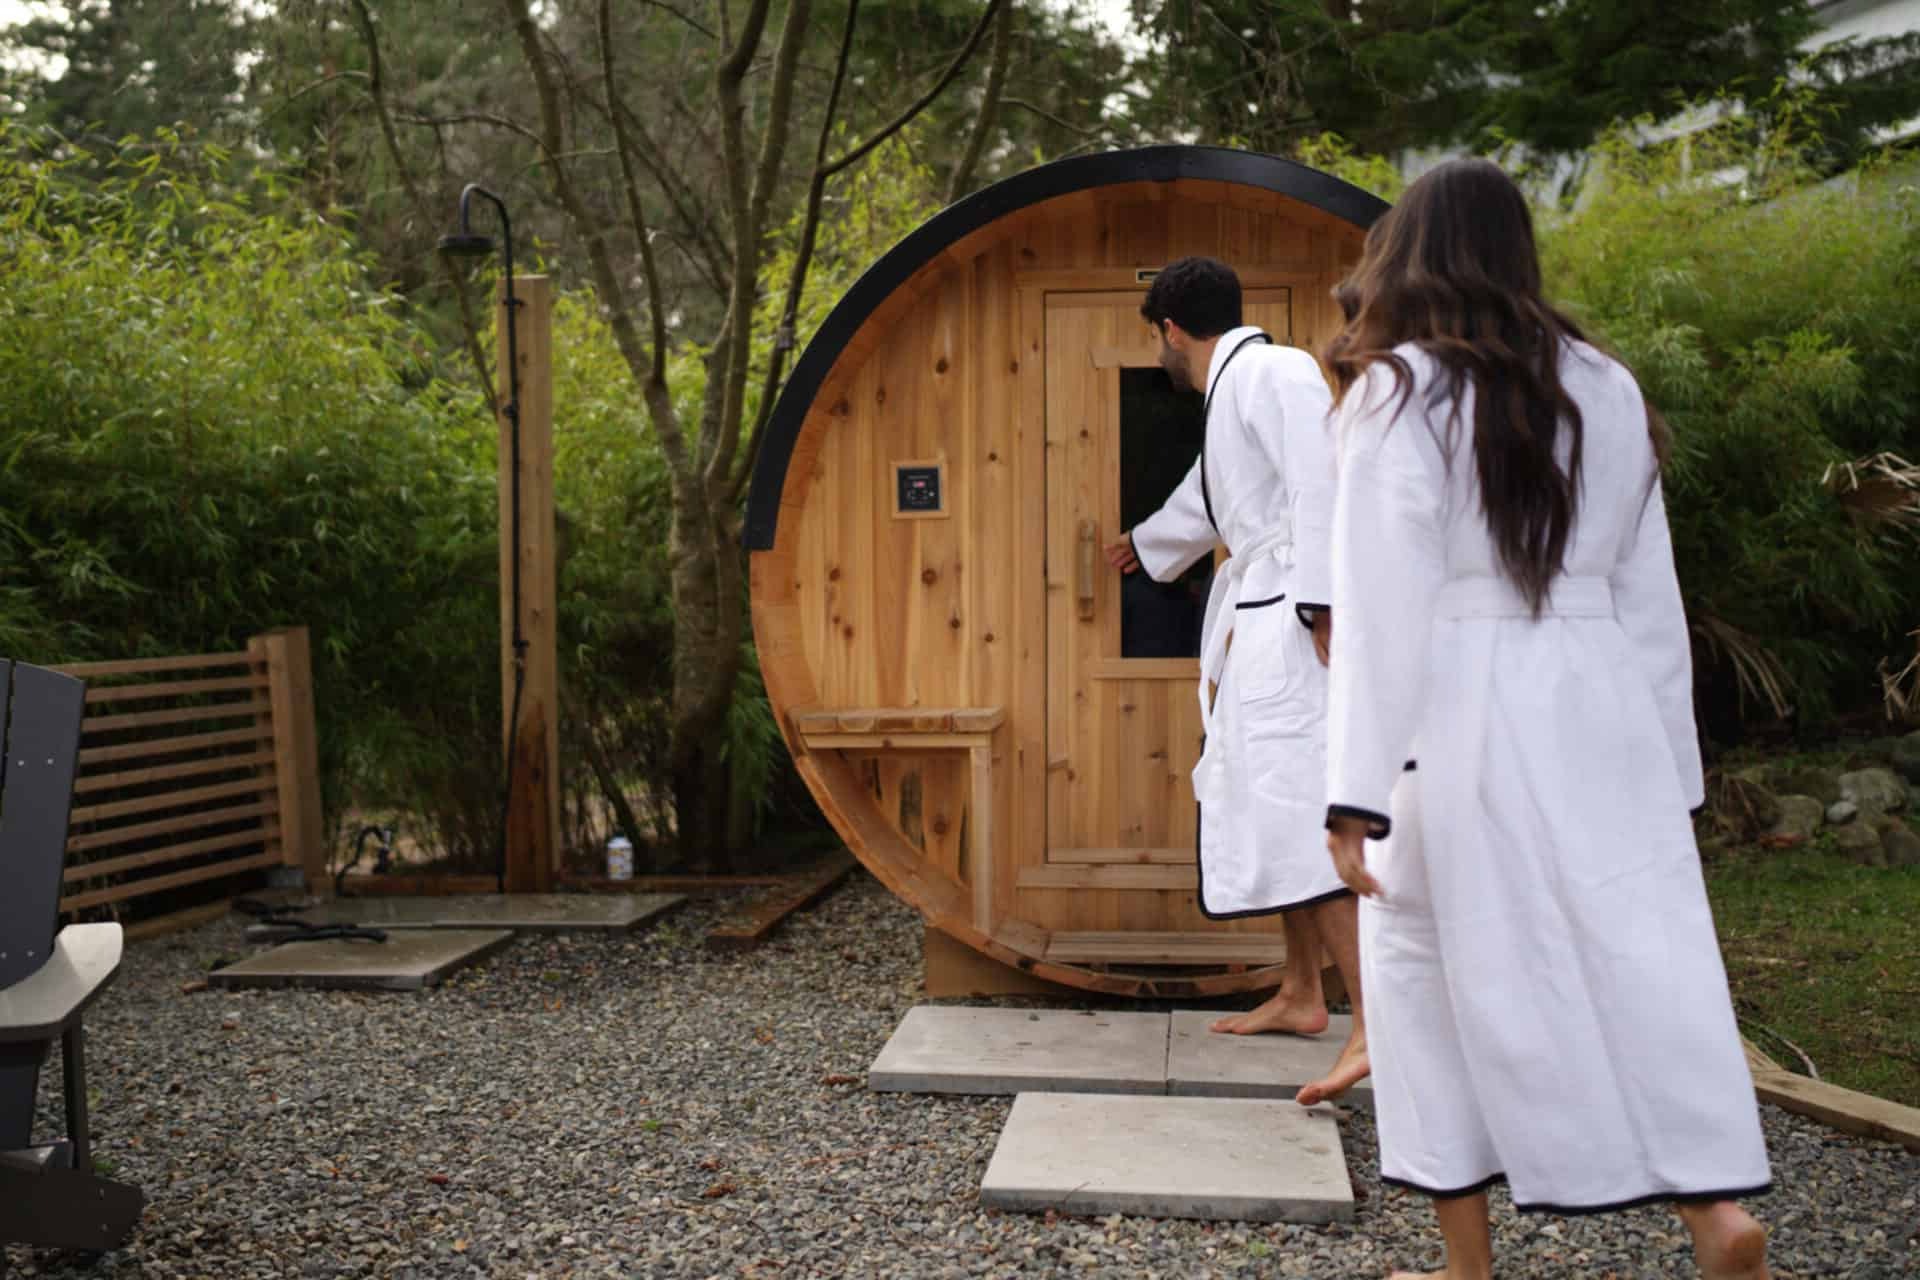
DIY Barrel Sauna: Step-by-Step Guide To Building Your Own
Published: June 9, 2024

Senior Editor in Create & Decorate, Kathryn combines traditional craftsmanship with contemporary trends. Her background in textile design and commitment to sustainable crafts inspire both content and community.
Learn how to build your own DIY barrel sauna with our step-by-step guide. Perfect for DIY & Crafts enthusiasts looking to create their own relaxing retreat.
(Many of the links in this article redirect to a specific reviewed product. Your purchase of these products through affiliate links helps to generate commission for Twigandthistle.com, at no extra cost. Learn more)
Introduction
Are you looking to add a touch of luxury to your backyard? Building your own barrel sauna can be a rewarding and cost-effective project that brings relaxation and comfort right to your doorstep. In this step-by-step guide, we will walk you through the process of creating your very own barrel sauna, from planning and gathering materials to the final touches and maintenance tips. Whether you're a seasoned DIY enthusiast or a beginner looking for a new challenge, this guide will help you bring the warmth and tranquility of a sauna to your home. So, roll up your sleeves and get ready to embark on this exciting DIY adventure!
Planning Your DIY Barrel Sauna
Before diving into the construction process, it's crucial to start with a well-thought-out plan for your DIY barrel sauna. Here are the key steps to consider as you begin this exciting project:
-
Selecting the Location: Choose a suitable spot in your backyard or outdoor area for the barrel sauna. Ensure that the ground is level and can accommodate the size of the sauna.
-
Determining the Size: Consider how many people you want the sauna to accommodate at once. This will help you determine the appropriate size for your barrel sauna.
-
Researching Local Regulations: Check with your local building authorities to understand any permits or regulations that may apply to the construction of a sauna on your property.
-
Designing the Layout: Sketch out the layout of your barrel sauna, including the placement of the entrance, windows, and any additional features you may want to incorporate.
-
Budgeting and Cost Estimation: Determine your budget for the project and research the cost of materials, sauna heaters, and other necessary components. This will help you stay on track financially throughout the construction process.
By carefully planning these essential aspects, you'll set a solid foundation for the successful creation of your DIY barrel sauna.
Gathering Materials and Tools
To bring your DIY barrel sauna to life, you'll need to gather a variety of materials and tools to ensure a smooth construction process. Here's a comprehensive list to help you get started:
Materials:
- Barrel Sauna Kit: Consider purchasing a pre-made barrel sauna kit, which typically includes the essential components such as the sauna staves, door, benches, and hardware.
- Wood: If you're building the sauna from scratch, you'll need high-quality, durable wood for the sauna staves, benches, and interior finishing. Cedar and redwood are popular choices due to their natural resistance to moisture and decay.
- Insulation: Choose insulation materials designed for saunas to ensure proper heat retention and energy efficiency.
- Sauna Heater: Select a suitable sauna heater based on the size of your barrel sauna and your heating preferences. Electric and wood-burning heaters are common options.
- Ventilation System: Invest in a ventilation system to maintain air circulation and prevent moisture buildup within the sauna.
- Sealant and Fasteners: Stock up on sealants, screws, and other fasteners to secure the sauna components and ensure a watertight seal.
Tools:
- Circular Saw: A circular saw will be essential for cutting the wood to the required dimensions for the sauna staves and benches.
- Drill and Bits: A power drill with a variety of drill bits will be necessary for assembling the sauna components and creating ventilation openings.
- Clamps: Clamps are indispensable for holding the sauna staves in place during assembly and ensuring a tight fit.
- Level: To ensure the sauna structure is plumb and level, a reliable level will be crucial for achieving precision.
- Screwdriver Set: A set of screwdrivers, including both flathead and Phillips head, will be needed for securing fasteners throughout the construction process.
- Insulation Knife: An insulation knife will come in handy for trimming and shaping the insulation materials to fit the sauna interior.
By gathering these materials and tools, you'll be well-equipped to commence the construction of your DIY barrel sauna with confidence and efficiency.
Building the Barrel Sauna Frame
Building the barrel sauna frame is a pivotal step in the construction process, as it forms the foundation for the entire sauna structure. Here's a detailed breakdown of the essential steps involved in creating the sturdy and visually striking frame for your DIY barrel sauna:
-
Preparing the Sauna Staves: Begin by carefully inspecting and preparing the sauna staves. Ensure that each stave is free from defects and is of uniform size. If necessary, sand the staves to achieve a smooth and even surface, which will contribute to the overall aesthetics of the sauna.
-
Laying Out the Staves: Lay out the sauna staves in a manner that forms a perfect circle, creating the desired diameter for the barrel sauna. Use clamps to hold the staves in place, maintaining the circular shape as you proceed with the assembly.
-
Securing the Staves: With the staves in position, use screws or specialized sauna fasteners to secure them together. It's crucial to ensure that the staves are tightly joined, creating a robust and stable foundation for the sauna frame.
-
Creating the Entrance and Ventilation Openings: Depending on your design, mark and cut out openings for the entrance and ventilation. Carefully measure and cut the staves to accommodate the door and ventilation components, ensuring a precise fit for seamless integration.
-
Installing Support Bands: To reinforce the structure and add visual appeal, install support bands around the exterior of the sauna frame. These bands not only enhance the aesthetics of the barrel sauna but also provide additional stability to the overall structure.
-
Checking for Alignment and Stability: Once the sauna frame is assembled, carefully check for alignment and stability. Use a level to ensure that the frame is perfectly vertical and that the circular shape is maintained throughout. Making any necessary adjustments at this stage will contribute to the overall quality of the finished sauna.
By following these detailed steps, you'll be well on your way to creating a robust and visually striking frame for your DIY barrel sauna. This foundational element sets the stage for the subsequent phases of the construction process, bringing you closer to the realization of your own backyard oasis.
Installing the Sauna Heater and Ventilation
Installing the sauna heater and ventilation system is a critical phase in the construction of your DIY barrel sauna, as it directly impacts the functionality and comfort of the sauna environment. Here's a comprehensive guide to successfully integrating the sauna heater and ventilation components into your barrel sauna:
-
Selecting the Sauna Heater: Begin by selecting a suitable sauna heater based on the size of your barrel sauna and your heating preferences. Sauna heaters are available in various types, including electric, wood-burning, and infrared options. Consider factors such as heating capacity, energy efficiency, and control features when choosing the right heater for your sauna.
-
Positioning the Sauna Heater: Determine the optimal location for installing the sauna heater within the barrel sauna. Typically, the heater is placed on a heat-resistant sauna floor, ensuring that it is positioned securely and complies with safety guidelines. Follow the manufacturer's instructions for the specific installation requirements of your chosen sauna heater.
-
Ventilation System Design: Plan the layout of the ventilation system to promote efficient air circulation and moisture control within the sauna. Incorporate vents or grilles to facilitate the inflow of fresh air and the expulsion of excess moisture. Proper ventilation is essential for maintaining a comfortable and healthy sauna environment.
-
Cutting Ventilation Openings: Carefully measure and mark the locations for the ventilation openings on the sauna frame. Use a saw or appropriate cutting tools to create precise openings for the ventilation components, ensuring that they align with the design and layout of the ventilation system.
-
Installing Ventilation Components: Once the openings are prepared, install the ventilation components, such as vents, grilles, and ductwork, according to the predetermined layout. Secure the components in place, ensuring a snug fit and proper alignment to facilitate effective air exchange within the sauna.
-
Wiring and Connection: If you have opted for an electric sauna heater, follow the manufacturer's guidelines for wiring and electrical connection. Ensure that all electrical work complies with safety standards and local regulations. For wood-burning heaters, establish a safe and efficient chimney or flue system to exhaust the combustion byproducts.
-
Testing and Calibration: After the sauna heater and ventilation components are installed, conduct thorough testing to ensure that the heater operates as intended and that the ventilation system functions optimally. Make any necessary adjustments to achieve the desired temperature and airflow within the sauna.
By meticulously executing the installation of the sauna heater and ventilation system, you'll create a comfortable and rejuvenating sauna environment within your DIY barrel sauna. These essential components contribute to the overall functionality and enjoyment of the sauna experience, allowing you to unwind and relax in your personalized backyard retreat.
Insulating and Sealing the Sauna
Proper insulation and sealing are crucial aspects of constructing a functional and energy-efficient barrel sauna. This phase focuses on creating a well-insulated and airtight interior to retain heat and ensure a comfortable sauna experience. Here's a detailed breakdown of the steps involved in insulating and sealing your DIY barrel sauna:
-
Selecting High-Quality Insulation: Choose high-quality insulation materials designed specifically for saunas. Common options include mineral wool, fiberglass, or natural materials such as wool or cotton. Ensure that the selected insulation material is suitable for high-temperature environments and provides effective heat retention.
-
Preparing the Sauna Interior: Before installing the insulation, prepare the interior surfaces of the sauna, including the walls and ceiling. Ensure that the interior is clean, dry, and free from any debris or obstructions that may hinder the insulation process.
-
Installing the Insulation: Cut the insulation material to fit the dimensions of the sauna interior, including the spaces between the sauna staves. Carefully place the insulation between the staves, ensuring a snug and uniform fit to minimize heat loss. Pay special attention to insulating the ceiling to prevent heat from escaping upward.
-
Sealing the Joints and Gaps: Use heat-resistant sealant to seal any gaps or joints between the sauna staves and around the insulation. This step is crucial for creating an airtight seal that prevents heat from escaping and maintains the desired temperature within the sauna. Ensure that the sealant is compatible with the selected insulation material and can withstand high temperatures.
-
Applying Vapor Barrier: Consider applying a vapor barrier over the insulation to prevent moisture from penetrating the sauna interior. A vapor barrier helps maintain a dry and comfortable sauna environment while protecting the insulation from potential moisture damage. Ensure that the vapor barrier is properly installed and sealed to achieve optimal effectiveness.
-
Insulating the Door and Windows: Pay attention to insulating the door and any windows in the sauna to minimize heat loss and maintain a consistent temperature. Use weather-stripping and insulation materials designed for high-temperature applications to create a tight seal around the door and windows.
-
Testing for Air Leaks: After insulating and sealing the sauna, conduct a thorough inspection to identify any potential air leaks or areas that may compromise the insulation. Address any detected leaks by reinforcing the sealant and insulation to ensure maximum heat retention and energy efficiency.
By meticulously insulating and sealing your DIY barrel sauna, you'll create a cozy and energy-efficient environment for relaxation and rejuvenation. This phase plays a pivotal role in enhancing the overall performance and comfort of your personalized sauna retreat, allowing you to indulge in the soothing warmth of your backyard oasis.
Adding Benches and Interior Finishing
Once the structural and functional elements of your DIY barrel sauna are in place, it's time to focus on adding the finishing touches that enhance both the aesthetics and comfort of the interior space. The installation of benches and the selection of interior finishing materials play a crucial role in creating a welcoming and inviting sauna environment. Here's a detailed guide to adding benches and interior finishing to your barrel sauna:
Installing Sauna Benches
-
Design Considerations: Determine the layout and design of the benches within the sauna. Consider factors such as the number of users the sauna will accommodate and the desired seating configuration. Typically, L-shaped or tiered bench designs are popular choices for maximizing seating capacity and comfort.
-
Selecting Bench Materials: Choose high-quality, heat-resistant wood for the sauna benches. Cedar, hemlock, or other durable wood species are well-suited for sauna environments due to their natural resistance to moisture and heat. Ensure that the selected wood is smooth and free from any rough edges to provide a comfortable seating surface.
-
Bench Installation: Install the benches at a suitable height and distance from the sauna heater to ensure optimal comfort and safety. Secure the benches to the sauna frame using appropriate fasteners, ensuring that they are stable and can support the anticipated weight capacity.
-
Applying Finish: Apply a protective finish to the benches to enhance their durability and resistance to moisture. Consider using sauna-specific wood finishes or oils that are safe for high-temperature environments. The finish should accentuate the natural beauty of the wood while providing long-lasting protection.
Interior Finishing
-
Selecting Interior Materials: Choose interior finishing materials that contribute to the overall ambiance of the sauna while maintaining functionality. Consider options such as tongue-and-groove cedar paneling for the walls and ceiling, which not only adds a warm and inviting aesthetic but also complements the natural properties of the wood.
-
Enhancing Lighting: Incorporate suitable lighting fixtures to create a cozy and inviting atmosphere within the sauna. Consider LED lighting options that emit a soft, warm glow, enhancing the overall ambiance while consuming minimal energy.
-
Accessorizing the Interior: Add functional and decorative elements such as towel hooks, backrests, and essential oil diffusers to enhance the comfort and convenience of the sauna. These accessories contribute to a personalized and luxurious sauna experience.
-
Maintaining Air Quality: Consider incorporating a small air vent or grille to ensure adequate air circulation within the sauna. Proper ventilation contributes to a comfortable and healthy sauna environment by preventing the buildup of excess humidity and maintaining air quality.
By meticulously attending to the installation of benches and interior finishing, you'll transform your DIY barrel sauna into a welcoming and visually appealing space for relaxation and rejuvenation. These final touches elevate the overall sauna experience, allowing you to unwind and indulge in the tranquil warmth of your personalized retreat.
Final Touches and Maintenance Tips
After completing the construction and interior finishing of your DIY barrel sauna, it's time to add the final touches that enhance the functionality and aesthetics of the space. Additionally, incorporating maintenance tips will ensure that your sauna remains in optimal condition for long-term enjoyment. Here's a comprehensive guide to the final touches and maintenance tips for your DIY barrel sauna:
Final Touches
-
Enhancing Ambiance: Consider adding essential oil diffusers or aromatherapy dispensers to infuse the sauna with soothing scents, creating a serene and relaxing atmosphere. Select essential oils known for their calming and rejuvenating properties, such as lavender, eucalyptus, or cedarwood.
-
Personalizing the Space: Incorporate personalized elements such as sauna accessories, comfortable seating cushions, or decorative accents that reflect your unique style and contribute to a welcoming sauna environment. Personal touches add character and warmth to the space, making it a true extension of your home.
-
Installing Thermometer and Hygrometer: Mount a thermometer and hygrometer within the sauna to monitor the temperature and humidity levels accurately. This allows you to maintain optimal sauna conditions and adjust the settings as needed for a comfortable and enjoyable experience.
-
Adding Towel Hooks and Storage: Install hooks or racks for towels and robes, providing convenient storage options within the sauna. This ensures that essential items are easily accessible and neatly organized, enhancing the overall functionality of the space.
Maintenance Tips
-
Regular Cleaning: Establish a routine for cleaning the sauna interior, including wiping down the benches, walls, and flooring to remove any accumulated sweat or residue. Use a mild, non-abrasive cleaner suitable for sauna surfaces to maintain cleanliness without damaging the wood or finishes.
-
Inspecting Sealant and Insulation: Periodically inspect the sealant and insulation to ensure that they remain intact and effective. Look for signs of wear, gaps, or damage that may compromise the insulation and airtight seal. Address any issues promptly to maintain energy efficiency and heat retention.
-
Sauna Heater Maintenance: Follow the manufacturer's guidelines for maintaining and servicing the sauna heater. This may include cleaning the heating elements, checking electrical connections, and ensuring that the heater operates safely and efficiently.
-
Monitoring Wood Condition: Keep an eye on the condition of the sauna wood, particularly in areas prone to moisture exposure. Address any signs of warping, discoloration, or decay promptly to prevent structural damage and maintain the visual appeal of the sauna interior.
-
Ventilation System Care: Regularly clean and inspect the ventilation components to ensure unrestricted airflow and moisture control. Clear any debris or obstructions that may hinder proper ventilation, promoting a healthy and comfortable sauna environment.
By attending to these final touches and implementing proactive maintenance practices, you'll ensure that your DIY barrel sauna remains a welcoming and rejuvenating space for years to come. These thoughtful additions and maintenance efforts contribute to the longevity and enjoyment of your personalized sauna retreat.