
Home>Organize & Storage>Closet Organization>DIY Barn Door Closet Makeover
Closet Organization
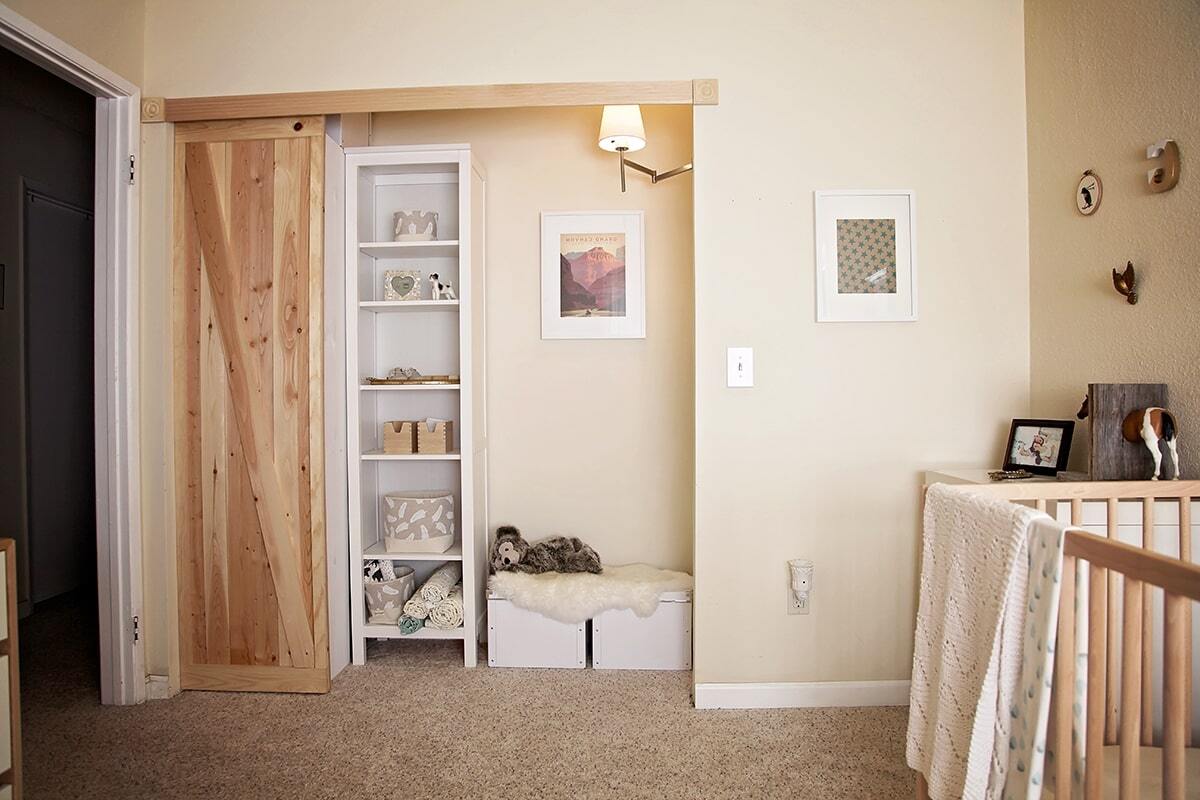
DIY Barn Door Closet Makeover
Published: September 1, 2024
Transform your closet with a DIY barn door makeover! Discover step-by-step instructions, tips, and tricks to create a stylish and functional space.
(Many of the links in this article redirect to a specific reviewed product. Your purchase of these products through affiliate links helps to generate commission for Twigandthistle.com, at no extra cost. Learn more)
Thinking about giving your closet a fresh look? A DIY barn door makeover might be just what you need. This project is a fun way to add some rustic charm and practicality to your space. Not only do barn doors look great, but they also save space compared to traditional swinging doors. Whether you're new to DIY projects or a seasoned pro, this guide will help you through each step. Grab your tools, put on your creative hat, and let's transform that closet into something truly special. Ready to roll up your sleeves? Let's get started!
Getting Ready for Your Project
Measure your space: Use a tape measure to get the height and width of the closet opening. Write down these measurements.
Choose your barn door: Pick a door that fits your measurements. Make sure it’s not too heavy for the wall.
Gather tools and materials: You’ll need a drill, screws, a level, a stud finder, a tape measure, a pencil, and the barn door hardware kit.
Check for studs: Use a stud finder to locate studs above the closet opening. Mark these spots with a pencil.
Clear the workspace: Move any furniture or items away from the closet area. Make sure you have enough room to work.
Safety gear: Wear safety glasses and gloves to protect yourself while working.
Pre-drill holes: Mark where the hardware will go and pre-drill holes into the studs. This makes it easier to screw in the hardware.
Install the track: Follow the instructions in the hardware kit to attach the track to the wall. Use a level to ensure it’s straight.
Attach door hardware: Secure the rollers and handles to the door according to the kit’s instructions.
Hang the door: Lift the door and place the rollers onto the track. Make sure it slides smoothly.
Test the door: Open and close the door several times to ensure it works properly. Adjust if needed.
What You Need: Materials and Tools
- Barn Door Kit: Includes the door, track, and hardware for installation.
- Measuring Tape: Ensures accurate measurements for fitting the door.
- Level: Keeps the track and door straight during installation.
- Drill: Used for making holes in the wall and door for screws.
- Screwdriver: Tightens screws in the hardware and track.
- Stud Finder: Locates wall studs to securely mount the track.
- Pencil: Marks measurements and drill points on the wall and door.
- Screws and Anchors: Secures the track and hardware to the wall.
- Wrench: Tightens bolts on the door hardware.
- Safety Glasses: Protects eyes from debris during drilling.
- Sandpaper: Smooths any rough edges on the door.
- Paint or Stain: Adds color or finish to the door for a polished look.
- Paintbrush or Roller: Applies paint or stain evenly on the door.
- Drop Cloth: Protects the floor from paint or stain spills.
- Ladder: Reaches higher areas for mounting the track.
Skill Level and Time Commitment
Skill Level: Intermediate
Time Required: 6-8 hours
- Measure and Plan - 1 hour
- Gather Materials - 1 hour
- Install Track System - 2 hours
- Hang the Door - 1 hour
- Finishing Touches - 1-2 hours
How to Do It: Step-by-Step Guide
Measure the Closet Opening
- Measure the width and height of the closet opening.
- Add a few inches to the width for overlap.
Choose Your Barn Door
- Select a barn door that fits your measurements.
- Ensure it matches your room’s style.
Gather Materials
- Barn door kit (includes door, track, hardware)
- Drill
- Level
- Screws
- Anchors (if needed)
- Tape measure
- Pencil
Install the Track
- Mark the track placement above the closet opening.
- Use a level to ensure it’s straight.
- Drill holes for the screws.
- Attach the track to the wall using screws and anchors.
Attach the Rollers to the Door
- Follow the barn door kit instructions.
- Attach the rollers to the top of the door.
Hang the Door
- Lift the door and place the rollers on the track.
- Ensure it slides smoothly.
Install Door Guides
- Attach guides to the floor to keep the door from swinging.
- Follow the kit instructions for placement.
Test the Door
- Slide the door back and forth.
- Make any necessary adjustments.
Add Handles
- Attach handles to the door.
- Follow the kit instructions for placement.
Finish Up
- Touch up any paint or finish as needed.
- Clean up your workspace.
Helpful Tips and Tricks
Measure twice, cut once. Accurate measurements prevent wasted materials. Use a level to ensure the door hangs straight. Pre-drill holes to avoid splitting wood.
Common mistakes to avoid: Not checking for studs before mounting hardware. Skipping the sanding step can lead to rough edges. Forgetting to account for door clearance can cause it to scrape the floor.
Alternatives: Instead of traditional wood, consider reclaimed wood for a rustic look. Use pipe fittings instead of standard barn door hardware for an industrial style. For a quieter slide, opt for nylon wheels over metal ones.
Budgeting for Your Makeover
Barn Door: $100 - $300
Sliding Door Hardware Kit: $50 - $150
Wood Stain or Paint: $20 - $40
Sandpaper: $5 - $10
Screws and Anchors: $5 - $10
Measuring Tape: $10 - $20
Drill: $30 - $100
Level: $10 - $20
Saw: $20 - $50
Safety Gear (Gloves, Goggles): $10 - $20
Total Cost: $260 - $720
Budget-Friendly Alternatives:
Barn Door: Use reclaimed wood or an old door ($50 - $100)
Sliding Door Hardware Kit: DIY with basic hardware from a local store ($30 - $50)
Wood Stain or Paint: Use leftover paint or stain from previous projects ($0 - $10)
Drill: Borrow from a friend or rent from a hardware store ($0 - $20)
Saw: Use a hand saw instead of a power saw ($10 - $20)
Total Cost with Alternatives: $150 - $370
Personalize Your Barn Door Closet
Materials: Instead of traditional wood, consider using reclaimed wood for a rustic look. Metal or glass panels can add a modern touch. Plywood offers a budget-friendly option.
Colors: Paint the door in bold colors like navy blue or forest green for a statement piece. For a more subtle look, use neutral tones like white, beige, or gray. Staining the wood can highlight its natural grain.
Styles: Add decorative trim or molding to give the door a more classic appearance. For a farmhouse style, use X-brace or Z-brace designs. A shiplap pattern can add a coastal vibe.
Hardware: Swap out standard handles for vintage knobs or leather pulls. Use black iron hardware for an industrial feel. Brass or copper accents can add a touch of elegance.
Additional Features: Install a mirror on one side of the door for functionality. Add chalkboard paint to create a writable surface. Attach hooks or shelves for extra storage.
Eco-Friendly Ideas for Your Project
Reclaimed wood makes a great choice for barn doors. Look for old pallets, barn wood, or even wood from old furniture. This reduces waste and gives your project a rustic charm.
Eco-friendly paint or stain is another good option. Choose products with low or no VOCs (volatile organic compounds) to keep indoor air clean.
Recycled hardware can add character and sustainability. Check out thrift stores or online marketplaces for second-hand handles, hinges, and tracks.
Natural fibers like jute or cotton can be used for any decorative elements. These materials are biodegradable and have a smaller environmental footprint.
Energy-efficient tools are also important. Use hand tools when possible, or opt for power tools with energy-saving features.
Insulation can be added behind the barn door if it’s on an exterior wall. Use eco-friendly insulation materials like recycled denim or sheep’s wool.
Upcycling old doors into barn doors is another creative option. This not only saves money but also keeps usable materials out of landfills.
Local sourcing of materials reduces the carbon footprint associated with transportation. Check local suppliers for wood, paint, and hardware.
Minimalist design can reduce the amount of material needed. A simple, clean design often requires fewer resources and less waste.
Composting any organic waste like wood shavings or sawdust can also contribute to a sustainable project. Use these in your garden or compost bin.
Your DIY Barn Door Closet Awaits
You've got all the tools and know-how to transform your closet with a barn door. From measuring your space to picking the right materials, every step counts. Remember, patience is key. Don’t rush through the process. Take your time to ensure everything lines up perfectly. If you hit a snag, don’t sweat it. There are plenty of resources and tutorials online to help you out. Once your barn door is up, you’ll not only have a functional closet but also a stylish focal point in your room. So, roll up your sleeves, gather your supplies, and get started. Your dream closet is just a few steps away. Happy building!
How do I measure for a barn door closet?
Measure the width and height of your closet opening. Add a few inches to the width so the door covers the opening completely. For height, measure from the floor to the top of the opening.
What tools will I need?
You’ll need a tape measure, drill, level, screws, anchors, and a stud finder. A saw might be necessary if you need to cut the door to size.
Can I install a barn door on my own?
Absolutely! With the right tools and a bit of patience, you can install a barn door yourself. Just follow the instructions carefully.
What kind of door should I use?
You can use a solid wood door, a hollow core door, or even a reclaimed door. Just make sure it’s sturdy enough to handle the hardware.
How do I find the studs in my wall?
Use a stud finder to locate the studs. Mark them with a pencil so you know where to drill. This ensures your door is securely mounted.
Do I need special hardware?
Yes, barn door hardware includes a track, rollers, and brackets. You can buy a kit that has everything you need.
How do I ensure the door slides smoothly?
Make sure the track is level and the rollers are properly installed. Lubricate the track if needed to keep the door gliding smoothly.