
Home>Home & Furniture>Roof>How to Install a Standing Seam Metal Roof
Roof
How to Install a Standing Seam Metal Roof
Published: August 21, 2024
Learn how to install a standing seam metal roof with our step-by-step guide. Discover tips, tools, and techniques for a durable and weather-resistant roofing solution.
(Many of the links in this article redirect to a specific reviewed product. Your purchase of these products through affiliate links helps to generate commission for Twigandthistle.com, at no extra cost. Learn more)
Ever thought about installing a standing seam metal roof yourself? It's a great way to upgrade your home’s durability and appearance. This type of roofing is known for its sleek look, long lifespan, and excellent weather resistance. While it's more challenging than some other DIY projects, with the right tools and a bit of patience, you can do it. This guide will take you through the essential steps, tools, and tips needed to get the job done right. Ready to transform your roof and boost your home’s curb appeal? Let’s get started!
Getting Ready for the Project
Measure the Roof: Use a tape measure to get the dimensions of your roof. This helps in calculating the amount of metal panels needed.
Gather Materials: Collect all necessary materials like metal panels, screws, underlayment, and flashing. Ensure you have the right tools such as a drill, snips, and a ladder.
Inspect the Roof Deck: Check for any damage or rot on the existing roof deck. Repair any issues before proceeding.
Remove Old Roofing: Strip off old shingles or roofing material. Clean the surface thoroughly to ensure a smooth installation.
Install Underlayment: Lay down a waterproof underlayment to protect against moisture. Secure it with staples or nails.
Set Up Safety Gear: Wear gloves, safety glasses, and non-slip shoes. Use a harness if working on a steep roof.
Organize Workspace: Keep tools and materials within easy reach. Ensure the ladder is stable and placed on a flat surface.
Plan Panel Layout: Decide the starting point and layout for the metal panels. This helps in avoiding mistakes during installation.
Check Weather Conditions: Ensure you have a clear weather forecast. Avoid working in rain or high winds for safety reasons.
Read Manufacturer Instructions: Go through the installation guide provided by the metal panel manufacturer. Follow their specific recommendations for best results.
Gathering Your Materials and Tools
- Metal Roofing Panels: These are the main components of your roof. They come in various colors and finishes.
- Underlayment: A protective layer placed under the metal panels to prevent moisture damage.
- Roofing Screws: Special screws designed to secure metal panels without causing leaks.
- Metal Snips: Used to cut the metal panels to fit around edges and obstacles.
- Measuring Tape: Ensures accurate measurements for cutting and fitting panels.
- Chalk Line: Helps mark straight lines on the roof for precise panel placement.
- Drill: Needed for driving screws into the metal panels and roof structure.
- Hammer: Useful for securing underlayment and other materials.
- Safety Gear: Includes gloves, safety glasses, and a harness to protect yourself while working on the roof.
- Ladder: Essential for accessing the roof safely.
- Sealant: Used to seal gaps and prevent water from seeping through.
- Ridge Caps: These cover the peak of the roof, providing a finished look and additional protection.
- Closure Strips: Foam or rubber strips that seal the gaps between the metal panels and the roof structure.
- Utility Knife: Handy for cutting underlayment and other materials.
- Square: Ensures right angles for accurate panel placement.
- Pry Bar: Helps remove old roofing materials and nails.
- Caulk Gun: Used to apply sealant neatly and efficiently.
- Roofing Boots: Provide better grip and safety while walking on the roof.
Assessing Skill Level and Time Commitment
Skill Level: Advanced
Time Required: 3-5 days
Steps:
Preparation: 1 day
- Measure the roof
- Order materials
- Remove old roofing
Install Underlayment: 0.5 day
- Lay down waterproof underlayment
- Secure with nails or staples
Install Metal Panels: 1.5-2 days
- Align first panel at the edge
- Secure with clips and screws
- Continue with overlapping panels
Install Flashing and Trim: 1 day
- Add flashing around chimneys, vents, and edges
- Install ridge caps and trim
Final Inspection: 0.5 day
- Check for gaps or loose panels
- Ensure all screws are tight
Detailed Step-by-Step Guide
Measure the Roof:
- Calculate the length and width of each section.
- Determine the total square footage.
Order Materials:
- Purchase standing seam metal panels, fasteners, and underlayment.
- Ensure you have enough materials for the entire roof.
Remove Old Roofing:
- Strip off old shingles or roofing material.
- Clean the roof deck thoroughly.
Install Underlayment:
- Roll out the underlayment over the roof deck.
- Secure it with roofing nails or staples.
Install Drip Edge:
- Attach the drip edge along the eaves and rakes.
- Use roofing nails to secure it in place.
Lay Out Panels:
- Start at one end of the roof.
- Place the first panel, ensuring it overhangs the edge slightly.
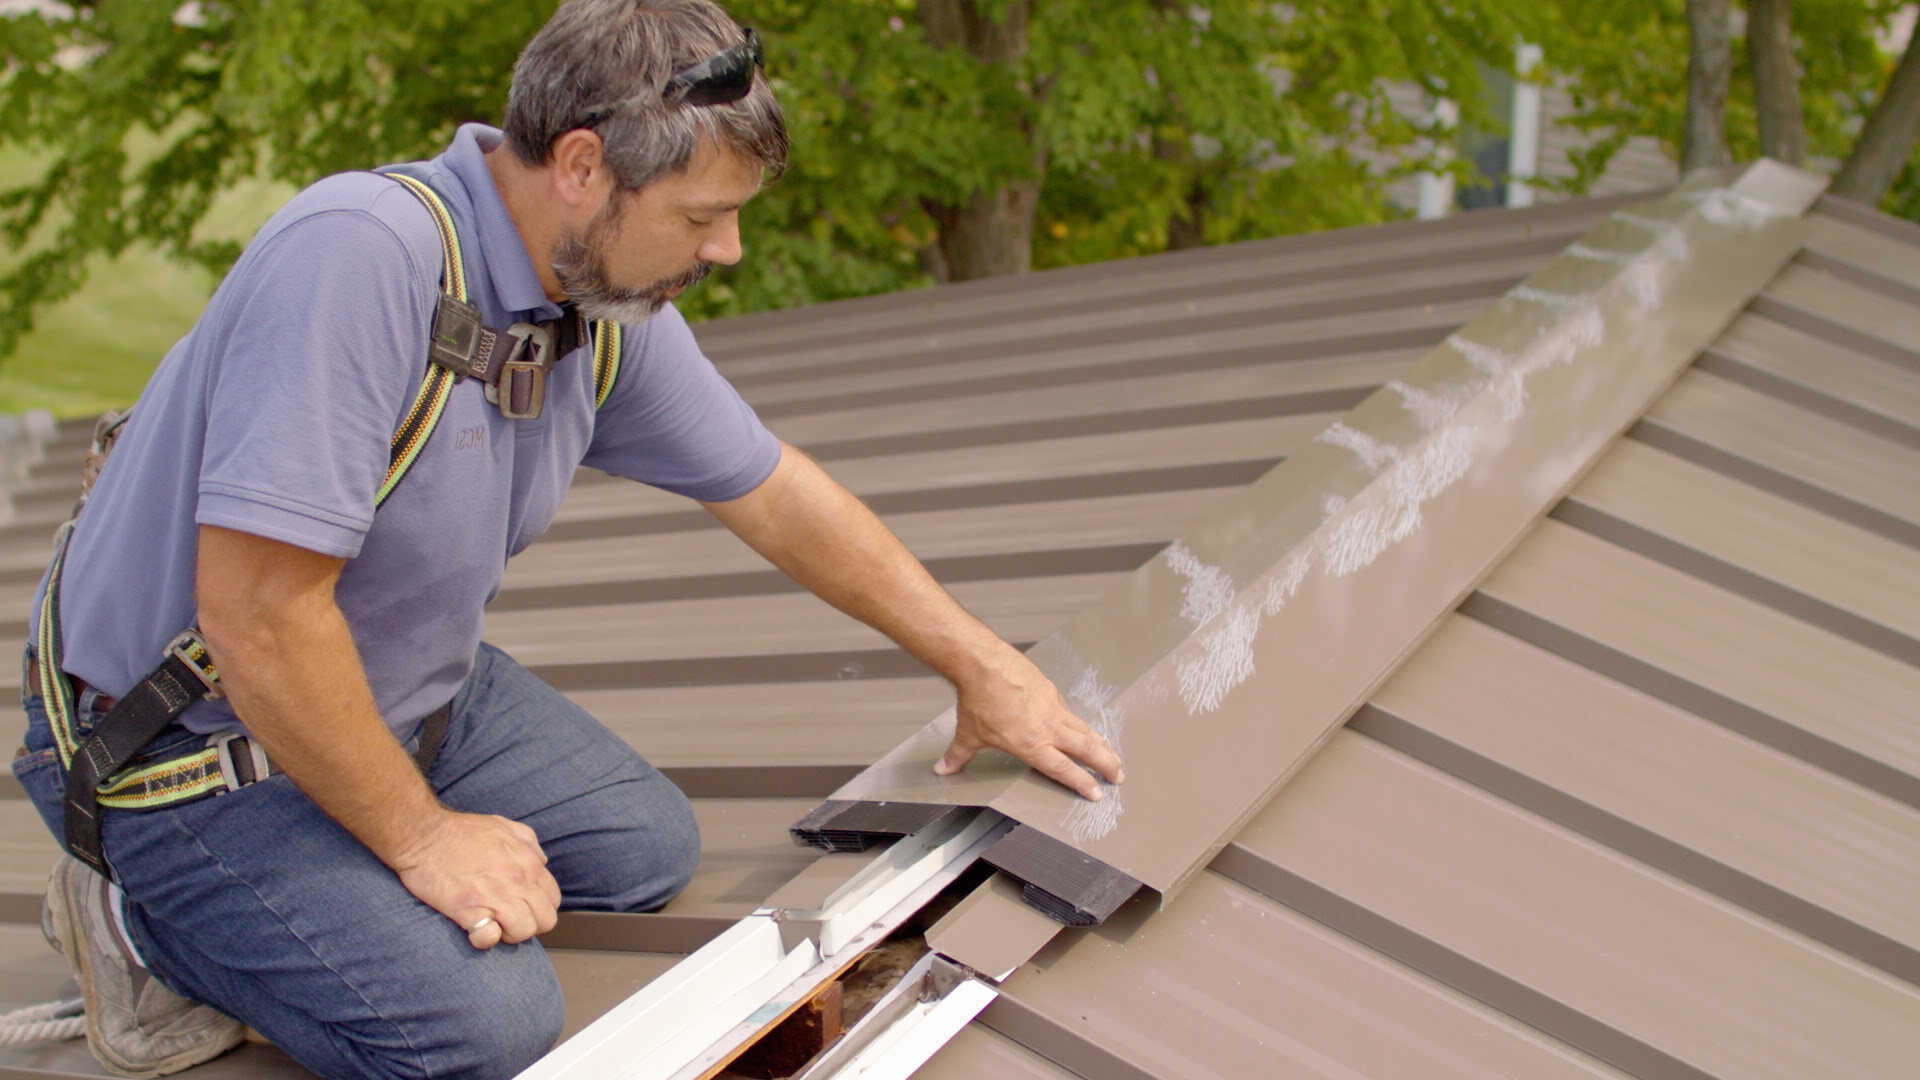
Secure Panels:
- Use clips and screws to attach the panels to the roof deck.
- Ensure each panel locks into the previous one.
Install Ridge Caps:
- Place ridge caps along the roof peak.
- Secure them with screws or clips.
Seal Seams:
- Apply sealant to all seams and joints.
- Ensure there are no gaps for water to enter.
Inspect the Roof:
- Check for any loose panels or fasteners.
- Make sure all seams are sealed properly.
Helpful Tips and Tricks
Measure accurately before ordering materials. Double-check measurements to avoid costly mistakes. Use a chalk line to ensure straight lines for panels. Pre-drill holes in panels to make installation faster and easier. Wear gloves to protect hands from sharp edges.
Common mistakes to avoid include not aligning panels properly, which can lead to leaks. Over-tightening screws can damage panels. Skipping the underlayment can cause moisture problems. Not sealing seams properly can result in leaks.
Alternatives for materials include using aluminum panels instead of steel for better corrosion resistance. Synthetic underlayment can be used instead of felt for better durability. Self-tapping screws can make installation easier compared to regular screws.
Estimating the Cost
Standing seam metal roof panels: $200-$300 per square (100 square feet).
Underlayment: $50-$100 per roll (covers about 400 square feet).
Fasteners and clips: $100-$200 for a typical roof.
Flashing and trim: $300-$500 for a standard-sized roof.
Sealant and caulk: $20-$50 for several tubes.
Roofing nails: $20-$30 per box.
Metal snips: $15-$30.
Drill and bits: $50-$150.
Safety gear: $50-$100 (includes gloves, goggles, and harness).
Ladder: $100-$200.
Budget-friendly alternatives:
- Corrugated metal panels: $100-$150 per square.
- Basic underlayment: $30-$50 per roll.
- Standard fasteners: $50-$100.
- Simple flashing: $150-$300.
- Basic sealant: $10-$20.
- Basic roofing nails: $10-$20 per box.
- Hand snips: $10-$20.
- Borrow tools: Ask friends or rent from a local store.
- Used ladder: Check online marketplaces for deals.
Exploring Variations and Customizations
Materials: Instead of traditional steel, consider using aluminum for a lighter option or copper for a unique look that develops a natural patina over time. Zinc is another alternative, known for its durability and low maintenance.
Colors: Choose from a wide range of colors to match your home’s exterior. Go for classic shades like gray or black for a sleek, modern look. For a more vibrant appearance, consider red, blue, or green. Some manufacturers offer custom colors if you have a specific shade in mind.
Styles: Opt for different panel widths to change the overall look. Narrower panels can give a more traditional appearance, while wider panels offer a contemporary feel. Consider textured finishes like matte or embossed to add visual interest.
Fasteners: Use hidden fasteners for a clean, seamless look. If you prefer a more industrial style, exposed fasteners can add a rugged touch.
Underlayment: Instead of standard felt paper, use a synthetic underlayment for better moisture resistance. For added insulation, consider a foam board underlayment.
Ridge Caps: Customize the ridge caps with decorative elements like finials or weathervanes to add a personal touch.
Gutters: Match your gutters to the roof material for a cohesive look. Copper gutters pair well with copper roofs, while aluminum gutters can be painted to match any color.
Snow Guards: If you live in a snowy area, install snow guards to prevent snow from sliding off the roof. Choose from various styles like bar-style or pad-style to suit your aesthetic.
Solar Panels: Integrate solar panels with your standing seam metal roof for an eco-friendly option. Some panels are designed to blend seamlessly with the roof, maintaining a sleek appearance.
Skylights: Add skylights to bring natural light into your home. Choose from fixed or vented options, and ensure they are properly sealed to prevent leaks.
Ventilation: Improve ventilation with ridge vents or gable vents. These can be painted to match the roof color, maintaining a uniform look.
Trim: Customize the trim pieces around edges and corners. Use contrasting colors for a bold look or matching colors for a seamless appearance.
Eco-Friendly Roofing Tips
Standing seam metal roofs are durable and eco-friendly. Use recycled metal for the panels. Many suppliers offer metal made from recycled materials. This reduces waste and saves resources.
Choose non-toxic coatings for the metal. These coatings protect the roof without harming the environment. Look for low-VOC (volatile organic compounds) options.
Install solar panels on the roof. Metal roofs are perfect for solar panel installation. This can reduce energy bills and carbon footprint.
Use insulation made from recycled or natural materials. Options like cotton, wool, or cellulose are good choices. They help keep the home energy-efficient.
Collect rainwater from the roof. Install a rainwater harvesting system. This water can be used for gardening or other non-potable uses.
Recycle any leftover materials. Metal scraps can be taken to a recycling center. This keeps waste out of landfills.
Consider cool roofing techniques. Light-colored metal roofs reflect more sunlight. This reduces cooling costs and energy use.
Use sustainable fasteners and sealants. Look for products that are durable and eco-friendly. Stainless steel or galvanized fasteners are good options.
Plan for proper ventilation. Good ventilation extends the roof's life and improves energy efficiency. Use ridge vents or soffit vents to allow airflow.
Hire a local contractor. This reduces transportation emissions and supports the local economy. Make sure they have experience with eco-friendly practices.
Your Roof, Your Masterpiece
Installing a standing seam metal roof isn't just about protection; it's about craftsmanship. You've learned the steps, gathered the tools, and tackled the challenges. Now, your home stands stronger and looks better. Remember, attention to detail and patience are key. If you ever feel stuck, don't hesitate to ask for help or consult more resources. Your hard work will pay off every time you look up at your roof. Enjoy the satisfaction of a job well done. Happy roofing!
What tools do I need to install a standing seam metal roof?
You'll need tin snips, a drill, screws, a tape measure, safety gear (like gloves and goggles), a chalk line, and a hammer. A metal roofing shear can also be handy.
How long does it take to install a standing seam metal roof?
Installation time varies based on roof size and your experience. For a small roof, it might take a weekend. Larger roofs or those with complex designs could take several days to a week.
Can I install a standing seam metal roof over my old shingles?
Yes, you can. However, make sure the old shingles are in good condition and the roof structure can support the extra weight. Adding a moisture barrier between the old and new roof is also a good idea.
How do I measure my roof for metal panels?
Measure the length and width of each roof section. Multiply these to get the square footage. Add 10-15% extra for waste and overlaps. Don't forget to measure valleys, ridges, and eaves.
What are the benefits of a standing seam metal roof?
These roofs are durable, long-lasting, and energy-efficient. They can withstand harsh weather and require less maintenance than traditional shingles. Plus, they look sleek and modern.
Do I need special training to install a standing seam metal roof?
While not mandatory, some basic roofing knowledge and DIY skills help. Watching tutorials and reading guides can make the process smoother. If unsure, consider hiring a professional.
How do I maintain a standing seam metal roof?
Regularly inspect for debris, leaves, and twigs. Clean the roof with a soft brush and mild detergent. Check for loose screws or panels and fix them promptly. Avoid walking on the roof to prevent dents.