
Home>Home & Furniture>Roof>How to DIY Roof Coating
Roof
How to DIY Roof Coating
Published: August 21, 2024
Learn how to DIY roof coating with our step-by-step guide. Save money, protect your roof, and extend its lifespan with these easy-to-follow instructions.
(Many of the links in this article redirect to a specific reviewed product. Your purchase of these products through affiliate links helps to generate commission for Twigandthistle.com, at no extra cost. Learn more)
Tired of leaks and worn-out shingles? Roof coating can help extend your roof's life. Doing it yourself can save money and give a sense of accomplishment. Whether it's adding a layer of protection from harsh weather or giving your home a fresh look, roof coating can be a worthwhile project. Maybe you've never done it before, but don't worry. This guide will walk you through the essential steps, tools, and tips to get the job done right. Get ready to roll up your sleeves and transform your roof!
Getting Ready for Roof Coating
Inspect the Roof: Check for any damage like cracks, holes, or loose shingles. Fix these issues before starting the coating process.
Clean the Surface: Remove dirt, debris, and old paint using a broom, brush, or pressure washer. A clean surface ensures the coating sticks well.
Gather Materials: Get all necessary items like roof coating, brushes, rollers, a ladder, and safety gear. Having everything ready saves time.
Check the Weather: Ensure the forecast shows clear skies for at least 24 hours. Rain can ruin the coating process.
Set Up Workspace: Arrange tools and materials in an easily accessible area. Clear any obstacles around the house.
Wear Safety Gear: Use gloves, safety glasses, and non-slip shoes. Safety harnesses are also a good idea if working on a steep roof.
Protect Surroundings: Cover plants, windows, and other areas with plastic sheets or tarps to prevent accidental spills.
Read Instructions: Go through the roof coating product's instructions carefully. Each product may have specific application methods.
Test a Small Area: Apply a small amount of coating to a less visible section. This ensures compatibility and helps you get a feel for the application process.
Plan Your Path: Start from the farthest corner and work your way back to the ladder. This prevents stepping on the freshly coated surface.
Essential Materials and Tools
Roof Coating: A liquid material applied to the roof to protect it from weather damage. Choose one suitable for your roof type.
Roof Cleaner: A solution to clean the roof surface before applying the coating. Ensures proper adhesion.
Pressure Washer: A tool to remove dirt, debris, and old coatings from the roof. Makes cleaning faster and more effective.
Scrub Brush: Helps scrub stubborn dirt and stains off the roof. Use with the roof cleaner for best results.
Roof Sealant: Fills cracks and gaps in the roof. Prevents leaks and prepares the surface for coating.
Paint Roller: Applies the roof coating evenly. Use a long-handled roller for easier reach.
Paint Brushes: Useful for coating edges and tight spots. Ensures complete coverage.
Ladder: Provides access to the roof. Ensure it is stable and tall enough for safe use.
Safety Harness: Protects you from falls. Essential for working on roofs.
Gloves: Protect your hands from chemicals and rough surfaces. Choose durable, waterproof gloves.
Protective Eyewear: Shields your eyes from splashes and debris. Important for safety.
Buckets: Holds roof cleaner and coating. Makes application easier.
Mixing Stick: Stirs the roof coating to ensure even consistency. Prevents clumps and uneven application.
Drop Cloths: Protects areas around the roof from spills and splashes. Keeps the workspace clean.
Caulk Gun: Applies roof sealant precisely. Helps fill cracks and gaps efficiently.
Required Skills and Time Commitment
Skill Level: Intermediate
Time Required: 1-2 days
- Preparation: 2-3 hours
- Cleaning the Roof: 3-4 hours
- Repairing Damages: 2-3 hours
- Applying Primer: 1-2 hours (drying time: 4-6 hours)
- Applying Roof Coating: 3-4 hours (drying time: 24 hours)
Important Keywords: Preparation, Cleaning, Repairing, Primer, Roof Coating
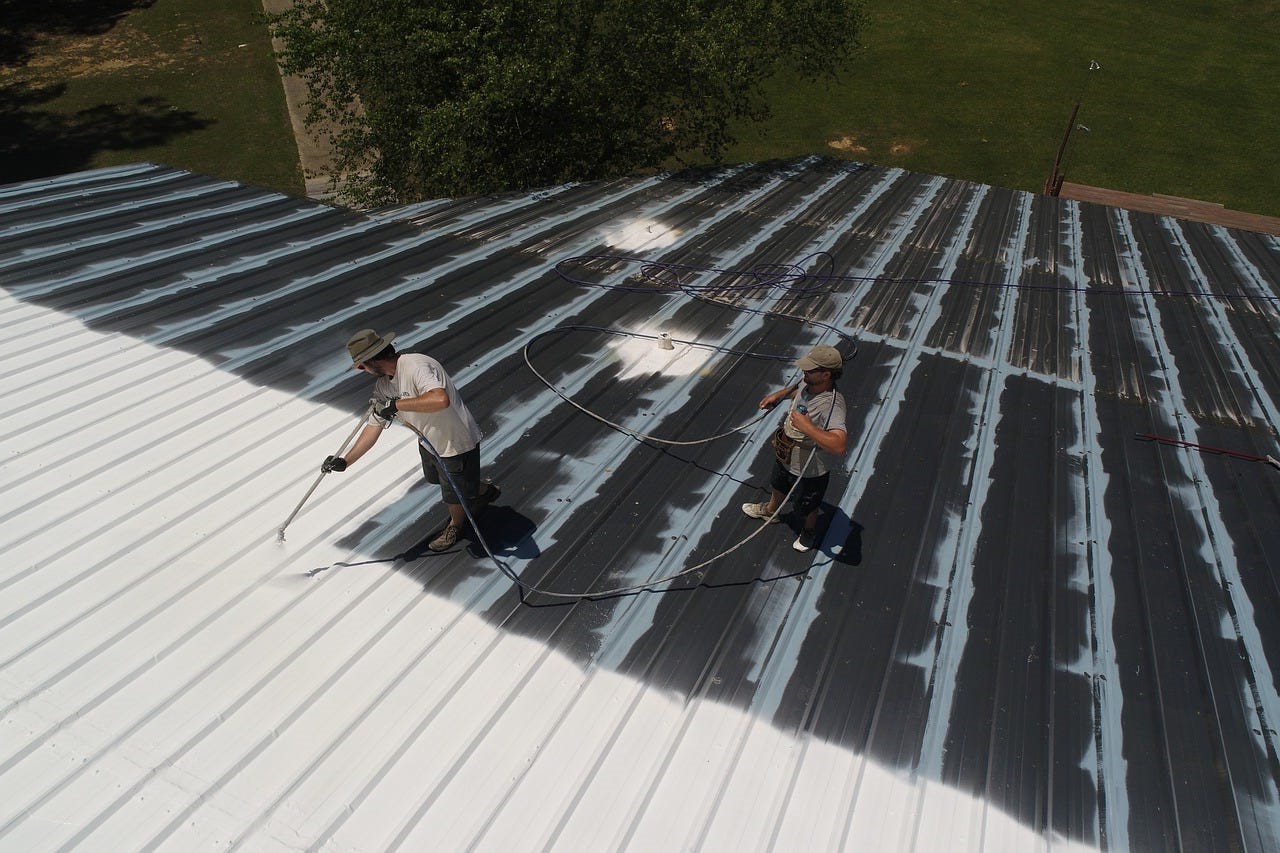
Detailed Steps to Coat Your Roof
Inspect the Roof
- Check for any damage or leaks.
- Clean off debris like leaves, branches, and dirt.
Clean the Roof
- Use a broom to sweep away loose dirt.
- Wash with a pressure washer or garden hose.
- Allow the roof to dry completely.
Repair Any Damage
- Patch holes or cracks with roofing cement.
- Replace any damaged shingles or tiles.
Apply Primer (if needed)
- Some coatings require a primer. Check the product instructions.
- Use a roller or brush to apply primer evenly.
- Let the primer dry as per the manufacturer's instructions.
Mix the Roof Coating
- Stir the coating thoroughly to ensure an even consistency.
- Use a drill with a mixing attachment for best results.
Apply the First Coat
- Pour the coating into a paint tray.
- Use a roller with an extension pole for easy application.
- Start at one end of the roof and work your way across.
- Apply the coating in thin, even layers.
Let the First Coat Dry
- Allow the first coat to dry completely. Check the product label for drying times.
Apply the Second Coat
- Repeat the application process for the second coat.
- Ensure even coverage and fill in any missed spots.
Inspect the Finished Roof
- Check for any missed areas or uneven spots.
- Touch up as needed.
Clean Up
- Clean your tools with water or the recommended solvent.
- Dispose of any leftover materials according to local regulations.
Helpful Tips and Tricks
Clean the Roof Thoroughly: Before applying any coating, make sure the roof is clean. Use a pressure washer to remove dirt, debris, and old paint. A clean surface ensures the coating adheres properly.
Choose the Right Coating: Different roofs need different coatings. Asphalt shingles, metal roofs, and flat roofs each have specific products. Read labels carefully to pick the right one.
Check the Weather: Apply roof coating on a dry, sunny day. Rain or high humidity can ruin the coating before it dries. Aim for a day with temperatures between 50°F and 90°F.
Use a Roller and Brush: For large areas, use a roller to apply the coating evenly. A brush helps with edges and tight spots. This ensures full coverage without missing any spots.
Apply Multiple Coats: One coat might not be enough. Apply at least two coats for better protection. Let the first coat dry completely before adding the second.
Inspect for Damage: Before coating, inspect the roof for damage. Fix any leaks, cracks, or loose shingles. Coating over damage won't solve the problem.
Wear Safety Gear: Roof work can be dangerous. Wear non-slip shoes, gloves, and safety goggles. Use a harness if the roof is steep.
Common Mistakes to Avoid:
- Skipping Cleaning: Dirt and debris prevent proper adhesion.
- Ignoring Weather: Applying in wet or humid conditions leads to poor results.
- Using Wrong Coating: Different materials need specific coatings.
- Not Fixing Damage: Coating over damage doesn't fix leaks or cracks.
Material Alternatives:
- Acrylic Coatings: Good for most roofs, easy to apply.
- Silicone Coatings: Best for flat roofs, excellent water resistance.
- Elastomeric Coatings: Flexible, great for roofs with minor movement or expansion.
Method Alternatives:
- Spray Application: Faster for large roofs but requires special equipment.
- Brush Only: Better for small areas or detailed work, though slower.
Using these tips, you can successfully coat your roof, extending its life and improving its appearance.
Estimating the Cost
Roof coating can protect your home and extend the life of your roof. Here’s a rough estimate of the total cost for materials and tools:
- Roof Coating: $100-$200 per 5-gallon bucket. You might need 2-3 buckets depending on roof size.
- Roof Cleaner: $20-$30 for a gallon.
- Brushes/Rollers: $10-$20 each. You’ll need a few.
- Extension Pole: $15-$30.
- Ladder: $100-$200 if you don’t already have one.
- Safety Gear: $20-$50 for gloves, goggles, and a mask.
- Caulking Gun and Sealant: $10-$20 for minor repairs.
Total estimated cost: $275-$570.
Budget-friendly alternatives:
- Roof Coating: Opt for a cheaper brand, around $80 per 5-gallon bucket.
- Brushes/Rollers: Use old ones if available.
- Ladder: Borrow from a neighbor or rent from a local store.
- Safety Gear: Use what you already have at home.
Using these alternatives, you can reduce costs to around $200-$350.
Different Ways to Customize
Materials: Instead of standard acrylic coatings, try silicone or polyurethane. Silicone works well in wet climates, while polyurethane offers extra durability.
Colors: Choose from a variety of colors. White reflects sunlight, keeping your home cooler. Darker colors absorb heat, which can be useful in colder climates.
Styles: Add a textured finish for a unique look. Use a roller with a pattern to create designs or a sprayer for a smooth, even coat.
Eco-Friendly Options: Opt for water-based coatings that are less harmful to the environment. Some brands offer low-VOC (volatile organic compounds) options.
Reflective Coatings: Use reflective or cool roof coatings to reduce energy costs. These coatings reflect more sunlight, keeping your home cooler.
Sealants: Add a sealant layer for extra protection. This can help extend the life of your roof and improve its resistance to weather.
Insulation: Combine your coating with insulating materials to improve energy efficiency. This can be especially useful in extreme climates.
Decorative Elements: Incorporate decorative elements like stencils or tape to create patterns or designs on your roof. This adds a personal touch.
Maintenance: Choose a coating that is easy to maintain. Some coatings require less frequent reapplication, saving time and effort.
Budget-Friendly Options: Look for cost-effective materials that still offer good protection. Some coatings are more affordable but still provide excellent coverage.
Application Tools: Use different tools like brushes, rollers, or sprayers depending on the finish you want. Each tool offers a different texture and coverage.
Weather Resistance: Select coatings designed for specific weather conditions. Some are better for UV protection, while others excel in waterproofing.
Thickness: Adjust the thickness of your coating based on your needs. Thicker coatings offer more protection but may take longer to apply and dry.
Combination Coatings: Mix different types of coatings for a custom solution. For example, combine reflective and waterproof coatings for dual benefits.
Eco-Friendly Tips
Eco-friendly materials for roof coating include recycled rubber, cool roof coatings, and water-based sealants. Recycled rubber can be sourced from old tires, providing a durable and sustainable option. Cool roof coatings, often made from white or reflective materials, help reduce heat absorption, lowering energy costs. Water-based sealants are less toxic than solvent-based ones, making them safer for the environment.
Methods to make your project greener involve reusing existing materials. If your current roof is in decent shape, consider applying a new coating over it instead of replacing the entire roof. This reduces waste and saves resources. Collect rainwater to clean your roof before applying the coating, conserving water.
When purchasing materials, look for products with recycled content or those certified by environmental organizations. This ensures you are choosing more sustainable options. Use solar-powered tools if possible, reducing your carbon footprint during the project.
Finally, properly dispose of any waste. Take leftover materials to recycling centers or reuse them for other projects. This minimizes landfill contributions and promotes a circular economy.
Your Roof's New Best Friend
Roof coating can extend your roof's life, save on energy bills, and protect against leaks. By following the steps, you can tackle this project confidently. Remember to clean the surface thoroughly, repair any damage, and apply the coating evenly. Use the right tools and materials for the job. Don't rush; take your time to ensure a smooth, even coat. Regular maintenance will keep your roof in top shape for years. If you ever feel unsure, don't hesitate to consult a professional. DIY projects can be rewarding, but safety and quality should always come first. Happy roofing!
What materials do I need for roof coating?
You'll need roof coating, a paint roller, brushes, cleaning supplies, and protective gear like gloves and goggles.
How do I prepare my roof before coating?
Clean the roof thoroughly, removing dirt, debris, and any mold. Repair any cracks or damaged areas before applying the coating.
Can I coat any type of roof?
Most roofs can be coated, but it's best for flat or low-slope roofs. Check the manufacturer's guidelines for your specific roof type.
How many coats should I apply?
Typically, two coats are recommended. The first coat acts as a primer, and the second provides durability and protection.
How long does it take for the coating to dry?
Drying time varies, but usually, it takes about 24-48 hours. Weather conditions like humidity and temperature can affect drying time.
How often should I reapply roof coating?
Reapply every 5-10 years depending on the product and climate. Regular inspections can help determine when a new coat is needed.
Is roof coating environmentally friendly?
Many roof coatings are eco-friendly, reducing energy costs by reflecting sunlight and lowering roof temperature. Check for low-VOC options for a greener choice.