
Home>Home & Furniture>Roof>How to Build a DIY Van Roof Extension
Roof
How to Build a DIY Van Roof Extension
Published: August 17, 2024
Learn how to build a DIY van roof extension with our step-by-step guide. Enhance your van's space and functionality with expert tips and detailed instructions.
(Many of the links in this article redirect to a specific reviewed product. Your purchase of these products through affiliate links helps to generate commission for Twigandthistle.com, at no extra cost. Learn more)
Building a DIY van roof extension can transform your vehicle into a more spacious and comfortable living space. Whether you're a weekend warrior or planning a long-term road trip, adding extra headroom makes a huge difference. With some basic tools and materials, you can tackle this project and create a custom fit that suits your needs. This guide will walk you through the process, providing clear steps and tips along the way. Get ready to roll up your sleeves and make your van the perfect adventure mobile.
Getting Ready for Your Project
Measure: Start by measuring the van's roof. Ensure you have accurate dimensions for the extension.
Materials: Gather all necessary materials like plywood, metal brackets, screws, sealant, and insulation. Double-check you have everything before starting.
Tools: Collect tools such as a saw, drill, measuring tape, screwdriver, and safety gear like gloves and goggles.
Workspace Setup: Clear a spacious area to work. Ensure it’s well-lit and ventilated. Lay down a tarp to protect the ground.
Safety Tips:
- Wear Gloves to protect hands from sharp edges.
- Goggles: Always wear goggles when cutting or drilling.
- Stable Ladder: Use a stable ladder to reach the roof safely.
Preliminary Tasks:
- Clean Roof: Clean the van's roof thoroughly to ensure a good seal.
- Marking: Mark the areas where you will cut or drill.
- Check Weather: Ensure good weather conditions to avoid working in rain or strong winds.
Plan: Sketch out your extension plan. Include measurements and where each piece will go.
Test Fit: Before final assembly, do a test fit of all parts to ensure everything aligns correctly.
Materials and Tools Checklist
Plywood Sheets: Used for the main structure of the roof extension. Choose sturdy, weather-resistant plywood.
2x4 Lumber: Provides support and framing for the extension. Essential for creating a strong base.
Metal Brackets: Connects the plywood and lumber securely. Ensures stability and durability.
Screws and Nails: Fasteners for assembling the plywood and lumber. Use galvanized screws to prevent rust.
Sealant: Waterproofs the joints and seams. Keeps the interior dry and protected from the elements.
Insulation: Keeps the van warm in winter and cool in summer. Foam board insulation is a good choice.
Roofing Material: Covers the top of the extension. Options include metal sheets or rubber roofing.
Hinges: Allows the roof extension to open and close. Heavy-duty hinges are recommended for strength.
Weatherstripping: Seals gaps around the edges. Prevents water and air leaks.
Paint or Stain: Protects the wood from moisture and UV rays. Choose exterior-grade products.
Measuring Tape: Ensures accurate measurements. Crucial for cutting materials to the right size.
Circular Saw: Cuts plywood and lumber. A must-have for precise cuts.
Drill: Makes holes for screws and bolts. Also useful for driving screws into place.
Screwdriver: Tightens screws. A power screwdriver can save time and effort.
Hammer: Drives nails into the wood. Also useful for adjusting and aligning materials.
Level: Ensures the extension is even and straight. Important for structural integrity.
Safety Gear: Includes gloves, goggles, and a dust mask. Protects you while working.
Ladder: Helps reach the top of the van. Necessary for installing the roof extension.
Clamps: Holds materials in place while you work. Keeps everything steady during assembly.
Pencil: Marks measurements and cutting lines. Essential for accuracy.
Required Skills and Time Commitment
Skill Level: Advanced
Time Required: Approximately 20-30 hours
Important Steps:
- Planning and Measuring: 2-3 hours
- Cutting the Roof: 3-4 hours
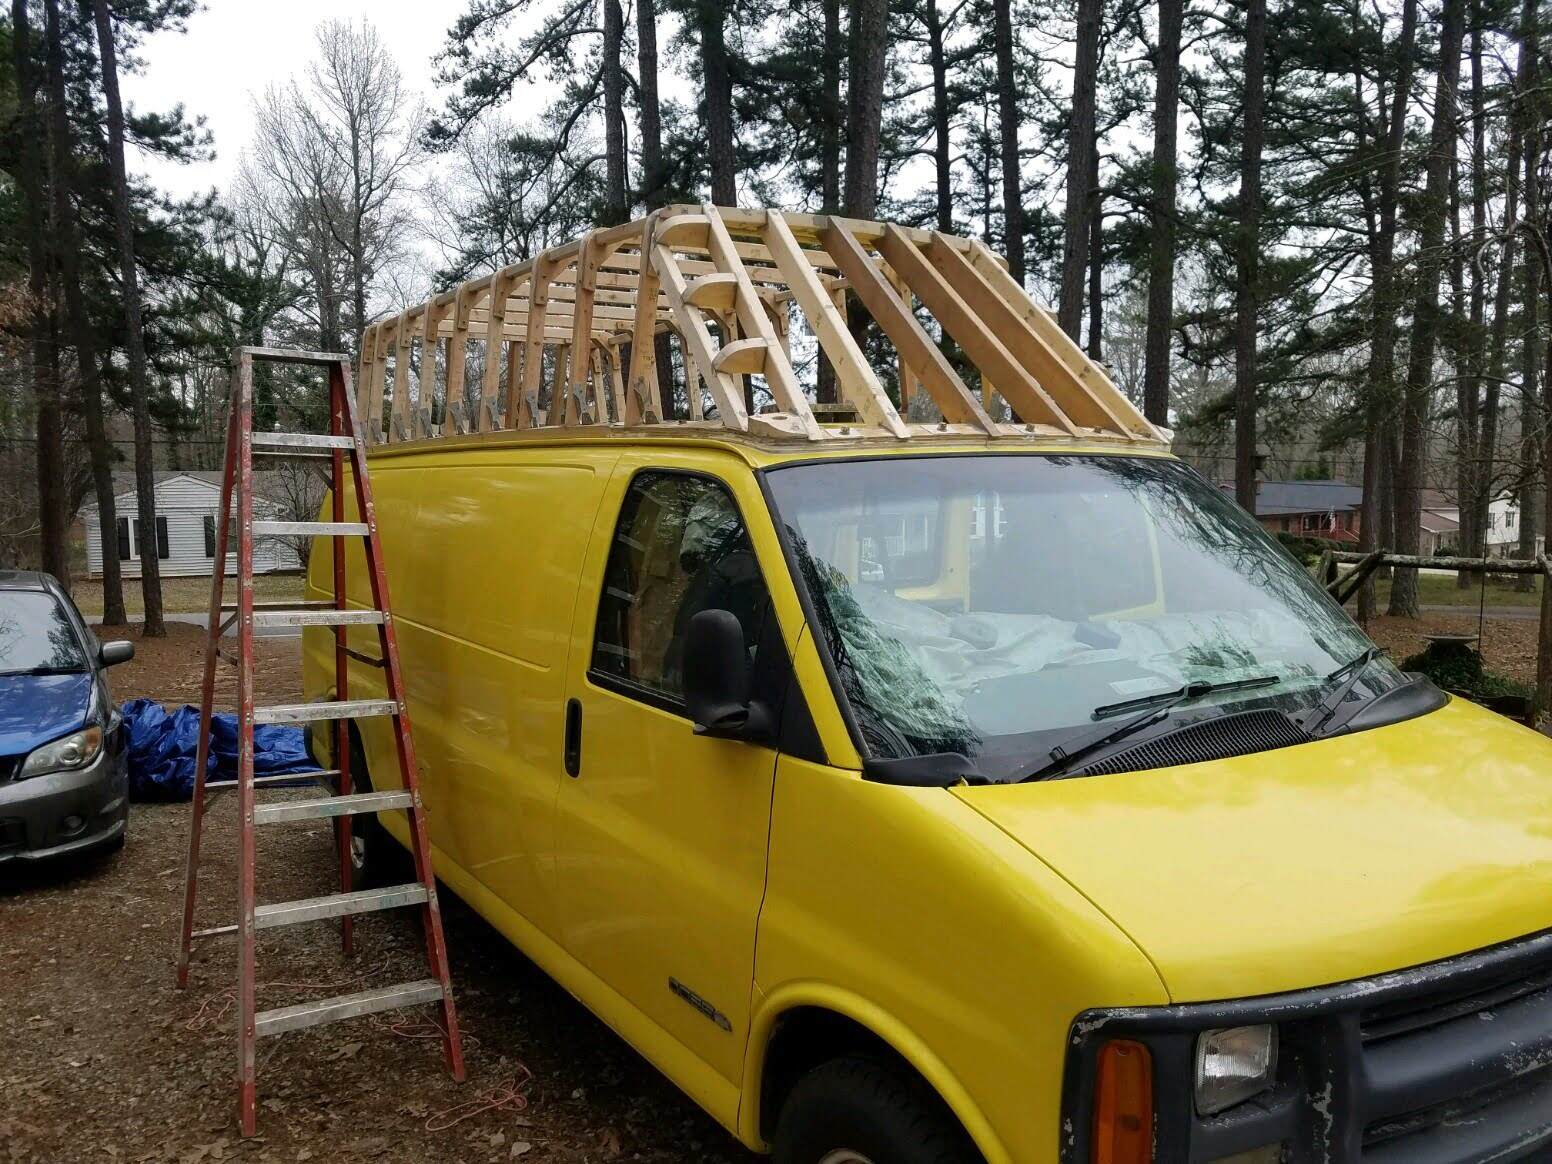
- Framing the Extension: 5-6 hours
- Installing Insulation: 2-3 hours
- Wiring and Plumbing (if needed): 4-5 hours
- Installing the Roof Panels: 3-4 hours
- Sealing and Waterproofing: 1-2 hours
- Finishing Touches: 2-3 hours
Detailed Steps to Follow
Gather Materials and Tools
- Plywood sheets
- Metal brackets
- Screws and bolts
- Sealant
- Measuring tape
- Saw
- Drill
- Screwdriver
- Ladder
Measure the Roof
- Use measuring tape to determine the length and width of the van roof.
- Note down the measurements for accuracy.
Cut the Plywood
- Mark the plywood sheets according to the roof measurements.
- Use a saw to cut the plywood to the required size.
Attach Metal Brackets
- Place metal brackets along the edges of the plywood.
- Secure brackets with screws using a drill.
Position the Plywood on the Roof
- With assistance, lift the plywood onto the van roof.
- Align it properly with the roof edges.
Secure the Plywood
- Drill holes through the plywood and into the van roof.
- Insert bolts through the holes and tighten with a screwdriver.
Seal the Edges
- Apply sealant along the edges where the plywood meets the van roof.
- Ensure there are no gaps to prevent water leakage.
Test for Stability
- Check the extension for any movement or instability.
- Tighten any loose bolts or screws.
Finish Up
- Clean up any excess sealant.
- Ensure all tools and materials are stored properly.
Helpful Tips and Tricks
Measure twice, cut once. Always double-check your measurements before cutting materials. This saves time and prevents waste.
Use lightweight materials like aluminum or fiberglass. These are easier to handle and won't add too much weight to your van.
Pre-drill holes before screwing anything into place. This helps avoid splitting the wood or damaging other materials.
Seal all seams with waterproof sealant. This prevents leaks and keeps your van dry.
Use a template for cutting out windows or vents. This ensures uniformity and a professional look.
Install insulation in the roof extension. This helps regulate temperature and reduces noise.
Common mistakes to avoid include overloading the roof. Too much weight can affect your van's handling and fuel efficiency. Skipping the waterproofing step can lead to leaks and water damage. Not checking local regulations might result in fines or having to redo your work.
For alternatives, consider using polycarbonate panels instead of traditional roofing materials. These are lightweight and durable. Instead of screws, use rivets for a more secure hold. If you don't have access to power tools, hand tools like a manual saw and screwdriver can work, though they require more effort.
Budgeting for Your Van Roof Extension
Plywood: $50-$100 for 4-6 sheets
2x4 Lumber: $30-$50 for 10 pieces
Insulation: $20-$40 for foam boards
Roofing Material: $100-$200 for metal or fiberglass
Sealant: $10-$20 for waterproof sealant
Screws and Nails: $10-$15 for a box
Hinges and Latches: $20-$30 for a set
Paint or Finish: $20-$40 for exterior paint
Tools:
- Saw: $50-$100 (or borrow)
- Drill: $30-$60 (or borrow)
- Measuring Tape: $5-$10
- Level: $10-$20
- Safety Gear: $15-$30 for goggles and gloves
Total Cost: $360-$715
Budget-Friendly Alternatives:
- Use reclaimed wood instead of new lumber: Save $20-$30
- Borrow or rent tools: Save $80-$160
- Look for discounted or second-hand roofing materials: Save $50-$100
- Use leftover paint or buy smaller cans: Save $10-$20
Creative Variations and Customizations
Materials: Instead of using plywood, consider aluminum for a lighter, more durable option. Fiberglass can also provide a sleek, aerodynamic look.
Colors: Paint the extension to match your van’s color for a seamless appearance. Use bright colors like yellow or red to make your van stand out. Camouflage patterns can give an adventurous vibe.
Styles: Add windows to the extension for more natural light. Install skylights for stargazing at night. Use pop-up roofs to create extra headroom when parked.
Interior: Line the inside with insulation for better temperature control. Add LED lighting for a modern touch. Use wood paneling for a cozy cabin feel.
Roof Rack: Install a roof rack on top of the extension for extra storage. Add solar panels to power your gadgets on the go.
Ventilation: Include vent fans to keep air circulating. Use louvered vents for a classic look.
Accessories: Attach an awning for shade during outdoor activities. Add bike racks or kayak mounts for adventure gear.
Eco-Friendly Building Tips
Reclaimed Wood: Use old pallets or barn wood. Sand and treat them to ensure durability.
Recycled Metal: Look for scrap metal at salvage yards. Clean and cut it to fit your needs.
Insulation: Choose eco-friendly options like sheep wool or recycled denim. Both are effective and sustainable.
Solar Panels: Install solar panels to power your van. This reduces reliance on fossil fuels.
Low-VOC Paint: Use paint with low volatile organic compounds. It’s better for your health and the environment.
Natural Sealants: Opt for sealants made from natural ingredients like beeswax or linseed oil.
Energy-Efficient Windows: Install double-glazed windows. They help maintain temperature and reduce energy use.
Recycled Plastic: Use recycled plastic for parts like roof racks. It’s durable and keeps plastic out of landfills.
Bamboo: Consider bamboo for interior finishes. It’s fast-growing and sustainable.
LED Lighting: Use LED lights. They consume less power and last longer.
Rainwater Collection: Set up a system to collect rainwater. Use it for washing or other non-drinking purposes.
Recycled Fasteners: Use screws and bolts made from recycled materials. They’re just as strong and eco-friendly.
Eco-Friendly Adhesives: Choose adhesives with low environmental impact. Look for water-based options.
Upcycled Furniture: Repurpose old furniture for storage or seating. It adds character and reduces waste.
Your Van, Your Rules
Building a DIY van roof extension isn't just about adding space; it's about personalizing your ride. You've learned how to measure, cut, and install materials. You've tackled insulation, weatherproofing, and finishing touches. Now, your van's ready for any adventure. Remember, every project has its hiccups. Don't sweat the small stuff. Each mistake is a lesson, making you a better DIYer. Keep your tools handy, stay patient, and enjoy the process. Your van is now a reflection of your hard work and creativity. Whether you're hitting the road for a weekend getaway or living the van life full-time, your custom roof extension will make every trip more comfortable. So, get out there and enjoy the fruits of your labor. Happy travels!
What materials do I need for a DIY van roof extension?
You'll need plywood, metal brackets, screws, sealant, insulation, and roofing material like fiberglass or aluminum.
How long does it take to build a van roof extension?
It usually takes about a week if you're working a few hours each day. Plan for extra time if you're new to DIY projects.
Do I need any special tools?
Basic tools like a drill, saw, measuring tape, and screwdriver should suffice. A jigsaw and caulking gun might also come in handy.
Can I do this project alone?
It's possible, but having a friend or family member to help will make things easier and faster.
How do I ensure the extension is waterproof?
Use high-quality sealant around all seams and joints. Apply weatherproofing tape and make sure your roofing material is properly installed.
Will this affect my van's fuel efficiency?
Yes, adding an extension can increase wind resistance, which might slightly reduce fuel efficiency. Keep this in mind when planning your design.
Do I need to inform my insurance company?
Definitely. Modifying your van can affect your insurance policy, so it's best to let them know about any changes.