
Home>Home & Furniture>Roof>How to Build a DIY Rooftop Tent
Roof
How to Build a DIY Rooftop Tent
Published: August 21, 2024
Learn how to build a DIY rooftop tent with our step-by-step guide. Perfect for camping enthusiasts, this project combines adventure and craftsmanship. Start your build today!
(Many of the links in this article redirect to a specific reviewed product. Your purchase of these products through affiliate links helps to generate commission for Twigandthistle.com, at no extra cost. Learn more)
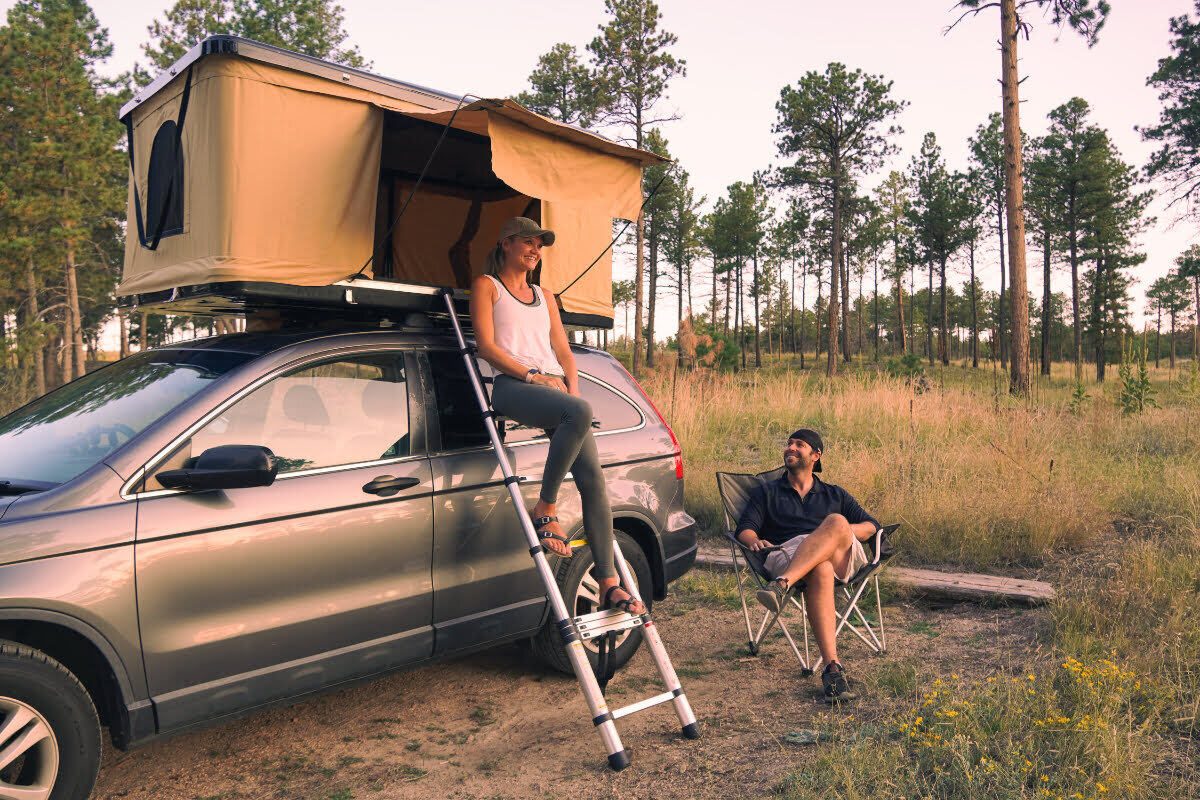
Creating your own rooftop tent offers both adventure and convenience for any outdoor enthusiast. Building one yourself not only saves money but also allows for customization to suit specific needs. With some basic tools, materials, and a bit of effort, you can transform your vehicle into a cozy mobile shelter. No need for expert carpentry skills; just follow simple steps and you’ll have a sturdy, reliable tent for camping trips. This guide will introduce the essentials to get started, ensuring you can enjoy nature with comfort and ease. Ready to elevate your camping game? Let's get to work!
Getting Ready for Your Rooftop Tent Project
Gather Materials: Collect plywood, aluminum poles, hinges, screws, waterproof fabric, and a mattress. Make sure everything is ready before starting.
Safety Gear: Wear gloves, safety glasses, and a dust mask. Keep a first aid kit nearby.
Workspace Setup: Clear a large, flat area. Ensure good lighting and ventilation. Lay out tools and materials for easy access.
Measure Your Car Roof: Measure the dimensions of your car roof. This will help in cutting the plywood to the correct size.
Cut Plywood: Use a saw to cut the plywood according to your measurements. Sand the edges to avoid splinters.
Assemble Frame: Attach aluminum poles to the plywood using screws and hinges. Make sure the frame is sturdy.
Waterproof Fabric: Cut the fabric to fit the frame. Use waterproof adhesive to attach it securely.
Install Mattress: Place the mattress inside the tent. Ensure it fits snugly.
Test Stability: Before mounting on the car, test the tent on the ground. Check for any weak points.
Mount on Car: Use strong straps to secure the tent to your car roof. Double-check all connections.
Final Safety Check: Inspect the entire setup. Make sure everything is tight and secure before driving.
Essential Materials and Tools
- Plywood Sheets: Used for the base and platform of the tent. Choose sturdy, weather-resistant plywood.
- Aluminum Tubing: Provides a lightweight yet strong frame for the tent structure.
- Tent Fabric: Waterproof and durable fabric to cover the tent. Canvas or heavy-duty nylon works well.
- Foam Mattress: Adds comfort for sleeping. Ensure it fits the dimensions of your tent base.
- Hinges: Connects the base to the platform, allowing the tent to fold and unfold.
- Latches: Keeps the tent securely closed when not in use.
- Bolts and Screws: Essential for assembling the frame and attaching the fabric.
- Weather Stripping: Seals gaps to keep out rain and wind.
- Rope or Bungee Cords: Helps secure the tent fabric to the frame.
- Sewing Machine: Needed for stitching the tent fabric.
- Drill: For making holes and driving screws.
- Saw: Cuts plywood and aluminum tubing to size.
- Measuring Tape: Ensures accurate measurements for cutting and assembly.
- Wrench Set: Tightens bolts and screws.
- Sandpaper: Smooths rough edges on the plywood.
- Paint or Sealant: Protects the plywood from weather damage.
- Clamps: Holds pieces in place during assembly.
- Utility Knife: Cuts fabric and weather stripping.
- Marker or Pencil: Marks measurements and cutting lines.
- Safety Gear: Includes gloves, goggles, and a dust mask for protection during construction.
Required Skills and Time Commitment
Skill Level: Intermediate
Time Required: 2-3 weekends
Important Steps:
- Gather Materials: Plywood, aluminum, hinges, bolts, waterproof fabric, mattress.
- Build the Base: Cut plywood to size, attach aluminum frame.
- Construct the Tent Frame: Use aluminum for lightweight support.
- Attach Hinges: Secure the tent to the base with heavy-duty hinges.
- Add Waterproof Fabric: Cover the frame, ensuring no gaps.
- Install Mattress: Place inside for comfort.
- Mount on Vehicle: Securely attach the tent to your car roof rack.
Tips:
- Safety First: Always wear protective gear.
- Measure Twice, Cut Once: Ensure accuracy.
- Test Stability: Before use, check for any weak points.
Building Your Rooftop Tent: Step-by-Step
Gather Materials
- Plywood (for the base)
- Aluminum or steel tubing (for the frame)
- Canvas or heavy-duty fabric (for the tent)
- Hinges
- Screws, bolts, and nuts
- Mattress or sleeping pad
- Waterproof sealant
- Drill, saw, and other basic tools
Build the Base
- Cut plywood to fit the roof rack dimensions.
- Sand edges to prevent splinters.
- Apply waterproof sealant to protect against moisture.
Construct the Frame
- Measure and cut tubing to form the tent frame.
- Assemble the frame using bolts and nuts.
- Attach hinges to allow the frame to fold.
Attach the Base to the Roof Rack
- Secure the plywood base to the roof rack using bolts.
- Ensure it’s tightly fastened to avoid movement.
Install the Tent Fabric
- Cut fabric to fit the frame dimensions.
- Sew edges to prevent fraying.
- Attach fabric to the frame using screws or strong adhesive.
Add the Mattress
- Place the mattress or sleeping pad on the plywood base.
- Secure it with straps to prevent shifting.
Test the Tent
- Open and close the tent to ensure smooth operation.
- Check for any loose parts or areas needing reinforcement.
Final Adjustments
- Make any necessary adjustments for comfort and stability.
- Apply additional waterproof sealant if needed.
Enjoy Your Rooftop Tent
- Pack camping gear.
- Head out for an adventure with your new rooftop tent!
Helpful Tips and Tricks
Measure twice, cut once. Always double-check your measurements before cutting any materials. This saves time and reduces waste.
Use lightweight materials. Aluminum and marine plywood are great options. They’re strong but won’t add too much weight to your vehicle.
Waterproofing is key. Use a high-quality waterproof sealant on all seams and edges. This keeps your tent dry during rain.
Ventilation matters. Install small vents or mesh windows to allow airflow. This prevents condensation inside the tent.
Secure your tent properly. Use heavy-duty bolts and brackets to attach the tent to your roof rack. Safety first!
Test before you travel. Set up the tent in your driveway to ensure everything works. Make adjustments as needed.
Common mistakes to avoid:
- Skipping the waterproofing. This leads to leaks and mold.
- Using heavy materials. This can damage your vehicle’s roof and affect gas mileage.
- Ignoring weight limits. Check your vehicle’s roof load capacity to avoid accidents.
Alternatives for materials or methods:
- Instead of marine plywood, consider fiberglass. It’s durable and lightweight.
- For waterproofing, use silicone-based sealants. They’re more flexible and last longer.
- Instead of bolts, use quick-release clamps. They make it easier to remove the tent when not in use.
Estimating the Cost
Plywood: $50-$100 for a 4x8 sheet, depending on thickness and quality.
Aluminum or Steel Tubing: $50-$150, depending on the amount and type.
Tent Fabric: $100-$200 for waterproof, durable fabric.
Foam Mattress: $50-$100 for a basic twin-size foam mattress.
Hinges and Brackets: $20-$50 for heavy-duty ones.
Bolts, Nuts, and Screws: $10-$30 for a variety pack.
Weather Stripping: $10-$20 for sealing edges.
Paint or Sealant: $20-$40 for protecting wood and metal.
Tools: If you don't have them, a drill ($30-$100), saw ($50-$150), and measuring tape ($5-$15).
Total Cost: Roughly $345-$955.
Budget-Friendly Alternatives:
- Use recycled wood or scrap metal to save on materials.
- Look for discount fabric or use a heavy-duty tarp.
- Buy a used mattress or use camping pads.
- Borrow or rent tools from friends or a local tool library.
Customizing Your Rooftop Tent
Materials: Instead of using plywood for the base, consider aluminum for a lighter, rust-resistant option. For the tent fabric, canvas offers durability, while nylon is lighter and more water-resistant.
Colors: Choose earth tones like green or brown to blend with nature. For a more vibrant look, use bright colors like red or blue. Reflective strips can add visibility at night.
Styles: Opt for a pop-up design for quick setup. A fold-out style provides more space but takes longer to assemble. Adding windows with mesh screens improves ventilation and keeps bugs out.
Additional Features: Install solar-powered lights for nighttime use. Add storage pockets inside for organizing gear. Consider a built-in mattress for extra comfort.
Mounting Options: Use universal roof racks for easy attachment to different vehicles. Custom brackets can provide a more secure fit.
Weatherproofing: Apply a waterproof coating to the fabric. Use seam sealant to prevent leaks. Adding a rainfly offers extra protection during heavy rain.
Ventilation: Include ventilation flaps to reduce condensation. Adding a small fan can improve airflow on hot nights.
Insulation: Use thermal liners for colder climates. Reflective insulation panels can keep the interior cooler in hot weather.
Entry Points: A side entrance can be more convenient than a front one. Adding a ladder with non-slip steps ensures safe access.
Flooring: Consider foam tiles for a softer, insulated floor. Rubber mats provide durability and are easy to clean.
Eco-Friendly Building Tips
Reclaimed wood can be used for the base and frame. Look for old pallets or leftover lumber from other projects. Recycled metal pipes or brackets can provide sturdy support.
For the tent fabric, consider using upcycled canvas from old tents, tarps, or even heavy-duty curtains. Natural fibers like cotton or hemp are also eco-friendly choices.
Use eco-friendly paint or sealant to protect the wood. These products have fewer harmful chemicals and are better for the environment.
Solar-powered lights can be added for illumination without relying on batteries or electricity.
When securing the tent to your vehicle, use recycled straps or ropes. Old seat belts or climbing ropes can be repurposed for this.
Lastly, insulate the tent with recycled materials like old blankets or foam padding to keep it warm and cozy.
Your Adventure Awaits
Building a DIY rooftop tent isn't just about saving money. It's about creating something unique that fits your needs. You've learned how to choose the right materials, measure accurately, and assemble the parts. Now, it's time to put those skills to the test. Don't worry about making mistakes; they're part of the learning process. Just keep safety in mind, double-check your work, and enjoy the journey. Once your tent is ready, you'll have a cozy spot for your adventures. Imagine the sunsets you'll watch, the stars you'll sleep under, and the memories you'll make. So grab your tools, gather your materials, and get started. Your next adventure is just a few steps away. Happy building!
What materials do I need to build a DIY rooftop tent?
You’ll need plywood, aluminum or steel tubing, canvas or heavy-duty fabric, hinges, bolts, screws, and weatherproofing materials. Don’t forget tools like a drill, saw, and measuring tape.
How much will it cost to build a rooftop tent?
Costs can vary, but expect to spend around $200 to $500 on materials. It’s cheaper than buying a pre-made tent, which can cost over $1,000.
How long will it take to build?
Depending on your skill level and tools, it might take a weekend or a few days. Plan for at least 10-20 hours of work.
Is it safe to sleep in a DIY rooftop tent?
Yes, if you use sturdy materials and secure it properly to your vehicle. Make sure the weight is evenly distributed and the tent is weatherproof.
Can I use any vehicle for a rooftop tent?
Most vehicles with a roof rack can support a rooftop tent. Check your vehicle’s weight limit and make sure the rack is secure.
How do I weatherproof my DIY rooftop tent?
Use waterproof fabric for the tent and seal all seams with weatherproof tape or sealant. Apply a waterproof coating to the fabric for extra protection.
What tools will I need for this project?
Basic tools like a drill, saw, measuring tape, screwdriver, and wrench are essential. A sewing machine might be handy for the fabric parts.