
Home>Home & Furniture>Kitchen>How to Create DIY Resin Flooring
Kitchen
How to Create DIY Resin Flooring
Published: August 2, 2024
Learn how to create stunning DIY resin flooring with our step-by-step guide. Transform your space with durable, stylish, and easy-to-maintain resin floors.
(Many of the links in this article redirect to a specific reviewed product. Your purchase of these products through affiliate links helps to generate commission for Twigandthistle.com, at no extra cost. Learn more)
Creating DIY resin flooring can transform a space with its glossy finish and durability. This project may seem tricky, but with some patience and the right materials, anyone can achieve professional-looking results. Resin floors are perfect for kitchens, garages, basements, or any area needing a tough, attractive surface. Besides looking great, resin floors are easy to clean and maintain. This guide will take you through each step, ensuring your new floor turns out just as you envision. Ready to dive in? Let’s get started on making your home shine!
Getting Ready for Your Resin Flooring Project
Gather Materials: Get resin, hardener, mixing tools, a roller, and protective gear like gloves and goggles.
Clear the Area: Remove furniture, rugs, and any obstacles. Sweep and mop the floor to ensure it’s clean.
Repair Cracks: Fill any cracks or holes in the floor with a suitable filler. Let it dry completely.
Sand the Surface: Use a sander to roughen the floor. This helps the resin stick better.
Ventilate the Room: Open windows and doors. Good airflow is important when working with resin.
Set Up Workspace: Lay down plastic sheets to protect nearby surfaces. Keep all tools within reach.
Mix Resin and Hardener: Follow the instructions on the resin kit. Mix thoroughly to avoid bubbles.
Apply Primer: Roll on a primer layer. This helps the resin adhere to the floor.
Wear Safety Gear: Put on gloves, goggles, and a mask. Resin fumes can be harmful.
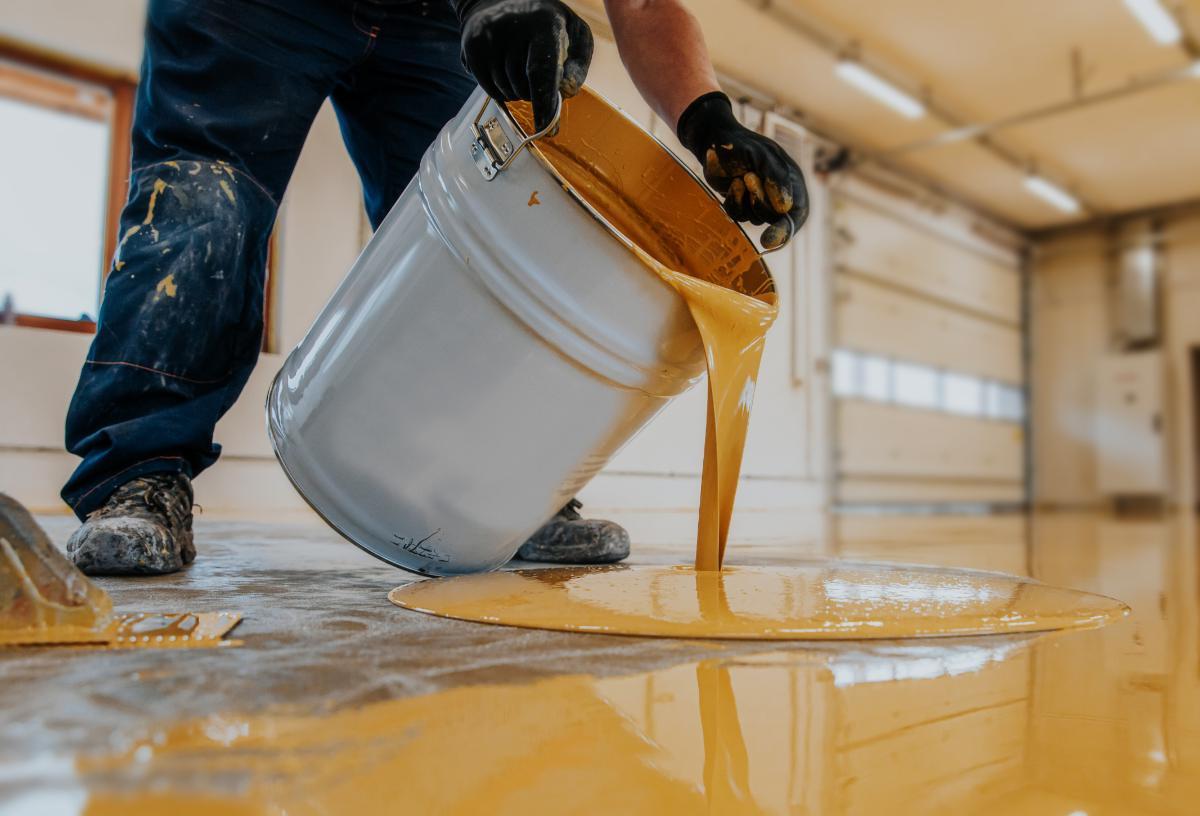
Pour and Spread Resin: Pour the mixed resin onto the floor. Use a roller to spread it evenly.
Let It Cure: Allow the resin to cure for the recommended time. Keep the area dust-free during this period.
Inspect and Finish: Check for any missed spots or bubbles. Apply a second coat if needed.
Essential Materials and Tools
Epoxy Resin: This is the main material for the flooring. It comes in two parts: resin and hardener. When mixed, it creates a strong, durable surface.
Primer: A base coat that helps the resin stick to the floor. It ensures a smooth, even application.
Concrete Patch: Used to fill any cracks or holes in the floor before applying the primer and resin.
Mixing Buckets: Needed for combining the resin and hardener. Make sure they are clean and sturdy.
Stirring Sticks: Used to mix the resin and hardener thoroughly. Wooden or plastic sticks work well.
Paint Roller and Tray: For applying the primer and resin evenly across the floor. A roller with a long handle makes the job easier.
Squeegee: Helps spread the resin evenly and remove any air bubbles.
Protective Gear: Gloves, goggles, and a mask protect you from fumes and spills.
Painter’s Tape: Used to mark off areas and create clean edges.
Sandpaper: For smoothing out any rough spots on the floor before applying the primer.
Vacuum Cleaner: Ensures the floor is dust-free before starting the project.
Heat Gun: Helps remove air bubbles from the resin after it’s applied.
Measuring Cups: Ensures the correct ratio of resin to hardener.
Drop Cloths: Protects surrounding areas from spills and drips.
Level: Ensures the floor is even before applying the resin.
Each item plays a crucial role in creating a smooth, durable resin floor.
Required Skills and Time Commitment
Skill Level: Intermediate
Time Required: 2-3 days
Preparation: 4-6 hours
- Clean and level the floor.
- Apply a primer coat.
Mixing Resin: 1-2 hours
- Follow instructions for mixing resin and hardener.
Pouring Resin: 2-3 hours
- Pour and spread the resin evenly.
Curing Time: 24-48 hours
- Allow the resin to fully cure before use.
Detailed Steps for Installation
Prepare the Area
- Clean the floor thoroughly. Remove any dirt, dust, or debris.
- Repair any cracks or holes using a suitable filler.
- Sand the floor to ensure a smooth surface.
- Vacuum and mop the floor to remove any remaining dust.
Apply Primer
- Mix the primer according to the manufacturer's instructions.
- Pour the primer onto the floor.
- Spread the primer evenly using a roller or brush.
- Allow the primer to dry completely, usually 24 hours.
Mix the Resin
- Read the resin instructions carefully.
- Combine the resin and hardener in a clean bucket.
- Stir the mixture thoroughly for the recommended time.
Pour the Resin
- Start at one corner of the room.
- Pour the mixed resin onto the floor.
- Spread the resin evenly using a notched squeegee.
- Use a roller to remove any bubbles.
Add Decorative Elements (Optional)
- Sprinkle decorative flakes or glitter onto the wet resin.
- Use a roller to press the elements into the resin.
Allow to Cure
- Let the resin floor cure for at least 24-48 hours.
- Avoid walking on the floor during this time.
Apply Topcoat
- Mix the topcoat according to the instructions.
- Pour the topcoat onto the cured resin floor.
- Spread the topcoat evenly with a roller.
- Allow the topcoat to dry completely, usually 24 hours.
Final Touches
- Inspect the floor for any imperfections.
- Sand any rough spots lightly if needed.
- Clean the floor with a damp mop.
Your DIY resin flooring is now complete!
Helpful Tips and Tricks
Prepare the Surface: Clean the floor thoroughly. Remove any dust, grease, or old paint. Use a vacuum and mop for best results.
Use a Primer: Apply a primer to help the resin stick better. Let it dry completely before moving on.
Mix Resin Properly: Follow the instructions on the resin packaging. Mix the resin and hardener well to avoid sticky spots.
Work Quickly: Resin can harden fast. Pour and spread it evenly using a trowel or roller.
Use a Heat Gun: Remove air bubbles with a heat gun or torch. Hold it a few inches above the surface and move it in a sweeping motion.
Add Color or Glitter: Mix in pigments or glitter for a unique look. Do this before pouring the resin.
Protect the Edges: Use painter's tape to protect walls and edges from spills.
Wear Safety Gear: Gloves, goggles, and a mask protect you from fumes and sticky resin.
Ventilation: Work in a well-ventilated area to avoid inhaling fumes.
Temperature Control: Resin cures best at room temperature. Avoid working in very hot or cold conditions.
Common Mistakes to Avoid:
Skipping Surface Prep: Not cleaning the floor well can cause the resin to peel.
Incorrect Mixing: Not following the resin-to-hardener ratio can lead to a sticky or brittle floor.
Ignoring Bubbles: Not using a heat gun can leave air bubbles in the resin.
Rushing the Process: Not letting each layer dry properly can ruin the finish.
Alternatives for Materials or Methods:
Epoxy Paint: If resin seems too tricky, epoxy paint is easier to apply and still durable.
Self-Leveling Compound: Use this instead of resin for a smooth, level surface.
Vinyl Flooring: For a quicker option, consider peel-and-stick vinyl tiles. They are easy to install and come in many designs.
Estimating the Cost
Epoxy Resin: $100-$150 for a 3-gallon kit. This covers about 100-150 square feet.
Primer: $30-$50 per gallon. One gallon covers around 200-300 square feet.
Concrete Patch: $20-$30 for a 10-pound bag. Needed for repairing cracks or holes.
Mixing Buckets: $10-$20 for a set of 5.
Paint Rollers and Brushes: $15-$25 for a set.
Painter's Tape: $5-$10 per roll.
Protective Gear: $20-$30 for gloves, goggles, and masks.
Sanding Tools: $30-$50 for a basic orbital sander. Sandpaper costs $10-$15 for a pack.
Cleaning Supplies: $10-$20 for degreasers and rags.
Budget-Friendly Alternatives:
- Epoxy Resin: Consider smaller kits or lower-cost brands, around $70-$100.
- Mixing Buckets: Use old containers or buy from a dollar store.
- Sanding Tools: Rent from a local hardware store for about $10-$15 per day.
Total estimated cost: $240-$400. Budget-friendly options can reduce this to around $200-$300.
Creative Variations and Customizations
Colors: Choose from a wide range of pigments to mix into the resin. Go for bold colors like red or blue for a striking look, or neutral tones like beige or gray for a more subtle appearance. You can even create marble effects by swirling two or more colors together.
Textures: Add texture by sprinkling decorative flakes or glitter into the resin before it sets. For a more rugged look, mix in sand or small pebbles. This not only changes the appearance but also adds grip to the floor.
Patterns: Use stencils or tape to create geometric patterns or designs on the floor. Pour different colored resins into the sections to make unique shapes and styles. You can also create a mosaic effect by embedding tiles or glass pieces into the resin.
Alternative Materials: Instead of traditional resin, consider using eco-friendly or bio-resin options. These are made from renewable resources and are better for the environment. Another option is epoxy resin, which is known for its durability and high-gloss finish.
Finishes: Choose between a glossy or matte finish. A glossy finish will give the floor a shiny, reflective surface, while a matte finish offers a more subdued look. You can also add a topcoat for extra protection and longevity.
Embedded Objects: Personalize your floor by embedding objects like coins, shells, or photos into the resin. This creates a customized look that reflects your interests and personality.
Lighting: Incorporate LED lights under the resin for a modern, illuminated effect. This works especially well in dark rooms or hallways. You can even use glow-in-the-dark pigments for a unique nighttime appearance.
Borders: Add a border around the edges of the floor using different colored resin or tiles. This can help define the space and add an extra design element.
Thickness: Vary the thickness of the resin layers to create a 3D effect. Thicker layers can be used in high-traffic areas for added durability, while thinner layers work well in low-traffic zones.
Eco-Friendly Flooring Tips
Eco-friendly materials can make a big difference. Choose bio-based resins made from renewable resources like plant oils. These resins have a lower carbon footprint compared to traditional petroleum-based ones.
Reusing or recycling materials helps reduce waste. Use recycled glass or metal flakes for decorative elements in the resin. These can add a unique look while being environmentally friendly.
For the base layer, consider using reclaimed wood or recycled concrete. These materials provide a sturdy foundation and reduce the need for new resources.
When mixing and applying the resin, use reusable tools like silicone spatulas and mixing cups. These can be cleaned and used again, cutting down on single-use plastic waste.
Opt for low-VOC (volatile organic compounds) resins and sealers. These products release fewer harmful chemicals into the air, making them safer for you and the environment.
Lastly, ensure proper ventilation during the application process to minimize exposure to any fumes. This not only protects your health but also helps in maintaining indoor air quality.
Your DIY Resin Flooring Awaits
You've got all the steps now. Prepping the surface, mixing the resin, and applying it evenly are key. Remember to wear protective gear. Patience is crucial, especially during curing. Don't rush it. Once cured, your floor will be durable and stunning. Any mistakes? No worries. Sand it down and reapply. This project saves money and gives a personal touch to your space. Plus, it's a fun way to learn new skills. So, gather your materials, clear your schedule, and dive into this rewarding DIY project. Your new resin floor will be a testament to your hard work and creativity. Enjoy the process and the fantastic results!
What materials do I need for DIY resin flooring?
You'll need epoxy resin, hardener, primer, mixing tools, protective gear (like gloves and goggles), paint roller, and squeegee.
How long does it take to install resin flooring?
Typically, it takes about 2-3 days. One day for preparation and priming, another for pouring and spreading the resin, and a final day for curing.
Can I apply resin flooring over tiles?
Yes, you can. Just make sure to clean and sand the tiles thoroughly so the resin adheres properly.
How do I maintain resin flooring?
It's pretty simple. Just sweep and mop regularly. For tougher stains, use a mild detergent and avoid harsh chemicals.
Is resin flooring safe for pets?
Absolutely. Resin flooring is non-toxic and scratch-resistant, making it a great option for homes with pets.
What if I make a mistake during installation?
Don’t panic. Small mistakes can often be sanded down and re-coated. For bigger issues, you might need to remove and reapply the resin layer.
How durable is resin flooring?
Resin flooring is extremely durable. It's resistant to stains, chemicals, and heavy foot traffic, making it ideal for both homes and commercial spaces.