
Home>Home & Furniture>Kitchen>DIY Wood Backsplash Guide
Kitchen
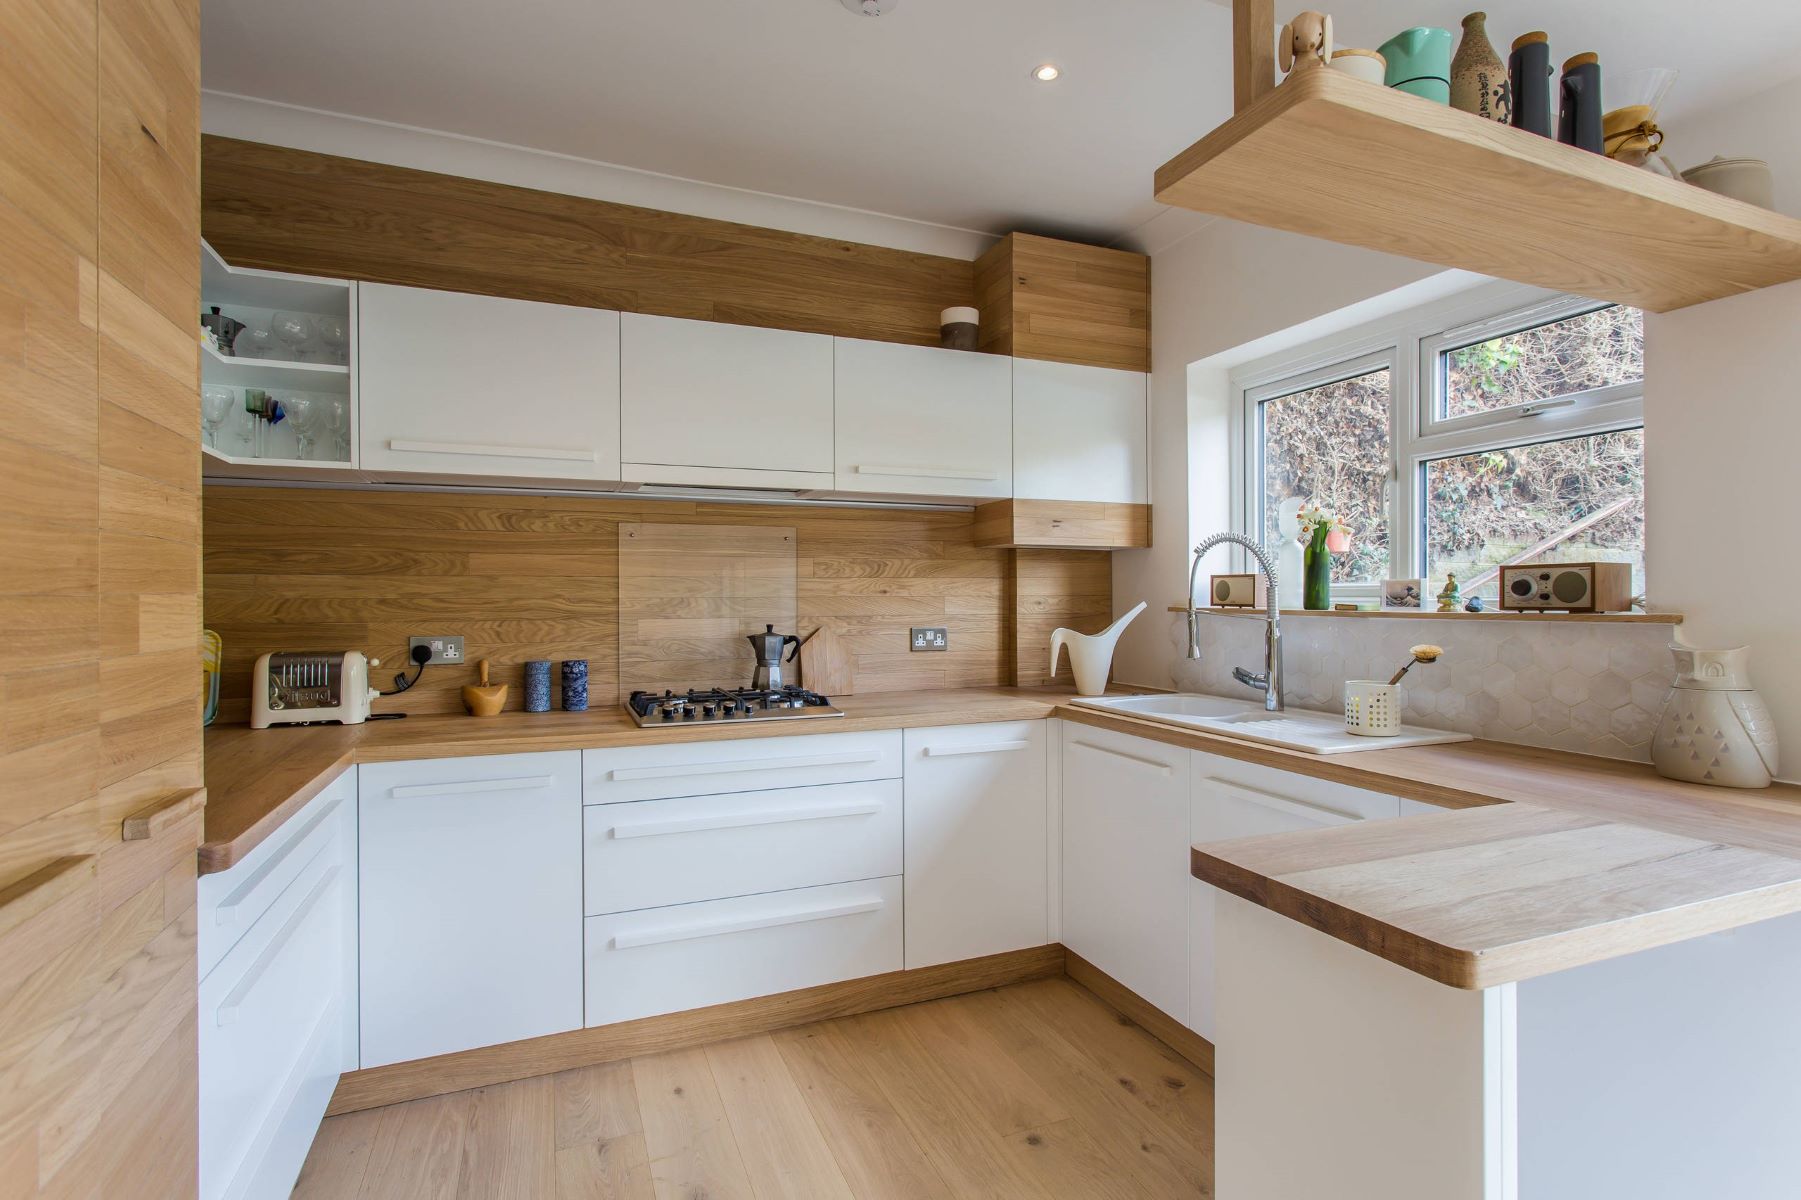
DIY Wood Backsplash Guide
Published: August 5, 2024
Transform your kitchen with a DIY wood backsplash! Our comprehensive guide covers materials, steps, and tips for a stunning, budget-friendly upgrade.
(Many of the links in this article redirect to a specific reviewed product. Your purchase of these products through affiliate links helps to generate commission for Twigandthistle.com, at no extra cost. Learn more)
Tired of looking at the same old kitchen walls? A wood backsplash can bring warmth, charm, and a touch of nature to your space. Even if you're new to DIY projects, creating a wood backsplash isn't as hard as it sounds. With some basic tools, a bit of patience, and a weekend to spare, you can transform your kitchen in no time. This guide will walk you through the steps, from choosing the right wood to finishing touches. Ready to give your kitchen a fresh look? Let's get started!
Getting Ready for Your Project
Gather Materials: Collect all necessary tools and supplies like wood planks, a saw, measuring tape, level, adhesive, nails, and a hammer.
Measure the Area: Use a measuring tape to determine the exact dimensions of the backsplash area. Write down these measurements.
Cut the Wood: Cut the wood planks to fit the measured area. Ensure each piece is the correct size.
Sand the Wood: Smooth out any rough edges on the wood planks using sandpaper. This helps the adhesive stick better.
Prepare the Wall: Clean the wall surface where the backsplash will go. Remove any dirt, grease, or old paint.
Set Up Workspace: Lay down a drop cloth to protect the floor. Arrange tools and materials within easy reach.
Wear Safety Gear: Put on safety goggles and gloves to protect your eyes and hands while cutting and handling wood.
Check for Level: Use a level to ensure the wall is straight. This will help keep the wood planks aligned.
Plan Layout: Lay out the wood planks on the floor in the desired pattern. This helps visualize the final look.
Test Fit: Place the cut wood pieces on the wall without adhesive to ensure they fit properly. Adjust if needed.
What You Need to Get Started
- Wood Panels: Choose reclaimed wood, shiplap, or tongue-and-groove boards for a rustic look.
- Measuring Tape: Ensures accurate measurements for cutting wood panels to fit your space.
- Level: Keeps the wood panels straight and even on the wall.
- Pencil: Marks measurements and cutting lines on the wood.
- Saw: Cuts wood panels to the required size. A miter saw or circular saw works well.
- Sandpaper: Smooths rough edges on the wood panels.
- Wood Glue: Secures the wood panels to the wall.
- Nail Gun: Fastens the wood panels to the wall quickly and securely.
- Nails: Used with the nail gun to attach the wood panels.
- Stud Finder: Locates wall studs to ensure secure attachment of the wood panels.
- Caulk: Fills gaps between wood panels and the wall for a seamless look.
- Paint or Stain: Adds color or finish to the wood panels, enhancing their appearance.
- Paintbrushes or Rollers: Applies paint or stain evenly on the wood panels.
- Drop Cloth: Protects floors and countertops from paint or stain spills.
- Safety Gear: Includes gloves, safety glasses, and a dust mask to protect yourself while working.
How Much Skill and Time You Need
Skill Level: Intermediate
Time Required: 4-6 hours
Preparation: 1 hour
- Measure the area
- Gather materials
Cutting and Sanding: 1-2 hours
- Cut wood to size
- Sand edges
Installation: 2-3 hours
- Apply adhesive
- Attach wood panels
Finishing Touches: 1 hour
- Seal wood
- Clean up workspace
Follow These Steps
Gather Materials:
- Wood planks or panels
- Measuring tape
- Level
- Pencil
- Saw
- Sandpaper
- Wood glue or adhesive
- Nails or screws
- Hammer or drill
- Sealant or finish
Measure the Area:
- Use a measuring tape to determine the height and width of the backsplash area.
- Mark these measurements on the wood planks.
Cut the Wood:
- Cut the wood planks to fit the measured area using a saw.
- Sand the edges to smooth out any rough spots.
Prepare the Wall:
- Clean the wall surface to remove dirt and grease.
- Ensure the wall is dry before proceeding.
Apply Adhesive:
- Spread wood glue or adhesive on the back of each wood plank.
- Press the planks firmly onto the wall, starting from the bottom.
Secure the Planks:
- Use nails or screws to secure the planks to the wall.
- Make sure each plank is level before securing.
Fill Gaps:
- Fill any gaps between the planks with wood filler.
- Let it dry completely.
Sand the Surface:
- Sand the entire backsplash to ensure a smooth finish.
- Wipe away dust with a damp cloth.
Apply Sealant:
- Apply a coat of sealant or finish to protect the wood.
- Let it dry according to the product instructions.
Final Touches:
- Inspect the backsplash for any missed spots.
- Touch up as needed.
Helpful Tips and Tricks
Measure twice, cut once. Accurate measurements prevent wasted materials and frustration.
Use a level. Ensuring each piece is straight keeps the backsplash looking professional.
Seal the wood. Protects against moisture and stains, extending the life of the backsplash.
Pre-drill holes. Prevents wood from splitting when attaching pieces.
Sand edges. Smooth edges give a polished look and prevent splinters.
Use construction adhesive. Stronger hold than nails or screws alone.
Stagger seams. Creates a more natural, visually appealing pattern.
Common mistakes to avoid:
Skipping the sealant. Leads to water damage and warping.
Not using a level. Results in a crooked backsplash.
Incorrect measurements. Causes gaps or misaligned pieces.
Alternatives for materials or methods:
Peel-and-stick wood tiles. Easier to install, no tools needed.
Reclaimed wood. Eco-friendly and adds character.
Wood-look tiles. Durable and moisture-resistant, mimicking real wood.
How Much Will It Cost?
Wood planks: $50-$100 depending on type and size. Adhesive: $10-$20 for a strong construction adhesive. Sealant: $10-$15 to protect the wood. Sandpaper: $5-$10 for smoothing edges. Paint or stain: $15-$30 if you want to change the wood color. Brushes or rollers: $5-$10 for applying paint or stain. Measuring tape: $5-$10 to ensure accurate cuts. Saw: $30-$100, depending on quality. Level: $10-$20 to ensure straight lines. Safety gear: $10-$20 for gloves and goggles.
Total cost: $150-$335.
Budget-friendly alternatives: Use pallet wood or reclaimed wood for free or cheap. Borrow tools from friends or rent them. Use leftover paint or stain from other projects.
Different Ways to Customize
Materials: Instead of traditional wood, try reclaimed wood for a rustic look or bamboo for an eco-friendly option. Pallet wood can give a farmhouse vibe, while plywood offers a smooth, modern finish.
Colors: Paint your wood backsplash in bold colors like navy blue or forest green for a dramatic effect. For a more subtle look, use pastel shades or whitewash the wood. Staining the wood in shades like walnut or cherry can add warmth.
Styles: Create a herringbone pattern for a sophisticated touch. For a more casual feel, use a shiplap style. Chevron patterns can add a dynamic look, while vertical planks make the space feel taller.
Finishes: Use a matte finish for a natural look or a glossy finish for a sleek, modern appearance. Distressing the wood can give it a vintage feel, while a smooth, polished finish offers a contemporary vibe.
Accents: Add metal accents like copper or brass strips between the wood pieces for a unique touch. Incorporate LED strip lighting under the backsplash to highlight the wood grain. Use decorative nails or screws for an industrial look.
Textures: Mix different wood textures, such as rough-sawn and smooth-sanded pieces, to add depth. Use wood tiles with carved designs for an artistic touch. Combine wood with other materials like stone or glass for a mixed-media effect.
Eco-Friendly Ideas
Reclaimed Wood: Use wood from old barns, pallets, or furniture. This reduces waste and gives a rustic look.
Bamboo: Fast-growing and renewable, bamboo is a great eco-friendly option. It’s durable and stylish.
Low-VOC Finishes: Choose finishes with low volatile organic compounds. These are better for indoor air quality and the environment.
Water-Based Adhesives: Opt for water-based glues instead of solvent-based ones. They emit fewer harmful chemicals.
Recycled Materials: Incorporate recycled glass or metal accents. This adds character and reduces landfill waste.
Natural Oils: Use natural oils like linseed or tung oil for sealing. They are less toxic and biodegradable.
Local Sourcing: Buy materials from local suppliers. This cuts down on transportation emissions and supports local businesses.
Upcycling: Repurpose old wood items. Turn an old door or table into a unique backsplash piece.
Energy-Efficient Tools: Use hand tools or energy-efficient power tools. This saves electricity and reduces your carbon footprint.
Sustainable Practices: Follow sustainable practices like minimizing waste and recycling scraps. This keeps your project eco-friendly from start to finish.
Your DIY Wood Backsplash Awaits
You've got all the tools and know-how to create a stunning wood backsplash. Just remember, measure twice, cut once. Sanding and sealing are key steps you don't want to skip. These ensure your backsplash not only looks good but lasts long. Don't rush the process; take your time to get each piece just right. If you hit a snag, don't stress. Every mistake is a learning opportunity. Before you know it, you'll have a beautiful, custom backsplash that adds warmth and character to your kitchen. So, roll up those sleeves, grab your tools, and get started. Your dream kitchen is just a few steps away. Happy building!
What materials do I need for a wood backsplash?
You'll need wood planks, measuring tape, saw, sandpaper, wood glue, nails or screws, level, and sealant.
How do I prepare the wall?
Clean the wall thoroughly. Make sure it's dry and smooth. If there are any holes or cracks, fill them in and let them dry before starting.
Can I use any type of wood?
Most types of wood work, but hardwoods like oak or maple are more durable. Pine is cheaper but softer.
How do I cut the wood planks?
Measure the area first, then use a saw to cut the planks to the right size. Sand the edges to make them smooth.
How do I attach the wood to the wall?
Apply wood glue to the back of each plank. Press it firmly against the wall. For extra security, use nails or screws.
Do I need to seal the wood?
Yes, sealing the wood protects it from moisture and stains. Use a clear sealant to keep the natural look.
How do I maintain a wood backsplash?
Wipe it down with a damp cloth regularly. Avoid using harsh chemicals. Reapply sealant every few years to keep it looking fresh.