
Home>Home & Furniture>Kitchen>DIY Outdoor Kitchen Kits: How to Build Your Own
Kitchen
DIY Outdoor Kitchen Kits: How to Build Your Own
Published: July 31, 2024
Discover how to build your own outdoor kitchen with DIY kits. Our guide covers everything from planning to installation, ensuring a seamless and enjoyable project.
(Many of the links in this article redirect to a specific reviewed product. Your purchase of these products through affiliate links helps to generate commission for Twigandthistle.com, at no extra cost. Learn more)
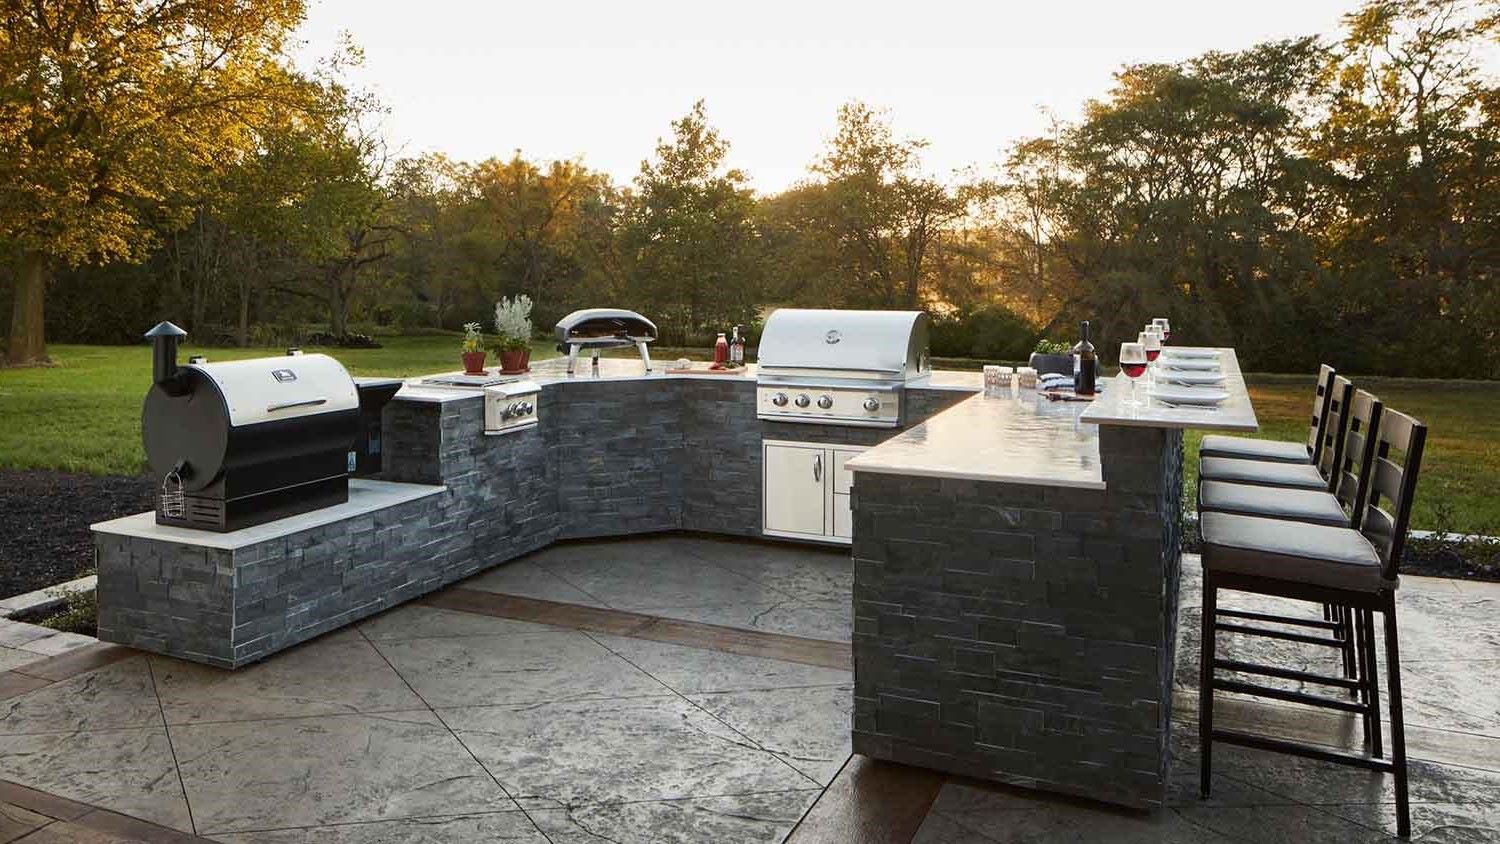
Building your own outdoor kitchen might seem challenging, but with a DIY kit, it's easier than you think. These kits offer everything you need to create a functional and stylish cooking space right in your backyard. From grills to countertops, each component fits together perfectly, making the project manageable even for beginners. Spending time outdoors becomes more enjoyable when you can cook and entertain in a space you've built yourself. Not only will it add value to your home, it also provides a unique place to make memories with friends and family. Ready to get started? Let's dive in!
Getting Ready for Your Outdoor Kitchen Project
Gather Tools and Materials: Make sure you have all necessary tools like a drill, screwdriver, measuring tape, level, and safety gear. Check the kit for any missing parts.
Choose a Location: Pick a spot with good ventilation and shade. Ensure the ground is level and can support the weight of the kitchen.
Check Local Codes: Verify if you need any permits or if there are restrictions on outdoor kitchens in your area.
Prepare the Ground: Clear the area of debris and vegetation. Lay a concrete slab or pavers to create a stable base.
Set Up Workspace: Arrange a clean, organized area for assembling the kit. Keep tools and parts within easy reach.
Safety First: Wear gloves, safety glasses, and closed-toe shoes. Keep a first aid kit nearby.
Read Instructions: Go through the manual thoroughly to understand the steps and avoid mistakes.
Plan Utilities: If your kitchen includes gas, water, or electricity, plan the connections and ensure they are safe and up to code.
Dry Fit Components: Before final assembly, dry fit all parts to ensure everything aligns properly.
Gather Helpers: Some parts may be heavy or awkward to handle alone. Having extra hands can make the process smoother and safer.
Gathering Essential Materials and Tools
Materials:
- Concrete Blocks: Used for building the base and structure of the kitchen.
- Cement: Binds the concrete blocks together.
- Grill Insert: The main cooking component.
- Countertop: Provides a surface for food prep.
- Sink: For washing hands and utensils.
- Outdoor Cabinets: Storage for utensils and cooking supplies.
- Tile or Stone Veneer: Decorative finish for the exterior.
- Mortar: Adheres tiles or stones to the structure.
- Sealant: Protects surfaces from weather damage.
- Plywood: Used for framing and additional support.
- Screws and Nails: Fasteners for assembling parts.
- Plumbing Supplies: Pipes, fittings, and connectors for the sink.
- Electrical Supplies: Wires, outlets, and switches for lighting and appliances.
Tools:
- Trowel: Spreads mortar and cement.
- Level: Ensures surfaces are even.
- Tape Measure: Measures dimensions accurately.
- Drill: Makes holes and drives screws.
- Saw: Cuts wood and other materials.
- Hammer: Drives nails and helps with assembly.
- Screwdriver: Tightens screws.
- Wrench: Tightens plumbing fittings.
- Tile Cutter: Cuts tiles to fit.
- Caulking Gun: Applies sealant.
- Safety Gear: Gloves, goggles, and masks for protection.
- Shovel: Digs and moves materials.
- Bucket: Mixes and carries mortar or cement.
Concrete blocks and cement form the base. Grill inserts are essential for cooking. Countertops provide workspace. Sinks and plumbing supplies ensure water access. Outdoor cabinets store items. Tile or stone veneer adds a decorative touch. Mortar and sealant secure and protect surfaces. Plywood offers extra support. Screws, nails, and electrical supplies complete the setup.
Trowels spread mortar. Levels ensure even surfaces. Tape measures help with dimensions. Drills and saws cut and assemble parts. Hammers and screwdrivers fasten pieces. Wrenches tighten plumbing. Tile cutters shape tiles. Caulking guns apply sealant. Safety gear protects you. Shovels and buckets handle materials.
Assessing Skill Level and Time Commitment
Skill Level: Intermediate
Time Required: 2-3 weekends
- Planning and Design: 4-6 hours
- Gathering Materials: 3-4 hours
- Building the Frame: 8-10 hours
- Installing Countertops and Appliances: 6-8 hours
- Finishing Touches: 4-6 hours
Detailed Steps to Build Your Outdoor Kitchen
Plan Your Layout
- Decide where to place the kitchen.
- Measure the area.
- Sketch a layout including grill, sink, and counter space.
Gather Materials
- Purchase a pre-made outdoor kitchen kit.
- Get tools: screwdriver, drill, level, tape measure.
- Buy additional materials: screws, brackets, sealant.
Prepare the Site
- Clear the area of debris.
- Level the ground.
- Lay a concrete slab if needed.
Assemble the Frame
- Follow the kit instructions.
- Use screws and brackets to secure the frame.
- Ensure the frame is level.
Install Countertops
- Place countertops on the frame.
- Secure with screws or adhesive.
- Seal edges with sealant.
Add Appliances
- Install the grill according to the manual.
- Hook up the sink to water lines.
- Connect any electrical appliances.
Finish with Details
- Attach cabinet doors.
- Install backsplash if desired.
- Add any decorative elements.
Test Everything
- Check water flow in the sink.
- Test the grill.
- Ensure all appliances work properly.
Helpful Tips and Tricks for Success
Plan your layout before starting. Measure your space carefully to ensure everything fits. Use weather-resistant materials like stainless steel or treated wood. Pre-assemble as much as possible in your garage or workshop to save time outside. Level the ground where the kitchen will sit to avoid wobbly surfaces. Install good lighting for evening use. Seal countertops to protect against weather damage. Add storage for utensils and supplies to keep everything handy.
Common mistakes to avoid: Skipping the planning phase can lead to misfits and wasted materials. Using non-weather-resistant materials will cause premature wear. Ignoring leveling can result in unstable structures. Forgetting to seal surfaces can lead to damage from rain or sun.
Alternatives: Instead of stainless steel, consider using powder-coated metal for a different look. For countertops, concrete can be a durable and stylish option. If you don't want to build from scratch, modular outdoor kitchen units can be a quicker solution.
Estimating the Cost of Your DIY Kitchen
Materials:
- Grill: $300 - $1,000
- Countertops: $200 - $600 (granite or concrete)
- Cabinets: $400 - $1,200 (stainless steel or weatherproof wood)
- Sink: $100 - $300
- Faucet: $50 - $150
- Refrigerator: $200 - $500
- Lighting: $50 - $200
- Electrical Wiring: $100 - $300
- Plumbing Supplies: $100 - $250
- Pavers or Concrete: $200 - $500 (for flooring)
- Miscellaneous: $100 - $200 (screws, nails, sealants)
Tools:
- Drill: $50 - $150
- Saw: $50 - $200
- Wrench Set: $20 - $50
- Screwdriver Set: $10 - $30
- Level: $10 - $30
- Measuring Tape: $5 - $15
- Safety Gear: $20 - $50 (gloves, goggles)
Budget-Friendly Alternatives:
- Grill: Use a portable grill ($100 - $200)
- Countertops: Opt for tile or laminate ($100 - $300)
- Cabinets: Use treated wood or repurpose old cabinets ($100 - $300)
- Sink: Use a basic utility sink ($50 - $100)
- Faucet: Choose a basic model ($20 - $50)
- Refrigerator: Use a cooler or mini-fridge ($50 - $100)
- Lighting: Use solar lights ($20 - $50)
- Electrical Wiring: Minimize electrical needs or use battery-operated devices
- Plumbing Supplies: Use a garden hose setup
- Pavers or Concrete: Use gravel or outdoor rugs ($50 - $100)
- Miscellaneous: Reuse materials from other projects
Total Estimated Cost:
- Standard: $1,780 - $5,775
- Budget-Friendly: $625 - $1,645
Creative Variations and Customizations
Materials: Instead of using standard brick or stone, consider reclaimed wood for a rustic look. Concrete countertops can be swapped for granite or marble for a more luxurious feel. Stainless steel is great for a modern touch, while tile can add color and pattern.
Colors: Paint the cabinets in bold colors like navy blue or forest green for a striking appearance. Use earth tones like browns and beiges for a natural look. Bright colors like yellow or red can make the space feel lively and fun.
Styles: For a modern style, use sleek lines and minimalistic designs. A rustic style can be achieved with distressed wood and vintage accessories. Mediterranean style might include terracotta tiles and wrought iron details. Industrial style could feature exposed metal and concrete elements.
Layouts: Consider an L-shaped layout for more counter space. A U-shaped layout can provide a more enclosed cooking area. An island layout with a central cooking station can be great for socializing while cooking.
Accessories: Add a pizza oven for a unique cooking option. Install a wine fridge for entertaining. Include a sink with a pull-out faucet for convenience. Add LED lighting under the counters for a modern touch.
Seating: Use bar stools for a casual feel. Add a built-in bench for more seating. Consider a dining table for a more formal eating area. Use outdoor cushions and pillows for comfort.
Shelving: Open shelves can display dishes and cookware. Closed cabinets can hide clutter. Floating shelves add a modern touch. Corner shelves can maximize space.
Grills: Choose a charcoal grill for traditional flavor. A gas grill offers convenience. Electric grills are great for easy cleanup. Smokers can add a unique flavor to your food.
Flooring: Use stone pavers for a natural look. Concrete can be stained or stamped for a custom design. Wood decking adds warmth. Tile is easy to clean and comes in many styles.
Protection: Add a pergola for shade. Use a retractable awning for flexibility. Outdoor curtains can provide privacy. Weatherproof covers protect your kitchen from the elements.
Eco-Friendly Tips for Your Outdoor Kitchen
Reclaimed wood can be used for countertops and cabinets. It adds character and reduces waste. Recycled metal like old pipes or sheets can be repurposed for structural elements or shelving. Eco-friendly concrete made with fly ash or slag can be used for countertops or flooring. Bamboo is a sustainable option for cabinetry or accents due to its rapid growth rate.
Solar-powered lights can illuminate your kitchen area without increasing your carbon footprint. Compostable materials for disposable items like plates and utensils can minimize waste. Natural stone or recycled glass countertops offer durability and a unique look while being eco-friendly.
Low-VOC paints and sealants help maintain air quality. Rainwater collection systems can provide water for cleaning or gardening. Energy-efficient appliances reduce electricity usage. Native plants around the kitchen area can enhance the landscape and require less water.
Reusing old furniture or fixtures can give new life to items that might otherwise end up in a landfill. Pallet wood can be transformed into tables, benches, or storage solutions. Recycled plastic lumber is another durable, low-maintenance option for outdoor furniture.
Your Outdoor Kitchen Awaits
Building your own outdoor kitchen can be a rewarding project. With the right tools, materials, and a bit of patience, you can create a space perfect for cooking and entertaining. Remember to plan carefully, measure twice, and follow safety guidelines. Don't rush the process; taking your time ensures a sturdy, long-lasting kitchen. Whether you're a seasoned DIYer or a beginner, this project is achievable. Enjoy the satisfaction of cooking in a space you built with your own hands. Happy building!
What tools do I need to build an outdoor kitchen kit?
You’ll need basic tools like a drill, screwdriver, measuring tape, level, and wrench. Depending on the kit, you might also need a saw or masonry tools.
How long does it take to assemble an outdoor kitchen kit?
Assembly time varies, but most kits take one to three days. It depends on the complexity of the design and your experience level.
Can I customize my outdoor kitchen kit?
Absolutely! Many kits offer modular components so you can add or remove features like a grill, sink, or refrigerator to fit your needs.
Do I need any special permits to build an outdoor kitchen?
Sometimes. Check with your local building department to see if you need a permit. Rules can vary based on your location and the scope of your project.
What materials are best for outdoor kitchen kits?
Stainless steel, stone, and concrete are popular choices. They’re durable and can withstand weather conditions. Make sure the materials are weather-resistant.
How do I maintain my outdoor kitchen?
Regular cleaning is key. Wipe down surfaces, clean the grill, and check for any rust or wear. Covering your kitchen when not in use can also help protect it.
Can I install an outdoor kitchen kit myself, or do I need professional help?
Many people can install these kits themselves, especially if they’re handy. However, if you’re not comfortable with plumbing or electrical work, it’s wise to hire a professional for those parts.