
Home>Home & Furniture>Doors & Windows>How to Install a Door
Doors & Windows
How to Install a Door
Published: September 16, 2024
Learn how to install a door with our step-by-step guide. From tools to techniques, ensure a perfect fit and smooth operation for your new door. Perfect for DIY enthusiasts!
(Many of the links in this article redirect to a specific reviewed product. Your purchase of these products through affiliate links helps to generate commission for Twigandthistle.com, at no extra cost. Learn more)
Installing a door might seem tricky, but with the right steps, it becomes manageable. Whether you’re replacing an old door or putting in a new one, some basic tools and patience will get the job done. This guide will help you understand the process from start to finish. You don’t need to be a professional carpenter; just follow the steps carefully. By the end, you’ll have a door that fits perfectly and swings smoothly. Ready? Let’s begin this handy home improvement project together and add a fresh look to your space.
Getting Ready for the Project
Measure the Door Frame: Use a tape measure to get the height and width of the door frame. Make sure the new door fits these dimensions.
Gather Tools and Materials: Collect a hammer, screwdriver, drill, level, shims, screws, and the new door. Having everything ready saves time.
Clear the Workspace: Remove any furniture or obstacles near the door area. This ensures you have enough space to work safely.
Wear Safety Gear: Put on safety glasses and gloves. Protecting your eyes and hands is crucial when using tools.
Remove the Old Door: Unscrew the hinges and carefully lift the old door off. Set it aside to avoid tripping over it.
Check the Door Frame: Inspect the frame for any damage or rot. Repair any issues before installing the new door.
Install Hinges on the New Door: Attach the hinges to the new door, making sure they align with the hinge spots on the frame.
Position the New Door: Place the new door in the frame. Use shims to hold it in place and ensure it’s level.
Secure the Door: Screw the hinges into the frame. Double-check that the door swings open and closes smoothly.
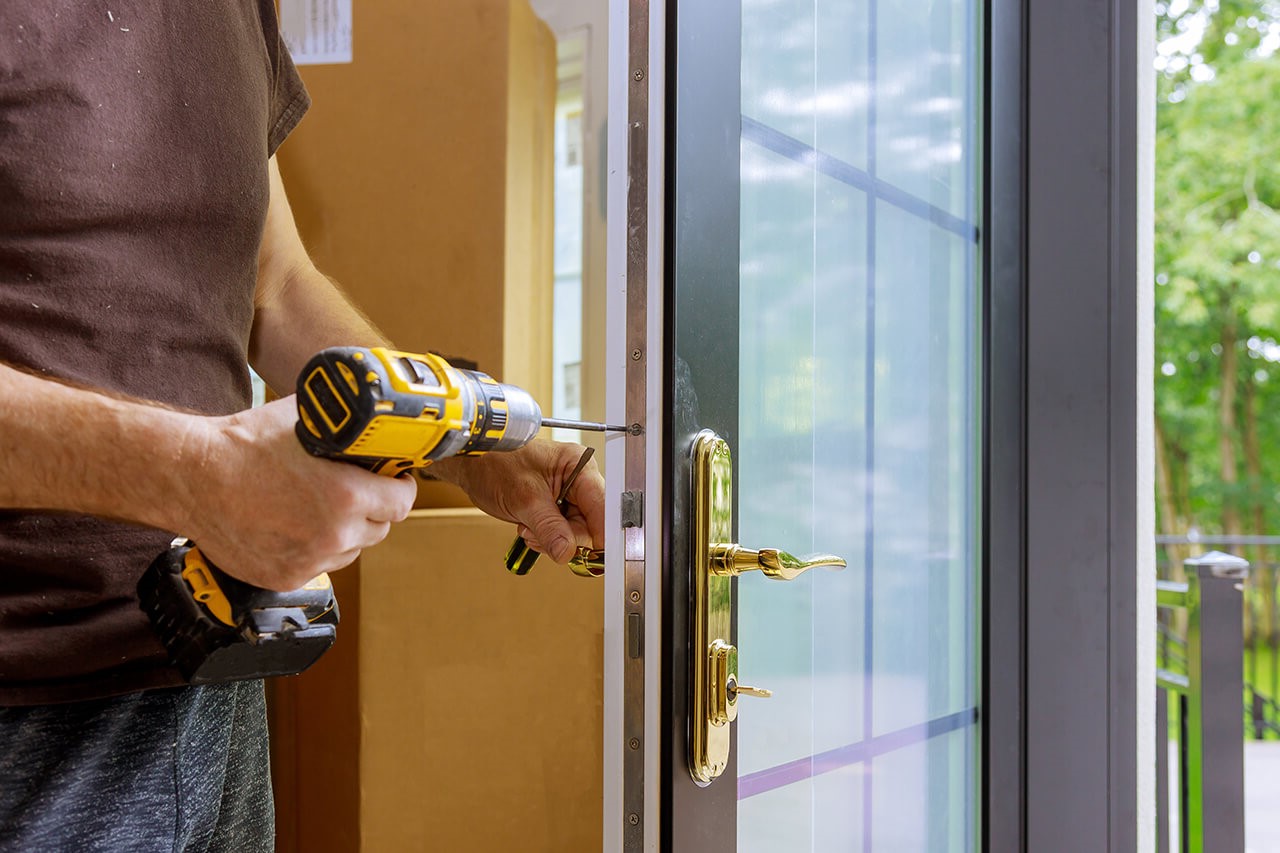
Install the Doorknob and Lock: Follow the manufacturer’s instructions to attach the doorknob and lock. Make sure they function correctly.
Test the Door: Open and close the door several times. Ensure it fits well and operates without sticking.
Clean Up: Remove any debris or tools from the area. A clean workspace prevents accidents.
What You Need: Materials and Tools
- New Door: The main item being installed. Make sure it fits the door frame.
- Hinges: Metal pieces that allow the door to swing open and closed. Usually, three are needed.
- Screws: Used to attach the hinges to the door and frame. Typically, wood screws are best.
- Screwdriver: A tool for driving screws into the wood. A power drill can also be used.
- Drill: Makes holes for screws and can drive screws in faster than a manual screwdriver.
- Tape Measure: Ensures accurate measurements for fitting the door and placing hinges.
- Pencil: Marks where to place hinges and screws.
- Chisel: Carves out wood to fit the hinges flush with the door and frame.
- Hammer: Taps the chisel and can also be used to adjust the door.
- Level: Ensures the door is hung straight.
- Shims: Small wedges used to level the door within the frame.
- Utility Knife: Cuts shims and trims any excess material.
- Sandpaper: Smooths rough edges on the door or frame.
- Door Knob/Handle: Allows you to open and close the door. Includes a latch mechanism.
- Latch Plate: Metal plate that the latch fits into when the door is closed.
- Wood Filler: Fills any gaps or holes in the door or frame.
- Paint or Stain: Finishes the door to match the room’s decor.
Skill Level and Time Commitment
Skill Level: Intermediate
Estimated Time Required: 2-4 hours
Steps:
- Remove the old door - 30 minutes
- Prepare the door frame - 30 minutes
- Fit the new door - 1 hour
- Install hinges and hardware - 30 minutes
- Adjust and finish - 30 minutes
Follow These Steps
Gather Materials:
- New door
- Hinges
- Screws
- Screwdriver or drill
- Measuring tape
- Pencil
- Chisel
- Level
Remove Old Door:
- Unscrew hinges from the door frame.
- Lift the door off the hinges.
Measure Door Frame:
- Measure height and width of the door frame.
- Ensure the new door matches these measurements.
Attach Hinges to New Door:
- Mark hinge positions on the new door, matching the old door.
- Chisel out space for hinges if needed.
- Screw hinges onto the new door.
Position New Door:
- Place the new door in the frame.
- Use a level to ensure it is straight.
Attach Hinges to Frame:
- Mark hinge positions on the frame.
- Screw hinges into the frame.
Check Door Alignment:
- Open and close the door to ensure it swings smoothly.
- Adjust hinges if necessary.
Install Door Handle and Lock:
- Mark positions for handle and lock.
- Drill holes as needed.
- Attach handle and lock.
Test Door:
- Open and close the door several times.
- Ensure it latches properly and swings without sticking.
Helpful Tips and Tricks
Measure twice, cut once. Ensure the door fits the frame perfectly. Use a level to check if the frame is plumb. Shims are your best friend for adjusting the frame. Place them behind the hinges to make the door hang straight.
Pre-drill holes for screws to avoid splitting the wood. Use long screws for the top hinge to support the door's weight better. Check the swing direction before installing hinges. Make sure the door opens the way you want.
Common mistakes: Not checking if the frame is level can cause the door to swing open or closed on its own. Forgetting to measure the door and frame can lead to gaps or a door that won't close. Using short screws can make the door sag over time.
Alternatives: Instead of wooden shims, try plastic ones. They don't compress over time. For a more modern look, consider using hidden hinges. If you don't have a power drill, a manual screwdriver works, but it takes more effort.
How Much Will It Cost?
Door: $100 - $300 depending on quality and style.
Hinges: $5 - $15 for a set of three.
Screws: $5 for a box.
Door Handle/Knob: $10 - $50 depending on design.
Chisel: $10 - $20.
Screwdriver: $5 - $20.
Drill: $30 - $100.
Level: $10 - $20.
Tape Measure: $5 - $15.
Shims: $5 for a pack.
Total Cost: $185 - $550.
Budget-Friendly Alternatives:
Used Door: Check local classifieds or thrift stores for doors under $50.
Basic Hinges: $3 - $5 for a set.
Basic Door Handle: $5 - $10.
Borrow Tools: Ask friends or family to borrow chisels, screwdrivers, drills, levels, and tape measures.
Total Cost with Alternatives: $68 - $150.
Different Ways to Customize
Materials: Instead of a standard wooden door, consider using fiberglass or steel for added durability. Glass doors can add a modern touch, while barn doors offer a rustic feel.
Colors: Paint the door in bold colors like red or blue to make it stand out. For a more classic look, use neutral colors like white, gray, or beige. Staining the wood can also highlight its natural beauty.
Styles: Choose a paneled door for a traditional look or a flush door for a sleek, modern appearance. French doors with multiple glass panes can add elegance and allow more light into the room.
Hardware: Swap out standard doorknobs for lever handles or smart locks for added convenience. Decorative hinges and kick plates can also enhance the door's appearance.
Trim and Molding: Add decorative trim or crown molding around the door frame to give it a more finished look. Wainscoting can also add a touch of sophistication.
Accessories: Install a door knocker or peephole for added functionality. Weatherstripping can improve energy efficiency, while a door sweep can help keep out drafts.
Glass Inserts: For a unique touch, consider adding stained glass or frosted glass inserts. These can provide privacy while still allowing light to filter through.
Sliding Doors: If space is limited, consider installing a sliding door instead of a traditional swinging door. Pocket doors slide into the wall, saving even more space.
Double Doors: For a grand entrance, install double doors. These can be particularly effective for entryways or large rooms.
Arched Doors: For a more dramatic effect, consider an arched door. This can add a touch of elegance and uniqueness to any space.
Eco-Friendly Tips
Reclaimed Wood: Use old doors or wood from other projects. Sand and refinish them to look new.
Eco-Friendly Paint: Choose paints with low or no VOCs (volatile organic compounds). These are better for indoor air quality.
Insulation: Install a door with good insulation properties. This helps keep your home warm in winter and cool in summer, reducing energy use.
Recycled Hardware: Use hinges, handles, and locks made from recycled materials. Check local hardware stores or online marketplaces.
Energy-Efficient Glass: If your door has windows, opt for double or triple-pane glass. This improves insulation and reduces energy bills.
Sealants: Use eco-friendly sealants to prevent drafts. Look for products labeled as non-toxic or biodegradable.
Local Materials: Source materials locally to reduce the carbon footprint associated with transportation.
Proper Disposal: Recycle old doors and materials. Many recycling centers accept wood, metal, and glass.
DIY Approach: Doing the installation yourself saves money and reduces the need for professional services, which often involve more travel and energy use.
Your Door Awaits
Installing a door might seem tricky, but with the right tools and a bit of patience, it's totally doable. Measure your space carefully, making sure everything fits snugly. Use a level to keep things straight, and don't rush the process. Secure the hinges tightly, and check that the door swings smoothly. If something feels off, don't hesitate to make adjustments. Remember, a well-installed door not only looks good but also provides security and insulation. Take pride in your work, knowing you've added value to your home. Now, grab that handle and enjoy the fruits of your labor. Happy DIY-ing!
How do I measure for a new door?
Measure the width and height of the door frame. Check the thickness of the existing door too. Don't forget to measure the hinge locations and lockset placement.
What tools will I need to install a door?
You'll need a tape measure, level, screwdriver, hammer, chisel, drill, and screws. A saw might be necessary if adjustments are needed.
How do I remove the old door?
Unscrew the hinges and carefully lift the door out of the frame. If it's painted shut, use a utility knife to cut through the paint.
How do I ensure the new door fits properly?
Place the new door in the frame to check the fit. Use shims to adjust the door so it’s level and plumb. Make sure the gaps around the door are even.
How do I install the hinges on the new door?
Mark the hinge locations on the new door, then use a chisel to create recesses for the hinges. Screw the hinges into place, ensuring they align with the frame.
How do I install the lockset?
Follow the manufacturer’s instructions for the lockset. Usually, you'll need to drill holes for the doorknob and deadbolt, then screw the lockset into place.
What should I do if the door doesn’t close properly?
Check if the door is level and plumb. Adjust the shims if needed. If the door still doesn’t close properly, you might need to sand or plane the edges.