
Home>Home & Furniture>Doors & Windows>How to Build a Lattice Door Under Your Deck
Doors & Windows
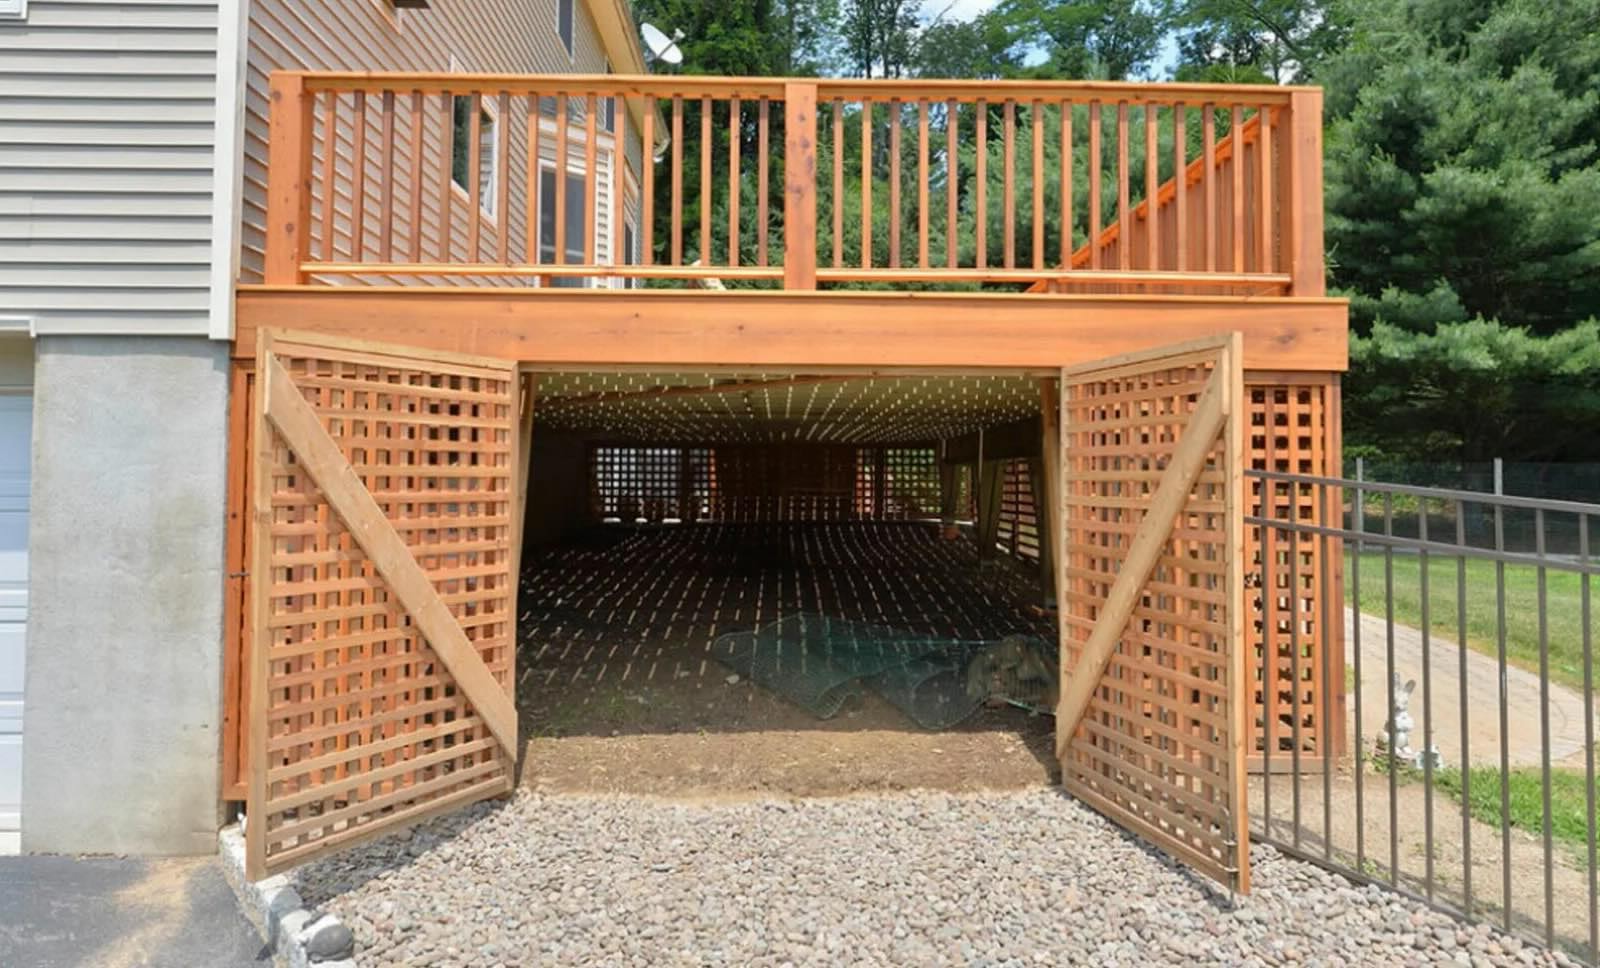
How to Build a Lattice Door Under Your Deck
Published: September 17, 2024
Learn how to build a lattice door under your deck with our step-by-step guide. Enhance your outdoor space with this practical and stylish addition.
(Many of the links in this article redirect to a specific reviewed product. Your purchase of these products through affiliate links helps to generate commission for Twigandthistle.com, at no extra cost. Learn more)
Want to make the space under your deck more useful and attractive? Building a lattice door can help you do just that. Lattice doors offer a simple, stylish way to hide storage while still allowing airflow. You don't need to be a pro carpenter to tackle this project—just have basic tools, some wood, and a little patience. Not only will you gain valuable storage space, but the project will also enhance your yard's look. Ready to get started? This guide will walk you through each step, making the process as smooth as possible.
Getting Ready for the Project
Measure the Space: Use a tape measure to get the exact dimensions of the opening under your deck. Write down the width and height.
Gather Materials: Get lattice panels, wood for framing, screws, hinges, a latch, and a saw. Make sure everything matches the measurements.
Safety Gear: Wear safety goggles and gloves to protect your eyes and hands. Use ear protection if you're using loud tools.
Clear the Area: Remove any debris or obstacles from the workspace. Make sure you have enough room to move around freely.
Cut the Lattice: Use a saw to cut the lattice panels to the size you measured. Double-check the measurements before cutting.
Build the Frame: Cut wood pieces to create a frame for the lattice. Use screws to attach the pieces together.
Attach Hinges: Screw the hinges onto one side of the frame. Make sure they are evenly spaced.
Install the Latch: Attach the latch to the opposite side of the frame. This will keep the door closed.
Mount the Door: Hold the door in place and mark where the hinges will go on the deck. Screw the hinges into the deck to attach the door.
Test the Door: Open and close the door a few times to make sure it works smoothly. Adjust if necessary.
Materials and Tools Checklist
- Lattice Panels: These are the main materials for the door. They provide a decorative and functional barrier.
- 2x4 Lumber: Used for framing the door and providing structural support.
- Hinges: Allow the door to swing open and closed.
- Latch or Lock: Keeps the door securely closed.
- Wood Screws: Fasten the lattice panels and lumber together.
- Measuring Tape: Ensures accurate measurements for cutting and fitting.
- Circular Saw: Cuts the lumber and lattice panels to the required size.
- Drill: Makes holes for screws and hinges.
- Screwdriver: Tightens screws into place.
- Level: Ensures the door is installed straight.
- Pencil: Marks measurements and cutting lines.
- Safety Glasses: Protects your eyes while cutting and drilling.
- Work Gloves: Protects your hands during construction.
- Sandpaper: Smooths rough edges on the wood.
These materials and tools will help you build a sturdy and functional lattice door under your deck.
Required Skills and Time Commitment
Skill Level: Intermediate
Time Required: 4-6 hours
- Measure and Cut: 1 hour
- Assemble the Frame: 1.5 hours
- Attach Lattice Panels: 1 hour
- Install Hinges and Latch: 1 hour
- Final Adjustments: 30 minutes
Building Instructions
Measure the Opening
- Use a tape measure to find the height and width of the space where the door will go.
- Write down these measurements.
Cut the Lattice Panel
- Lay the lattice panel flat.
- Mark the measurements on the panel using a pencil.
- Cut the lattice panel to size with a saw.
Build the Frame
- Cut four pieces of wood to create a rectangular frame that matches the size of the lattice panel.
- Attach the pieces together using screws and a drill.
Attach the Lattice to the Frame
- Place the lattice panel inside the frame.
- Secure the lattice to the frame with nails or screws.
Install Hinges
- Attach two or three hinges to one side of the frame.
- Make sure the hinges are evenly spaced.
Mount the Door
- Hold the door in place under the deck.
- Mark where the hinges will attach to the deck.
- Screw the hinges into the deck.
Add a Latch
- Attach a latch to the opposite side of the door.
- Make sure the latch lines up with a secure spot on the deck.
Test the Door
- Open and close the door to ensure it swings freely.
- Adjust the hinges or latch if needed.
Paint or Stain (Optional)
- Apply paint or stain to protect the wood and match your deck.
- Let it dry completely before using the door.
Helpful Tips and Tricks
Measure Twice, Cut Once: Always double-check measurements before cutting. This saves time and materials.
Use Pressure-Treated Wood: For durability, choose pressure-treated wood. It resists rot and insects.
Pre-Drill Holes: Prevent wood from splitting by pre-drilling holes for screws.
Paint or Stain Before Assembly: Painting or staining the lattice and frame before assembly makes the process easier and ensures even coverage.
Hinges and Latches: Use sturdy hinges and latches to ensure the door opens and closes smoothly.
Level Ground: Make sure the ground where the door will be installed is level. This prevents the door from sticking or dragging.
Common Mistakes to Avoid:
- Incorrect Measurements: Not measuring accurately can lead to a poorly fitting door.
- Skipping Pre-Drilling: This can cause wood to split, weakening the structure.
- Ignoring Ground Level: An uneven ground can cause operational issues with the door.
- Using Non-Treated Wood: Regular wood can rot quickly when exposed to moisture.
Alternatives for Materials or Methods:
- Vinyl Lattice: Instead of wood, use vinyl lattice. It’s low maintenance and weather-resistant.
- Metal Hinges: For added strength, consider metal hinges over plastic ones.
- Gravel Base: Instead of leveling the ground with soil, use gravel. It provides better drainage and stability.
- Sliding Door: If space is tight, a sliding lattice door can be a good alternative to a swinging door.
Budgeting for Your Lattice Door
Lattice panels: $20-$30 each. You might need 2-3 panels, so around $60-$90.
Wood for framing: $2-$3 per linear foot. For a 4x6 door, you'll need about 20 feet, costing $40-$60.
Hinges: $5-$10 per pair. You'll need at least two pairs, so $10-$20.
Latch: $5-$10.
Screws and nails: $5-$10.
Wood stain or paint: $15-$30.
Saw: If you don't have one, a basic hand saw costs $10-$20.
Drill: A basic drill costs $30-$50 if you don't already own one.
Sandpaper: $5.
Total cost: $180-$295.
Budget-friendly alternatives:
Reclaimed wood: Free or very cheap from pallets or old furniture.
Basic hand tools: Borrow from friends or family.
Second-hand materials: Check local classifieds or online marketplaces.
Personalizing Your Lattice Door
Materials: Instead of traditional wood lattice, consider using vinyl or metal lattice. Vinyl is durable and low-maintenance, while metal offers a modern look and increased strength.
Colors: Paint or stain the lattice in a color that complements your deck. For a natural look, use wood stains in shades like cedar or mahogany. For a more vibrant appearance, choose bold colors like navy blue or forest green.
Styles: Traditional lattice has a crisscross pattern, but you can opt for square or diamond patterns for a different look. For a more intricate design, consider decorative panels with unique cutouts or patterns.
Hardware: Use decorative hinges and handles to add a touch of style. Black wrought iron hardware gives a rustic feel, while brushed nickel or stainless steel offers a modern touch.
Additional Features: Add a lock for security or a magnetic latch for ease of use. Install a small window or vent in the door for better airflow and visibility.
Finishing Touches: Frame the lattice door with trim to give it a polished look. Use molding or corner brackets to enhance the overall design.
Eco-Friendly Building Tips
Reclaimed wood can be a great choice for the frame. It’s sturdy and gives a rustic look. Look for old pallets or leftover lumber from other projects.
For the lattice itself, consider bamboo. It’s a fast-growing plant, making it a renewable resource. Bamboo is also strong and weather-resistant.
Use eco-friendly paint or stain. These products have fewer harmful chemicals and are better for the environment. Look for labels like "low VOC" (volatile organic compounds).
Recycled hardware can be found at salvage yards or online marketplaces. Hinges, handles, and latches can often be reused from old doors or furniture.
Instead of using nails or screws, try wooden dowels. They hold pieces together without metal, making the door easier to recycle later.
When cutting materials, save any scraps. Small pieces can be used for other DIY projects or as kindling for a fire pit.
Consider using a solar-powered drill or saw. These tools reduce electricity use and can be charged with sunlight.
For the door latch, a simple hook and eye made from recycled metal can work well. It’s easy to install and secure.
Finally, seal gaps with natural materials like wool or cotton. These insulate well and are biodegradable.
Your Deck's New Look
You've got a lattice door under your deck now. It wasn't too hard, right? With some basic tools and a bit of effort, you transformed that space. Now, you've got a neat spot to store stuff or just keep things tidy. Plus, it adds a bit of charm to your deck area.
Remember, the key steps: measure, cut, assemble, and install. Each step is crucial for a sturdy door. Don't forget to paint or stain the lattice to match your deck. It makes everything look cohesive.
If you ever need to tweak or fix something, you know how to do it. This project not only improved your deck but also boosted your DIY skills. Enjoy your new, organized space and the satisfaction of a job well done. Happy building!
What materials do I need to build a lattice door under my deck?
You’ll need lattice panels, wooden frames, hinges, screws, a saw, a drill, a measuring tape, and wood stain or paint.
How do I measure the space for the lattice door?
Measure the height and width of the opening under your deck. Subtract about 1/4 inch from each side to ensure the door fits properly.
How do I cut the lattice panels to size?
Use a saw to cut the lattice panels according to your measurements. Make sure to wear safety goggles and gloves.
How do I attach the lattice to the wooden frame?
Place the lattice panel inside the wooden frame and use screws to secure it. Make sure the panel is centered and even.
How do I install the hinges on the lattice door?
Attach the hinges to one side of the wooden frame using screws. Then, secure the other side of the hinges to the deck post or frame.
Should I stain or paint the lattice door?
Staining or painting the lattice door helps protect it from the elements. Choose a weather-resistant stain or paint that matches your deck.
How do I ensure the lattice door stays closed?
Install a latch or hook on the opposite side of the hinges to keep the door securely closed.