
Home>Home & Furniture>Doors & Windows>DIY Above Garage Door Storage Ideas
Doors & Windows
DIY Above Garage Door Storage Ideas
Published: September 5, 2024
Discover creative DIY above garage door storage ideas to maximize space, organize your garage, and keep your belongings neatly stored and easily accessible.
(Many of the links in this article redirect to a specific reviewed product. Your purchase of these products through affiliate links helps to generate commission for Twigandthistle.com, at no extra cost. Learn more)
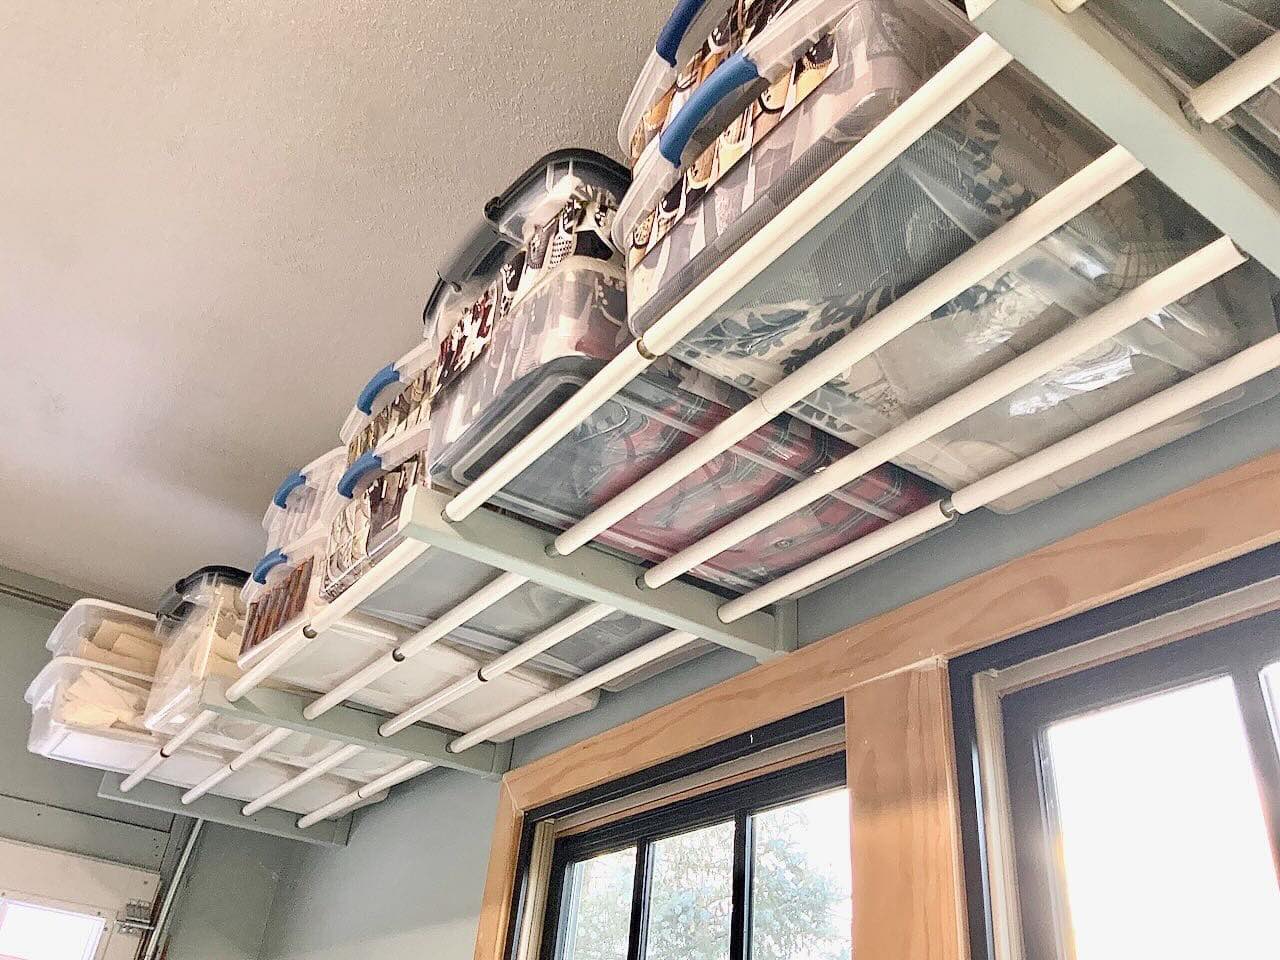
Running out of space in your garage? Think about using the area above your garage door for storage. It's an often-overlooked spot that can help keep your garage organized. With some DIY skills and a bit of planning, you can create custom storage solutions suited to your needs. Whether it’s shelving, racks, or hooks, there are many ways to make this space functional. Plus, doing it yourself can save money and give you a sense of accomplishment. Ready to get started? Let's look at some ideas that will help you transform your garage.
Getting Ready for Your Project
Measure the Space: Use a tape measure to determine the height, width, and depth above the garage door. This helps in selecting or building the right storage unit.
Gather Materials: Collect all necessary tools and materials like plywood, screws, brackets, a drill, and a saw. Make sure everything is within reach.
Clear the Area: Remove any items or obstacles from the garage. This ensures a safe and clutter-free workspace.
Wear Safety Gear: Put on safety glasses, gloves, and a dust mask. Protecting yourself from debris and dust is crucial.
Check for Obstructions: Look for any pipes, wires, or vents that might interfere with the storage installation. Plan around these obstacles.
Mark Studs: Use a stud finder to locate wall studs. Mark these spots with a pencil to ensure secure mounting.
Pre-Drill Holes: Pre-drill holes in the wall and storage unit. This makes screwing in brackets easier and prevents wood from splitting.
Assemble the Unit: Follow instructions to assemble the storage unit. Double-check all connections for stability.
Install Brackets: Securely attach brackets to the wall studs. Make sure they are level and evenly spaced.
Mount the Storage: Lift and attach the storage unit to the brackets. Ensure it’s level and securely fastened.
Test Stability: Gently push and pull the storage unit to check for stability. Make adjustments if necessary.
Organize Items: Place items on the storage unit, keeping heavier items on the bottom and lighter ones on top.
Gathering Materials and Tools
- Plywood Sheets: Strong and durable, these will form the base and shelves of your storage unit.
- 2x4 Lumber: Used for framing and support, ensuring the structure is sturdy.
- Metal Brackets: Provide additional support and stability to the shelves.
- Screws and Nails: Essential for securing the plywood and lumber together.
- Measuring Tape: Helps measure the space accurately to ensure a perfect fit.
- Level: Ensures your shelves are even and properly aligned.
- Drill: Necessary for making holes and driving screws.
- Saw: Used to cut the plywood and lumber to the required dimensions.
- Stud Finder: Helps locate the studs in your garage wall for secure mounting.
- Pencil: For marking measurements and cut lines.
- Safety Gear: Includes gloves, safety glasses, and ear protection to keep you safe while working.
These materials and tools will help you create a functional and sturdy storage solution above your garage door.
Required Skills and Time Commitment
Skill Level: Intermediate
Time Required: 4-6 hours
- Measure and Plan: 30 minutes
- Gather Materials: 1 hour
- Install Brackets: 1-2 hours
- Attach Shelving: 1 hour
- Organize Storage: 30 minutes
Step-by-Step Guide
Measure the Space
- Use a tape measure to find the width and height above the garage door.
- Note these measurements for planning.
Gather Materials
- Plywood Sheets (for shelves)
- 2x4 Lumber (for support)
- Metal Brackets (for mounting)
- Screws and Bolts
- Drill
- Saw
- Level
Cut the Lumber
- Cut the 2x4 lumber to fit the width of the space.
- Cut plywood sheets to desired shelf size.
Install Support Brackets
- Mark spots on the wall where brackets will go.
- Use a drill to attach metal brackets to the wall studs.
Attach 2x4 Supports
- Secure 2x4 pieces to the brackets using screws.
- Ensure they are level.
Place Plywood Shelves
- Lay plywood sheets on top of the 2x4 supports.
- Secure plywood to the supports with screws.
Reinforce Shelves
- Add additional brackets under shelves if needed for extra support.
Organize Storage
- Place items on the shelves.
- Use bins or boxes for better organization.
Safety Check
- Ensure all screws and brackets are tight.
- Verify shelves are sturdy and level.
Clean Up
- Remove any debris or tools from the area.
- Enjoy your new storage space!
Helpful Tips and Tricks
Measure the space above your garage door to ensure your storage solution fits. Use sturdy materials like plywood or metal for shelves. Install brackets securely into wall studs for stability. Consider using sliding bins or pulley systems for easy access. Label bins clearly to find items quickly. Leave enough clearance for the garage door to open fully.
Common mistakes include not measuring properly, using weak materials, and overloading shelves. Avoid these by double-checking measurements, choosing strong materials, and distributing weight evenly.
Alternatives to traditional shelves include ceiling-mounted racks or hanging storage nets. These options can save space and keep items off the floor.
Estimating Your Costs
Materials:
- Plywood (4x8 sheet): $30-$50
- 2x4 Lumber (8 feet each, need about 6): $3 each, total $18
- Metal Brackets (pack of 4): $10
- Screws (box): $5
- Wood Stain or Paint (optional): $10-$20
Tools:
- Drill: $40 (or borrow one)
- Saw: $50 (or rent for $10/day)
- Measuring Tape: $5
- Level: $10
Total Cost:
- Materials: $73-$103
- Tools: $105 (or $55 if renting/borrowing)
Budget-Friendly Alternatives:
- Reclaimed Wood: Free or low cost from pallets or old furniture
- Borrow Tools: Ask friends or family
- Second-Hand Tools: Check thrift stores or online marketplaces
Estimated Total with Alternatives:
- Materials: $50-$80
- Tools: $20 (if borrowing/renting)
Different Ways to Customize
Alternative materials can change the look and durability of your storage. Use metal brackets for a more industrial feel or wooden beams for a rustic touch. PVC pipes offer a lightweight, moisture-resistant option.
Colors can make a big difference. Paint the shelves white to blend with the ceiling or bold colors to stand out. Stain wood for a natural look or use spray paint on metal for a sleek finish.
Styles vary too. Install open shelves for easy access or closed cabinets to hide clutter. Use sliding bins for items you need often or fixed racks for long-term storage. Add hooks for hanging bikes or pegboards for tools.
Mix and match these ideas to create a storage solution that fits your needs and style.
Eco-Friendly Suggestions
Reclaimed wood can be used to build sturdy shelves above your garage door. Old pallets or leftover lumber from other projects work well.
Metal brackets from old furniture or shelving units can support the shelves. These brackets are often strong and durable.
Recycled plastic bins can store smaller items. Look for bins made from post-consumer recycled materials.
Natural finishes like beeswax or linseed oil can protect wood without harmful chemicals. These finishes are eco-friendly and safe.
Repurpose old cabinets by mounting them above the garage door. This gives new life to furniture that might otherwise be discarded.
Energy-efficient LED lights can illuminate the storage area. These lights use less energy and last longer than traditional bulbs.
Reusable hooks and hangers from previous projects can hold tools or other items. This reduces waste and saves money.
Insulate the garage door with eco-friendly materials like recycled denim or cellulose. This helps maintain temperature and protects stored items.
Plan your project to minimize waste. Measure carefully and use materials efficiently to avoid excess scraps.
Making the Most of Your Space
Creating above garage door storage can be a game-changer for organizing your home. By using simple materials like plywood, metal brackets, and screws, you can build sturdy shelves that hold a variety of items. Remember to measure carefully, ensuring your storage solutions fit snugly without interfering with the garage door's operation.
Don't forget to label your storage bins and keep frequently used items within easy reach. This way, you won't have to dig through piles of stuff to find what you need. Regularly check your storage setup for any signs of wear or instability, making adjustments as necessary to keep everything safe and secure.
With a bit of planning and effort, you can transform that unused space above your garage door into a functional and efficient storage area. Happy organizing!
How much weight can above garage door storage hold?
Most above garage door storage systems can hold between 250 to 600 pounds. Always check the manufacturer's guidelines to be sure.
What materials do I need for a DIY above garage door storage project?
You'll need plywood, metal brackets, screws, a drill, and a measuring tape. Some folks also use 2x4 lumber for extra support.
How high should I install the storage?
Install the storage at least 18 inches above the garage door's highest point. This ensures the door can open and close without hitting anything.
Can I install above garage door storage by myself?
Yes, but having a buddy helps. Some parts can be tricky to hold in place while you secure them.
What items are best stored above the garage door?
Store seasonal items, sports gear, or holiday decorations. Avoid heavy items you need to access frequently.
How long does it take to install above garage door storage?
It usually takes about 2 to 4 hours. Time can vary based on your experience and the complexity of the design.
Is it safe to install above garage door storage?
Yes, as long as you follow safety guidelines and use proper materials. Double-check that everything is securely fastened.