
Home>Create & Decorate>DIY & Crafts>DIY Speaker: How To Build Your Own Custom Sound System
DIY & Crafts
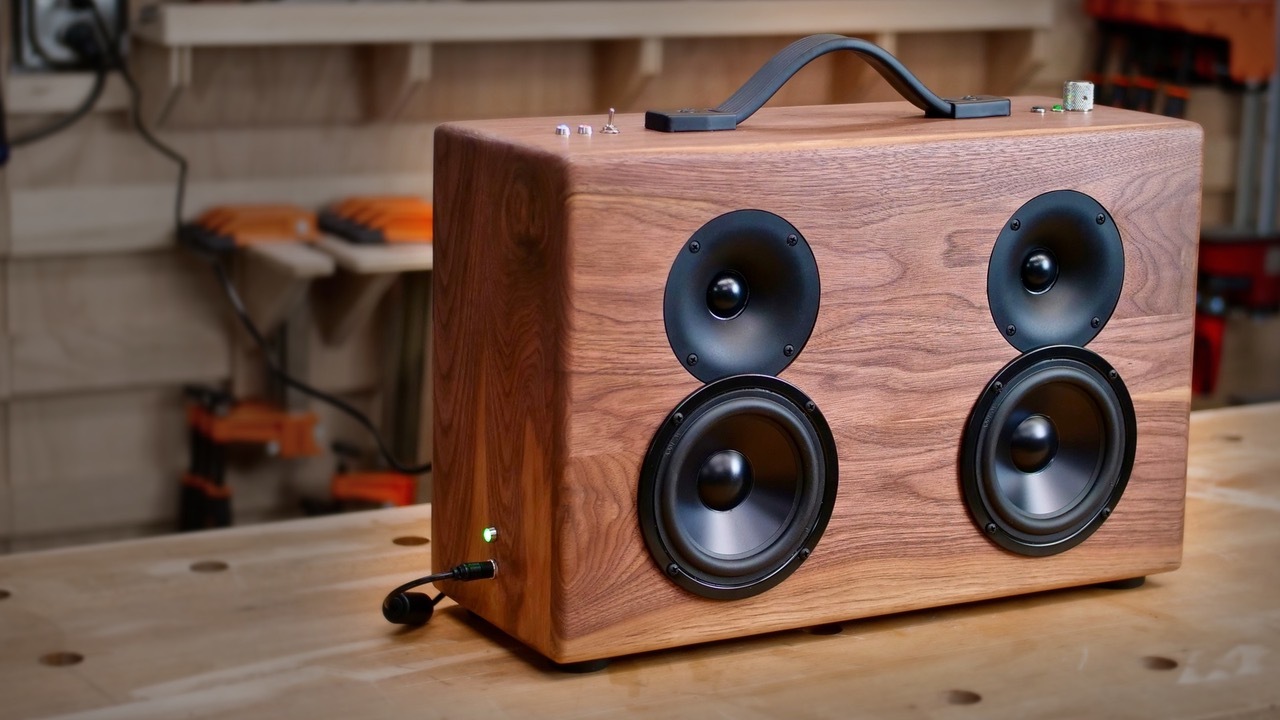
DIY Speaker: How To Build Your Own Custom Sound System
Published: June 15, 2024

Senior Editor in Create & Decorate, Kathryn combines traditional craftsmanship with contemporary trends. Her background in textile design and commitment to sustainable crafts inspire both content and community.
Learn how to create your own custom sound system with our step-by-step DIY speaker guide. Get creative with DIY & Crafts and elevate your audio experience!
(Many of the links in this article redirect to a specific reviewed product. Your purchase of these products through affiliate links helps to generate commission for Twigandthistle.com, at no extra cost. Learn more)
Introduction
So, you're ready to take your music listening experience to the next level by building your very own DIY speaker. Congratulations! Not only is this a fun and rewarding project, but it also allows you to customize your sound system to fit your specific needs and preferences. Whether you're a music enthusiast, a tech-savvy individual, or just someone who loves a good DIY challenge, creating your own custom sound system can be a truly fulfilling endeavor. In this guide, we'll walk you through the step-by-step process of building your own DIY speaker, from choosing the right components to customizing its appearance. Let's dive in and get started on this exciting journey to DIY audio bliss!
Choosing the Right Components
When it comes to building your own DIY speaker, selecting the right components is crucial to achieving the sound quality and performance you desire. Here are the key components you'll need to consider:
1. Speaker Drivers
The speaker drivers, including woofers, tweeters, and mid-range drivers, are the heart of your sound system. Each driver is responsible for producing specific frequencies, so it's essential to choose drivers that complement each other and work harmoniously to deliver a balanced sound.
2. Crossover Network
A crossover network is essential for directing the appropriate frequencies to the corresponding drivers. It ensures that low frequencies go to the woofer, high frequencies to the tweeter, and mid-range frequencies to the mid-range driver. Selecting or designing the right crossover network is crucial for achieving a well-balanced sound output.
3. Enclosure Materials
The materials used for the speaker enclosure can significantly impact the sound quality. Different materials have varying acoustic properties, so it's important to choose materials that minimize resonance and vibration while enhancing the overall sound reproduction.
4. Speaker Wires and Connectors
High-quality speaker wires and connectors are essential for maintaining signal integrity and minimizing signal loss. When selecting these components, consider factors such as wire gauge, insulation, and connector quality to ensure optimal performance.
5. Amplifier
An amplifier provides the necessary power to drive the speaker drivers and produce sound. Choose an amplifier that matches the power requirements of your speaker drivers and is compatible with your audio source.
By carefully selecting the right components for your DIY speaker, you can lay a solid foundation for a high-quality, custom sound system that meets your specific audio preferences and performance expectations.
Designing Your Speaker Enclosure
Designing the speaker enclosure is a critical step in creating a DIY speaker that delivers optimal sound performance. The enclosure not only houses the speaker components but also plays a significant role in shaping the overall sound output. Here's how to design your speaker enclosure for the best results:
-
Enclosure Type: The first decision to make is the type of enclosure you want to build. Common options include sealed enclosures, ported enclosures, and bandpass enclosures. Each type has its own acoustic characteristics, affecting factors such as bass response and overall sound quality.
-
Enclosure Size and Shape: The size and shape of the enclosure directly impact the speaker's frequency response and tonal characteristics. Factors such as internal volume, aspect ratio, and internal bracing can influence the speaker's performance. Consider using speaker design software or consulting enclosure design guidelines to determine the optimal size and shape for your specific speaker drivers.
-
Material Selection: Choosing the right materials for the enclosure is crucial for achieving the desired sound quality. Common materials include MDF (medium-density fiberboard), plywood, and acrylic. Each material has its own acoustic properties, density, and resonance characteristics, which can affect the overall sound reproduction. Additionally, consider internal damping materials to minimize unwanted resonances within the enclosure.
-
Internal Design: The internal layout and design of the enclosure can impact the speaker's performance. Factors such as internal bracing, damping materials, and driver placement can contribute to reducing internal reflections, standing waves, and resonance, resulting in a cleaner and more accurate sound output.
-
Port Design (if applicable): If you opt for a ported enclosure, careful consideration of the port design is essential. The port's dimensions, length, and flare can significantly impact the bass response and overall efficiency of the speaker system.
By carefully designing the speaker enclosure to complement your chosen speaker drivers and desired sound characteristics, you can create a custom sound system that delivers exceptional audio performance tailored to your preferences.
Assembling the Speaker Components
Assembling the speaker components is a pivotal stage in bringing your DIY speaker to life. This process involves integrating the selected speaker drivers, crossover network, and other essential elements into the speaker enclosure to create a cohesive sound system. Here's a detailed guide on how to assemble the speaker components for your custom sound system:
-
Mounting the Speaker Drivers: Begin by carefully mounting the speaker drivers into the designated positions within the speaker enclosure. Ensure that the drivers are securely fastened and aligned properly to achieve optimal sound dispersion and coherence. Pay close attention to the orientation and positioning of each driver to maintain phase coherence and accurate sound reproduction.
-
Installing the Crossover Network: Once the speaker drivers are in place, it's time to install the crossover network. Depending on the design, the crossover network can be mounted inside the speaker enclosure or in a separate external housing. Connect the appropriate wires from each driver to the corresponding terminals on the crossover network, ensuring a secure and insulated connection.
-
Securing the Amplifier: If your sound system includes an external amplifier, securely mount it in a suitable location, ensuring that it is easily accessible for connections and adjustments. Properly route the necessary cables from the amplifier to the crossover network and speaker drivers, maintaining organized and insulated wiring throughout the assembly process.
-
Connecting the Speaker Wires: Carefully connect the speaker wires from the crossover network to each speaker driver, ensuring correct polarity and secure connections. Utilize high-quality connectors and insulating materials to minimize signal loss and maintain signal integrity throughout the speaker system.
-
Testing the Speaker Components: Before finalizing the assembly, conduct a thorough test of the speaker components to ensure proper functionality and sound output. Connect the speaker system to an audio source and amplifier, then play a variety of audio tracks to evaluate the sound quality, frequency response, and overall performance of the assembled components.
-
Fine-Tuning and Adjustments: After testing, make any necessary adjustments to the crossover network settings, driver positioning, and amplifier configurations to optimize the sound system's performance. Fine-tune the sound output to achieve the desired tonal characteristics and sonic balance, ensuring that the assembled components work harmoniously to deliver exceptional audio quality.
By meticulously assembling the speaker components and conducting comprehensive testing and adjustments, you can create a custom sound system that reflects your audio preferences and delivers an immersive listening experience.
Wiring and Testing Your Sound System
Wiring and testing your sound system are crucial steps in the DIY speaker-building process, ensuring that all components are properly connected and functioning optimally. Here's a detailed guide on how to wire and test your custom sound system:
Wiring the Components
-
Speaker Wiring: Begin by carefully routing and connecting the speaker wires from the crossover network to each speaker driver. Ensure that the polarity is correct for each connection to maintain phase coherence and accurate sound reproduction. Use high-quality speaker wires with appropriate gauge and insulation to minimize signal loss and interference.
-
Crossover Network Wiring: Double-check the wiring connections within the crossover network, ensuring that each driver is receiving the correct frequency signals. Securely fasten the wires to the crossover terminals, and consider using wire management techniques to maintain a tidy and organized wiring layout.
-
Amplifier Connection: If your sound system includes an external amplifier, connect the amplifier to the crossover network using high-quality audio cables. Ensure that the amplifier's output matches the input requirements of the crossover network, and verify that all connections are secure and insulated to prevent signal degradation.
-
Grounding and Shielding: Pay attention to grounding and shielding techniques to minimize the risk of electrical interference and noise. Properly ground the amplifier and utilize shielded cables where necessary to maintain a clean and noise-free audio signal.
Testing the Sound System
-
Functional Testing: Before finalizing the wiring, conduct a functional test of the entire sound system. Power on the amplifier and play a test tone through the speakers to verify that each driver is operational and producing sound. Listen for any anomalies or irregularities that may indicate wiring or component issues.
-
Frequency Response Test: Use a frequency sweep or test tones to evaluate the frequency response of the sound system. Check for smooth transitions between drivers and ensure that the crossover network is directing frequencies appropriately to each driver. Make note of any frequency peaks, dips, or inconsistencies that may require further adjustments.
-
Sound Quality Evaluation: Play a variety of music tracks through the sound system to assess its overall sound quality and tonal characteristics. Listen for clarity, detail, and balance across the frequency spectrum, and make adjustments to the crossover settings or driver positioning as needed to achieve the desired sonic performance.
-
Volume and Power Handling Test: Gradually increase the volume levels to test the power handling capabilities of the sound system. Monitor for distortion, clipping, or driver overload, and ensure that the system can deliver the desired sound levels without compromising audio quality or risking damage to the components.
-
Polarity and Phase Check: Verify the polarity and phase coherence of the speaker drivers by playing phase test tracks or conducting a polarity check. Confirm that the drivers are in phase with each other to avoid phase cancellation and ensure coherent sound reproduction.
By meticulously wiring and testing your sound system, you can identify and address any potential issues, optimize the performance of your DIY speaker, and ultimately enjoy a custom sound system that meets your audio expectations.
Customizing Your Speaker's Appearance
Customizing the appearance of your DIY speaker not only adds a personal touch but also allows you to integrate it seamlessly into your home environment. Here's a comprehensive guide on how to enhance the visual appeal of your custom sound system:
-
Enclosure Finishing: Choose a finishing material that complements your home decor and personal style. Options include wood veneer, vinyl wraps, automotive paint, or custom artwork. Ensure that the finishing material is durable and resistant to scratches and abrasions.
-
Grille Design: If your speaker design includes a removable grille, consider customizing it to match your aesthetic preferences. You can use acoustically transparent fabric in various colors and patterns to create a unique grille design that adds a decorative element to your speaker.
-
LED Accent Lighting: Incorporating LED accent lighting into the speaker enclosure can create a visually striking effect. Choose LED strips or modules in your preferred color and strategically place them within the enclosure to illuminate the speaker and create an ambient glow.
-
Custom Logos or Badges: Personalize your speaker by adding custom logos, emblems, or badges. These can be laser-cut acrylic, metal, or 3D-printed designs that showcase your creativity and make your speaker truly one-of-a-kind.
-
Decorative Inlays: Consider adding decorative inlays or accents to the speaker enclosure. These could be intricate wood patterns, metal trims, or other embellishments that elevate the visual appeal of your custom sound system.
-
Integrated Display or Controls: For advanced customization, you can integrate a small display or control panel into the speaker enclosure. This feature can display album artwork, song information, or provide convenient access to volume controls and input selection.
-
Matching Speaker Stands: If your speaker system includes stands, customize them to match the speaker's appearance. Coordinate the finishing, design elements, and overall aesthetic to create a cohesive and visually appealing speaker setup.
By customizing your speaker's appearance, you can transform it from a functional audio device into a visually stunning piece of art that enhances your listening space and reflects your individual style and creativity.
Conclusion
Congratulations on completing the journey of building your very own DIY speaker and custom sound system! By carefully selecting the right components, designing the speaker enclosure, assembling the speaker components, wiring and testing the sound system, and customizing its appearance, you've embarked on a fulfilling and rewarding DIY project that has resulted in a unique audio masterpiece tailored to your preferences.
Your DIY speaker represents not only a functional sound system but also a reflection of your creativity and passion for audio. Whether you're a music enthusiast, a tech-savvy individual, or someone who simply enjoys a good DIY challenge, the process of building a custom sound system has allowed you to explore the realms of audio engineering and craftsmanship while creating a personalized audio experience.
As you enjoy the immersive sound and the satisfaction of listening to music through a system you've built with your own hands, take pride in the knowledge and skills you've gained throughout this DIY endeavor. Your custom sound system stands as a testament to your dedication and ingenuity, and it's sure to be a conversation starter and a source of pride in your home.
Now, sit back, relax, and immerse yourself in the captivating sound of your DIY speaker, knowing that you've not only built a remarkable audio device but also expanded your DIY and home improvement expertise. Whether it's for personal enjoyment, sharing with friends and family, or showcasing your DIY prowess, your custom sound system is a testament to the power of creativity and hands-on craftsmanship in the world of home audio.
So, turn up the volume, savor the rich sound, and revel in the satisfaction of a job well done. Your DIY speaker is more than just a sound system – it's a testament to your creativity, resourcefulness, and the joy of bringing your own custom sound system to life. Cheers to your DIY audio bliss!