
Home>Create & Decorate>DIY & Crafts>DIY Pin Cushion: A Fun And Functional Addition To Your Sewing Room
DIY & Crafts
DIY Pin Cushion: A Fun And Functional Addition To Your Sewing Room
Published: February 15, 2024

Content Creator specializing in woodworking and interior transformations. Caegan's guides motivate readers to undertake their own projects, while his custom furniture adds a personal touch.
Discover how to create a DIY pin cushion for your sewing room with this fun and functional craft project. Get creative with DIY & Crafts!
(Many of the links in this article redirect to a specific reviewed product. Your purchase of these products through affiliate links helps to generate commission for Twigandthistle.com, at no extra cost. Learn more)
Introduction
Are you an avid crafter or a sewing enthusiast looking to add a touch of charm and functionality to your sewing room? If so, creating your own DIY pin cushion is a fantastic way to infuse personality and practicality into your crafting space. A pin cushion not only serves as a handy tool for storing and organizing your pins and needles but also offers an opportunity to showcase your creativity through the choice of fabric, embellishments, and design.
Crafting a pin cushion from scratch allows you to tailor it to your preferences, ensuring that it complements your sewing room decor and reflects your unique style. Whether you prefer a classic, vintage-inspired pin cushion or a modern, whimsical design, the possibilities are endless when you embark on this delightful DIY project.
In this comprehensive guide, we will walk you through the step-by-step process of creating your very own pin cushion, from selecting the perfect fabric to adding personalized embellishments. With just a few simple materials and a touch of creativity, you can craft a charming and functional pin cushion that will become a beloved addition to your crafting space.
So, gather your materials, unleash your creativity, and get ready to embark on a delightful crafting journey as we guide you through the art of making a DIY pin cushion. Let's dive in and bring your vision of the perfect pin cushion to life!
Materials Needed
To embark on this delightful DIY project, you will need a few essential materials to create your own charming and functional pin cushion. Here's a list of what you'll need to get started:
-
Fabric: Choose a fabric that reflects your personal style and complements your sewing room decor. Opt for a durable and visually appealing fabric that will serve as the outer covering of your pin cushion. Consider cotton, linen, or even a fun patterned fabric to add a pop of color to your crafting space.
-
Scissors: A pair of sharp fabric scissors is essential for cutting the fabric to the desired size and shape. Make sure your scissors are suitable for cutting through the fabric of your choice with precision.
-
Needle and Thread: High-quality sewing needles and a sturdy thread are necessary for stitching the fabric together to create the pin cushion. Ensure that the needle is suitable for the fabric you've selected and that the thread complements or contrasts with the fabric for a visually appealing finish.
-
Filling: Choose a filling material that provides ample support for your pins and needles. Common options include polyester fiberfill, wool roving, or even crushed walnut shells for a natural and firm filling.
-
Embellishments (Optional): If you wish to add a personal touch to your pin cushion, consider embellishments such as decorative buttons, lace, ribbons, or embroidery floss. These elements can elevate the visual appeal of your pin cushion and make it uniquely yours.
-
Measuring Tape: A measuring tape will come in handy for accurately measuring and cutting the fabric to the desired dimensions for your pin cushion.
-
Pins and Needles: While this may seem obvious, having a set of pins and needles at hand will ensure that you can test your pin cushion as you create it, ensuring that it is functional and practical.
-
Sewing Machine (Optional): If you prefer to use a sewing machine for efficiency, have it ready for stitching the fabric together. However, this project can also be completed entirely by hand sewing if you don't have access to a sewing machine.
Gathering these materials will set the stage for a delightful crafting experience as you bring your vision of the perfect pin cushion to life. With these essentials at your disposal, you're ready to move on to the next step: choosing the perfect fabric for your DIY pin cushion.
Step 1: Choose Your Fabric
The first step in creating your own DIY pin cushion is selecting the perfect fabric that will serve as the outer covering of this charming and functional sewing accessory. The fabric you choose will not only determine the aesthetic appeal of the pin cushion but also contribute to its durability and overall look. When choosing your fabric, consider factors such as texture, color, and pattern to ensure that it complements your sewing room decor and reflects your personal style.
If you prefer a classic and timeless look, opt for a high-quality cotton fabric in a solid color or subtle pattern. Cotton is a versatile and durable choice that provides a smooth surface for your pins and needles while offering a clean and polished appearance. Additionally, cotton fabric is readily available in a wide range of colors and prints, allowing you to select a fabric that resonates with your individual taste.
For those seeking a touch of elegance and sophistication, consider using linen fabric for your pin cushion. Linen exudes a natural and rustic charm, adding a touch of texture and visual interest to the pin cushion. Its earthy tones and subtle variations in the fabric weave can bring a sense of warmth and character to your crafting space.
If you're inclined towards adding a pop of color and personality to your sewing room, explore the vast array of patterned fabrics available. From floral motifs to geometric designs, patterned fabrics offer an opportunity to infuse your pin cushion with a playful and whimsical vibe. Select a pattern that resonates with your personal style and complements the existing color scheme of your sewing room.
Furthermore, consider the weight of the fabric when making your selection. A medium-weight fabric is generally suitable for creating a sturdy and long-lasting pin cushion, providing ample support for your pins and needles. Ensure that the fabric is easy to work with and can withstand regular use without losing its shape or integrity.
By carefully considering these factors and exploring the myriad options available, you can choose a fabric that perfectly aligns with your vision for the ideal pin cushion. Once you've selected the fabric that speaks to your creativity and style, you're ready to proceed to the next step: cutting and sewing the fabric to bring your DIY pin cushion to life.
Step 2: Cut and Sew the Fabric
Once you have chosen the perfect fabric for your DIY pin cushion, it's time to bring your vision to life by cutting and sewing the fabric to create this charming and functional sewing accessory. This step is where your creativity and precision come into play as you transform the selected fabric into a beautifully crafted pin cushion.
Begin by laying out the chosen fabric on a clean and flat surface, ensuring that it is free from wrinkles or creases. Using a measuring tape and fabric scissors, carefully measure and cut two identical fabric squares or circles, depending on the desired shape and size of your pin cushion. The dimensions of the fabric pieces will determine the final size of the pin cushion, so take your time to achieve accurate measurements.
Once you have cut the fabric pieces to the desired size, place them together with the right sides facing inward, aligning the edges evenly. Using high-quality sewing needles and a sturdy thread that complements the fabric, begin stitching around the perimeter of the fabric pieces, leaving a small opening for turning and filling the pin cushion. Whether you choose to hand sew or use a sewing machine, ensure that the stitches are secure and evenly spaced for a professional finish.
As you near the end of the stitching, reinforce the seams by backstitching to prevent unraveling. This will ensure that the pin cushion withstands regular use and maintains its shape over time. Once the stitching is complete, carefully trim any excess fabric and threads to tidy up the edges, preparing the pin cushion for the next step: filling it with the chosen filling material.
With precision and attention to detail, cutting and sewing the fabric is a pivotal stage in the creation of your DIY pin cushion. This step sets the foundation for the pin cushion's structure and durability, ensuring that it is ready to be filled and adorned with personalized embellishments if desired. As you complete this stage, you're one step closer to holding your handcrafted pin cushion and adding a delightful touch to your sewing room.
Step 3: Fill the Pin Cushion
With the fabric pieces securely stitched together, it's time to breathe life into your DIY pin cushion by filling it with the chosen filling material. This step is crucial in determining the firmness and support that the pin cushion will provide for your pins and needles. Whether you opt for traditional polyester fiberfill, natural wool roving, or crushed walnut shells, the filling material plays a significant role in the functionality and longevity of your pin cushion.
Begin by carefully turning the fabric inside out through the small opening left during the sewing process. Gently push out the corners and edges to ensure that the fabric takes on the intended shape of the pin cushion. This step sets the stage for adding the filling material, allowing you to achieve a smooth and evenly distributed finish.
When selecting the filling material, consider the level of firmness and support you desire for your pin cushion. Polyester fiberfill is a popular choice for its lightweight and pliable nature, providing a soft yet supportive base for your pins and needles. Alternatively, wool roving offers a natural and resilient filling option, adding a touch of organic charm to the pin cushion. If you prefer a firmer and more substantial feel, crushed walnut shells can provide a sturdy and stable foundation for your pins and needles.
Carefully insert the chosen filling material into the pin cushion through the small opening, using a tool such as a chopstick or pencil to gently push the filling into the corners and ensure an even distribution. Take your time to achieve the desired level of fullness, ensuring that the pin cushion offers ample support for your sewing essentials while maintaining a pleasing shape.
Once the pin cushion is adequately filled, carefully hand stitch the opening closed using a matching thread, ensuring that the stitches are secure and inconspicuous. This final step seals the pin cushion, encapsulating the chosen filling material and completing the creation of this charming and functional sewing accessory.
By filling the pin cushion with precision and attention to detail, you ensure that it not only serves as a practical tool for organizing your pins and needles but also stands as a testament to your craftsmanship and creativity. With the pin cushion now filled and ready for use, you're one step closer to adding a delightful and personalized touch to your sewing room.
Step 4: Add Embellishments (Optional)
With the foundation of your DIY pin cushion in place, the optional yet delightful step of adding embellishments presents an opportunity to infuse your creation with a personalized touch. Embellishments can elevate the visual appeal of the pin cushion, adding a touch of charm and individuality that reflects your unique style and creativity.
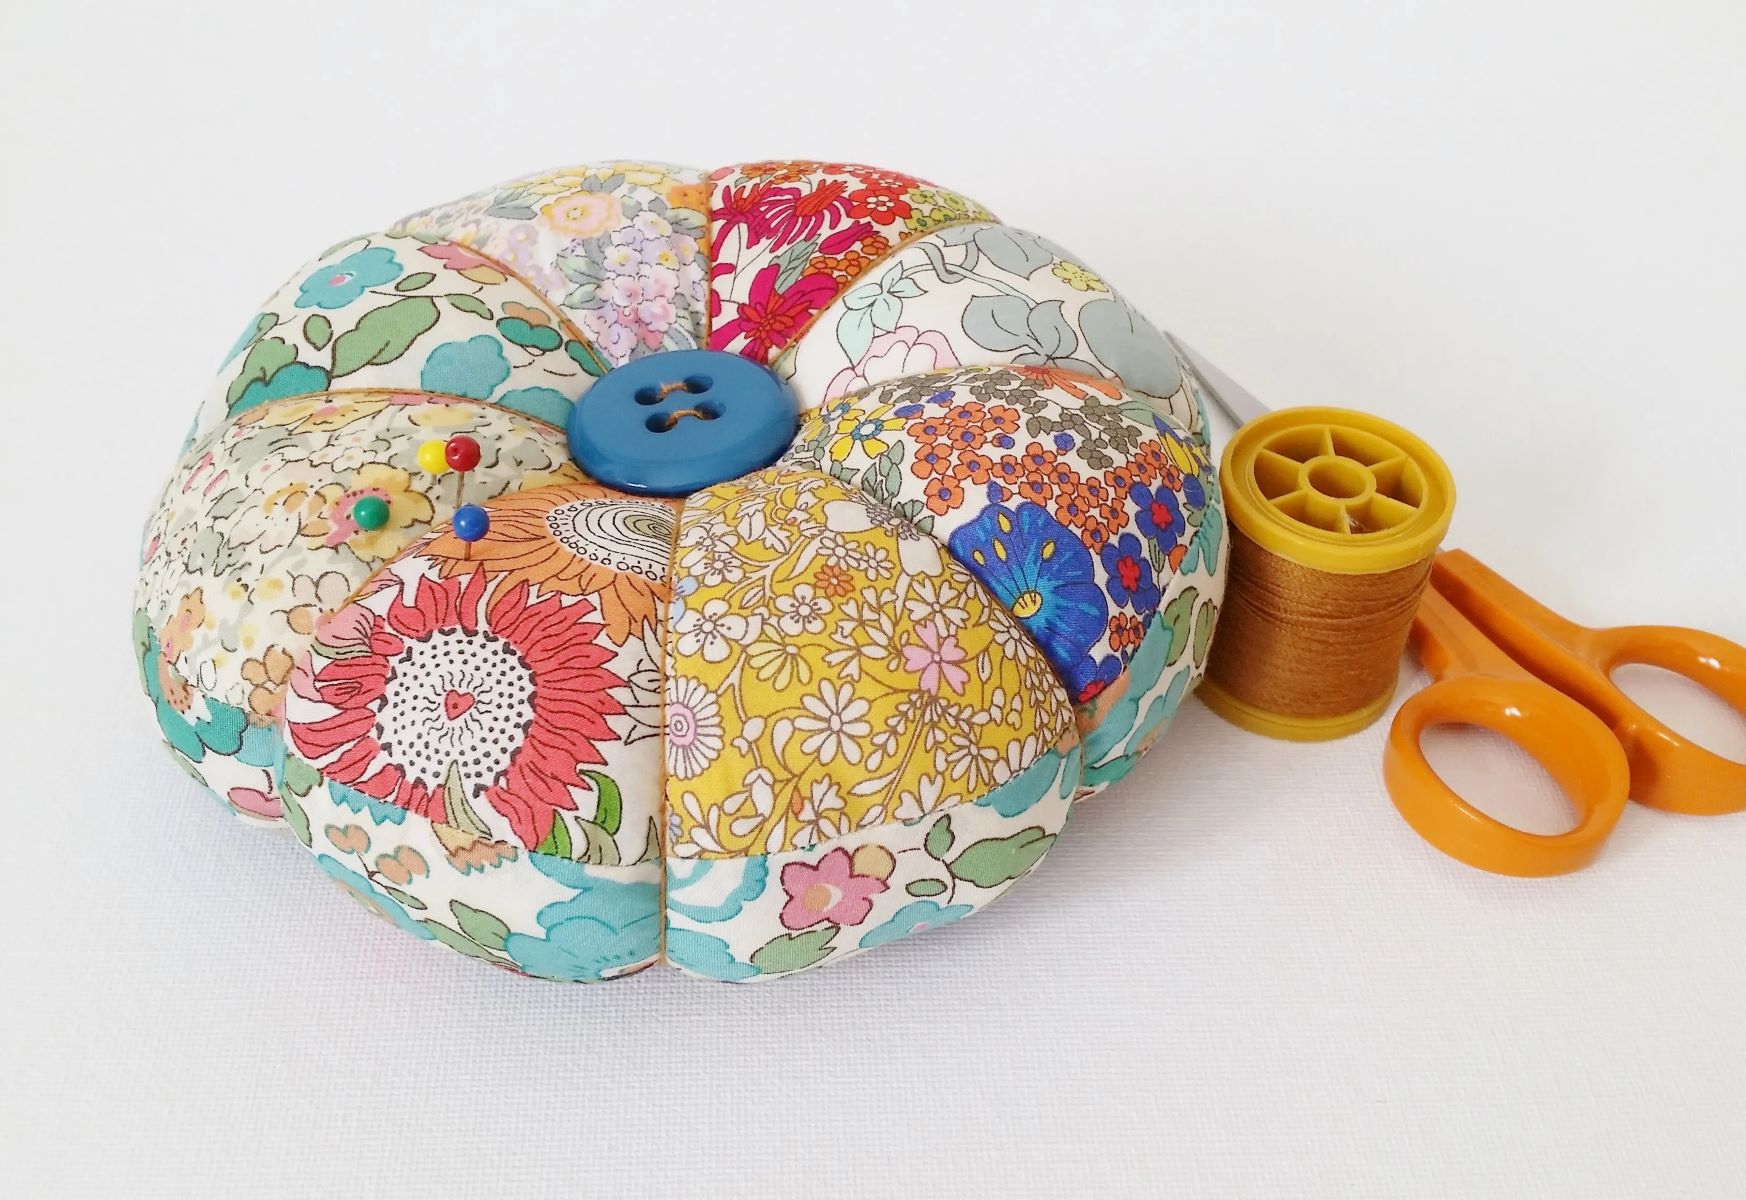
One popular embellishment option is decorative buttons, which can serve as both functional and ornamental elements. Whether you opt for vintage-inspired buttons with intricate designs or whimsical, brightly colored buttons, they can add a delightful focal point to the pin cushion. Securely stitching a decorative button at the center of the pin cushion not only enhances its visual appeal but also provides a convenient spot for storing needles or pins.
Incorporating lace or ribbon can also lend a touch of elegance to the pin cushion. Wrapping a delicate lace trim around the perimeter of the pin cushion or adding a bow made from a coordinating ribbon can impart a sense of refinement and grace. These embellishments not only enhance the aesthetic appeal of the pin cushion but also allow you to customize it to align with your personal style and the decor of your sewing room.
For those inclined towards embroidery, adding a touch of hand-stitched embellishment can impart a truly unique and artisanal quality to the pin cushion. Consider embroidering a monogram, a floral motif, or a whimsical design onto the fabric surface, infusing the pin cushion with a personalized and handcrafted touch. Embroidery floss in coordinating or contrasting colors can be used to create intricate patterns, adding a bespoke element to the pin cushion.
Furthermore, the addition of trims such as pom-poms, tassels, or fabric flowers can inject a playful and whimsical vibe into the pin cushion's design. These charming embellishments can bring a sense of joy and creativity to the sewing space, transforming the pin cushion into a delightful and eye-catching accessory.
As you consider the optional embellishments for your pin cushion, let your creativity guide you in selecting elements that resonate with your personal style and bring a sense of joy to your crafting space. Whether you opt for understated elegance or whimsical charm, the addition of embellishments allows you to tailor the pin cushion to your preferences, creating a one-of-a-kind accessory that reflects your creativity and passion for crafting.
Conclusion
In conclusion, crafting your own DIY pin cushion is a delightful and rewarding endeavor that allows you to infuse your sewing room with charm, functionality, and a touch of your unique personality. By following the step-by-step process outlined in this guide, you can create a charming and practical pin cushion that not only serves as a convenient tool for organizing your pins and needles but also stands as a testament to your creativity and craftsmanship.
As you embark on this crafting journey, the choice of fabric plays a pivotal role in shaping the aesthetic appeal and durability of the pin cushion. Whether you opt for classic cotton, elegant linen, or a vibrant patterned fabric, the selection process allows you to express your personal style and enhance the visual appeal of your sewing space.
The meticulous steps of cutting and sewing the fabric, followed by filling the pin cushion with the chosen material, set the stage for creating a sturdy and supportive sewing accessory. Attention to detail during these stages ensures that the pin cushion not only looks visually appealing but also provides a reliable and functional base for your sewing essentials.
Furthermore, the optional step of adding embellishments presents an opportunity to personalize the pin cushion, infusing it with a touch of elegance, whimsy, or artisanal charm. Whether you choose to adorn it with decorative buttons, lace, embroidery, or playful trims, these embellishments allow you to tailor the pin cushion to your preferences and create a one-of-a-kind accessory that reflects your creativity.
Upon completing your DIY pin cushion, you'll have a handmade creation that not only enhances the organization of your sewing supplies but also serves as a delightful focal point in your crafting space. The pin cushion stands as a testament to your passion for crafting and attention to detail, showcasing your ability to transform simple materials into a functional and visually appealing accessory.
As you place your handcrafted pin cushion in your sewing room, it becomes a reflection of your creativity and a source of inspiration for future crafting endeavors. Whether you're an experienced crafter or a novice enthusiast, the process of creating a DIY pin cushion offers a fulfilling and enjoyable experience that adds a personalized touch to your sewing space.
In essence, the creation of a DIY pin cushion goes beyond the practicality of organizing pins and needles; it embodies the joy of crafting, the expression of individual style, and the celebration of handmade artistry. So, embrace the creative journey, infuse your sewing room with charm, and revel in the satisfaction of crafting a delightful and functional DIY pin cushion.